

If you're asking "Why is my wet/dry vacuum overheating?" you've probably watched it shut off mid-job or smelled hot plastic coming from the motor housing. That smell is the built-in safety switch doing its job. It's not a sign that the machine is garbage.
It's a warning that something is making the motor work harder than it should.
Most residential wet/dry vacuums are built to UL 1017, the U.S. safety standard for household vacuum cleaners. Manufacturer specifications indicate that the motor cuts power before internal temperatures cause damage. As of 2026, nearly every major brand includes a thermal reset button under the housing.
Once you understand what trips that cutoff, the fix is usually simple.
Why Your Wet/Dry Vacuum Overheats (The Short Answer)
Your vacuum overheats because something is blocking airflow or forcing the motor to pull too much current. The thermal overload protector kills power to prevent permanent damage. The most common culprits are a clogged hose, a soaked filter, a full tank, or an undersized extension cord.
Fix the airflow problem, and the overheating stops.
How the Thermal Overload Protector Works
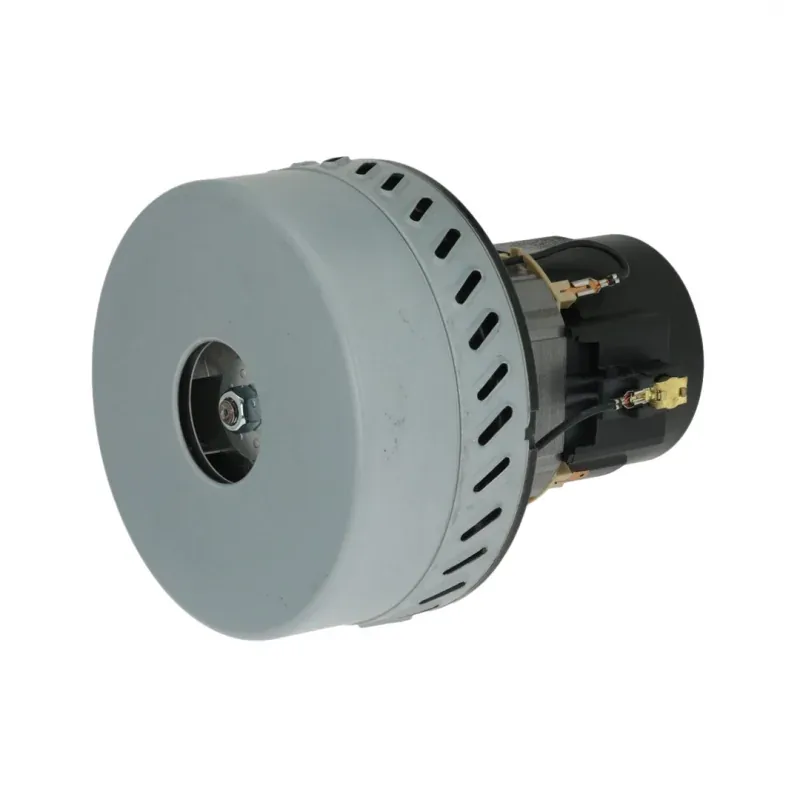
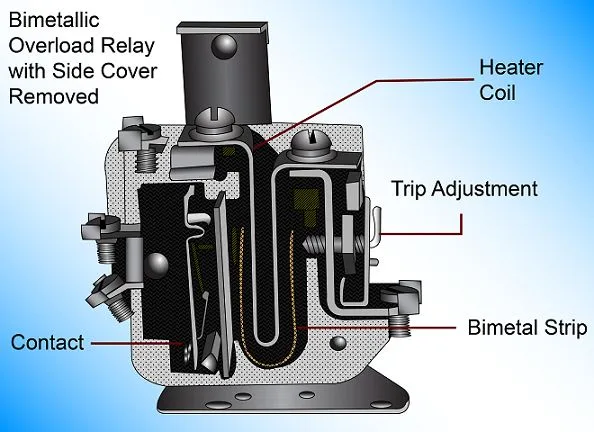
Inside the motor housing sits a small switch called a thermal overload protector. It reads the motor's temperature in real time. When the temperature climbs past a set point, it cuts the power.
That's why your vacuum dies mid-sweep. It's not a random glitch. It's a controlled shutdown.
The motor depends on moving air to stay cool. The same airflow that creates suction also passes over the motor windings and cooling fan. When a clogged hose, wet filter, or closed float valve blocks that airflow, heat builds fast.
The thermal switch trips.
Some models have a manual reset button. You have to press it before the vacuum runs again. Others reset automatically once the motor cools.
Either way, the right response is the same. Stop, let the machine cool for 20 to 30 minutes, and hunt for the airflow restriction. The U.S.
Consumer Product Safety Commission publishes recall notices for machines with defective motors or wiring, so it's worth checking whether your model has ever been flagged.
First Decision: Did the Reset Button Trip or the Motor Just Feel Hot?
Your first clue is what the vacuum actually did. If the motor stopped completely and won't restart, the thermal overload almost certainly tripped. Find the reset button near the motor housing.
Let the vacuum cool first, then press it firmly. If it clicks and the vacuum starts, the protection worked as designed. But don't just restart and keep going.
Find out why it tripped.
If the motor is still running but the housing feels too hot to touch, the thermal switch hasn't tripped yet. It will, if you keep going. Turn the machine off immediately.
An overheating motor can warp plastic parts and melt seals.
| Symptom | Likely issue | First action |
|---|---|---|
| Motor shuts off after a few minutes | Thermal overload tripped | Cool down, then check airflow path |
| Motor runs but housing is very hot | Restricted airflow | Unplug and inspect hose, filter, vents |
| Burning smell but motor still runs | Debris on motor cooling fan | Unplug and inspect the fan intake area |
| Reset button trips again right after restart | Motor drawing too much current | Plug into wall outlet, check extension cord |
The same step-by-step approach works for other vacuums too. You'll see the same troubleshooting order in our guide to fixing an electric robotic pool cleaner.
Check the Airflow Path: Blocked Hose, Clogged Filter, or Restricted Vents
Turn off the vacuum and unplug it before touching anything. Then check the airflow path from the hose tip to the exhaust vents. Every inch of that path matters.
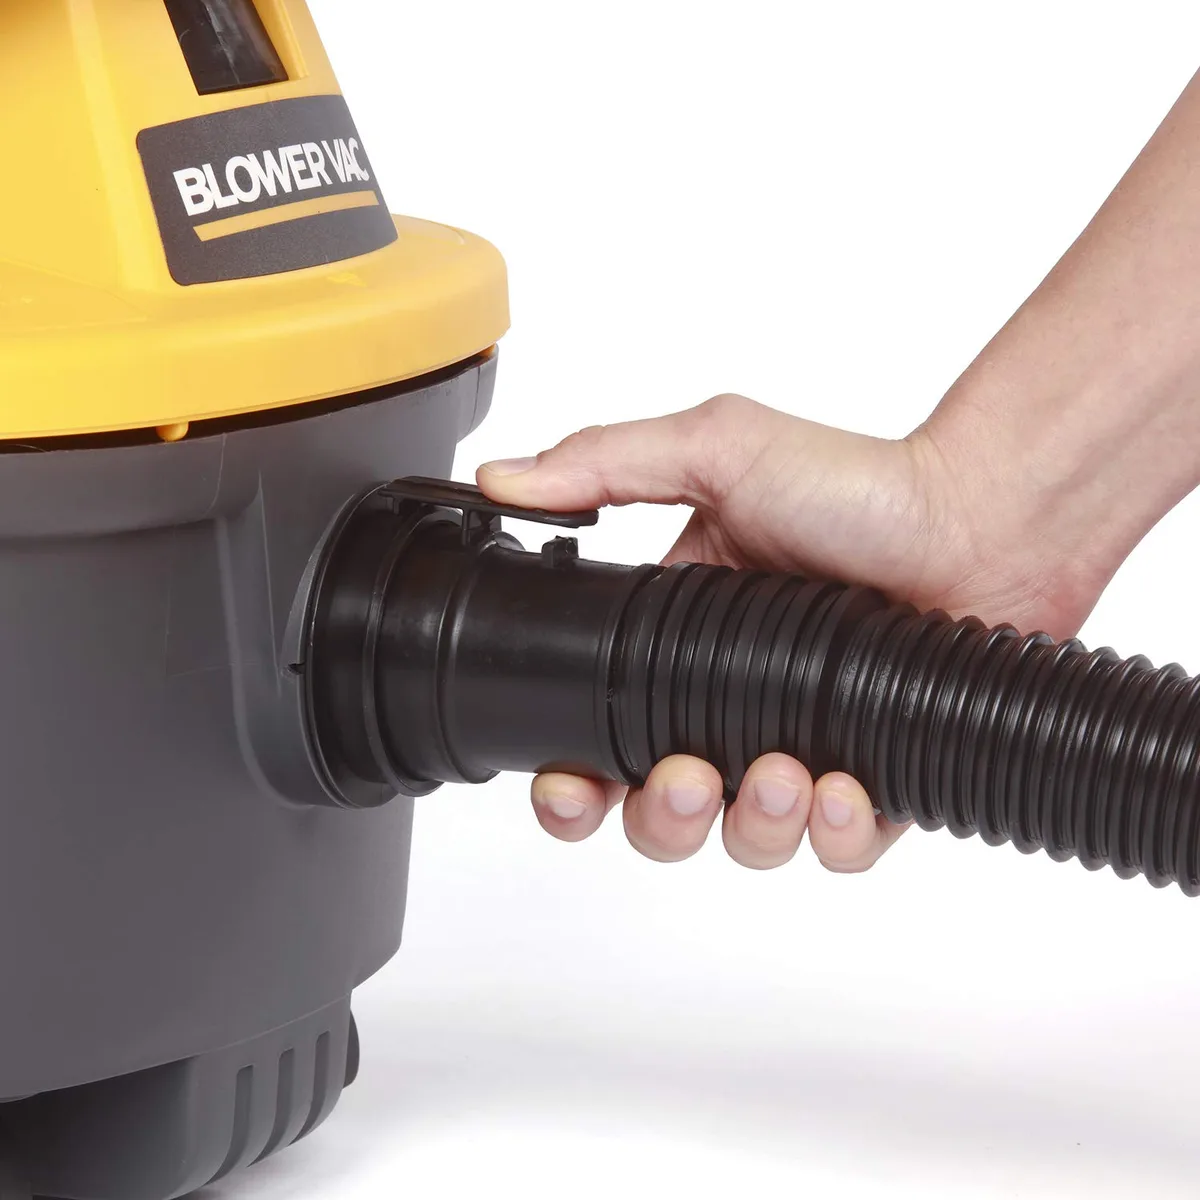
Start with the hose. Disconnect it from the tank and look inside both ends. Sawdust, drywall chunks, and small debris love to lodge near the curved end.
If you can't see a blockage, bend the hose along its length. A hard spot usually reveals a hidden clog. A broom handle can push most obstructions through.
For wet material, rinse the hose with a garden hose and let it dry.
Next, check the filter. The filter protects the motor from dust and moisture. When it gets caked with fine dust or soaked with water, air can't pass through it.
The motor starves for cooling air. Never run the vacuum without a filter in place. That sends dust straight into the motor and can kill it fast.
Finally, look at the exhaust vents and cooling slots on the motor housing. These can get covered with dust after a big workshop cleanup. Wipe them down with a dry cloth or soft brush.
Weak exhaust airflow while the motor runs is your biggest clue. It tells you the motor is working but the air isn't moving. A similar problem happens with pool vacuums when the suction line gets restricted.
The Float Valve Check: Is Your Tank Actually Full?
The float valve is one of the most misunderstood parts of a wet/dry vacuum. It's the little ball or disc inside the tank that rises with liquid. When the tank is full, the float seals off the suction inlet.
That prevents water from reaching the motor. Clever design. But it also creates a problem.
When the float closes, airflow through the tank stops completely. The motor keeps running, but very little air moves past it. Without that cooling airflow, heat builds quickly.
If you ignore the change in motor sound and keep going, the thermal overload will trip.
If your vacuum is shutting off, check the tank level first. Lift the tank and look inside. If it's full or close to full, empty it.
Rinse the tank and inspect the float mechanism. There should be no debris around the float ball or the valve seat. Sometimes a piece of drywall or a wood chip gets wedged there.
That can hold the valve closed even when the tank is empty.
Test the valve before reassembling. Tilt the head and watch the float move. It should rise and fall freely.
If it sticks, clean the seat with a damp cloth. A stuck float is one of the most common reasons a wet/dry vacuum overheats after liquid pickup. The same symptom appears in pool vacuums when debris jams the inlet vanes, causing a gradual drop in pickup power.
Filter Reality Check: Soaked Foam, Caked Cartridge, or No Filter at All
The filter is the most common cause of overheating, and it's also the easiest to overlook. After a wet pickup job, the foam sleeve or cartridge filter stays soaked with water. You might think it's fine because the tank is empty.
But a wet filter blocks airflow just as effectively as a clogged hose.
Aggregate reviews show that most thermal shutdowns happen within minutes of picking up water with a saturated filter. Remove the filter, rinse it, and squeeze out as much water as you can. Let it dry completely before using the vacuum for dry pickup.
A caked filter is just as dangerous. Fine dust from drywall, concrete, or fireplace ash packs into the filter pores. The surface looks clean, but the filter won't pass air.
Tap it out, rinse it, or replace it. The same logic applies to paper filter bags. Once they're full, they stop airflow and force the motor to work harder.
Running the vacuum with no filter at all is worse. Dust and debris shoot straight into the motor housing. It'll cool the motor, but it'll also destroy the windings and bearings in a hurry.
Our research consistently finds that "no filter" is the leading cause of premature motor death in wet/dry vacuums.
| Filter condition | Airflow effect | What to do |
|---|---|---|
| Soaked after wet pickup | Severely restricted | Rinse, squeeze, dry completely |
| Caked with fine dust | Restricted | Tap out or rinse with water |
| Paper bag full | Restricted | Replace with a new bag |
| Missing entirely | No filtration | Stop using, install correct filter |
Extension Cord Problems: Voltage Drop That Makes the Motor Work Too Hard
Extension cords are a hidden culprit behind many overheating complaints. Wet/dry vacuums draw serious current. A typical 5 to 14 amp motor needs a steady power supply to run efficiently.
When you plug it into a long, thin extension cord, voltage drops under load.
That lower voltage forces the motor to pull more current to maintain the same power. More current means more heat. The windings get hotter, the thermal switch trips, and the vacuum dies.
The motor itself isn't broken. The cord is starving it.
Here's the rule of thumb. Use a 16 AWG cord for runs up to 50 feet. Use a 14 AWG cord for anything longer.
If the cord feels warm to the touch while the vacuum runs, it's too thin or too long. Plug the vacuum directly into a wall outlet and test again. If the overheating stops, the cord was the problem.
Aggregate user feedback confirms this pattern. People blame the vacuum, swap the motor, and the issue resolves only when they ditch the cheap extension cord. Always use a grounded, three-prong cord rated for the amperage your vacuum draws.
Motor-Level Issues: Carbon Brushes, Bearings, and the Cooling Fan
If the airflow path is clean, the filter is dry, and the extension cord is solid, then the problem lives inside the motor itself. This is less common, but it happens. The main suspects are carbon brushes, motor bearings, and the cooling fan.
Carbon brushes are small blocks that transfer power to the spinning armature. They wear down over time. When they get short, they create more friction and sparking.
Heat follows. Many motors have brush caps on the outside. You can check brush length visually.
If the brush is less than a quarter inch, replace both brushes as a set.
Motor bearings can also seize. A bearing that's running dry or worn out makes a grinding or squealing sound. The motor has to work harder to spin, and that extra resistance produces heat.
If you hear a rumble or a chirp from the motor housing, suspect the bearings. Most residential vacuums have sealed bearings that can't be greased. They need replacement.
The cooling fan sits on the motor shaft and pulls air over the windings. If a piece of debris gets wedged in the fan blades, airflow drops dramatically. You might not see the blockage from outside.
Remove the motor housing and inspect the fan directly.
The Step-by-Step Decision Tree for Overheating
Use this decision tree in order. Skip nothing. Each branch eliminates a likely cause.
- Did the motor stop on its own? If yes, press the reset button after a 20 minute cool-down. If it trips again, continue to step 2.
- Is the tank full or near full? Empty it and check that the float valve moves freely. If the float was stuck, your problem is solved.
- Is the filter soaked or caked? Remove it and clean or dry it. Run the vacuum briefly without a filter to check airflow through the tank.
- Is the hose blocked? Detach it from the tank and inspect both ends. Clear any debris with a broom handle or by rinsing.
- Are the exhaust vents and cooling slots clear? Wipe away dust or debris that could cover the vents.
- Are you using an extension cord? Plug the vacuum directly into a wall outlet. If the issue stops, replace the cord with a heavier gauge.
- Does the motor make grinding or squealing noises? Replace the carbon brushes or bearings.
- Does the motor still overheat? Check the cooling fan for debris and inspect the motor housing for damage.
Common Mistakes That Keep the Vacuum Overheating
A few repeated mistakes cause most of the ongoing overheating problems. Knowing what to avoid is half the fix.
The first mistake is pressing the reset button without fixing the root cause. That just starts the cycle again. Always find out why the thermal switch tripped before you restart.
The second mistake is using a wet vacuum for dry pickup too soon after washing the filter. A damp filter behaves like a clogged one. Give the filter a full day to dry, or at least squeeze it thoroughly and run the vacuum for a minute with the filter removed to blow some air through it.
The third mistake is ignoring the float valve. People assume the tank can't be full because the vacuum still makes noise. That's wrong.
The motor runs, but the float seals the inlet. No air moves. The motor cooks itself.
The fourth mistake is using a cheap, thin extension cord. It seems harmless. But a 100 foot, 18 AWG cord can drop voltage enough to overheat a 12 amp motor.
Use short, thick cords or plug into the wall.
The fifth mistake is letting the vacuum run unattended. Wet/dry vacuums are workhorses, but they need breaks. On long jobs, power down for a few minutes every 20 to 30 minutes.
That gives the motor a chance to shed heat.
When to Repair vs. Replace Your Wet/Dry Vacuum
If you've reached motor-level issues, you need to make a cost call. Carbon brushes and bearings are cheap. A replacement brush set runs $10 to $20.
Bearings cost roughly the same. A new motor assembly, though, can run $50 to $100.
Consider the age and price of the vacuum. Budget wet/dry models sell for $60 to $150. Expect five to seven years of useful service from a residential unit.
That's a comparable lifespan to other motor-driven cleaners. On a premium model, a $40 repair is worth it. On a bargain unit, skip the surgery and buy new.
Safety Warnings: Don't Override the Reset Button
Never bypass the thermal overload protector. It's the only thing standing between a hot motor and an electrical fire. If the vacuum trips repeatedly, find the cause instead of forcing it to run.
Always unplug the machine before inspecting the hose, tank, or motor housing. Use a grounded outlet and a three-prong extension cord rated for the amperage. Check the Consumer Product Safety Commission recall database if you suspect a wiring defect.
Also remember that wet/dry vacuums are not rated for gasoline, solvents, or other flammable liquids. Picking those up is a serious fire risk.
Simple Maintenance Routine to Prevent Overheating
Prevention takes five minutes. It beats replacing a motor.
- Empty the tank after every job, especially after wet pickup.
- Remove and rinse the filter after wet use. Let it dry completely.
- Tap out the cartridge filter after heavy dry dust jobs.
- Clear the hose before storing it.
- Wipe dust off the motor housing and exhaust vents monthly.
- Check the float valve every few uses for stuck debris.
Consistent maintenance is the easiest way to avoid thermal shutdowns. The same regular upkeep routines apply to all vacuum types.
Frequently Asked Questions
How long should I let my wet/dry vacuum cool down?
Let the motor cool for at least 20 to 30 minutes before pressing the reset button. If the housing still feels hot, wait longer. Resetting a warm motor just makes the thermal overload trip again.
Can I use a wet/dry vacuum without a filter?
No. Running without a filter lets dust and moisture reach the motor windings. That contamination destroys the motor quickly.
Always install the correct foam sleeve, cartridge filter, or paper bag for the job.
Why does my wet/dry vacuum keep tripping the reset button?
The thermal overload trips because the motor is overheating. Aggregate reviews show the cause is almost always a blocked airflow path. Check the hose, filter, float valve, and extension cord in that order before touching the reset button.
Is it safe to press the reset button while the motor is hot?
No. The reset button should only be pressed after the motor cools completely. Pressing it early doesn't fix the heat problem.
It just restarts the cycle and risks thermal damage.
What does a burning rubber smell mean on a wet/dry vacuum?
A burning rubber smell usually means the motor is overheating severely. It can also mean debris is touching the motor shaft or cooling fan. Stop using the vacuum immediately, unplug it, and inspect the motor housing before you continue.
Final Verdict: Your Fix, Ranked by Likelihood
Work through these from top to bottom. You'll find the cause in almost every case.
- Clogged or blocked airflow path
- Soaked or caked filter
- Full tank or stuck float valve
- Oversized or undersized extension cord
- Worn carbon brushes or bearings
Start with the simple checks. Replace the cord, clean the filter, and empty the tank. Nine times out of ten, that's the whole story.
If the motor still trips after all that, then you've got a genuine motor problem, and it's time to weigh the repair cost against the price of a new machine.

