

Image source: Bing (Web (fair-use with source credit))
Inspect the Float: The Hidden Stoppage
Here’s the part people forget about. Your wet/dry vacuum has a built-in shut-off that stops the motor from sucking water into it. It’s called a float, and it sits near the top of the tank or in a small cage by the inlet.
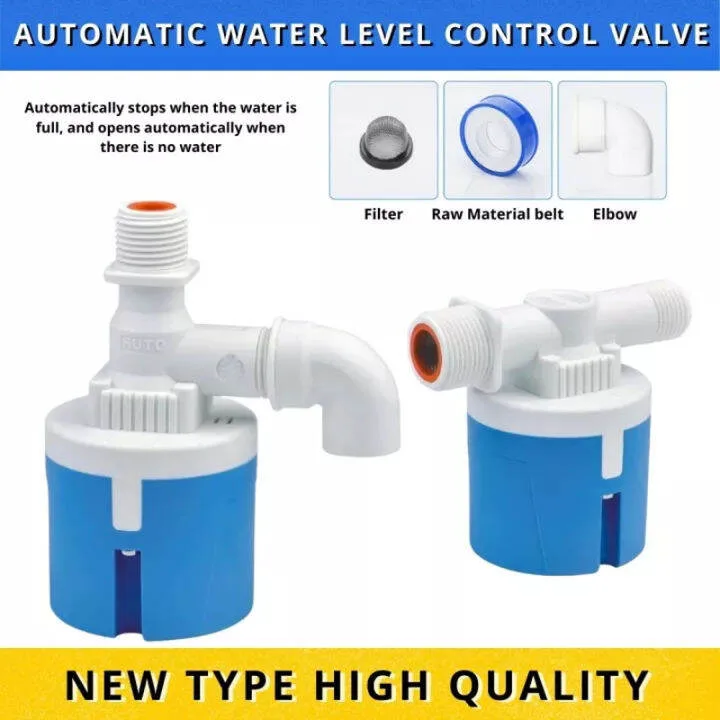
Image source: Web (Bing) / lazada.com.ph (Web image (fair-use with source credit))
When the tank fills, the float rises with the water. Once it reaches the top, it seals the opening that leads to the motor. That cuts off airflow almost completely.
It’s a brilliant safety feature, but it causes a classic panic when everyone forgets they stored the vacuum with a half-full tank from a previous job.
So if your tank isn’t full, check the float anyway. They get stuck. A piece of debris, a stiff rubber seal, or just time in storage can leave the float propped up in the closed position.
Reach in and press it down gently. It should move freely and spring back on its own.
If it doesn’t move, clean around its guides with a wet cloth. If it still sticks, the float itself may be worn or waterlogged. Replacement floats are cheap and available from most manufacturers.
This is the same sort of small, stubborn blockage that makes pool vacuum hoses collapse when they shouldn’t. Once the float moves, suction returns instantly.
Check the Lid, Gaskets, and Seals
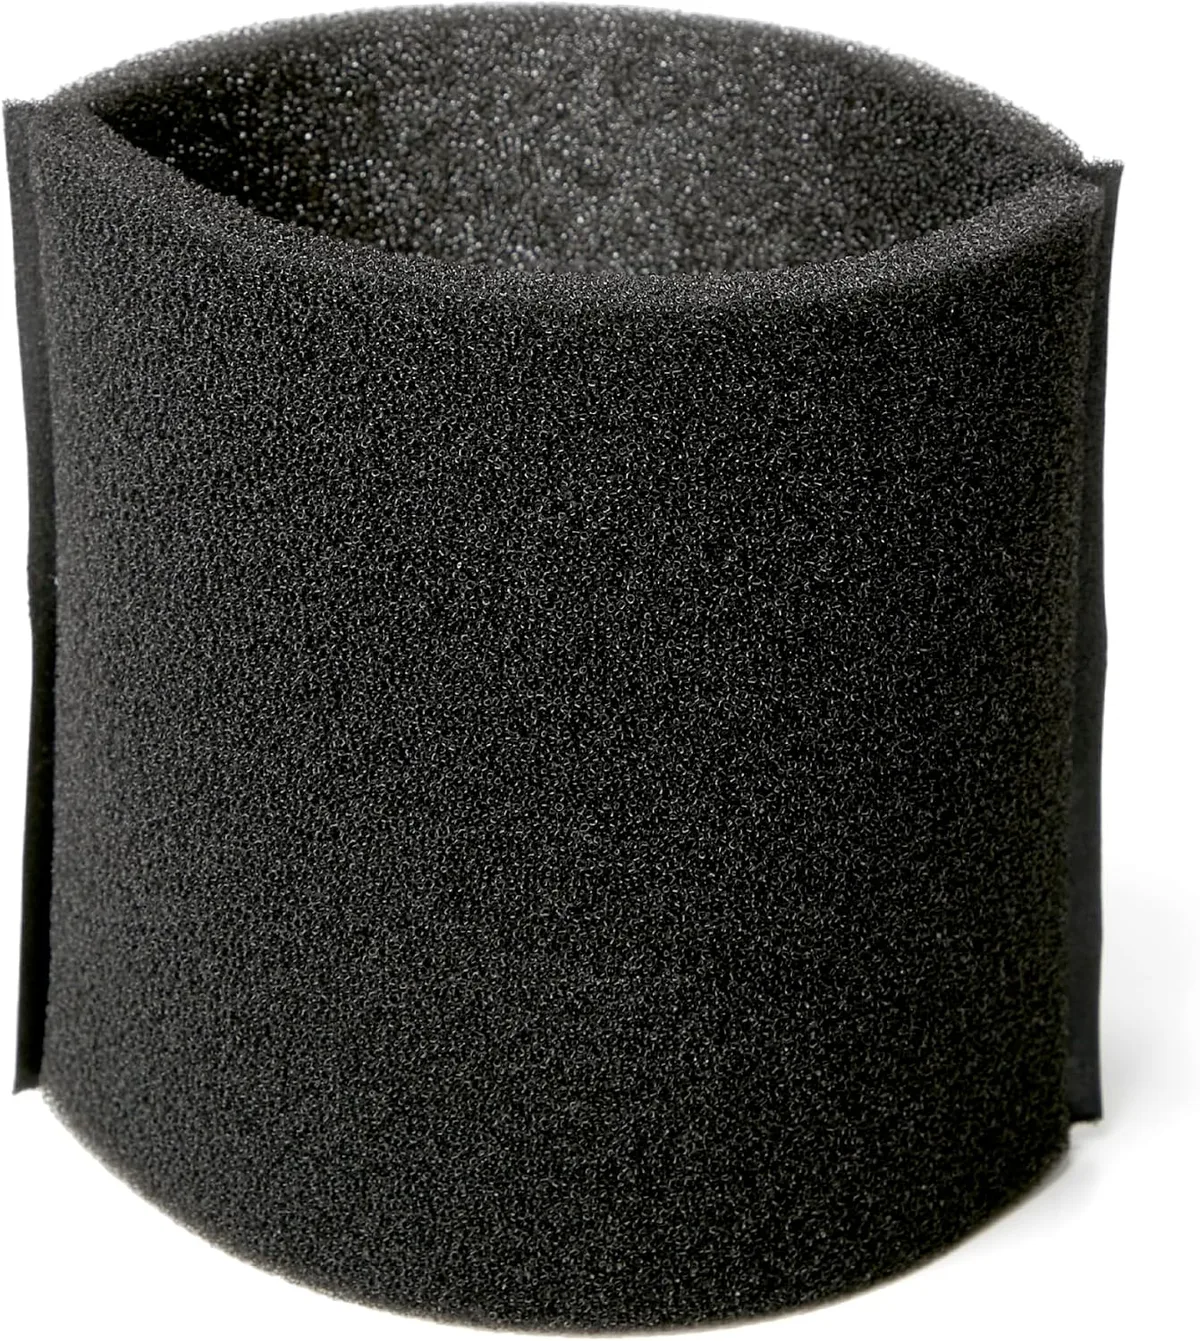
Image source: Web (Bing) / amazon.com (Web image (fair-use with source credit))
Suction is entirely dependent on a sealed tank. A vacuum that leaks air pulls half the power it should. The most common leak spot is the lid.
First, lift the lid and inspect the gasket. It’s a soft rubber ring that sits around the tank’s rim. If it’s cracked, flattened, or missing a chunk, you’ve found the problem.
The motor may run fine, but the air just slips past the seal. Replace the gasket if it looks worn. They’re inexpensive and press in without tools.
Second, close the lid and make sure the clamps or latches are fully engaged. It sounds basic, but it’s easy to clip one latch and leave the other loose. That tiny gap drops suction by a lot.
The same is true for a wet/dry vacuum as it is for any pool vacuum that struggles with small debris. Seals matter.
Third, check the hose connector where it mounts to the lid. If that plastic collar is cracked, air gets pulled in there too. Give it a wiggle while the machine runs.
If you hear a change in pitch, you’ve found the leak.
Is the Tank Too Full? The Simplest Cause You’ll Roll Your Eyes At
You’re not above this one. None of us are. A wet/dry vacuum holds a surprising amount of water, so it’s easy to lose track of how full it is.
And here’s the catch: the float engages while the water still sits a couple of inches below the top. That’s by design. It just doesn’t feel that way when you’re mid-cleanup.
The machine still makes plenty of noise. The motor still spins. But the float has already sealed the intake, so you’re running a very loud, very useless air pump.
Solution: unplug the vacuum, open the drain port, and empty it.
If your model has a drain valve, use it. It empties cleanly into a bucket in about a minute. If it doesn’t, tilt the tank toward a drain or into a large container.
Just don’t do it over a carpet. Trust us on that one.
Once it’s empty, reset the tank lid and try again. That one step fixes more stalled cleanups than any other.
Step-by-Step Decision Guide: Diagnose in Under 10 Minutes
Follow this in order. Each step takes about a minute, and it skips the guesswork.
| Step | Action | What it rules out |
|---|---|---|
| 1 | Empty the tank and check the water level | Float shut-off from a full tank |
| 2 | Remove the filter and inspect it | Wrong filter type or waterlogged filter |
| 3 | Test suction at the hose with your palm | Clogged hose or nozzle |
| 4 | Press the float down and watch it spring back | Stuck float valve |
| 5 | Inspect the lid gasket and tighten the clamps | Air leaks from poor sealing |
| 6 | Plug into a known-good GFCI outlet | Power supply issues |
Work down the list and stop when suction returns. If you reach step 6 and the vacuum still won’t pick up, the motor or impeller may have failed. But that’s rare, and it’s usually preceded by loud noises and a burnt smell.
Common Mistakes People Make When Picking Up Water
Here’s where most people get tripped up, even after they fix the first problem.
The biggest one is leaving the dust bag installed. A cloth filter bag will soak up water, swell, and destroy suction. Some bags even burst.
If you ran a dry pickup earlier, always remove the bag before switching to liquid duty.
The second mistake is using a pleated paper filter for wet pickup. That’s what the foam sleeve is for. If your vacuum only came with one filter and you didn’t buy a spare, you can still do a one-time emergency setup: remove the paper filter entirely and add a foam sleeve over the motor intake.
But never run the machine bare, because debris can hit the impeller.
The third mistake is pulling the hose out while the vacuum is still running. That doesn’t hurt the machine, but it leaves a face full of spray if there’s standing water. Shut it off first.
And the fourth: skipping the cleanup afterward. Wet filters and damp tanks grow mold in two or three days. Once they do, the entire vacuum smells like a pond.
The solution is only a few minutes of rinsing and drying, which we’ll cover next.
After You Fix It: Cleaning and Drying Your Vacuum
You’ve got suction back, good. Now take the extra ten minutes to keep it that way.
Empty the tank fully. Rinse it out with fresh water to get rid of sludgy debris and lingering dirt. Use the drain port if the model has one, then tip the tank upside down to drain the rest.
Wipe the inside with a dry cloth to remove moisture.
Wash the foam filter in warm, soapy water. Squeeze it out, don’t twist it. Twisting tears the foam.
Rinse until the water runs clear, then let the filter air dry completely. A wet filter left in a dark tank turns into a science experiment. The same applies to any pool vacuum filter you clean between uses.
The rule never changes: dry storage prevents mold.
While the filter dries, leave the lid slightly unclamped so the tank can breathe. Keep the drain port open if it’s positioned to catch nothing. Even an extra day of airing makes a difference.
When It’s Not Worth Fixing: Repair vs. Replace
Sometimes a wet/dry vacuum is genuinely done. You’ll know when the motor grinds but the impeller freezes, or you smell burnt plastic. That’s typically a $50 to $80 repair with a replacement motor.
But here’s what the math says. A new 6-gallon wet/dry vacuum runs anywhere from $60 to $120 in our research. A replacement motor or impeller kit plus your time rarely beats that.
If you paid under $80 for the vacuum, repair usually isn’t worth it. That’s the same logic we use when thinking about how long a robotic pool vacuum lasts before it’s cheaper to upgrade. If the body is cracked, the tank leaks, or the latches are broken, replace it.
If the motor is fine and a gasket fixed it, keep it going.
Quick Safety Checklist for Wet Pickup
This list is short, but each point matters. Water and electricity don’t mix, and a wet/dry vacuum makes that combination all too easy.
- Plug into a GFCI outlet.
- Keep the power cord away from standing water.
- Never submerge the vacuum or the motor head.
- Don’t use a damaged cord.
- Unplug before emptying or cleaning the tank.
- Never pick up chemicals, solvents, or fuel.
A wet/dry vacuum is not safe for gasoline spillage. Many tanks aren’t sealed against vapors, and a motor spark can ignite fuel. Stick to water and water-based messes.
That’s the guidance OSHA and most owner’s manuals agree on, and it’s not worth testing.
Still Stuck? A Few Final Checks Before You Give Up
If you’re reading this with a dead vacuum in front of you, take a breath. There are two last things worth trying.
First, look for a clogged exhaust port. If the exhaust is blocked, air can’t leave the system and the impeller backs up. That creates a false “no suction” reading.
Clear the exhaust cover and try again.
Second, test a different outlet or reset the GFCI. Many a “broken” vacuum was just a tripped breaker. The motor needs a solid, uninterrupted power supply.
A weak outlet on an extension cord can cause the motor to spin slowly and lose suction.
If neither fixes it, you’ve done a full diagnostic pass. At that point, the motor bearings, switch, or wiring is the culprit. That’s a repair shop job or a replacement decision.
Frequently Asked Questions
Why does my wet/dry vacuum run but won’t pick up water?
The motor spins, but airflow is blocked. Check the filter, the hose, the float, and the tank seal. In most cases, one of those four is the culprit.
Empty the tank first, then work through the suction path in order.
Can I use a paper filter to pick up water?
No. Paper filters swell and stop airflow as soon as they get wet. Use a foam filter sleeve or a wet-rated cartridge.
If you must pick up water, switch the filter before starting and swap back later.
How do I know if the float is stuck?
Press it down by hand. It should move freely and spring back. If it doesn’t, debris or a stiff rubber seal is holding it up.
Clean the float cage and check again before reassembling the tank.
Why does my wet/dry vacuum blow water out the exhaust?
The tank is too full. The water level has reached the motor intake, and air is pushing water out through the exhaust port. Empty the tank immediately and dry the motor area before running it again.
How full should the tank get before I empty it?
Empty it as soon as the float shuts off. That usually happens a couple of inches below the top. Don’t wait until the tank looks full, because the float will stop suction first.
What happens if I leave water in the tank?
It won’t ruin the vacuum overnight, but it will start smelling in two or three days. Mold and mildew grow quickly in a damp, dark tank. Rinse it, dry it, and leave the lid cracked open for storage.
And that’s the full path. Check the tank, swap the filter, clear the hose, free the float, seal the lid. Nine times out of ten, those five steps fix the problem.
If they don’t, the motor is done, and that’s a straight swap at a reasonable price. You’ve got this.## Inspect the Float: The Hidden Stoppage
Here’s the part people forget about. Your wet/dry vacuum has a built-in shut-off that stops the motor from sucking water into it. It’s called a float, and it sits near the top of the tank or in a small cage by the inlet.
Image source: Web (Bing) / lazada.com.ph (Web image (fair-use with source credit))
When the tank fills, the float rises with the water. Once it reaches the top, it seals the opening that leads to the motor. That cuts off airflow almost completely.
It’s a brilliant safety feature, but it causes a classic panic when everyone forgets they stored the vacuum with a half-full tank from a previous job.
So if your tank isn’t full, check the float anyway. They get stuck. A piece of debris, a stiff rubber seal, or just time in storage can leave the float propped up in the closed position.
Reach in and press it down gently. It should move freely and spring back on its own.
If it doesn’t move, clean around its guides with a wet cloth. If it still sticks, the float itself may be worn or waterlogged. Replacement floats are cheap and available from most manufacturers.
This is the same sort of small, stubborn blockage that shows up in other suction-based gear. Once the float moves, suction returns instantly.
Check the Lid, Gaskets, and Seals
Suction is entirely dependent on a sealed tank. A vacuum that leaks air pulls half the power it should. The most common leak spot is the lid.
First, lift the lid and inspect the gasket. It’s a soft rubber ring that sits around the tank’s rim. If it’s cracked, flattened, or missing a chunk, you’ve found the problem.
The motor may run fine, but the air just slips past the seal. Replace the gasket if it looks worn. They’re inexpensive and press in without tools.
Second, close the lid and make sure the clamps or latches are fully engaged. It sounds basic, but it’s easy to clip one latch and leave the other loose. That tiny gap drops suction by a lot.
Seals matter.
Third, check the hose connector where it mounts to the lid. If that plastic collar is cracked, air gets pulled in there too. Give it a wiggle while the machine runs.
If you hear a change in pitch, you’ve found the leak.
Is the Tank Too Full? The Simplest Cause You’ll Roll Your Eyes At
You’re not above this one. None of us are. A wet/dry vacuum holds a surprising amount of water, so it’s easy to lose track of how full it is.
And here’s the catch: the float engages while the water still sits a couple of inches below the top. That’s by design. It just doesn’t feel that way when you’re mid-cleanup.
The machine still makes plenty of noise. The motor still spins. But the float has already sealed the intake, so you’re running a very loud, very useless air pump.
Solution: unplug the vacuum, open the drain port, and empty it.
If your model has a drain valve, use it. It empties cleanly into a bucket in about a minute. If it doesn’t, tilt the tank toward a drain or into a large container.
Just don’t do it over a carpet.
Once it’s empty, reset the tank lid and try again. That one step fixes more stalled cleanups than any other.
Step-by-Step Decision Guide: Diagnose in Under 10 Minutes
Follow this in order. Each step takes about a minute, and it skips the guesswork.
| Step | Action | What it rules out |
|---|---|---|
| 1 | Empty the tank and check the water level | Float shut-off from a full tank |
| 2 | Remove the filter and inspect it | Wrong filter type or waterlogged filter |
| 3 | Test suction at the hose with your palm | Clogged hose or nozzle |
| 4 | Press the float down and watch it spring back | Stuck float valve |
| 5 | Inspect the lid gasket and tighten the clamps | Air leaks from poor sealing |
| 6 | Plug into a known-good GFCI outlet | Power supply issues |
Work down the list and stop when suction returns. If you reach step 6 and the vacuum still won’t pick up, the motor or impeller may have failed. But that’s rare, and it’s usually preceded by loud noises and a burnt smell.
If the motor is dead, a new wet/dry vacuum often costs less than a professional repair. That’s the same math you’d run on any robotic pool vacuum that stops holding a charge. Sometimes replacement beats repair.
Common Mistakes People Make When Picking Up Water
Here’s where most people get tripped up, even after they fix the first problem.
The biggest one is leaving the dust bag installed. A cloth filter bag will soak up water, swell, and destroy suction. Some bags even burst.
If you ran a dry pickup earlier, always remove the bag before switching to liquid duty.
The second mistake is using a pleated paper filter for wet pickup. That’s what the foam sleeve is for. If your vacuum only came with one filter and you didn’t buy a spare, you can still do a one-time emergency setup: remove the paper filter entirely and add a foam sleeve over the motor intake.
But never run the machine bare, because debris can hit the impeller.
The third mistake is pulling the hose out while the vacuum is still running. That doesn’t hurt the machine, but it leaves a face full of spray if there’s standing water. Shut it off first.
And the fourth: skipping the cleanup afterward. Wet filters and damp tanks grow mold in two or three days. Once they do, the entire vacuum smells like a pond.
The solution is only a few minutes of rinsing and drying, which we’ll cover next.
After You Fix It: Cleaning and Drying Your Vacuum
You’ve got suction back, good. Now take the extra ten minutes to keep it that way.
Empty the tank fully. Rinse it out with fresh water to get rid of sludgy debris and lingering dirt. Use the drain port if the model has one, then tip the tank upside down to drain the rest.
Wipe the inside with a dry cloth to remove moisture.
Wash the foam filter in warm, soapy water. Squeeze it out, don’t twist it. Twisting tears the foam.
Rinse until the water runs clear, then let the filter air dry completely. A wet filter left in a dark tank turns into a science experiment. The same applies to any pool vacuum filter you clean between uses.
The rule never changes: dry storage prevents mold.
While the filter dries, leave the lid slightly unclamped so the tank can breathe. Keep the drain port open if it’s positioned to catch nothing. Even an extra day of airing makes a difference.
When It’s Not Worth Fixing: Repair vs. Replace
Sometimes a wet/dry vacuum is genuinely done. You’ll know when the motor grinds but the impeller freezes, or you smell burnt plastic. That’s typically a $50 to $80 repair with a replacement motor.
But here’s what the math says. A new 6-gallon wet/dry vacuum runs anywhere from $60 to $120 in our research. A replacement motor or impeller kit plus your time rarely beats that.
If you paid under $80 for the vacuum, repair usually isn’t worth it. If the body is cracked, the tank leaks, or the latches are broken, replace it. If the motor is fine and a gasket fixed it, keep it going.
Quick Safety Checklist for Wet Pickup
This list is short, but each point matters. Water and electricity don’t mix, and a wet/dry vacuum makes that combination all too easy.
- Plug into a GFCI-protected outlet.
- Keep the power cord away from standing water.
- Never submerge the vacuum or the motor head.
- Don’t use a damaged cord.
- Unplug before emptying or cleaning the tank.
- Never pick up chemicals, solvents, or fuel.
A wet/dry vacuum is not safe for gasoline spillage. Many tanks aren’t sealed against vapors, and a motor spark can ignite fuel. Stick to water and water-based messes.
That’s the guidance OSHA and most owner’s manuals agree on, and it’s not worth testing.
Still Stuck? A Few Final Checks Before You Give Up
If you’re reading this with a dead vacuum in front of you, take a breath. There are two last things worth trying.
First, look for a clogged exhaust port. If the exhaust is blocked, air can’t leave the system and the impeller backs up. That creates a false “no suction” reading.
Clear the exhaust cover and try again.
Second, test a different outlet or reset the GFCI. Many a “broken” vacuum was just a tripped breaker. The motor needs a solid, uninterrupted power supply.
A weak outlet on an extension cord can cause the motor to spin slowly and lose suction.
If neither fixes it, you’ve done a full diagnostic pass. At that point, the motor bearings, switch, or wiring is the culprit. That’s a repair shop job or a replacement decision.
Frequently Asked Questions
Why does my wet/dry vacuum run but won’t pick up water?
The motor spins, but airflow is blocked. Check the filter, the hose, the float, and the tank seal. In most cases, one of those four is the culprit.
Empty the tank first, then work through the suction path in order.
Can I use a paper filter to pick up water?
No. Paper filters swell and stop airflow as soon as they get wet. Use a foam filter sleeve or a wet-rated cartridge.
If you must pick up water, switch the filter before starting and swap back later.
How do I know if the float is stuck?
Press it down by hand. It should move freely and spring back. If it doesn’t, debris or a stiff rubber seal is holding it up.
Clean the float cage and check again before reassembling the tank.
Why does my wet/dry vacuum blow water out the exhaust?
The tank is too full. The water level has reached the motor intake, and air is pushing water out through the exhaust port. Empty the tank immediately and dry the motor area before running it again.
How full should the tank get before I empty it?
Empty it as soon as the float shuts off. That usually happens a couple of inches below the top. Don’t wait until the tank looks full, because the float will stop suction first.
What happens if I leave water in the tank?
It won’t ruin the vacuum overnight, but it will start smelling in two or three days. Mold and mildew grow quickly in a damp, dark tank. Rinse it, dry it, and leave the lid cracked open for storage.

