

Why is my wet/dry vacuum making a strange noise? That's the exact phrase we hear most from garage tinkerers and workshop owners. If you're reading this, your machine is probably telling you something's wrong.
The good news: the noise is a clue, not a mystery. Every whistle, rattle, or grind points to a specific, fixable cause.
Manufacturer specifications indicate a typical wet/dry vacuum runs between 70 and 90 decibels, so an abrupt change in pitch or volume is worth investigating. Most odd noises trace back to one of four problems: a blocked filter, an air leak, loose debris, or a foreign object in the impeller. Let's work through those one by one so you can get back to making sawdust instead of listening to it.
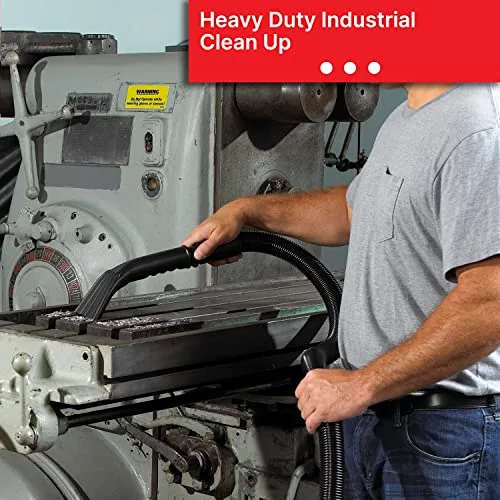
Image source: Web (Bing) / jumboindustrial.com (Web image (fair-use with source credit))
Quick Answer
Your wet/dry vacuum makes a strange noise for one of four reasons. Blocked airflow, loose parts, worn bearings, or debris in the impeller. A whistle means a clogged filter or an air leak.
A rattle signals loose debris or unsecured accessories. A grinding sound points to debris caught in the impeller.
The Noise Diagnosis Is the Shortcut
Here's the trick that saves the most time: don't guess. Listen first.
Your vacuum's sound is a diagnostic signal. Identify the noise, and you've already narrowed the problem down to one area of the machine. A quick listen will tell you whether to check the filter, the tank, or the motor head.
| Noise Type | Most Likely Cause | Where to Look |
|---|---|---|
| High-pitched whistle | Clogged filter or air leak | Filter housing, gasket, hose |
| Rattling or vibration | Loose part or debris in tank | Tank, casters, accessories |
| Grinding or scraping | Foreign object in impeller | Motor intake, impeller cover |
| Humming or labored motor | Blockage or float shut-off | Hose, float valve, tank level |
As of 2026, the basic design of most home wet/dry vacuums hasn't changed much. A universal motor spins an impeller, which pulls air through the filter and hose. When anything interrupts that flow, you get noise.
That's why the fix follows the sound. Work through the noise types below in order, and you'll find the problem in minutes.
Before You Do Anything: Unplug Your Vacuum
This sounds obvious, but it's the most skipped safety step. Unplug the unit before you put hands anywhere near the tank, filter, or motor housing. Even with the switch off, a faulty switch can leave the circuit live.
Empty the tank completely. If you've just vacuumed up water, the float shut-off may have debris stuck to it. Dried-on gunk around the float is a common source of both noise and suction problems.
Rinse the tank with clean water after wet pickup.
Grab a flashlight, a screwdriver, and a soft brush. That's enough to handle 95% of noise-related issues. And if you've been running the vac for a while, grab earplugs too.
OSHA's noise guidance notes that continuous exposure above 85 dB can strain your hearing over time.
Noise Type 1: High-Pitched Whistle (Air Leak or Clogged Filter)
A whistle means air is squeezing through a narrow gap or fighting to get through a blocked filter. It's the most common noise complaint, and the fix is usually quick.
Start with the filter. A pleated cartridge caked with drywall dust restricts airflow. The motor responds by sucking harder and whining.
Pull the filter off, tap it clean, or rinse it if it's washable. If the whistle disappears, that was your problem.
Next, check the seal between the motor head and the tank top. That rubber gasket is the most common spot for a leak. A crack or a misaligned seal creates a high-pitched sound and kills suction at the same time.
Look at the full perimeter for gaps.
Finally, inspect the hose. A pin-sized puncture can produce a surprisingly loud whistle. Run your hand slowly along the hose while the vacuum runs, or shine a flashlight inside.
A blocked hose works the same way a pool cleaner's kinked hose does. It restricts flow and changes the motor's pitch.
If the sound changes when you cup your hand over the hose opening, the restriction is upstream. If it stays constant, the leak is somewhere between the motor and the tank seal.
Noise Type 2: Rattling or Vibration (Loose Parts or Debris in the Tank)
Rattles are physical. Something is moving around that shouldn't be, or something is vibrating against something else.
First, check what's actually inside the tank. This is embarrassing in the best way. A stray screw, washer, or wood chip from a previous job can bounce around in the bottom.
The sound it makes often seems to come from the motor.
Then check the accessories. A loosely attached nozzle or wand vibrates at high speed and produces exactly this sound. Make sure every hose connection clicks into place completely.
Loose wing nuts on the filter retainer are another common source.
Casters can also rattle. If the vacuum has wheels, check the nuts or clips holding them in place. A worn caster bracket on a hard shop floor produces a distinctive metal-on-metal chatter.
If the rattling only happens while you're moving the unit, the source is almost certainly the wheels or the handle. If it happens when the machine sits still, look inside the tank and at the filter housing. This is also a good moment to remember the routine upkeep that keeps any vacuum running quietly.
Tight fittings, clean gaskets, and a clear tank prevent most noise issues before they start.
Noise Type 3: Grinding or Scraping (Impeller or Foreign Object)
This is the noise that makes your stomach drop. A grinding or scraping sound usually means debris has found its way into the impeller, the fan blade that creates suction inside the motor head.
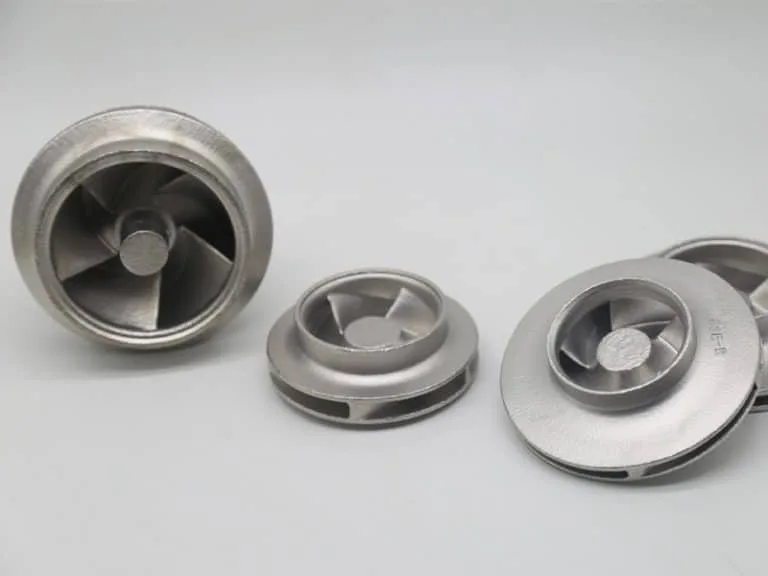
Image source: Web (Bing) / investmentcastingpci.com (Web image (fair-use with source credit))
Before you panic, know this: most impeller issues are fixable. Hard debris like a drywall screw, a staple, or a piece of stiff wire can wedge between the blades. The motor keeps spinning, and each rotation scrapes the blade against the object.
Start by unplugging the vacuum. Remove the filter and shine a flashlight down into the motor intake. You can often see the object directly.
If you can reach it with needle-nose pliers, carefully pull it out. If you can't see it, you'll need to open the motor housing.
The housing usually has a few screws on the underside of the motor head. Removing them gives you access to the impeller chamber. Once inside, clear any debris and check the fins for cracks.
A bent or broken fin creates a persistent scraping noise even after the debris is gone. That means the impeller needs replacing.
The same debris-induced grinding shows up in impeller jams in other vacuum types. The fix follows the exact same logic: clear the obstruction, check for damage, replace if broken.
One more thing. If you open the housing and the impeller spins freely but still makes a rough growling sound, the motor bearings are failing. That's a higher-level repair, and it usually means the motor head assembly needs replacing.
We'll cover that call in the repair-versus-replace section.
Noise Type 4: Humming or Labored Motor (Blockage or Float Issue)
A hum that stays the same while the vacuum struggles to pull air points to a restriction. It's the sound of the motor working against closed-off airflow. The float shut-off valve is the usual suspect.
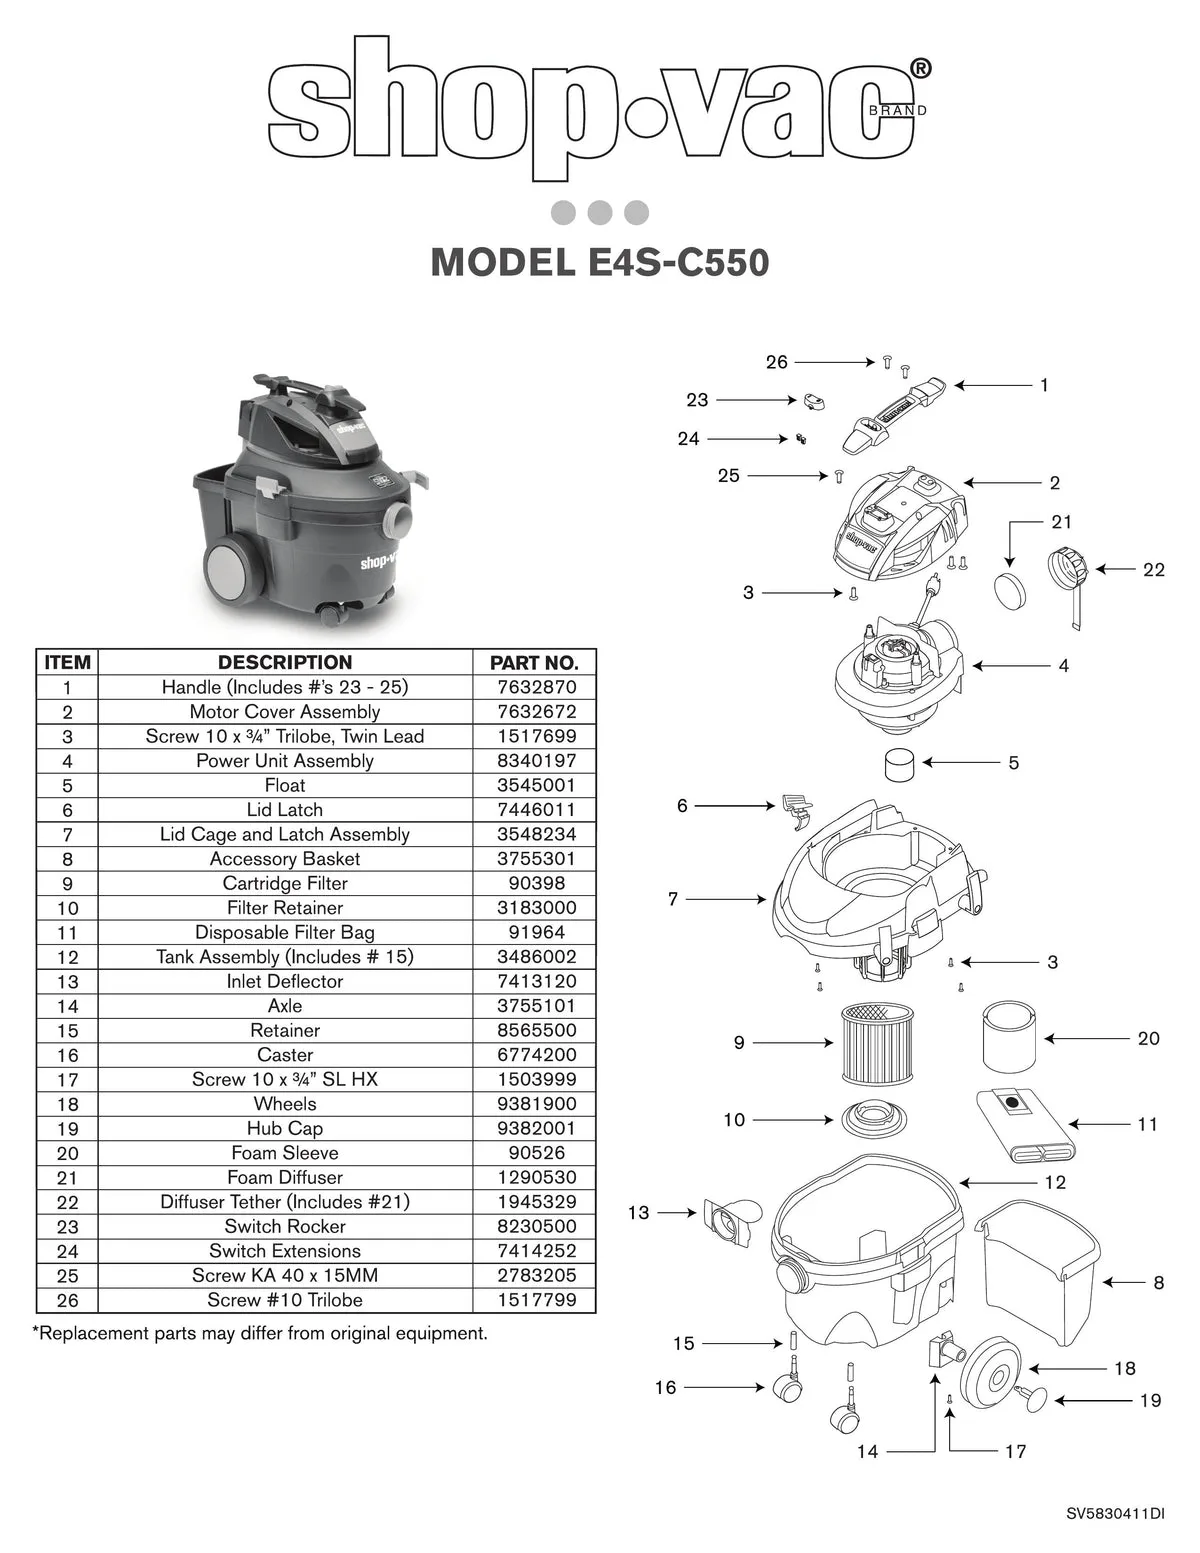
Image source: Bing (Web (fair-use with source credit))
The float sits inside the tank and rises with the water level. When it reaches the top, it seals the intake to keep liquid out of the motor. If that valve sticks, it seals too early.
The motor keeps running but pulls almost no air.
This happens a lot after wet pickup. Dried-on crud or a piece of debris holds the float in place. Open the tank, find the float, and make sure it moves freely.
A quick rinse usually fixes it.
A low hum can also mean a full tank. Check the water level first if you've been vacuuming liquids. The same goes for a tank packed tight with dry debris.
The filter may look fine while the drum is the actual bottleneck.
If the hum happens with a clean filter and an empty tank, inspect the hose by following the same logic as a stuck pool cleaner. A compacted object inside the hose restricts flow and makes the motor strain.
The 10-Minute Troubleshooting Workflow
When you're not sure which noise matches, run this sequence. It covers the most likely causes in the fastest order.
| Step | Action | What It Rules Out |
|---|---|---|
| 1 | Unplug and inspect the tank | Full tank, solid clogs, loose debris |
| 2 | Remove and check the filter | Clogged or saturated filter |
| 3 | Inspect the hose | Blockages, punctures, kinks |
| 4 | Check the float shut-off | Stuck float, premature shut-off |
| 5 | Examine the tank seal | Air leaks, cracked gasket |
| 6 | Listen to the motor head | Worn bearings, loose parts |
The whole workflow takes about ten minutes. Most fixes are just cleaning, not repairs.
Start with the tank. Open the latches, look inside, and remove any heavy debris. Then move to the filter.
Tap it clean or rinse it if it's washable.
Run the vacuum with the hose attached but no nozzle. If the sound becomes normal, the restriction is in the nozzle or the end of the hose. If it stays odd, continue down the list.
Common Mistakes That Turn Noise Into Real Damage
Gritting your teeth through an odd noise is the biggest mistake. A small issue like a clogged filter becomes a big one like a burned-out motor.
Running the vacuum with a wet filter is a close second. A soaked cartridge restricts airflow severely. The motor overheats and can short out.
Always let a washed filter dry completely before reinstalling it.
Vacuuming fine dust without the proper filter hurts too. Drywall dust in particular clogs pleats and gets past worn seals. Over time, it eats into the motor bearings.
Aggregate reviews report this as a leading cause of premature vacuum failure.
Using the machine without a filter at all is even worse. It lets abrasive debris straight into the impeller and motor housing. That's how impellers crack and bearings fail.
Also avoid pulling the vacuum by its hose. It strains the connection points and can loosen the seal between the hose and tank. A loose seal introduces exactly the kind of air leak that causes a whistle.
Replacing vs. Repairing: When a Part Needs to Go
Some noises end with a repair. Others end with a replacement. The decision usually comes down to how much the motor head costs compared to the whole unit.
First, price the replacement parts. A new pleated filter runs roughly $10 to $40. A replacement gasket is a few dollars.
An impeller, if you can source one, costs anywhere from $15 to $50 depending on the brand. All of these are worth installing.
Motor bearings are the line in the sand. Replacing them requires pressing old bearings out and new ones in. Special tools, patience, and some risk come with that job.
For a homeowner vacuum, it rarely makes sense.
If the motor head assembly itself needs replacing, compare its cost against a new vacuum. When the part costs more than half of a new unit, skip the repair. That goes double if your vacuum is past its five-year warranty.
| Scenario | Typical Cost | Verdict |
|---|---|---|
| Clogged or dirty filter | $10–$40 | Repair |
| Cracked tank gasket | $3–$10 | Repair |
| Stuck float | Free to clean | Repair |
| Broken impeller | $15–$50 | Repair |
| Worn motor bearings | $50+ plus labor | Replace |
| Failed motor head | $40–$100 | Compare to new unit |
A simple rule: if the fix costs less than a new vacuum, repair it. If it costs more, replace the whole machine.
Maintenance That Keeps Your Wet/Dry Vacuum Quiet
The best way to fix a strange noise is to prevent it from ever starting. A consistent maintenance routine takes ten minutes and keeps the motor running smoothly.
Clean the filter after every few uses. Fine dust builds up fast, especially after drywall work or sanding. Tap it out or rinse it, but let it dry fully before the next job.
Empty the tank before it reaches the float shut-off. Don't test the limit. Debris left sitting in the bottom gets damp, clumps, and finds its way into the motor housing.
Check the gasket every few months. The rubber seal between the tank and motor head wears out with use. A cracked or flattened gasket causes air leaks before you even hear them.
Keep the hose coiled loosely. Storing it folded sharply creates kinks and cracks. Those cracks are prime spots for the same restricted airflow that causes a whistle.
And once a season, run the vacuum with just water in the tank. It flushes out dust that settled into the float chamber. That quick rinse keeps the shut-off valve moving freely.
Safety First: What to Know Before Opening Your Vacuum
Unplug the vacuum before you remove the motor head or reach into the tank. Even with the switch off, a faulty switch can leave the circuit live. That's a shock you don't want while handling wet surfaces.
Wear eye protection when the motor housing is open. Debris in the impeller chamber can be sharp, and compressed air or a brush may send it flying. Gloves also help when you're fishing out screws or staples.
Let the motor cool down for at least 15 minutes after heavy use. The housing gets hot enough to burn skin, and some plastic parts become brittle. If you vacuumed anything flammable, like spilled paint thinner, let it air out completely before opening anything.
Never run the vacuum without a filter in place. Abrasive dust and droplets will go straight into the motor. The same goes for the dust bag on models that use one.
Check your manual if you're unsure.
When to Call a Pro or Buy a New Vacuum
Most noises end with cleaning or a small part. Some end with a burned-out motor or a failed switch. If you smell burning plastic or see smoke, stop immediately and don't run the vacuum again.
A persistent grinding after you've cleared the impeller often means bearing failure. Replacing bearings is possible but usually not worth it. The tooling and time cost more than a new motor head assembly.
Compare the repair cost against the price of a new vacuum. If the motor head costs $60 and a replacement vac costs $90, buy the new one. The same goes for a cracked tank that can't hold a seal.
If your vacuum is under warranty, contact the manufacturer before you buy anything. Most brands cover defects for one to five years. The same advice applies to other expensive cleaning equipment when major parts fail.
Quick Decision Guide: Noise Type → Cause → Fix
This table pulls the whole article into one glance. Match your noise, confirm the cause, then follow the fix.
| Noise Type | Most Likely Cause | Best Fix |
|---|---|---|
| High-pitched whistle | Clogged filter or air leak | Clean or replace filter, reseal gasket |
| Rattling or vibration | Loose parts or debris in tank | Remove debris, tighten accessories |
| Grinding or scraping | Foreign object in impeller | Open motor housing, clear obstruction |
| Humming or labored motor | Blockage or stuck float | Clear hose, clean float shut-off |
| Unusual silence | No power or tripped GFCI | Check outlet, cord, and reset button |
The workflow takes about ten minutes. Start with the tank, then the filter, then the hose. If the noise changes after any step, you've found the problem.
Frequently Asked Questions
Why does my wet/dry vacuum whistle?
A whistle usually means air is leaking through a narrow gap or struggling to pass a clogged filter. Check the filter first. Then inspect the gasket between the motor head and tank.
A visible crack or misalignment causes the same sound.
Why is my shop vac rattling when I turn it on?
Rattling is physical. Something is vibrating inside the tank or on the motor head. Check the bottom of the tank for loose debris like screws or wood chips.
Then make sure all accessories, casters, and filter retainers are tight.
Can a wet filter damage my vacuum?
Yes. A soaked filter blocks airflow, which makes the motor overheat. Overheating can warp the motor housing and shorten the vacuum's life.
Always let a washed filter dry completely before reinstalling it.
How do I know if the impeller is broken?
Open the motor housing and inspect the fins. A cracked or bent fin makes a scraping sound even after you remove debris. The impeller should spin freely without touching the housing.
If it doesn't, replace the impeller.
Is it worth repairing an old wet/dry vacuum?
Only if the repair is cheap. Filters, gaskets, and floats are worth fixing. Motor bearings or a burned-out motor usually cost more than a new vacuum.
Compare the repair price against a replacement model before you commit.

