

Why is my handheld vacuum losing suction? It’s one of those annoying little mysteries that makes you want to toss the whole thing in the trash. You press the trigger, hear the motor spin, and yet crumbs barely crawl across the floor.
The good news is that it’s almost never a dead motor.
In our research, most suction loss comes down to a blocked airflow path, and a dirty filter is the top culprit. Per International Electrotechnical Commission vacuum performance standards, airflow is the real measure of suction power, so anything that restricts that path cuts pickup fast. As of 2026, most handheld vacuums still rely on a simple washable pre-filter or a HEPA filter, and both clog quicker than you’d expect.
Let’s walk through the troubleshooting flow step by step.
Quick Answer: Why Your Handheld Vacuum Lost Its Pull
Your handheld vacuum loses suction when something blocks the airflow path. That path runs from the nozzle through the filter to the motor. The usual culprits are a full dustbin, a dirty filter, or a clog.
Check those three before touching the battery or motor.
First, Pin Down the Symptom: What Is Your Vacuum Telling You?
Before you take anything apart, listen to your vacuum. It gives you clear clues. A high-pitched whine usually means the motor is straining to pull air through a blockage.
That points to a clog in the nozzle, hose, or dustbin pathway. A quieter motor with no pull at the nozzle usually means the filter is clogged or the dustbin isn't seated properly. And a motor that sounds fine for five seconds, then fades, points to the battery.
This simple symptom check narrows your search dramatically. You can skip half the repair steps just by paying attention. Here’s the quick breakdown.
| Symptom | Most Likely Cause | Next Move |
|---|---|---|
| High-pitched whine, weak pickup | Clog in nozzle, hose, or cyclone path | Inspect the full air path |
| Normal motor sound, no suction | Dirty or wet filter | Clean or replace the filter |
| Suction starts strong, then fades | Battery struggling under load | Charge fully, or test a fresh battery |
| Rattling or clicking noise | Hair or debris wrapped in the brush roll | Remove brush roll and clear it |
If you hear a burning smell or the motor stops abruptly, stop testing right there. That can signal a worn motor or a damaged battery, and continuing to run it can make things worse. Every other case is almost certainly a simple airflow problem you can fix at home.
Check the Dustbin: Is It Full, Overstuffed, or Poorly Seated?
The dustbin is the fastest thing to check and the easiest to overlook. On most handheld vacuums, the dustbin is the first stage of the airflow system. When it’s full, air can barely move.
When it isn’t clicked in properly, air sneaks around the bin and never develops enough pull at the nozzle. Both issues feel similar, but they’re easy to fix.
Start by emptying the bin completely, even if it looks only half full. Packed debris can create a dense mat that blocks airflow, especially if you vacuum pet hair or fine dust. While the bin is off, look at the small rubber gasket or seal around the rim.
A torn or misaligned seal lets air leak in, and that kills suction even with a clean filter.
Bagless vacuums depend on that seal to hold negative pressure. If the seal is cracked, the motor will sound fine but the nozzle won’t pick anything up. The fix is often a new dustbin lid or seal kit, which many manufacturers sell as a spare part.
Before you buy anything, though, make sure the bin clicks firmly into place. A loose fit is the most common reason suction disappears after routine cleaning.
Inspect the Filter: The Most Common Suction Killer
This is where most handheld vacuum suction problems live. The filter is the last gate before the motor. Once it becomes coated with fine dust, air can’t pass through easily.
The motor may still run, but actual pickup falls off dramatically. In our research, a clogged filter is the number one cause of suction loss across major brands like Dyson, Black+Decker, and Shark.
As of 2026, most cordless handhelds use either a washable foam or felt pre-filter, a HEPA filter, or both. Foam filters trap larger particles, while HEPA filters catch microscopic dust. The [U.S.
Department of Energy defines true HEPA as capturing 99.97% of particles at 0.3 microns](https://www.energy.gov). That level of performance depends on free airflow, which means the filter needs regular attention.
Here’s how to inspect and clean it properly:
- Remove the dustbin and pull the filter out of its housing.
- Tap it gently over a trash can to knock off loose dust.
- If the filter is washable, rinse it under lukewarm water.
- Do not use detergent. Soap residue can clog the filter fibers.
- Air-dry the filter fully for 12 to 24 hours before reinstalling.
- If it’s a non-washable HEPA filter, replace it instead of soaking it.
Aggregate user reviews across many models show that a damp filter is a hidden suction killer. People clean the filter, feel it’s wet, and pop it back in to save time. The vacuum then runs with restricted airflow until the filter dries, and sometimes the moisture damages the filter permanently.
Manufacturer cleaning instructions and International Electrotechnical Commission airflow standards both point to the same conclusion: filter condition is the main variable in suction performance.
If your filter looks clean but still isn’t passing air, check the filter housing itself. Cracks in the plastic housing can let unfiltered air bypass the filter entirely. That reduces suction and sends dust straight into the motor, which is worse.
Replace the housing if you see damage.
Look for Clogs: Nozzle, Hose, and Cyclone Path
If the dustbin is empty and the filter looks clean, move upstream. That’s where clogs love to hide. Coffee grounds, pet hair, and drywall dust can wedge themselves into the nozzle or hose.
The cyclone chamber on bagless models can also build up a thick layer of fine dust, especially if you vacuum powders like plaster, baking soda, or construction debris.
Here’s a real-world example. You vacuumed drywall dust last weekend. Drywall powder is extremely fine and packs into the cyclone chamber like concrete.
The dustbin might look nearly empty, but the airflow path can still be completely blocked. That’s why suction disappears even after you empty the bin and clean the filter.
Follow this sequence to clear a clog:
- Detach the nozzle and any extension wand from the main body.
- Shine a flashlight into both ends of the nozzle and hose.
- Look for hair, thread, or debris wrapped around the brush roll if it has one.
- Use a long, flexible tool like a pipe cleaner or a piece of wire to fish out blockages.
- Blow compressed air from the motor side backward if you have a can handy.
- Reassemble everything and test on a hard floor first.
Don’t jam anything long and stiff into the openings near the motor. You could puncture the filter or damage the impeller. If the clog refuses to budge after a few minutes, remove the dustbin and access the cyclone chamber directly if your model allows it.
Many newer handheld vacuums have a release latch that opens the cyclone assembly for deep cleaning.
The key is to check the entire path, not just the obvious spots. A small hairball wedged in the hose can cause as much suction loss as a completely full dustbin. Once the path is clear, you’ll usually feel the difference immediately at the nozzle.
Untangle the Brush Roll: Hair, Threads, and Debris Jams
Brush roll jams are the sneaky cause, because they don't always stop the motor. The motor spins, the roller sits still, and nothing gets lifted off the carpet. You'll hear a faster, whinier motor sound, but the nozzle feels weak.
Hair, thread, and pet fur wrap around the axle. To fix it, remove the brush roll from the nozzle, usually by unscrewing a single latch or end cap. Then cut away the debris with scissors.
Don't pull it, cut it. Pulling can break the bristles or bend the shaft.
Check the bristles while you're in there. Worn or melted bristles won't dig into carpet fibers, so pickup falls even with full suction. Replacement brush rolls cost $10 to $20 and take about five minutes to swap.
The motorized brush version is more prone to jams than a suction-only nozzle. If your model has a brush roll, inspect it every few weeks, especially in pet households. A quick visual check catches problems before suction disappears.
Test the Battery: Low Charge vs. Failing Motor
This one's easy to confuse with a clog. If suction starts strong and fades within a few seconds, your problem is electrical, not airflow. The motor draws more current as the battery sags, and the result is a soft, sputtering pickup.
Manufacturer specifications indicate that battery pack voltage typically ranges from 7.2V to 20V in handheld vacuums. Capacity, measured in amp-hours, determines runtime. Both drop as the battery ages, which drops effective suction power under load.
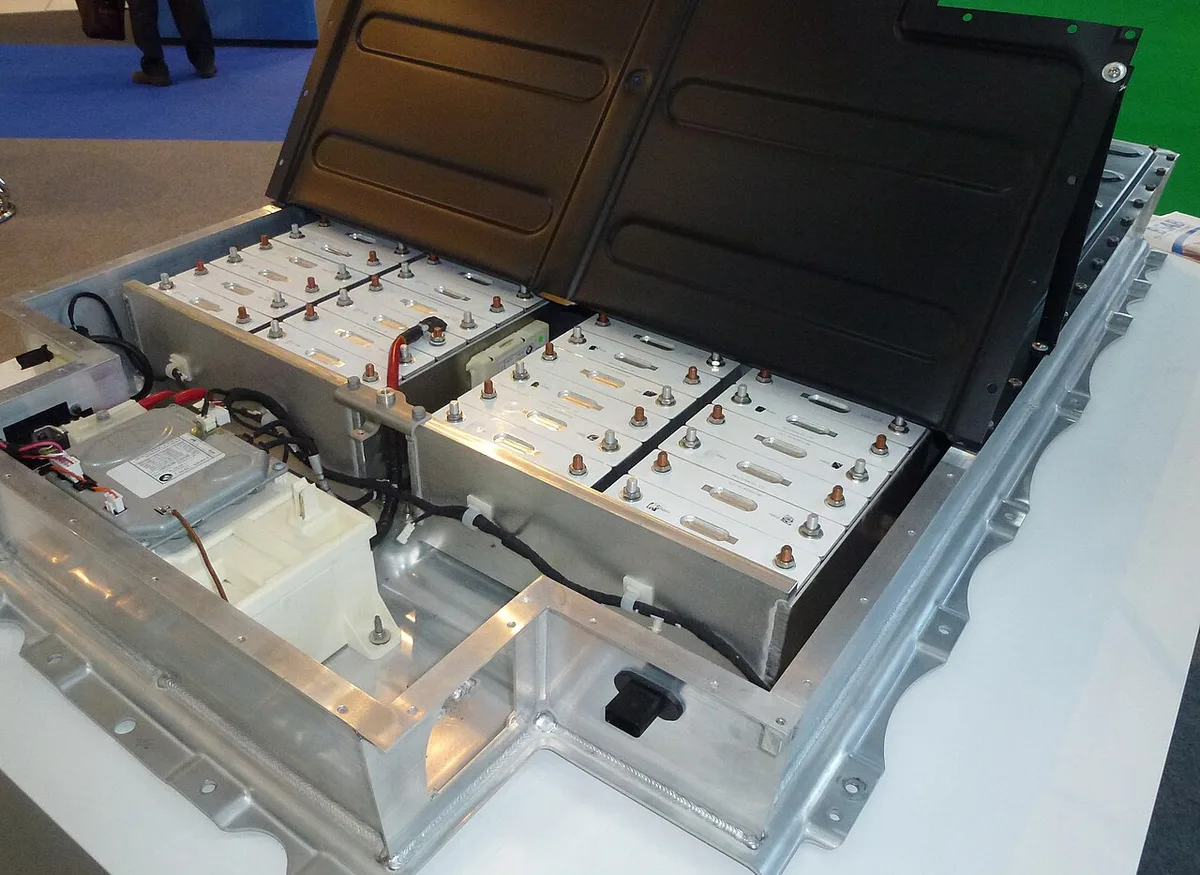
Image source: Wikimedia Commons / RudolfSimon (CC BY-SA)
Check the indicator light first. If it's blinking or showing one bar, charge it fully and retest. Cold batteries also lose capacity, so if you store your vacuum in the garage or porch, bring it inside for an hour before testing.
If a fully charged battery still can't hold suction, it's time to replace it.
Aggregate user reviews across many cordless models show that battery degradation is noticeable after roughly two years of regular use. A fresh battery often restores suction completely, even with the same filter and dustbin. That's why testing the battery before assuming motor failure is so important.
Examine Seals and Gaskets: Where Air Is Sneaking Back In
A vacuum loses pickup when air sneaks in through a leak instead of rushing through the nozzle. The dustbin rim, the filter housing, and the connector joints are the usual spots. Aggregate user reviews report that cracked seals are the third most common cause of suction loss, right after clogged filters and full dustbins.
Test for leaks while the vacuum runs. Cup your hand over the nozzle. If you feel a steady air current along the side of the dustbin, you found your leak.
Inspect the rubber gaskets for cracks, hair, or a pinched fit.
Sometimes the fix is just reseating the dustbin. If a gasket is torn, most manufacturers sell replacement seals. A $4 gasket beats a $120 new vacuum any day.
Check the filter housing gasket too. That one sits between the filter and the motor. If it's missing or damaged, unfiltered air bypasses the filter and carries dust straight into the motor.
That's a bigger problem than weak suction, because it shortens motor life significantly.
Step-by-Step: A Full Suction Restore Workflow
Work through these steps in order, and you'll find the culprit in about ten minutes. This workflow follows the airflow path from intake to motor.
- Empty the dustbin and check the rim seal.
- Remove, clean, and fully dry the filter.
- Shine a flashlight down the nozzle and hose.
- Clear any clogs with a long, flexible tool.
- Remove the brush roll and untangle hair or thread.
- Reseat the filter and dustbin, listening for a click.
- Test on a hard floor with a full battery charge.
Run each step as a single test. After each one, retest the suction. If something feels better after a step, you've found the issue.
If not, move on. This chain of tests is faster than tearing the whole machine apart at once.
Write down what you found. If the fix was a dirty filter, you'll know to check it more often. If the battery was the problem, you'll know a replacement is coming soon.
Common Mistakes That Make Suction Worse (and How to Avoid Them)
Some well-meaning maintenance habits do more harm than good. Avoid these and your vacuum will last far longer.
- Washing a non-washable HEPA filter. Water destroys the fine filtration media, and the filter collapses against the motor. Check the manual first.
- Using soap on washable filters. Soap residue traps dust and quickly makes the filter worse than before.
- Reinstalling filters while damp. The material blocks airflow, and trapped moisture grows mold in humid environments.
- Vacuuming drywall dust without a cyclone-ready filter. Fine powder packs into the cyclone chamber like concrete.
- Overfilling the dustbin. Packed debris presses into the filter and restricts airflow before the bin ever looks full.
If you've made one of these mistakes, don't panic. Rinse the filter without soap, dry it fully, and clear the cyclone chamber. Most vacuums recover fine.
One more habit to break: running the vacuum on full power while the filter is visibly dirty. It strains the motor and embeds dust deeper into the filter fibers. Clean the filter first, and the vacuum will actually use less battery while doing a better job.
When to Call It: Repair, Replace, or Upgrade?
If you've cleared every clog, cleaned the filter, and tested a fresh battery, you've hit the decision point. The next step is figuring out whether a repair makes financial sense. That depends on the vacuum's original price and replacement part costs.
Let's use real numbers. A $30 handheld vacuum that needs a $20 replacement battery is borderline, because a new unit often costs $40 to $50. A $150 model that needs the same $20 battery is worth the repair.
The rule of thumb is simple: if the fix costs more than 50% of a comparable new vacuum, skip it.
Here's your quick decision guide:
| Condition | Best Move |
|---|---|
| Clogged filter or hose | Clean or replace immediately |
| Cracked dustbin seal | Buy a replacement gasket, usually under $10 |
| Bad battery | Check if the price is under half of a new unit |
| Burnt motor smell | Replace the vacuum, motor repairs aren't worth it |
| Dropped and cracked filter housing | Replace if the part exists; otherwise, buy new |
Also check your warranty before spending anything. Many cordless handhelds carry a one to two year warranty, and motors are often covered. Consumables like filters and brush rolls usually aren't.
One more angle: your vacuum's age. Aggregate user reviews indicate that budget cordless models typically last two to three years, while premium units may last five or more. If your handheld has been running strong for four years and now needs a motor repair, that other shoe has finally dropped.
Upgrade instead of throwing good money after a dying platform.
Maintenance Schedule to Prevent Suction Loss
Prevention takes five minutes a month, and it saves you from the frustration of a dead vacuum at the worst moment. Build these tasks into your routine and you'll rarely see a suction drop.
Weekly, empty the dustbin after every heavy use. Don't wait until it's packed to the rim. Monthly, remove the filter, tap it clean, and wash it if it's washable.
Let it dry fully for 12 to 24 hours, then reinstall.
| Task | Frequency | Time |
|---|---|---|
| Empty dustbin | After every use | 30 seconds |
| Rinse washable filter | Monthly | 2 minutes |
| Check brush roll for hair | Every 2 to 4 weeks | 2 minutes |
| Inspect seals and gaskets | Monthly | 1 minute |
| Replace disposable HEPA filter | Every 3 to 6 months | 3 minutes |
Set a simple reminder on your phone if that helps. Pick the first Saturday of the month as your vacuum care day. When you notice the filter is dirty just by looking at it, you've gone too long.
Battery care matters too. Avoid leaving the vacuum on the charger overnight every single day. Most modern battery packs use lithium-ion cells, and while they handle charging well, heat and overcharge cycles can shorten their life.
Plug it in when it's low, unplug when it's full.
Frequently Asked Questions
Why does my handheld vacuum lose suction when the filter is clean?
If the filter looks clean but suction is still weak, check the filter housing for cracks. Air can bypass the filter through a broken seal, and that leaks pressure before it reaches the nozzle. Also check the dustbin rim gasket.
How often should I clean my handheld vacuum filter?
Plan to rinse a washable filter monthly under normal use. Pet households and dusty environments need more frequent cleaning, so check the filter every two weeks. Disposable HEPA filters should be replaced every three to six months.
Can I use my handheld vacuum to pick up drywall dust?
Technically yes, but it will clog the filter almost instantly. Fine powder packs into the cyclone chamber and coats the filter media beyond recovery. Use a shop vacuum with a fine dust bag for drywall jobs, or accept that you'll likely replace the filter afterward.
How do I know if my vacuum battery needs replacing?
Suction that fades quickly after a full charge is the classic sign. If the vacuum picks up strongly for two seconds and then weakens, the battery can't sustain voltage under load. A fresh battery usually restores full suction immediately.
Is it worth replacing filters on a cheap handheld vacuum?
It depends on the filter price. A $10 washable replacement for a $40 vacuum is worth it. A $25 HEPA filter for the same vacuum is harder to justify.
Check the warranty first, since some brands cover filter replacement within the first year.

