

A handheld vacuum battery stops holding a charge because the lithium-ion cells have aged, the charger is faulty, the contacts are dirty, or the vacuum motor is drawing too much current. Check the charger, clean the terminals, and test the battery voltage with a multimeter. If the pack reads near full voltage at rest but dies fast under load, the cells are worn out.
So why is your handheld vacuum battery not holding a charge? The most common reason is simple lithium-ion aging, but it's not the only one. Before you throw money at a replacement pack, you need to know exactly what you're dealing with.
The good news: you can figure this out at home in less than an hour.
As of 2026, most handheld vacuums run on lithium-ion cells rated for roughly 300 to 1000 charge cycles. That's two to four years of normal use for most households. But a lot of other things can mimic battery death, from a faulty charger to dirty contacts.
Let's work through the symptoms one by one.
First: Nail Down the Exact Symptom You're Seeing
The right fix depends entirely on what your vacuum actually does. So before you do anything else, get specific.
- Won't charge at all. The battery does nothing when you dock it or plug it in.
- Charges but dies after a few seconds. The light says full, then the motor cuts out immediately.
- Runs for a couple of minutes then fades. You get a short burst of suction, then the power tapers off fast.
- Runtime got worse gradually over months. You used to get 20 minutes, now you're lucky to get 5.
If you're in the first bucket, the power chain is broken somewhere. Check the charger, the contacts, and the battery's internal safety board. If you're in the second or third bucket, you're almost certainly looking at high internal resistance or a weak cell.
And if runtime faded slowly, normal chemistry aging is the likely villain.
Write down which symptom matches. That tiny bit of homework points you to the right diagnostic branch.
Quick Key Insight: It's Diagnosis, Not Luck
Cordless vacuum battery problems follow a logical path. There's no voodoo and no magic reset trick. Once you understand how the pieces connect, the fault becomes findable.
A multimeter is the single most useful tool for this job. You can pick one up for around ten bucks at any hardware store. It measures voltage at the charger, at the battery terminals, and under load.
That one tool removes almost all guesswork.
Here's the part that surprises people: the indicator lights on your vacuum lie. A green charging light doesn't mean the battery is healthy. It means the charger sees enough voltage to think things are fine.
The battery can still be completely dead the moment you pull the trigger. So don't trust the LEDs. Trust what your meter tells you.
How a Handheld Vacuum Battery Actually Holds (and Loses) a Charge
All rechargeable batteries degrade. That's chemistry, not a defect. But the why matters because it explains what you're seeing.
| Battery type | Typical lifespan | Memory effect | Common in handheld vacuums |
|---|---|---|---|
| Lithium-ion (Li-ion) | 300 to 1000 charge cycles | No | Yes, most modern models |
| Nickel-metal hydride (NiMH) | 200 to 500 cycles | Minor | Some older models |
| Nickel-cadmium (NiCd) | 100 to 300 cycles | Yes | Rare, very old models |
Each charge cycle is a full discharge and recharge. Two partial charges roughly equal one full cycle. That's why a vacuum you top off every day runs out faster in year two than year one.
Inside a lithium-ion pack, there's also a battery management system, or BMS. It prevents overcharging, deep discharge, and short circuits. When a single cell drops below a safe voltage, the BMS shuts everything down.
That can look exactly like a dead battery, even though the cells are technically alive.
The other key player is internal resistance. As cells age, their resistance rises. That means less usable power reaches the motor.
You get a few seconds of strong suction, then the voltage sags and the vacuum cuts out. That's the classic "charges but dies instantly" symptom.
The Main Decision Branch: Removable Battery or Sealed-In Unit?
Before you dig deeper, ask one question: can you pop the battery out without tools?
If the battery is removable, you're in the easy lane. Slide it out and read the label. The voltage rating and model number are right there.
You can test the pack directly with your multimeter, and a replacement is usually under a hundred dollars.
If the battery is sealed inside, you're facing a different kind of project. Many modern handheld vacuums glue or screw the pack into the body. Getting to it means taking the device apart, sometimes with a screwdriver and a plastic pry tool.
That's doable, but it raises the risk of breaking clips or damaging the motor wires.
Here's the if/then logic. If you have a removable pack and the vacuum is otherwise working well, a replacement battery makes sense. If you have a sealed pack and the vacuum is over three years old, ask yourself whether the time and hassle are worth it.
Sometimes the smart move is a new vacuum.
But don't decide yet. You still need to know whether the battery is even the real problem.
If It Won't Charge At All: Work Through the Power Chain
When the battery shows zero signs of life, work through the system in order. Start with the easiest, cheapest possible cause and move toward the battery itself.
Step 1: Test the charger and cable.
Plug the charger into the wall and measure the output voltage at the barrel connector or charging pins. Compare that reading to the specs printed on the charger label. If you see zero volts or a wildly different number, the charger is dead.
That's a simple, inexpensive fix.
Step 2: Inspect the contacts.
Look at the metal terminals on both the battery and the vacuum. Grime, dust, or oxidation can block the charging current. Clean them with a dry cloth or a bit of isopropyl alcohol on a cotton swab.
Bent or sunken pins are also common on older models.
Step 3: Check the battery pack voltage directly.
Remove the battery and measure across its positive and negative terminals. A nominal 18V pack should sit around 20V when fully charged. If it reads below 15V, the pack is over-discharged or has a dead cell.
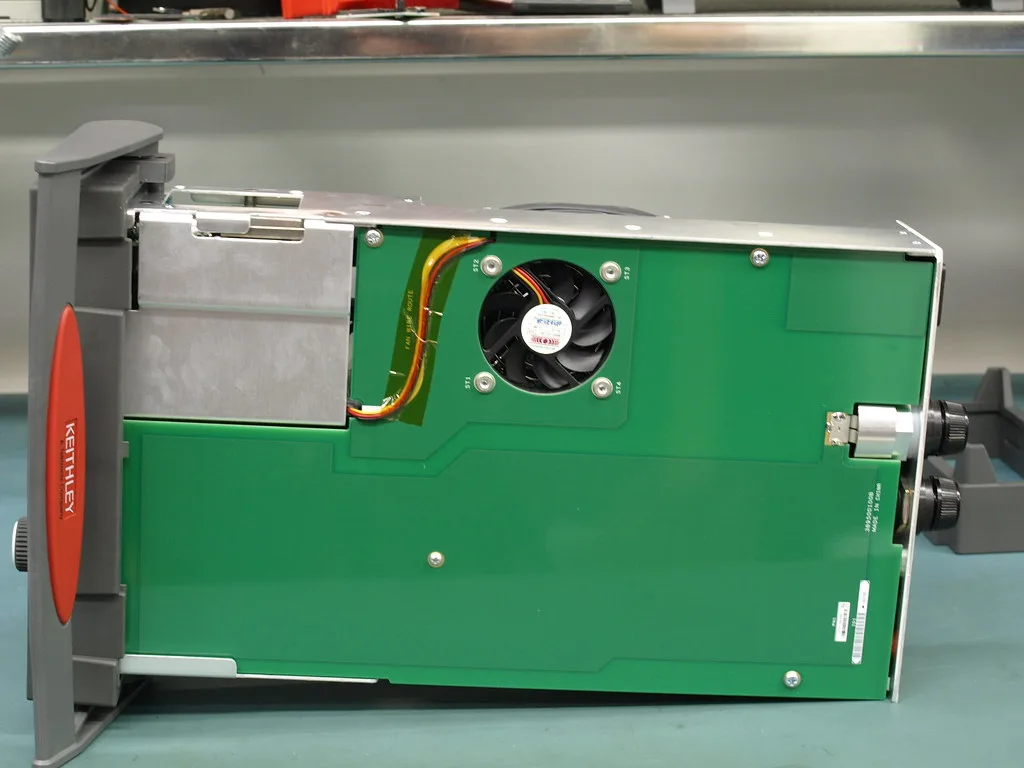
Image source: Openverse / eevblog
Step 4: Look for a tripped BMS or a blown fuse.
Some battery packs contain a tiny fuse. If it blows, the pack looks completely dead. The BMS can also lock out the pack when one cell drops too low.
In that case, you might need a specialized charger or a reset procedure specific to your brand.
If the charger, contacts, and battery voltage all check out, the problem may live on the vacuum's main circuit board. That's a harder repair, and it often costs more than the vacuum is worth. Also worth a quick search: check the CPSC recall database for your model, because defective battery packs have been recalled in the past.
If It Charges But Dies Quickly: Run the Runtime Diagnostic
If your vacuum charges to a green light but dies within a minute, you're looking at high internal resistance. A healthy lithium-ion pack holds most of its voltage under load. A worn pack lets voltage collapse the moment the motor spins up.
Run a controlled test. Fully charge the battery. Set the vacuum to standard suction mode, not max.
Hold the trigger on and time how long it runs until it cuts out.
Most handheld vacuums are rated for 10 to 25 minutes on standard mode. If yours dies in under two minutes, the pack has one or more weak cells.
Now grab your multimeter. Immediately after the vacuum shuts off, measure the battery terminal voltage. If it rebounds to a near-full reading, that's the classic voltage-sag signature of internal resistance.
One more clue: a pack that gets hot on a quick run is struggling. Heat is the byproduct of resistance, and resistance is the byproduct of worn cells.
If the voltage reads fine at rest but collapses under load, don't waste time polishing the contacts. The cells themselves are done.
If Runtime Slowly Got Worse: Capacity Loss and Calibration
Slow, gradual runtime loss is completely normal. In our research, lithium-ion packs lose about 20% of their capacity after the first year. By year three, that number can hit 40% or more.
Each charge cycle reduces the amount of active lithium available. There's no chemical trick to bring it back. But that doesn't mean the pack is dangerous or dead.
It just means the tank is smaller.
A calibration cycle won't restore capacity. What it does is re-sync the charge indicator on the vacuum or battery. If your vacuum shuts off when the indicator still says 40%, calibration can fix that.
Here's how to do it correctly. Fully discharge the vacuum by running it until it stops. Charge it to full without interruption.
Then run it again using the highest suction mode until it dies. Repeat that once more.
If runtime stays short after calibration, the pack is simply aging out. Measure your timed runtime against the rated runtime. If you're below 50%, replacement is the honest answer.
The Hidden Culprit: A Dying Vacuum Motor Draining a Healthy Battery
A fatigued motor can kill a fresh battery. It's less common than bad cells, but it happens more often than most owners realize.
Motors draw more current as they wear. Dust packed around the fan, dry bearings, or worn brushes inside a brushed motor all increase resistance. That extra current pulls battery voltage down hard, which triggers a premature cutoff.
Test the motor before you blame any replacement battery. Set your multimeter to DC voltage and connect the leads across the battery terminals while the vacuum runs. A healthy battery should hold near 90% of its nominal voltage.
If it drops hard, compare the motor's current draw against the spec.
You can measure current with a clamp meter around the positive wire from the battery. Most handheld vacuums draw 4 to 8 amps depending on power mode. If your motor pulls 10 or more, the motor is the problem.
If the motor checks out but the battery still fails, replace the pack. If the motor is the culprit, swapping the battery is just an expensive delay.
Common Mistakes That Kill Handheld Vacuum Batteries Faster
Plenty of people buy a replacement, install it, and start the same habits that killed the first one. Avoid these.
- Leaving the vacuum on the charging dock 24/7. Trickle charging keeps the pack near 100%, adds heat, and stresses cells.
- Storing the vacuum fully discharged for months. Lithium-ion packs fall below safe voltage and the BMS locks them out.
- Storing it fully charged, too. The ideal resting point is 40 to 60% charge in a cool place.
- Exposing the battery to heat. Inside a parked car on a summer day, a lithium pack ages faster than it ever would in normal use.
- Using a random aftermarket charger. Wrong voltage trips the BMS or damages the cells directly.
- Always running on max power. High current draw spikes internal temperature and cuts cycle life down.
- Buying the cheapest no-name replacement pack. Aggregate reviews show those skip safety certifications and use low-grade cells that sag under load.
Also avoid deep discharging every single time. For lithium-ion, small top-ups between uses are actually better than draining to zero.
What to Do Next: Rebuild, Replace the Battery, or Buy a New Vacuum
If the battery failed your diagnostics, you have three paths. Choose based on vacuum age, replacement cost, and how comfortable you are with tools.
| Option | Best for | Cost range | Effort |
|---|---|---|---|
| OEM replacement battery | Replaceable pack, vacuum is otherwise solid | $20 to $100 | 5 minutes |
| Aftermarket compatible battery | Budget-conscious, same specs as OEM | $15 to $60 | 5 minutes |
| Cell rebuild | Expensive pack, advanced DIY skills, spot welder | $25 to $60 in parts | 1 to 2 hours |
| New vacuum | Sealed-in battery, vacuum over 3 years old | $80 to $300 | No repair |
OEM is the safest choice. It matches the original chemistry, BMS calibration, and physical dimensions. Aftermarket packs can work well if you match voltage, capacity, and size, and you should always check verified buyer feedback first.
Rebuilding only makes sense for premium packs, because opening a lithium-ion battery without experience is a real safety risk. Short circuits can cause fires, and prying cells loose can puncture them.
The practical rule is simple. If a replacement battery costs more than 40% of a comparable new vacuum, buy the new vacuum. If your vacuum is otherwise in great shape and the battery is cheap, swap it.
Safe Battery Handling, Recycling, and Disposal
If your battery is swollen, hot, or leaking, stop using it immediately. A swollen lithium-ion cell is a fire risk. Don't puncture it, don't squeeze it, and don't try to charge it.
Place the pack in a metal container or a fireproof bag if you have one. Keep it away from anything flammable until you can recycle it. Most hardware stores, big-box retailers, and household hazardous waste centers accept lithium-ion batteries for free.
Look for a Call2Recycle drop-off location near you if you're in North America. That program handles rechargeable batteries from cordless vacuums, laptops, and power tools. You can also check with your local municipality for battery recycling rules, since restrictions vary by state and country.
Never throw lithium-ion batteries in the trash. In many places it's illegal, and in every place it's dangerous. Landfill compaction can damage cells and spark fires in waste trucks.
When you buy a replacement, check for safety certifications. Look for UL 2591 or IEC 62133 on the label or listing. Those standards confirm the pack has passed basic safety testing for overcharge, short circuit, and thermal abuse.
Repair vs Replace Decision Guide: A Quick Flowchart Wrap-Up
Answer five questions in order, and your decision will be obvious.
| Question | Yes | No |
|---|---|---|
| Is the battery removable? | Continue | Factor in labor |
| Is the vacuum under 2 years old? | Replace the battery | Continue |
| Is the battery less than 40% of a new vacuum's price? | Replace it | Buy a new vacuum |
| Does the motor draw normal current? | Battery is the culprit | Fix the motor |
| Is the vacuum overall in good shape? | Repair makes sense | Replace the unit |
The if/then logic gets simple after this. If a replacement battery costs less than $60 and your vacuum is otherwise solid, swap the battery. If the pack is sealed in, the unit is old, or the motor is failing, put that money toward a new machine.
Here's the bottom line. Most battery problems in handheld vacuums are true battery failures. But checking the charger, contacts, and motor before you buy anything is the difference between a ten-dollar fix and a wasted hundred.
Frequently Asked Questions
Why does my vacuum die faster in high-power mode?
High-power mode pulls more current from the battery. That worsens voltage sag in worn cells and speeds up heat buildup. If you have a pack with rising internal resistance, boost mode will expose the weakness immediately.
Try standard mode during your runtime test to get a fair read on battery health.
Can I use a higher-capacity replacement battery?
Yes, if the voltage matches and the physical size fits. A higher mAh rating gives longer runtime, but only when the pack uses quality cells. Manufacturer specifications indicate that a compatible battery with the same nominal voltage is safe to use.
Just verify that the connector and charging dock are identical.
Why is the charge light blinking red or orange?
A blinking indicator almost always signals a battery management system alarm. It usually means the pack is over-temperature, over-discharged, or shorted. Unplug the vacuum and let the battery cool to room temperature.
If the blinking persists after a cool-down, the pack likely has a damaged cell and needs replacement.
Is it worth reviving a 5-year-old handheld vacuum?
Usually not. At that age, the battery is near end-of-life and other parts like the motor and filters often degrade too. Compare the replacement battery price against a new vacuum with a warranty.
If the repair costs are under 40% of the new price and the vacuum runs strong, go for it. Otherwise, retire it.
How long should a handheld vacuum battery last?
With normal use, expect 2 to 4 years before noticeable runtime loss. That comes out to roughly 300 to 1000 charge cycles for modern lithium-ion packs. Frequent high-power use, heat exposure, and constant docking cut that lifespan short.
Proper storage habits can stretch it toward the upper end.

