

Replacing a vacuum filter is simple: unplug the vacuum, remove the old filter, install the correct new one, and test airflow.
Learning how to replace a vacuum filter can protect your motor, improve suction, and reduce dust in your home. This guide explains the process for upright, canister, stick, handheld, and shop vacuums, with simple safety tips and real-world advice to help you avoid common mistakes.
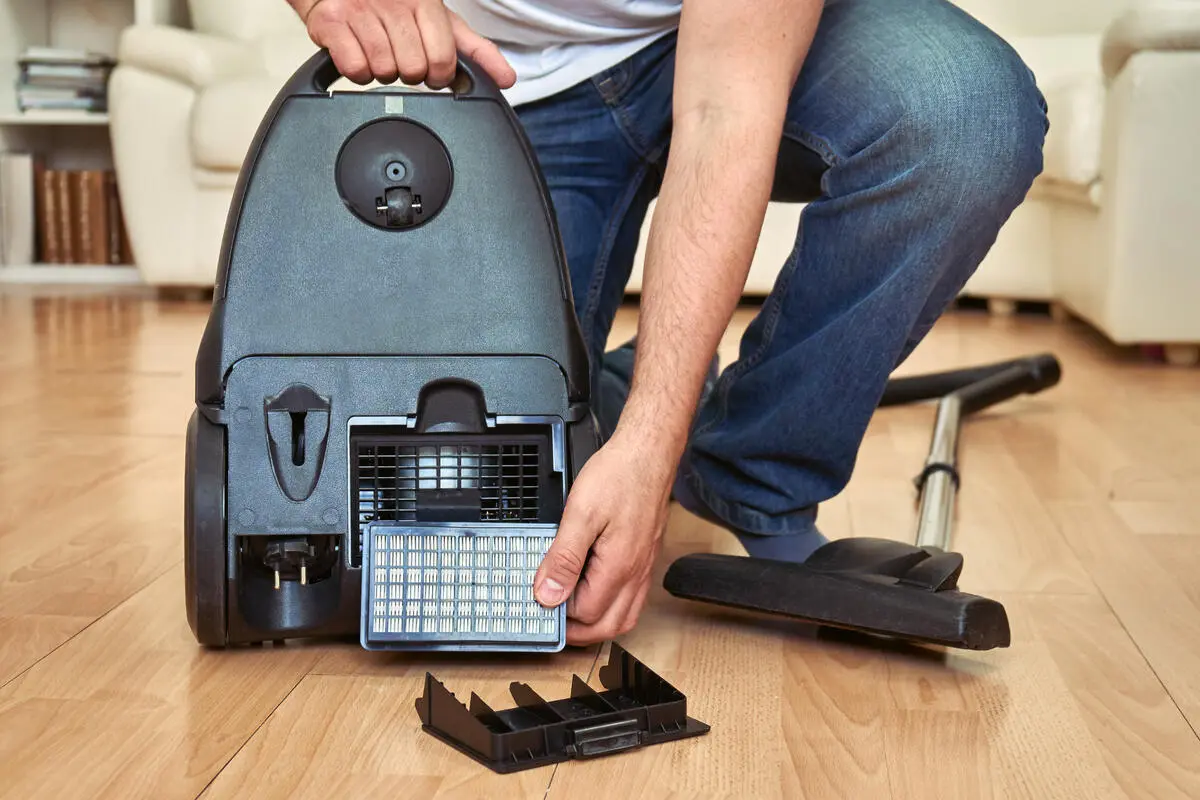
Why vacuum filters need regular replacement
A vacuum filter traps dust, hair, pollen, and tiny particles before air leaves the machine. Over time, the filter fills with debris. Once it becomes blocked, the vacuum must work harder to pull air through.
A dirty filter may cause:
• Weak suction
• Loud or unusual motor sounds
• A dusty or musty smell
• More dust blowing from the exhaust
• Overheating or automatic shutoff
• Shorter motor life
Learning how to replace a vacuum filter is important because cleaning and replacing are not always the same thing. Some filters are washable. Others are disposable and must be replaced when dirty.
Many modern vacuums use more than one filter. You may find a pre-motor filter, a post-motor filter, a foam filter, a felt filter, or a high-efficiency particulate air filter. Each one has a different job and care method.
In my experience, the most common mistake is waiting until the vacuum loses almost all suction. A filter can look only slightly gray but still have fine dust packed deep inside its fibers.

Check your vacuum filter type first
Before learning how to replace a vacuum filter, identify the vacuum model and filter style. The filter location and replacement method vary by brand and design.
Look for the model number on:
• The back or bottom of the vacuum
• The dust cup or dirt bag door
• A label near the power cord
• The battery compartment on a cordless vacuum
• The owner’s manual
You can also search the model number on the manufacturer’s website. Use the exact filter made for your vacuum when possible. A filter that looks similar may not seal correctly.
Common vacuum filter types include:
Foam filters
Foam filters are often washable. They catch larger dust particles and protect the motor. They must dry fully before you reinstall them.
Felt filters
Felt filters are used in many upright and canister vacuums. Some are washable, but many are designed for replacement only. Check the care label before using water.
HEPA filters
HEPA filters capture very small particles. They are useful for homes with allergies, asthma, pets, or fine dust. Some HEPA filters are washable, but many are not.
Cartridge filters
Shop vacuums often use large cartridge filters. These may be pleated paper, foam, or a washable synthetic material. The filter must match the type of debris you collect.
Bag filters
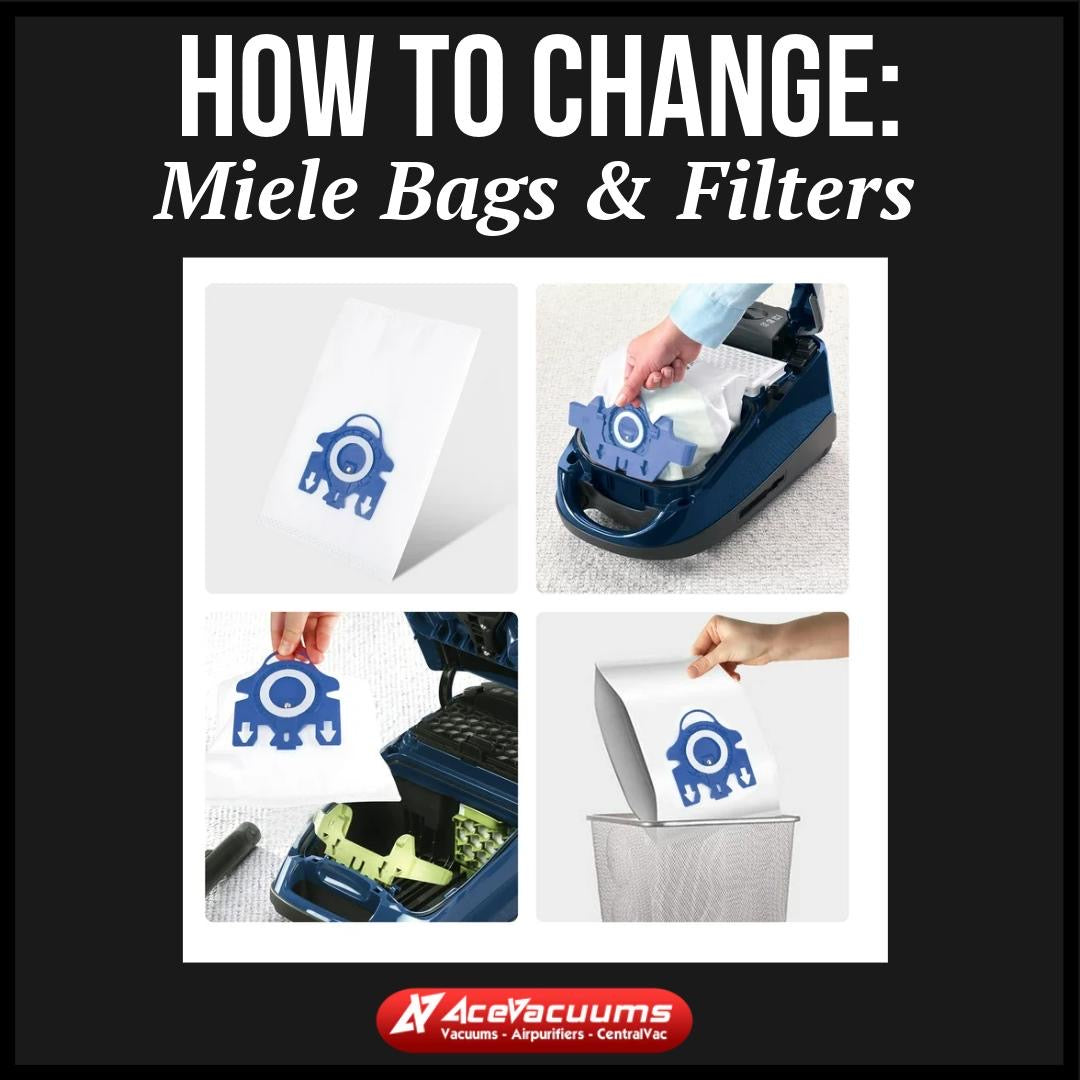
Some vacuums use a dust bag as the main filter. The bag should be replaced when full or when airflow drops. Many also include a separate motor filter.
Never wash a filter unless the manual says it is washable. Water can damage paper fibers and may cause mold if the filter is put back while damp.
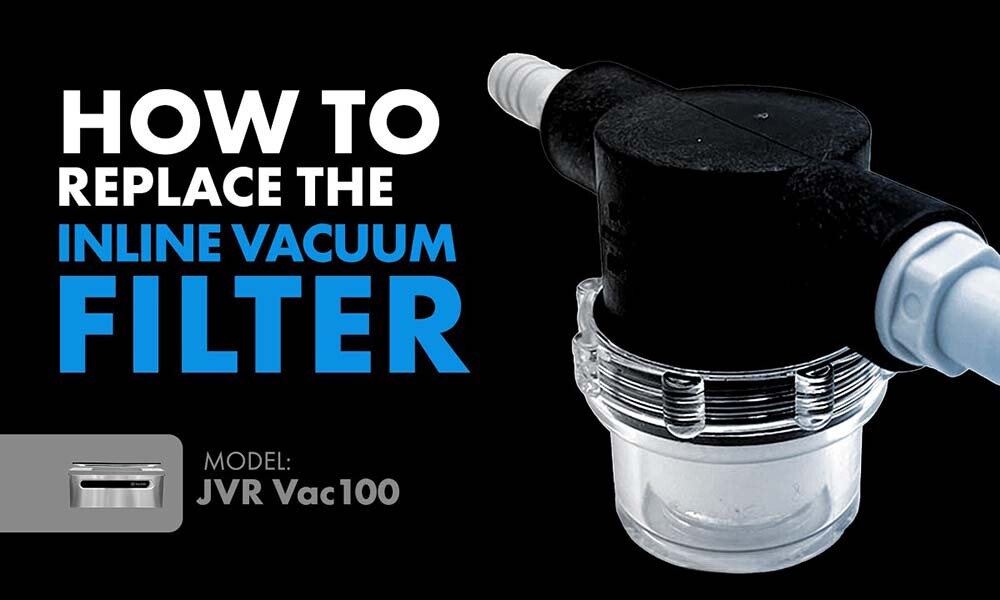
What you need before replacing a vacuum filter
The job needs only a few basic items. Prepare everything before opening the vacuum so dust does not spread through the room.
You may need:
• A compatible replacement filter
• A clean, dry cloth
• A soft brush
• Mild soap for washable filters
• Warm water
• A trash bag
• A small screwdriver, if the filter cover uses screws
Work in a well-ventilated area. If you are sensitive to dust, wear a face mask and disposable gloves. Keep children and pets away while you empty the dust cup or remove a dirty filter.
Unplug corded vacuums before starting. For cordless models, turn the vacuum off and remove the battery if the design allows it. This small step prevents accidental startup.
Take a photo before removing the old filter. This is a useful trick when the filter has several layers or a specific direction. It can save time during reassembly.

How to replace a vacuum filter step by step
The exact process may differ, but these steps work for many household vacuums.
1. Turn off and unplug the vacuum
Switch off the vacuum and unplug it from the wall. Remove the battery from a cordless model when possible.
Do not replace a filter while the motor is warm. Let the machine cool for several minutes, especially if it has overheated.
2. Find the filter compartment
Check behind the dust cup, under the dirt bin, near the motor, or at the exhaust outlet. Some models have a marked filter door. Others require you to remove the dust cup first.
Read the arrows and labels on the cover. Do not force the door. A hidden latch or small screw may hold it in place.
3. Remove the dust cup or bag
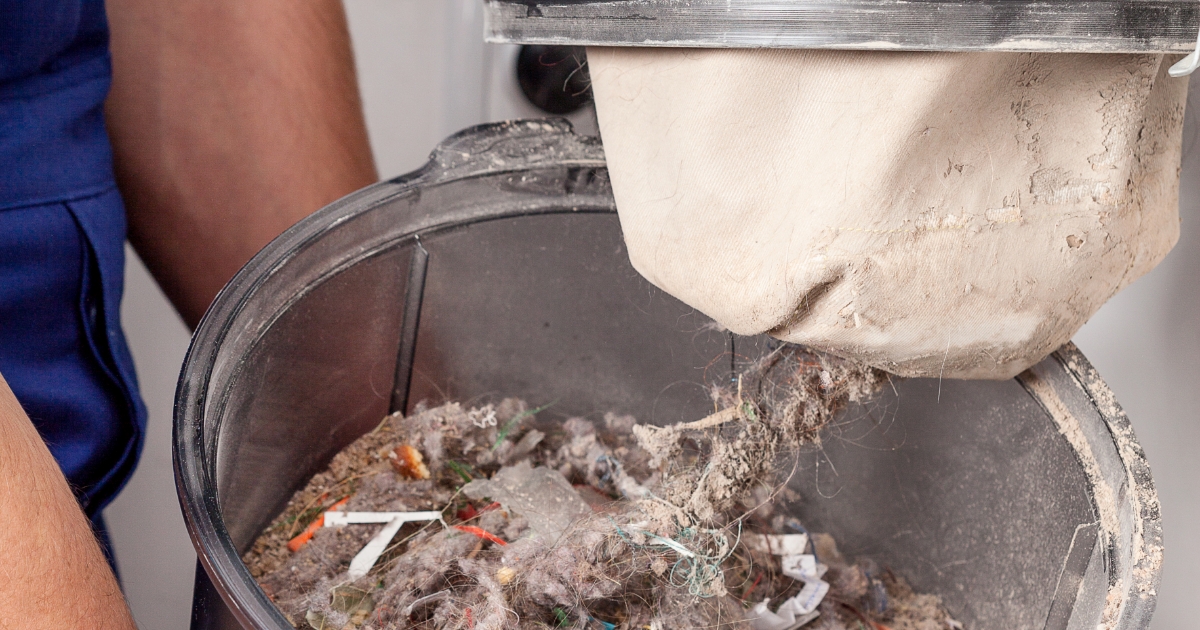
Hold the dust cup over a trash bag. Empty it slowly to keep dust from becoming airborne.
If the vacuum uses a bag, remove and seal the old bag before opening the filter area. A full bag can release a cloud of dust when handled.
4. Remove the old filter
Pull the filter out gently. Note how it sits and which side faces the motor.
If the filter is packed with dirt, place it directly into a trash bag. Avoid shaking it indoors. Shaking can spread the fine dust the filter was designed to capture.
5. Clean the filter housing
Use a dry cloth or soft brush to remove loose debris from the filter compartment. Do not push dirt into the motor.
Never spray cleaner into the vacuum. Moisture near electrical parts can create a safety risk.
6. Install the new filter
Place the new filter in the same position as the old one. Make sure it sits flat and forms a complete seal.
A loose filter can let dust bypass the filter material. That dust may reach the motor or blow back into the room.
7. Reassemble the vacuum
Replace the filter cover, dust cup, bag, and any screws. Check that every latch clicks into place.
Do not run the vacuum with the filter cover removed. The cover helps hold the filter in position and protects the motor.
8. Test the vacuum
Plug in the vacuum or reinstall its battery. Run it for about 30 seconds in an open area.
Listen for a smooth motor sound. Check for better suction, air leaks, unusual smells, or warning lights. Turn the vacuum off if it sounds strained or overheats.
That is the basic answer to how to replace a vacuum filter. The key is using the right filter and creating a tight, dry seal.
How to replace a washable vacuum filter
Washable filters can reduce waste and save money, but they need proper care. Start by checking the manual or the markings on the filter.
Follow these steps:
-
Remove the filter from the unplugged vacuum.
-
Tap it gently over a trash can to remove loose dust.
-
Rinse it under cool or lukewarm running water.
-
Use a small amount of mild soap only if the instructions allow it.
-
Rinse until the water runs clear.
-
Squeeze foam gently without twisting or wringing it.
-
Place the filter in a warm, dry area with good airflow.
-
Wait at least 24 hours, or until it is fully dry, before reinstalling it.
A filter may feel dry on the outside while still holding water inside. Reinstalling it too soon can cause a musty odor, damage the motor, or encourage mold growth.
Do not use a hair dryer, heater, clothes dryer, or direct high heat. High heat can shrink foam or change the filter shape.
In my own cleaning routine, I keep a second washable filter ready. One can dry while the other is in use. This is especially helpful in homes with pets, children, or frequent messes.

How to replace a HEPA vacuum filter
HEPA filters need extra care because their fine fibers capture very small particles. First, check whether the filter is washable. Do not assume that a HEPA label means it can be rinsed.
For a replaceable HEPA filter:
• Switch off and unplug the vacuum.
• Open the filter compartment.
• Remove the old filter without shaking it.
• Put the old filter in a sealed trash bag.
• Wipe the compartment with a dry cloth.
• Install the new filter with the correct side facing out.
• Close the cover tightly.
For allergy control, replace the filter outdoors or in a garage when possible. If you must work indoors, wear a mask and clean the area afterward.
A HEPA filter does not remove every possible indoor pollutant. It also cannot make up for poor ventilation, a full dust cup, or leaks around the vacuum body. It works best as part of a complete cleaning routine.
How to replace a shop vacuum filter
Shop vacuums handle larger amounts of dust and debris, so filter care is especially important. Always unplug the unit before opening the motor head.
The filter may sit under the top housing and attach with a retainer, cage, nut, or mounting ring. Remove the retainer before pulling off the filter.
Use the correct filter for the material you collect:
• A standard cartridge filter for dry household debris
• A fine-dust filter for drywall dust or fine particles
• A foam sleeve for wet pickup, when approved by the manual
• A specialized filter for ash or hazardous materials
Never use a standard household vacuum filter for hot ash, chemicals, asbestos, lead dust, or other hazardous materials. These materials require equipment designed and rated for that specific hazard.
After installing the new filter, check that the retainer holds it firmly. A loose cartridge may collapse, shift, or allow dust to enter the motor.
:max_bytes(150000):strip_icc()/GettyImages-1224836541-75a9706bf42a483eb8cbe10f63a27a4b.jpg)
When should you replace a vacuum filter?
The best replacement schedule depends on the filter type, vacuum design, and amount of use. A home with pets may need more frequent filter care than a home without pets.
Use these general guidelines:
• Inspect washable filters every one to three months.
• Replace disposable filters when they look clogged or airflow drops.
• Replace HEPA filters according to the manual, often every six to 12 months.
• Check shop vacuum filters after heavy jobs or fine-dust projects.
• Replace filters sooner if the vacuum smells hot or dusty.
The owner’s manual is more reliable than a general schedule. Some brands use a filter-life indicator. Treat that light as a guide, not a guarantee.
A filter can need replacement even when the vacuum still runs. Fine dust slowly reduces airflow and places extra stress on the motor. Regular inspection costs little and can prevent a larger repair.

Common mistakes to avoid
Knowing how to replace a vacuum filter also means knowing what not to do. Small errors can lower performance or damage the machine.
Installing the wrong filter
A filter with the wrong shape may leave gaps. Use the model number to confirm compatibility.
Washing a disposable filter
Paper and some pleated filters can fall apart when wet. Replace them instead of rinsing them.
Using a wet filter
Even a washable filter must be completely dry. Moisture can harm the motor and create an unpleasant smell.
Forgetting the second filter
Many vacuums have both a pre-motor and post-motor filter. Replacing one while ignoring the other may not solve poor suction.
Running without a filter
This can send dust into the motor and back into the room. It may also cancel the manufacturer’s warranty.
Packing the dust cup too tightly
A full dust cup blocks airflow even with a new filter. Empty it before it reaches the maximum line.
Forcing the filter cover
A cover that will not close may indicate that the filter is upside down or the wrong size. Stop and check the fit.
How to improve vacuum performance after filter replacement
A new filter helps, but it is only one part of vacuum maintenance. Check the whole airflow path if suction remains weak.
Inspect these parts:
• The brush roll for wrapped hair
• The hose for clogs
• The wand for blockages
• The dust cup for cracks
• The seals around the filter
• The floor head for trapped debris
Cut hair from the brush roll with scissors. Do not pull hard on wires or bristles.
If the vacuum has a belt, inspect it for cracks or stretching. A damaged belt can stop the brush roll even when the filter is clean.
After you learn how to replace a vacuum filter, add filter checks to your normal cleaning schedule. A quick monthly inspection is easier than troubleshooting a vacuum that suddenly stops working.
Safety tips and limitations
Replacing a vacuum filter is usually a simple home task, but not every problem comes from the filter. A failing motor, damaged fan, blocked hose, or electrical fault may need professional service.
Stop using the vacuum if you notice:
• Burning smells
• Smoke
• Sparks
• A hot power cord
• Repeated circuit trips
• Grinding or rattling sounds
• Motor shutdown after short use
Do not open the motor housing unless the manufacturer permits it and you understand the electrical risks. Some repairs also require special tools.
Filter replacement may improve suction, but it cannot repair a worn motor or a broken seal. If performance does not improve after installing the correct filter and clearing clogs, contact the manufacturer or a qualified repair technician.
Frequently Asked Questions About How to Replace a Vacuum Filter
How often should I replace a vacuum filter?
Replace a disposable filter when it is clogged, damaged, or causing weak airflow. Washable filters may last much longer, but you should clean and inspect them regularly according to the vacuum manual.
Can I wash every vacuum filter?
No. Only wash a filter labeled washable or approved for rinsing by the manufacturer. Paper, felt, and many HEPA filters must stay dry and be replaced instead.
How do I know which way the filter goes?
Look for arrows, printed labels, tabs, or a shaped edge. If you are unsure, compare the new filter with the old one or check the model manual before running the vacuum.
Can I use a vacuum without its filter?
No. Operating without a filter can send dust into the motor and back into the air. It may cause damage and can void the warranty.
Why does my vacuum still have weak suction after replacing the filter?
Check the hose, wand, brush roll, dust cup, bag, and floor head for clogs. If airflow remains weak, the vacuum may have a damaged belt, seal, fan, or motor.
How long should a washable filter dry?
Allow it to dry for at least 24 hours in a warm place with good airflow. It must be completely dry inside and out before you put it back.
Should I replace a HEPA filter or clean it?
Follow the manufacturer’s instructions. Some HEPA filters are washable, but many are disposable and can lose their filtering ability if washed.
Conclusion
Learning how to replace a vacuum filter helps your vacuum keep strong airflow and capture dust as intended. Unplug the machine, identify the correct filter, remove the old one carefully, clean the housing, install the new filter securely, and keep washable filters fully dry.
Check your filter today, especially if the vacuum smells dusty or has lost suction. A few minutes of care can help protect the motor and make cleaning easier. Share your vacuum model or maintenance tip in the comments, and explore the manufacturer’s care guide for model-specific advice.


1 Comment
Pingback: How Often Should You Replace A Vacuum Belt: Timing Guide - Vacuum Cleaner Tips