

Replace the old belt by unplugging the vacuum, opening the brush housing, and installing the correct new belt.
A canister vacuum belt may be small, but it plays a big role in how well your machine cleans. When it wears out, the brush roll slows down, dirt stays behind, and the vacuum can feel weaker than it should. I’ve seen this happen many times in real homes, and the fix is usually simpler than people expect. If you want to replace a canister vacuum belt the right way, this guide walks you through each step with clear, practical advice.

What a canister vacuum belt does
A canister vacuum belt connects the motor power to the brush roll in the floor head or power nozzle. That belt helps the brush roll spin so it can loosen dirt from carpets and rugs. Without a healthy belt, suction may still work, but deep cleaning drops fast.
In many homes, people think the vacuum has “lost power” when the real problem is a stretched or broken belt. The belt is a wear part, just like a car tire or a pair of shoelaces. It does not last forever, and that is normal.
A worn belt often causes:
- Weak or stalled brush roll
- Burning smell from the head
- Poor pickup on carpet
- Strange squealing noises
- Belt slippage after a few minutes of use
Signs you need to replace a canister vacuum belt
The first clue is usually performance. If the canister vacuum still turns on but the brush does not move like it used to, the belt may be the issue. Sometimes you will hear the motor running, but the floor head does not grab debris the way it should.
Other common signs include:
- The brush roll spins slowly or not at all
- Hair and lint wrap around the brush more than usual
- The belt looks cracked, shiny, loose, or stretched
- The vacuum smells hot after a short run
- Carpet cleaning takes more passes than normal
I once helped a friend who was ready to buy a new vacuum because the carpet looked dirty after every pass. The belt was worn so thin it could barely grip the pulley. After a simple replacement, the vacuum felt new again.
Before you replace a canister vacuum belt
Before you start, make sure the machine actually uses a belt. Some canister vacuums rely on direct-drive brush heads or different power systems. That is why checking the model number and the owner’s manual matters.
Gather what you need first:
- The correct replacement belt for your exact model
- A screwdriver if your floor head has screws
- A clean towel or soft cloth
- Scissors or a seam ripper for tangled hair, if needed
- Good lighting
Safety matters too. Unplug the vacuum before you touch the belt or brush roll. A canister vacuum may seem harmless, but the nozzle and moving parts can still pinch fingers.
How do you replace a canister vacuum belt?
Replacing a canister vacuum belt is usually a simple job if you follow the right order. The exact steps can vary by brand, but the basic process is very similar across most canister vacuums with powered brush heads.
Step 1: Unplug the vacuum
Always disconnect the vacuum from power first. This removes the risk of the brush roll starting while your hands are inside the nozzle.
Step 2: Remove the floor nozzle cover
Turn the power head over and look for screws, latches, or release tabs. Some heads pop open easily, while others need a screwdriver. Keep the screws in a small dish so they do not disappear.
Step 3: Take out the brush roll
Lift the brush roll out of the housing. If hair or thread is wrapped around it, cut it away carefully. This is a good time to clean the end caps and inspect the brush bristles for wear.
Step 4: Remove the old belt
Slip the belt off the motor shaft and brush roll pulley. If it is broken, stretched, or glazed, that confirms the problem. A belt that feels loose or looks shiny has usually lost its grip.
Step 5: Install the new belt
Loop the new belt onto the motor shaft first, then stretch it around the brush roll pulley. Make sure it sits straight and is not twisted. The belt should feel snug, not sloppy.
Step 6: Reinstall the brush roll
Place the brush roll back into the housing while keeping the belt aligned. Spin the brush by hand a little to check that it moves freely. If it binds, stop and realign it before closing the cover.
Step 7: Close the nozzle and test it
Put the cover back on and secure all screws or latches. Plug the vacuum in and run it for a short test on carpet. The brush roll should spin smoothly and pick up debris more effectively.
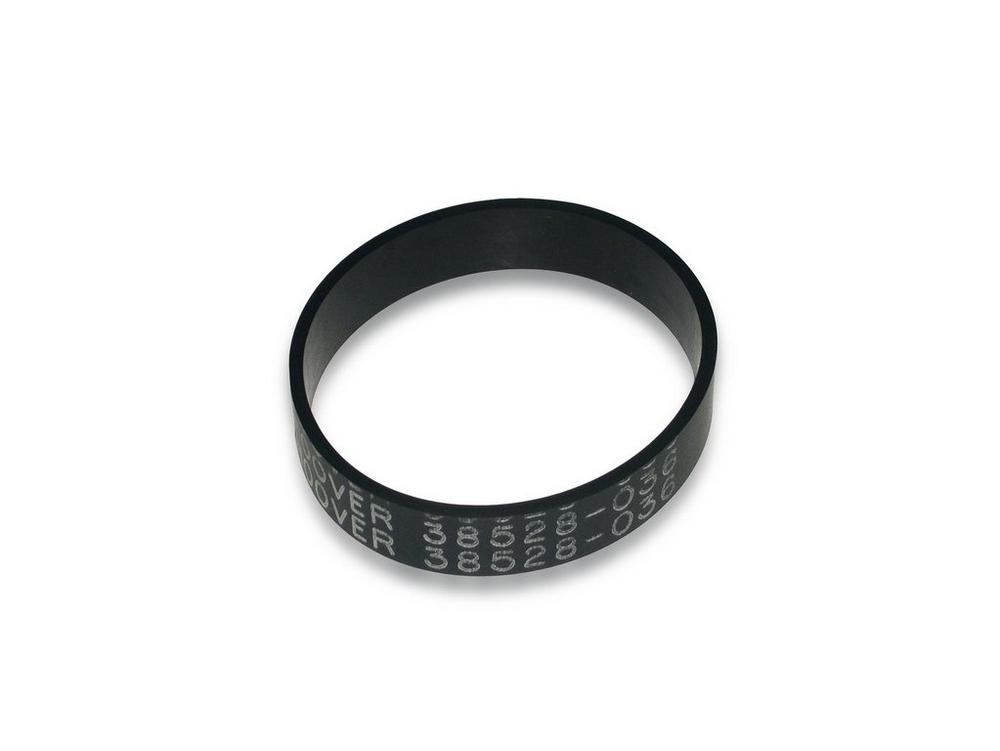
Choosing the right replacement belt
Not all belts are the same. Using the wrong belt can cause slipping, overheating, or brush roll damage. I always tell people to match the belt to the vacuum model first, not just the brand name.
Here is what to check:
- Model number on the vacuum or nozzle
- Belt part number from the manual
- Belt type, such as flat, ribbed, or stretch fit
- Brand-specific replacement parts
- Belt material and thickness
A belt that is “close enough” often is not close enough. In my experience, the wrong belt may fit for a day and fail soon after. A proper match saves time and money.
Common mistakes to avoid
This is where many repairs go off track. The belt replacement itself is not hard, but small mistakes can shorten the life of the new part.
Avoid these errors:
- Installing the wrong belt size
- Forgetting to unplug the vacuum
- Reassembling the head with the belt twisted
- Leaving hair wrapped around the brush roll
- Ignoring worn bearings or damaged brush ends
- Overtightening screws and cracking the housing
A worn brush roll can also make a new belt fail early. If the brush is hard to spin by hand, the belt must work too hard. That extra strain can cause heat and reduce the belt’s life.
How often should you replace a canister vacuum belt?
Most vacuum belts need replacement every 6 to 12 months, depending on use. Homes with pets, lots of carpet, or frequent vacuuming may need new belts sooner. If the brush roll gets jammed often, the belt may wear out faster.
A good habit is to inspect the belt when you clean the brush roll. That way, you catch wear before the vacuum stops performing well. Think of it like checking the tread on a bike tire before a long ride.
How to make the new belt last longer
A new belt works best when the rest of the nozzle is clean and moving freely. A clean machine puts less stress on the belt and helps it last longer.
Useful habits include:
- Remove hair and string from the brush roll often
- Clean the belt area before closing the nozzle
- Replace worn brush rolls and end caps when needed
- Do not force the vacuum over thick rugs if the head is not designed for them
- Stop the vacuum if you smell burning or hear squealing
Dust, hair, and thread act like sand in a zipper. They create drag, and drag creates heat. Heat is one of the fastest ways to shorten belt life.
When a belt replacement is not enough
Sometimes the belt is only part of the problem. If the brush roll still does not spin after replacement, another part may be worn or broken. The motor shaft, pulley, brush bearings, or power nozzle clutch may need inspection.
Watch for these warning signs:
- Brush roll is hard to spin by hand
- Motor shaft does not turn
- Belt keeps snapping
- Power nozzle makes grinding noises
- Vacuum still cleans poorly after a new belt
In cases like these, deeper repair may be needed. If the vacuum is under warranty, check the warranty terms before opening more than the belt compartment.
Safety and maintenance tips from real-world use
One thing I’ve learned is that vacuum repairs go much smoother when you slow down. Most people rush the first time and then spend more time fixing a small mistake. A clean workspace and a few extra minutes can prevent a lot of frustration.
A few practical tips:
- Take a photo before removing parts
- Keep screws grouped by location
- Use the vacuum manual if the brush head seems unusual
- Inspect the belt whenever suction on carpet drops
- Replace parts before they fail completely
That last tip matters more than people think. Waiting until the belt breaks can put stress on the motor and brush system. Early replacement is often cheaper than repairing multiple parts later.
Frequently Asked Questions of How do you replace a canister vacuum belt?
How do you know if a canister vacuum belt is bad?
A bad belt often looks stretched, cracked, shiny, or broken. The brush roll may spin slowly, stop entirely, or make squealing sounds.
Can you use a generic belt on a canister vacuum?
Sometimes, but it is risky. The safest choice is the exact belt made for your vacuum model, since belt size and tension matter a lot.
How long does it take to replace a canister vacuum belt?
Most people can do it in 10 to 20 minutes. If the brush roll is dirty or the housing has tricky latches, it may take a little longer.
Why does my new vacuum belt keep breaking?
A belt may keep breaking because the brush roll is jammed, the bearings are worn, or the wrong belt was installed. Heat and friction from dirty parts can also shorten belt life.
Should I replace the brush roll when I replace the belt?
Not always, but it is smart to inspect it. If the bristles are worn down or the roll spins roughly, replacing it can help the new belt last longer.
Conclusion
Replacing a canister vacuum belt is one of those repairs that looks harder than it is. Once you know how to open the nozzle, remove the old belt, and install the correct new one, the job becomes very manageable. The key is to use the right part, keep the brush roll clean, and check for other worn pieces while you are in there.
If your vacuum is losing carpet-cleaning power, do not ignore the belt. A small fix can bring back strong brush action and save you from replacing the whole machine. Take a few minutes to inspect your vacuum, replace the belt if needed, and enjoy a cleaner home again.

