

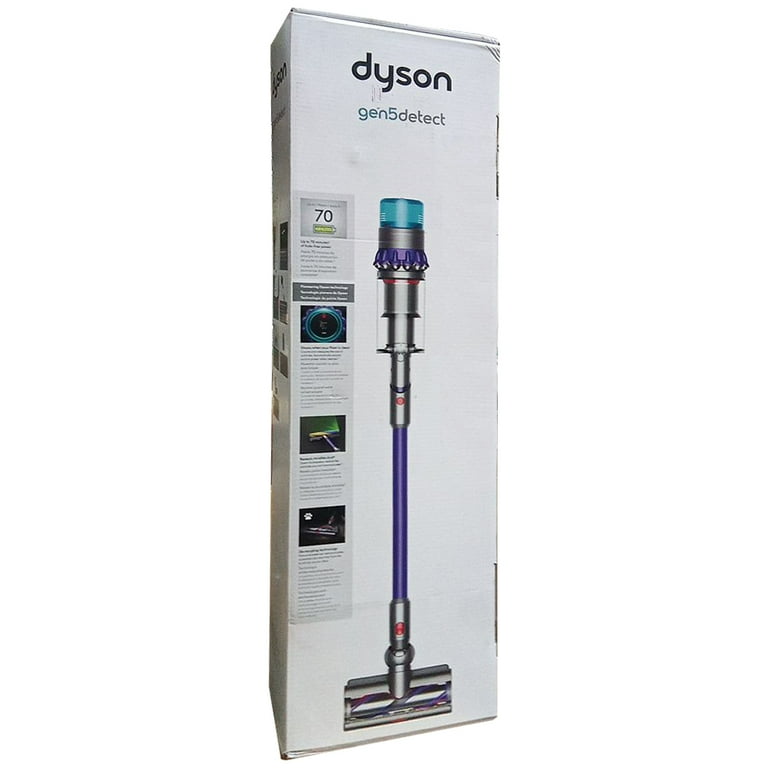
Cleaning your Dyson Gen5Detect vacuum is key to keeping it powerful and long-lasting. Many people buy this advanced machine for its strong suction and smart laser technology, but forget that regular cleaning makes all the difference. If you want to avoid loss of suction, strange smells, or damage, you need to know exactly how to clean each part. The process can look a bit complicated at first, but with the right steps, you can keep your Dyson Gen5Detect performing like new for years.
This guide will show you how to clean the main parts of your vacuum safely and thoroughly. Whether you’re a first-time Dyson owner or just want to do things the right way, you’ll find simple instructions, useful tips, and answers to common questions.
Let’s get started and make your Dyson Gen5Detect work its best.
Why Regular Cleaning Matters
A clean vacuum doesn’t just look better—it works better. When you clean your Dyson Gen5Detect often, you help the motor, filters, and sensors work at full power. Dust build-up can block airflow, making the vacuum less effective and sometimes even causing it to stop working. Also, a dirty machine can spread bad smells and even bacteria around your home.
Dyson recommends cleaning the filter at least once a month and emptying the bin after every use. In homes with pets or allergies, you might need to clean more often. Regular maintenance can also protect your warranty and lower the risk of repairs.
What You Need Before Cleaning
You don’t need many tools, but it’s important to have the right ones ready:
- A clean, dry cloth (preferably microfiber)
- A soft brush (like a new paintbrush or an old toothbrush)
- Mild dish soap
- Cold water
- Scissors (for removing hair from the brush bar)
- A clean, dry place for air drying
Never use harsh chemicals or hot water. These can damage the vacuum’s parts.
Step-by-step Cleaning Instructions
1. Safety First: Power Off And Unplug
Always turn off the vacuum and remove it from the charging dock before cleaning. This keeps you safe and protects the electronics.
2. Empty And Clean The Dust Bin
The dust bin is where all dirt collects. If you don’t empty it, suction drops and your vacuum may smell.
- Press the red bin release button to slide the bin off.
- Hold the bin over a trash can and push the lever to open the base.
- Tap gently to remove dust. For stubborn dirt, use a dry brush.
- Wash the bin with cold water if needed. No soap or cleaning agents here.
- Let the bin air dry completely (at least 24 hours) before reattaching.
Practical tip: Never put a wet bin back—this can damage the motor.
3. Clean The Filter Properly
The filter keeps dust from reaching the motor. If it’s dirty, suction will drop.
- Remove the filter from the top of the vacuum (usually purple and labeled “filter”).
- Tap it gently to remove loose dust.
- Rinse under cold water (no soap). Squeeze gently until the water runs clear.
- Shake off excess water and let the filter air dry for at least 24 hours.
Beginner insight: Many people don’t let the filter dry long enough. If it’s even slightly damp, it can cause mold or motor problems.
4. Clean The Laser Slim Fluffy Cleaner Head
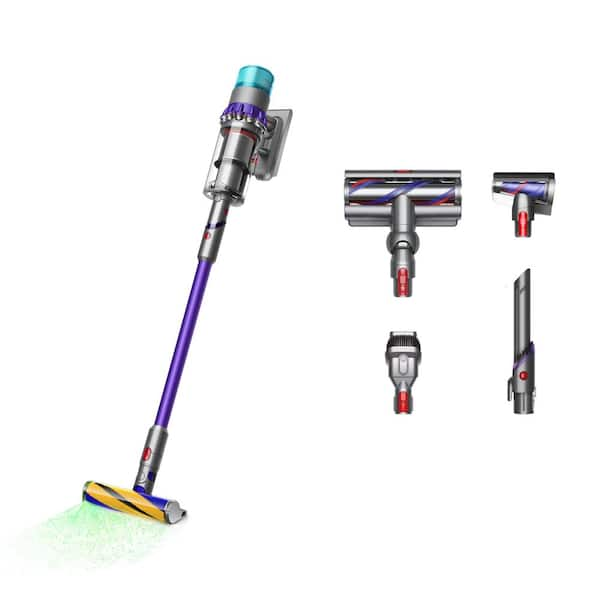
This part picks up fine dust and shows dirt with a green laser. It gets clogged easily, especially with pet hair.
- Remove the cleaner head from the wand.
- Use scissors to carefully cut away hair or threads wrapped around the brush bar.
- Remove the brush bar (most Dyson heads have a release catch).
- Wipe the bar with a damp cloth. For sticky messes, use a tiny bit of mild soap, then rinse.
- Let the brush bar dry fully before putting it back.
Non-obvious tip: If the laser window looks cloudy, gently wipe it with a microfiber cloth. Never use spray cleaners.
5. Clean The Wand And Attachments
The wand and tools can trap dust inside, which can block airflow.
- Remove the wand and tools from the main unit.
- Tap both ends to loosen dust.
- Use the soft brush to sweep out inside.
- Wipe with a dry cloth.
Example: If you use the crevice tool a lot, you’ll find dust builds up quickly inside. Cleaning this keeps suction strong.
6. Wipe The Main Body
The outside of the vacuum gets dusty too. Use a dry or slightly damp cloth to clean the handle, screen, and body. Don’t let water get into any charging ports or buttons.
How Often Should You Clean?
The right cleaning schedule depends on your home, but here’s a useful guide:
| Part | Recommended Frequency |
|---|---|
| Dust Bin | After every use |
| Filter | Once a month |
| Brush Bar | Every 2-4 weeks |
| Wand & Attachments | Monthly or as needed |
| Main Body | Monthly or as needed |
Homes with pets, children, or heavy use may need more frequent cleaning.

What Not To Do When Cleaning Your Dyson Gen5detect
Some mistakes can harm your vacuum or reduce its life. Avoid these common errors:
- Don’t use hot water on any part—it can warp plastics.
- Don’t use detergents or cleaning sprays on the filter or laser window.
- Don’t put any parts in the dishwasher or washing machine.
- Don’t reassemble while wet. Always wait until everything is completely dry.
- Don’t poke sharp objects into any holes or sensors.
Dealing With Common Cleaning Challenges
Removing Stuck-on Dirt
If you find sticky or stubborn dirt in the dust bin or brush bar, soak the part in cold water (if allowed), then use a soft brush. Never scrape with metal tools.
Fixing Loss Of Suction
Loss of suction usually means a blockage or dirty filter. Check for clogs in the wand and clean the filter first. If the problem continues, check the brush bar and airways.
Getting Rid Of Bad Odors
A smelly vacuum often means the filter or bin is dirty. Wash both with cold water and let them dry. For extra odor control, wipe the bin with a little baking soda and rinse well.
How To Check For Clogs
Sometimes, your Dyson Gen5Detect may lose power or make a strange noise if there’s a blockage. Here’s how to check:
- Remove the wand and look through it toward a light. If you can’t see through, there’s a clog.
- Check the cleaner head and hose for trapped debris.
- Use a long, flexible brush to remove anything stuck inside.
Non-obvious insight: Tiny objects like LEGO pieces or large crumbs often get stuck and are easy to miss.
Keeping The Laser Feature Clean
The laser dust detection is a big selling point of the Gen5Detect. For the best results:
- Wipe the green laser window gently with a microfiber cloth.
- Keep the brush bar free of dust and hair.
- Don’t use any cleaning sprays or water directly on the laser window.
If the laser looks dim, it’s usually just dust on the window, not a problem with the electronics.
Comparing Dyson Gen5detect Cleaning To Other Dyson Models
How does cleaning the Gen5Detect compare to older models like the V11 or V15? Here’s a quick comparison:
| Feature | Gen5Detect | V11/V15 |
|---|---|---|
| Laser Dust Detection | Yes (laser window needs cleaning) | No (no laser window) |
| Filter Type | Reusable, washable | Reusable, washable |
| Bin Emptying | Slide-off, easy clean | Slide-off, easy clean |
| Brush Bar Cleaning | Removable, washable | Removable, washable |
The main difference: the Gen5Detect’s laser window and upgraded brush head, which need a bit more care.
Dyson Gen5detect Maintenance Schedule
To keep your vacuum running smoothly, it helps to track when you last cleaned each part. Here’s a simple schedule you can follow:
| Task | How Often | Notes |
|---|---|---|
| Empty Dust Bin | After each use | Prevents clogging |
| Wash Filter | Monthly | Let dry fully |
| Clean Brush Bar | 2-4 weeks | Remove hair and threads |
| Wipe Laser Window | Monthly | Use microfiber only |
| Check for Clogs | Monthly | Check wand and hose |
A simple calendar reminder can help you stay on track.
Extending The Life Of Your Dyson Gen5detect
Proper cleaning is the best way to get many years from your vacuum. Here are a few extra tips:
- Store the vacuum indoors, away from extreme heat or cold.
- Always let washed parts dry for at least 24 hours.
- Don’t let the bin get overfilled; empty it even if it’s only half full in dusty environments.
- Check the brush bar after vacuuming long hair or pet fur.
If you ever need replacement parts, always buy genuine Dyson accessories to avoid fit or quality problems.
For more details, you can also visit the official Dyson Support page.
Frequently Asked Questions
How Long Does The Filter Take To Dry After Washing?
The filter usually takes at least 24 hours to air dry. Always let it dry in a warm, dry place, not on a heater or in sunlight. If it’s still damp, wait longer before putting it back.
Can I Wash The Brush Bar With Soap?
You can use a small amount of mild dish soap if the brush bar is very dirty, but rinse well with cold water. Never use strong chemicals or bleach.
What If The Laser Isn’t Working After Cleaning?
If the laser seems dim or off after cleaning, check that the window is clear and the battery is charged. If it’s still not working, contact Dyson support. The laser itself is sealed and rarely fails.
Can I Use My Dyson Gen5detect While Parts Are Drying?
No. Never use the vacuum if any part is wet. This could damage the machine or cause electric shock. Wait until all washed parts are fully dry.
How Do I Know If I Need A New Filter?
If the filter smells, looks damaged, or you notice a big drop in suction even after washing, it may be time to buy a new one. Always use genuine Dyson filters for the best fit and performance.
Keeping your Dyson Gen5Detect clean doesn’t have to be hard or take much time. With regular care, you’ll enjoy strong suction, a healthier home, and a vacuum that lasts for years. The extra effort pays off every time you clean your floors and see the results.

