

So, how do you clean a wet/dry vacuum filter? It sounds like a simple question, but the answer changes completely depending on what kind of filter you own. Use the wrong method and you risk ruining a cartridge that costs $30 or more.
Get it right and the same filter can serve you for months.
In our research across manufacturer manuals, the basics break down to a few key differences between pleated paper, foam sleeves, and HEPA media. Standard wet/dry vacuum filters catch particles down to about 5 to 30 microns, while true HEPA filters stop at 0.3 microns. As of 2026, most major brands still use the same removable cartridge design.
That keeps maintenance straightforward once you know your material.
Quick Answer: Match Your Filter to the Cleaning Method
The answer depends on your filter type. Remove the filter and tap off loose dust outdoors. Rinse washable foam or cartridge filters in cool water.
Let them dry completely, 24 to 48 hours. Never wet a paper cartridge filter. Reinstall only when fully dry.
Here's a quick reference table so you can see your path at a glance.
| Filter type | Cleaning method | Safe for wet pickup? |
|---|---|---|
| Pleated paper cartridge | Tap out dust, brush pleats, rinse only if labeled washable | No |
| Foam sleeve | Rinse, wash with mild soap, squeeze dry | Yes |
| HEPA | Follow the manufacturer's care instructions | Depends on the model |
| Cloth bag | Empty often, wash only if marked washable | No |
Many vacuums also have a secondary filter. Check the manual for that too.
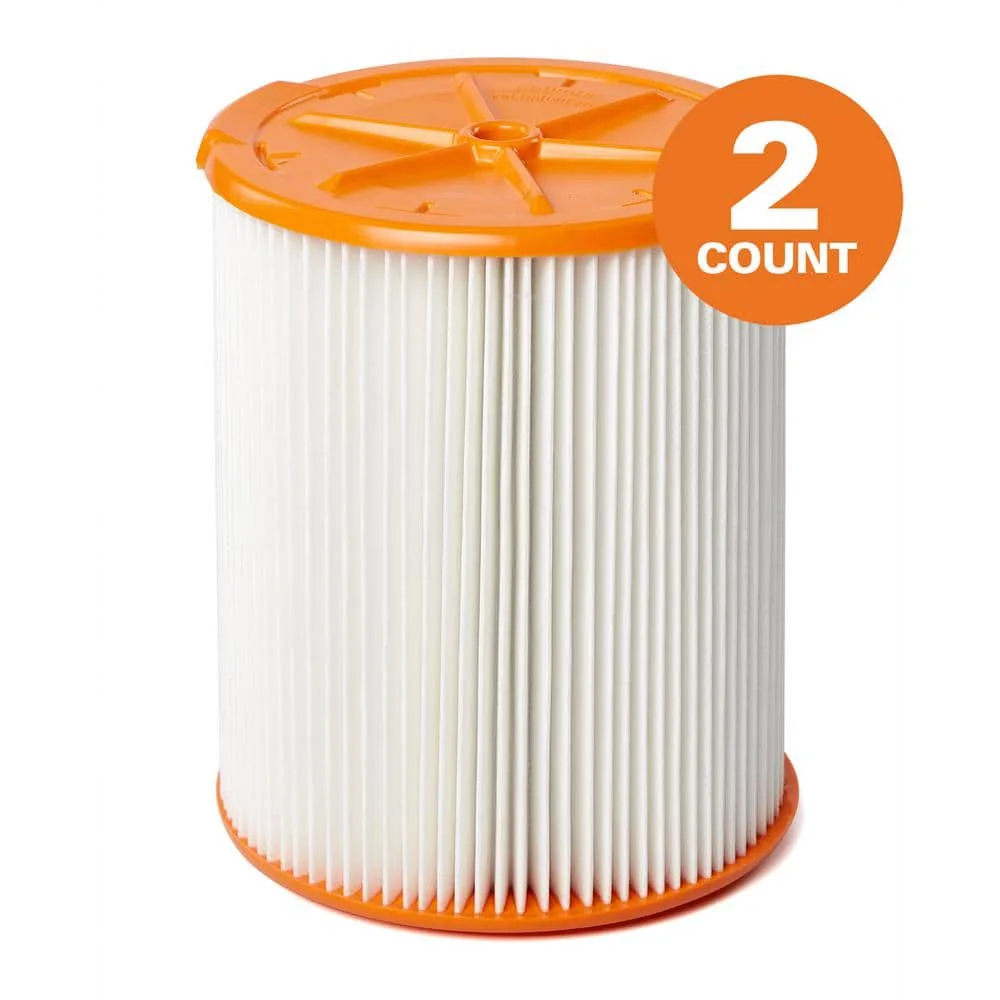
Image source: Web (Bing) / homedepot.com (Web image (fair-use with source credit))
Start Here: Why the Right Cleaning Method Depends on Your Filter
A wet/dry vacuum filter only works if air can get through it. Once it clogs, your suction disappears, the motor runs hotter, and dust starts blowing back into the room. That's why filter care is not optional.
Three variables decide your cleaning method. Filter material, what you vacuumed, and whether the filter stayed dry.
- If you only pick up dry dust and sawdust, a pleated paper cartridge works. Tap and brush it clean.
- If you vacuum water or wet spills, switch to a foam sleeve. Foam won't fall apart when it gets soaked.
- If you handle fine particles like drywall dust, use a HEPA filter and follow stricter cleanup rules.
- If you didn't switch filters before wet pickup, stop and check for damage.
The biggest mistake we see in model-specific forums is rinsing a dry-only filter. That single error ruins more cartridges than anything else. It's the same kind of frustration as diagnosing weak pickup on a robotic pool vacuum, where the culprit often turns out to be a blocked water path.
On a wet/dry vacuum, the blocked path is the filter itself.
What Kind of Filter Are You Using?
Look at the media first. Pleated paper cartridges are stiff, with accordion-like folds and a hard plastic cap. Foam sleeves are soft, spongy, and usually sit over a plastic cage.
HEPA filters can look similar to paper, but the material is denser and often labeled.
Tip the vacuum over and inspect the filter retainer. Most brands print the filter model number on the cap or cage. If the number is gone, check the owner's manual under "maintenance" or "replacement parts."
Some models use a two-stage setup. A foam sleeve goes over the cage, and a paper cartridge sits on top. In that case, you clean both and follow the rules for the more delicate material.
If you handle hazardous dust, check OSHA's dust and exposure guidelines before removing anything. That matters mainly for drywall, concrete, lead paint dust, and silica. Those particles require a HEPA-rated filter and careful disposal, not just a tap-out.
The EPA sets similar rules for lead paint dust during renovations, so know what you're dealing with before you start.
Whichever filter you have, it shares one job with the rest of your equipment. Keeping fine particles away from the motor. You probably already run a regular maintenance checklist for other household tools.
This takes about ten minutes.
Cleaning a Pleated Paper Cartridge Filter (Dry Use Only)
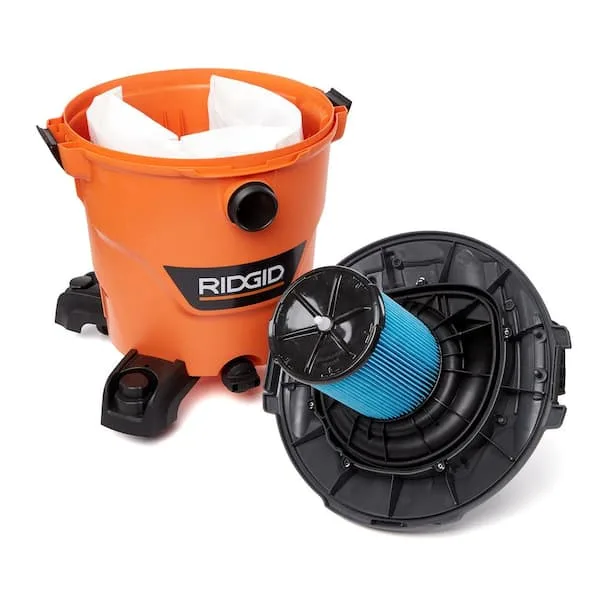
Image source: Bing (Web (fair-use with source credit))
This is the most common filter setup. It's also the easiest to ruin. Pleated paper cartridges are not meant for water.
The paper fibers swell, the pleats collapse, and the filter loses its structure.
Follow these steps:
- Unplug the vacuum. Always.
- Unlock or lift the filter retainer. Slide the cartridge off the cage.
- Take it outside. Hold it over a bin and tap the top cap firmly.
- Brush the pleats with a soft brush. Sweep in the direction of the folds, not across them.
- If the filter is marked "washable," rinse it gently with cool water from the inside out. If it doesn't say washable, keep it bone dry.
- Let it sit 24 to 48 hours until completely dry before reinstalling.
Never use compressed air on a paper filter. It blasts holes through the pleats. A vacuum cleaner with a brush attachment can also do damage if you hold the nozzle too close.
Know when to quit. If the pleats are crushed, the paper is brittle, or the end cap cracks, replace the filter. Cleaning won't bring it back.
One more tip. Match the replacement to your model. A filter that fits the cage loosely lets unfiltered air bypass the media.
That's like a clogged pickup path on a pool vacuum. The system looks fine from the outside, but the actual flow is blocked.
Cleaning a Foam Sleeve Filter (Wet or Dry Use)
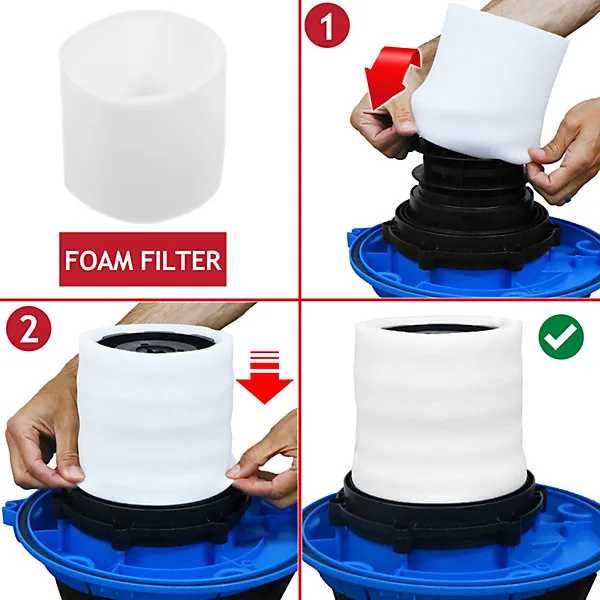
Image source: Web (Bing) / walmart.com (Web image (fair-use with source credit))
Foam sleeves are the friendliest filter type. They're cheap, flexible, and they survive water without a second thought. That makes them the right choice for wet pickup.
Follow these steps:
- Unplug the vacuum.
- Slide the foam sleeve off the plastic cage.
- Rinse it under cool water until it runs clear.
- If it's oily or caked, fill a bucket with cool water and add one drop of mild dish soap. Swish the foam, then squeeze gently.
- Never wring or twist. That destroys the open-cell structure.
- Rinse again until no soap remains.
- Press the foam between your palms, or roll it in a clean towel, to draw out extra water.
- Air-dry for at least 24 hours, and up to 48 hours in humid air, before reusing.
Do not machine wash or toss it in a dryer. The heat and agitation will warp the foam.
If you notice a musty smell after washing, that's a sign bacteria or mold took hold. A vinegar rinse (one part white vinegar to three parts water) can help, but only if the foam is still solid. If it crumbles, replace it.
Wet filters also create airflow resistance before they're fully dry. This is the same annoyance as airflow restrictions in hoses on any vacuum system. Wait it out, or keep a spare sleeve handy so you're never tempted to reuse one too early.
Cleaning a HEPA Filter: What's Safe, What's Not
HEPA filters on wet/dry vacuums are a different beast. They use dense media to trap particles down to 0.3 microns. That includes drywall dust, ash, and lead paint debris.
Read the label before you clean anything. Some HEPA filters are washable. Many are not.
The same filter name can mean completely different care rules on different models.
If your manufacturer explicitly says washable, follow this path. Rinse with cool water. Always work from the dirty side to the clean side so you push debris out.
Then give it a full 48 hours to dry. HEPA media holds moisture much longer than a standard pleated paper filter.
If the label does not say washable, treat it as disposable. Rinsing a non-washable HEPA filter collapses the fibers. Once the media is damaged, the filter turns into a dust pump.
Check OSHA's silica and respiratory guidelines to understand why a torn HEPA filter is a safety concern, not just a suction annoyance.
For hazardous dust, the rules get stricter. Drywall, concrete, lead paint, and ash require HEPA filtration. When the filter is full, double-bag it and check local disposal regulations.
When to Clean vs. When to Replace the Filter
Know the difference between dirty and dead. A dirty filter cleans up. A damaged filter doesn't.
Replace your filter if you see any of these signs:
- Torn or punctured pleats
- Collapsed folds
- Cracked plastic end cap
- Foam that crumbles under pressure
- Persistent odor after washing
Clean it if the structure is intact and only surface dust is the problem.
Based on manufacturer guidance, a standard cartridge filter lasts three to six months with regular cleaning. Replacement cost runs from $10 to $50, depending on type. HEPA filters sit at the top end of that range.
Here's a useful test. Clean the filter, then run the vacuum with it installed. Remove the filter and run the vacuum briefly.
If the suction difference is massive, the filter is clogged deep inside the pleats. That's a sign to replace it, not to clean it again.
What If the Filter Got Wet or Was Used for Water Pickup?
Stop using the vacuum if the wrong filter got wet. A wet paper filter kills airflow. The motor runs under load and can overheat.
Take the filter off immediately. Check the pleats for swelling and the end cap for separation. If the paper has swollen, replace it.
If it still looks flat and tight, let it dry for a full 48 hours. Then brush off any residual dust and test it.
If the filter is foam, wet pickup is its job. Rinse it, squeeze out the water, and dry it before reinstalling. Damp foam left mounted inside the drum is how the vacuum starts smelling like a swamp.
Also consider what you vacuumed. If you picked up floodwater or a damp garage floor, the filter now contains bacteria. Rinse foam filters outdoors or in a sink.
Never spray mist toward your face.
Mistakes That Ruin Wet/Dry Vacuum Filters
These five mistakes cover most ruined filters.
- Wringing a foam sleeve. Twisting tears the open-cell structure. Squeeze gently instead.
- Blasting a paper cartridge with a pressure washer. The jet cuts through the pleats like scissors.
- Reinstalling a damp filter. It clogs faster and grows mold.
- Forgetting to switch filter types after wet pickup. That creates the damaging scenario described above.
- Skipping a pre-filter for fine dust. The fine particles embed themselves permanently between the pleats.
If you vacuum drywall or joint compound without a pre-filter, expect the cartridge to die after a single project. The same kind of suction problems show up in pool equipment when the filter hasn't seen proper care. Track those down the same way you would here.
How to Make Your Next Filter Last Longer
The best time to extend a filter's life is before the dust hits it. Use a separator, a pre-filter, or a cyclone attachment for fine dust jobs. That's the single largest factor.
Adopt a simple routine. Tap the filter outside after every heavy-use session. Check the drum fill line regularly.
Overfilling pushes debris directly into the filter during every startup surge.
Keep a spare filter in rotation. That lets you swap a dirty filter for a clean one while the dirty one air-dries. In humid climates, drying can take two full days.
A backup saves that wait.
Finally, store the vacuum in a dry space. Remove the filter if the machine sits for a month. This prevents moisture from condensing inside the media.
Simple maintenance routines make this easier across all your gear.
Take care of the filter media and the rest of the vacuum runs cooler, quieter, and with far stronger pickup.
How Often Should You Clean It? (Real-World Timelines)
No universal number exists. It depends on your debris type and usage. Still, a pattern emerges from manufacturer manuals and user forums.
| Filter type | Cleaning frequency | Best signal to clean |
|---|---|---|
| Pleated paper (dry) | Tap out after every heavy job, rinse every 1–2 months if washable | Visible dust cake on pleats |
| Foam sleeve (dry) | Brush or rinse weekly | Discoloration |
| Foam sleeve (wet) | Rinse after every wet job, then dry fully | No signal needed, just routine |
| HEPA (washable) | Clean after large fine-dust projects | Suction drop |
The most reliable indicator is airflow. If the vacuum's tone rises to a higher pitch, the motor is working harder. That's the filter telling you it's blocked.
Drying time adds to the schedule. Budget 24 to 48 hours in normal indoor air. In humid climates, plan for the full two days or use a backup filter.
The same timing logic applies to other filter-based tools. Robotic pool vacuum filters need the same rinse routine after heavy jobs.
Quick FAQs People Actually Ask
Can I put a wet/dry vacuum filter in a washing machine?
No. The agitator destroys the pleats and tears the foam. Even a gentle cycle will warp the media and shorten the filter's life.
Stick to hand rinsing and air-drying in the sink or outdoors.
Can I run the vacuum without a filter?
Don't. The motor pulls in debris and burns itself out. A shop vac running without a filter will also blow dust out the exhaust vents.
Replace the filter or skip the job until you have one.
How do I get the musty smell out of a foam filter?
Mix one part white vinegar with three parts cool water and soak the foam for 30 minutes. Rinse until the vinegar smell fades, squeeze gently, then air-dry fully. If the odor stays after that, the foam is harboring bacteria and should be replaced.
Can I use the same filter for drywall dust and water?
Only if the filter is a foam sleeve or a marked washable cartridge. Paper filters will fall apart once wet. Drywall dust also turns into paste when water hits it, clogging the media permanently.
It's the same problem as fine sand and silt in a pool vacuum.
How do I know when the filter is too far gone?
If the pleats stay compressed after brushing, the foam crumbles, or the paper feels brittle, it's time. Another strong sign is suction that drops after a thorough clean. When cleaning twice doesn't restore airflow, you'd chase the same clues on any vacuum system and swap the part.
Your Decision Guide: Pick Your Situation, Follow the Right Step
Here is the shortcut version, in plain if/then form.
- If you only picked up dry household dust, tap the filter and brush the pleats. Rinse only if the label says washable.
- If you vacuumed water or wet spills, use a foam sleeve. Rinse, squeeze, dry, and reinstall.
- If you handled drywall, concrete, or other fine toxic dust, HEPA is mandatory. Replace after the job, don't rinse.
- If the filter has tears, crushed pleats, or a cracked cap, don't clean it. Replace it.
- If suction keeps dropping, clean the filter first. Still weak, the filter is dead.
Each of these paths starts the same way. Unplug the vacuum, remove the media, and inspect it against strong light. Match the cleaning method to the material.
Consistency matters more than perfection. Keep a spare filter, store the vacuum dry, and clean after heavy projects. That simple routine keeps the motor cool and the suction strong.

