

How do you clean a robot vacuum? That's usually the point when you first hear a grinding noise from the brushroll or notice the suction shrinking. The answer is simpler than you'd think.
It comes down to a handful of parts that need regular attention.
In our research, the most common cause of a "dying" robot vacuum is not a worn motor. It's a clogged filter or a dustbin that never gets a proper wash. Manufacturer specifications indicate that the filter alone should be replaced every 2 to 3 months on most models.
As of 2026, that replacement cycle still holds across all major brands. If you learn one skill, make it routine maintenance.
Image source: Web (Bing) / smartfloorclean.com (Web image (fair-use with source credit))
Why Your Robot Vacuum Is Slowly Getting Worse (And How to Fix It)
Has your robot started leaving debris behind or bumping into walls? You're not alone. Aggregate reviews show that most performance complaints trace back to neglected parts, not a failing motor.
The robot itself is fine. The consumables are just overdue.
Think about what your robot touches every day. Dust, dander, hair, and grime all pile up in the same spots. A tiny dustbin fills fast.
The filter gets coated. Hair wraps around the brushroll. Sensors get a thin film of dust that confuses navigation.
If you notice weaker suction, the filter or dustbin is the first suspect. If the robot wanders in odd patterns, check the sensors. If the brush stalls, look for tangled hair under the brushroll cap.
The same maintenance rhythm that applies to service intervals for upright vacuums works here too: check weekly, deep clean monthly.
Quick Answer: The 10-Minute Clean That Fixes 90% of Problems
Empty the dustbin after every run. Remove hair from the brushroll weekly. Clean the filter monthly.
Wipe sensors and charging contacts monthly. This simple cycle, done every two to four weeks, fixes most performance issues.
It restores suction, keeps navigation accurate, and prevents breakdowns. Ten minutes on a weekend is all it takes. Here's the short version:
- Empty the dustbin: tap out debris and wipe the inside.
- De-tangle the brushroll: remove hair wrap with scissors.
- Check the filter: tap it clean or rinse it if washable.
- Wipe sensors and charging contacts with a dry cloth.
- Let everything dry fully before reassembly.
What Actually Needs Cleaning (And What Doesn't)
Every robot vacuum has the same core anatomy under the shell. The brand changes the look, but the maintenance list stays familiar. Here's the breakdown of what collects dirt and what truly needs your attention.
| Component | Why it matters | How often to clean |
|---|---|---|
| Dustbin | Holds debris; a full bin blocks suction | After every run |
| Brushroll | Picks up dirt; hair wrap stops rotation | Weekly |
| Side brushes | Sweep edges; bent brushes miss spots | Every 2-4 weeks |
| Filter | Traps fine dust; clogged filter kills suction | Monthly |
| Sensors | Guide navigation; dirty sensors cause drift | Monthly |
| Charging contacts | Recharge the battery; dirty contacts mean no charge | Monthly |
| Wheels | Keep movement smooth; debris jams them | Monthly |
| Self-emptying base | Clogs reduce emptying power | Every 2 weeks |
The filter is the most overlooked component. It either gets washed or replaced, depending on the model. The filter washing rules are simple: cold water only, no soap, and a full air dry.
If yours isn't washable, order a replacement and stick to a schedule.
Some parts, like the suction motor and internal air path, do not need routine cleaning. You can't reach them, and you shouldn't try. Disassembling past the brushroll and bin risks breaking clips and seals.
For comparison, some traditional vacuums are easy to maintain, but robots are sealed units by design.
One thing worth mentioning: indoor air quality matters if you use a HEPA filter. The EPA recommends regular vacuuming and proper filter maintenance to control airborne particles. A clean filter isn't just about suction.
It's about what stays in the air.
Step-by-Step: Clean the Dustbin the Right Way
Start with the dustbin. This is the easiest step, but most people do it wrong. They just empty it on the run and never truly clean it.
Follow these steps:
- Unlock the bin and slide it out of the robot.
- Press the release latch over a trash can. Tap it a few times to knock out stuck debris.
- Rinse the bin under lukewarm water. Do not use hot water, as it can warp the plastic.
- Add a drop of mild dish soap. Swirl it around and rinse well.
- Dry the bin completely. Use a clean towel, then let it air dry for one to two hours.
The key is the drying step. A damp bin traps moisture, which leads to mold and odors. The same logic applies to drying times for vacuum filters.
Two hours is a safe baseline for most bins.
A quick tip: always empty the bin before it looks full. Compacted debris creates clumps that stick to the walls and block airflow. If your robot has a transparent bin, give it a visual check every few runs.
If it's opaque, empty it on a set schedule, not by feel.
Step-by-Step: De-Tangle the Brushroll Without Damaging It
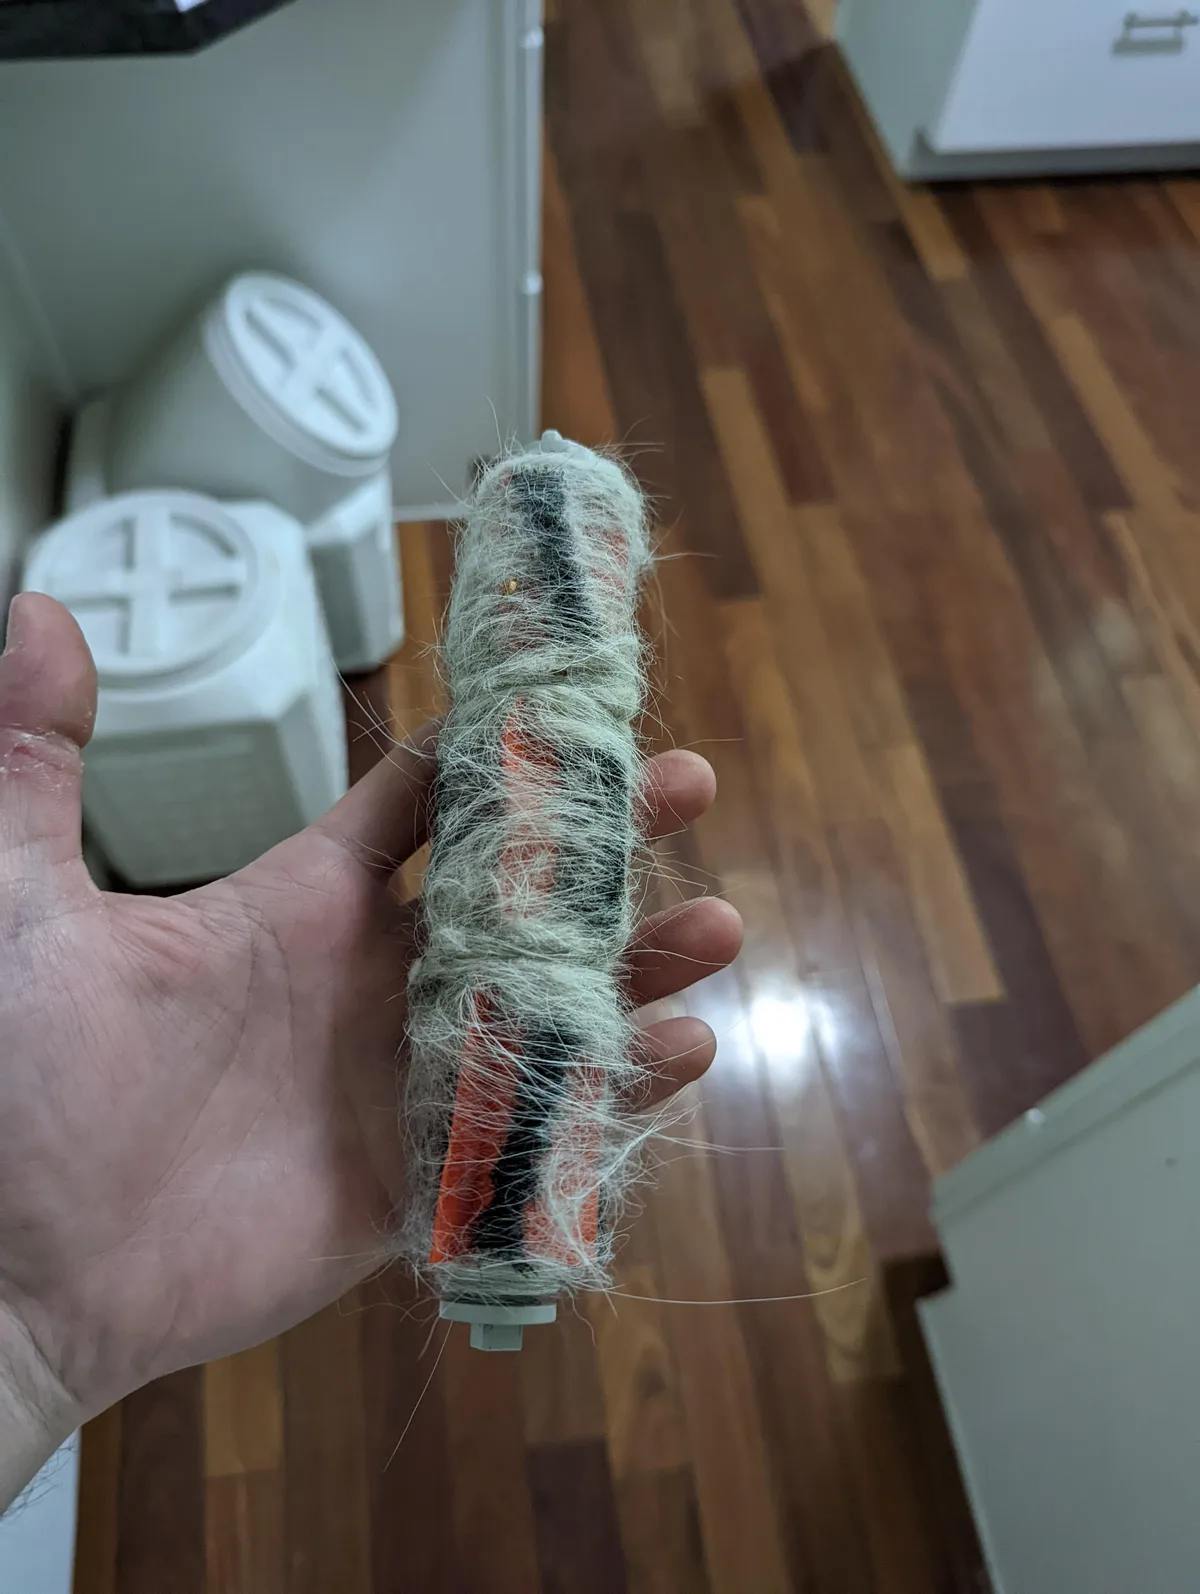
Image source: Web (Bing) / reddit.com (Web image (fair-use with source credit))
A tangled brushroll is the number one cause of that grinding noise. It also reduces suction because the brush can't spin fast enough. The good news is that cleaning it takes about five minutes.
First, turn the robot upside down. Use the release tabs or a Phillips screwdriver to remove the brushroll cover. Lift the roll out and inspect it.
If you see hair or string wrapped around the core, use scissors to cut through the wrap. Then slide the pieces off with your fingers. Do not pull hard.
The same de-tangling trick that works on upright vacuums applies here: cut first, pull after.
Next, wipe down the bristles with a damp cloth. Check the rubber fins for cracks. Also inspect the end caps and bearings.
If they look worn, it's time for a replacement roll.
Finally, reinstall the brushroll and click the cover back on. Spin it by hand once to confirm it turns freely. If it sticks, remove debris from the end bearings and try again.
That's it. With a clean brushroll, your robot should run quieter and pick up more debris per pass. If you notice the brushroll is still not spinning after a deep clean, you might be dealing with a worn motor or a broken belt.
Always inspect the brushroll first before assuming the worst.
Step-by-Step: Fixing the Filter Before Suction Drops
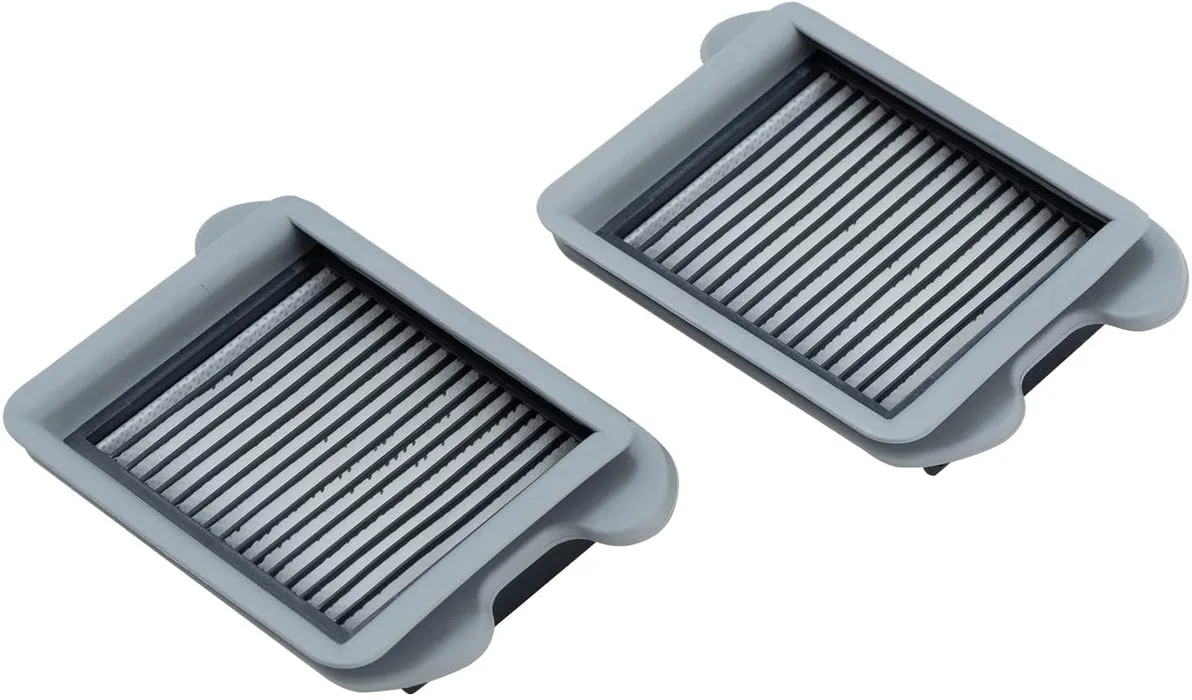
Image source: Web (Bing) / robotspecialist.com.au (Web image (fair-use with source credit))
The filter is the single most common cause of weak suction. A clogged filter blocks the airflow path, which makes the motor work harder and pick up less. If your robot sounds strained but picks up nothing, check the filter first.
Washable vs. Replaceable: How to Tell Which One You Own
Check the manual or look at the filter itself. Washable filters usually have a plastic or rubber frame and a reinforced mesh. Replaceable filters look like folded paper or felt with a cardboard edge.
If the label says "do not wash," don't risk it. Washing a non-washable filter destroys the fiber structure permanently.
Aggregate user reviews indicate that washable filters last about six months with proper care. Replaceable filters should be swapped every two to three months. If you have pets or live in a dusty area, cut that interval in half.
A clogged filter will also drag down a full-size machine's performance if you skip regular upkeep.
How to Clean a Washable Filter
- Remove the filter from its housing. Tap it gently over a trash can to remove loose dust.
- Rinse it under cold water only. Hot water can warp the frame and melt the adhesive.
- Do not use soap. Manufacturers state that soap residue clogs the fibers.
- Squeeze out excess water with a towel. Do not twist or wring it.
- Air dry completely for at least 24 hours before reinstalling.
Never put a damp filter back into the robot. Moisture gets pulled into the motor, which can cause corrosion. If you only have one filter, buy a spare so you can rotate them while one dries.
Step-by-Step: Wiping Sensors, Contacts, and Wheels
Dirty sensors cause erratic behavior. A robot that bumps into walls, spins in circles, or stops randomly often has a thin layer of dust over its cliff sensors or wall sensors. Navigation depends on those tiny lenses, so keeping them clear matters more than most owners realize.
| Component | What it does | Cleaning method | Frequency |
|---|---|---|---|
| Cliff sensors (underside) | Prevent falls down stairs | Dry cotton swab | Monthly |
| Wall sensors (side) | Follow walls and avoid bumper collisions | Dry microfibre cloth | Monthly |
| Charging contacts (robot) | Recharge the battery | Dry cloth, gentle rub | Monthly |
| Charging contacts (dock) | Transfer power to the robot | Dry cloth | Monthly |
| Wheels and casters | Move the robot smoothly | Remove hair wrap, wipe debris | Monthly |
Use a cotton swab or a dry microfibre cloth. Do not use water or cleaning spray on sensors, since moisture can seep into the housing. If the contacts look black or pitted, that's oxidation.
A dry pencil eraser can gently polish them, but it's best to confirm that with your warranty terms before trying it.
A quick check for the wheels: flip the robot upside down and spin each wheel by hand. If they don't turn freely, remove visible hair and debris with tweezers. Worn wheel treads on the main drive wheels also deserve a second look.
If the tread is smooth, the robot may struggle on carpets. Replacement wheels are cheap compared to buying a whole new robot.
Step-by-Step: Cleaning a Self-Emptying Base (If You Have One)
Self-emptying docks are convenient, but they need maintenance too. The base pulls debris from the robot's bin into a larger bag or bin inside the dock. If that airflow path gets clogged, the robot will still dock and "empty," but the bin stays full.
Start by unplugging the dock. Open the top lid and remove the dust bag or empty the internal bin. Check the tall plastic chute that connects the robot to the bag.
Hair and string often get stuck here. Use a long, dry tool like a chopstick to pull out any blockages.
Check the charging terminals on the base as well. Wipe them with a dry microfibre cloth. If your robot has trouble docking or charging, dirty contacts are a common culprit.
Clean the chute at least every two weeks if you have pets. Monthly is fine for lighter households. Also, inspect the bag's fill level.
Most models have a sensor that tells you when the bag is full. Physical inspection helps if the sensor gets blocked by debris.
What About the Bag?
Vacuum bags from self-emptying bases are designed to hold about 30 to 60 days of debris. They seal themselves when you pull them out. Replace them when full or every two months, whichever comes first.
Some newer models use a washable collection bin instead of bags. If that's your setup, empty the bin and wash it under lukewarm water, then air dry completely.
Troubleshooting by Symptom
Still hunting for the root cause? Use this quick chart to narrow it down. It's a decision tree in table form, and it covers the most common failures.
| Symptom | Most likely cause | Check first |
|---|---|---|
| Weak suction | Clogged filter or full dustbin | Filter and bin |
| Robot drifting or bumping randomly | Dirty sensors or blocked cliff sensors | Sensor lenses |
| Brushes not spinning | Hair wrapped around brush module | Brushroll check |
| Error code for brush | Tangled brush or jammed debris | Under the brushroll cap |
| Bad smell when running | Damp debris in bin, filter, or mop pad | Bin wash and full drying |
| Won't charge or dies fast | Dirty charging contacts or old battery | Contacts on robot and base |
| Robot stops mid-cycle | Obstruction in wheels or cliff sensors | Wheel rotation and sensors |
Notice a pattern? Most diagnoses start with the easiest, cheapest fix: a good cleaning. If you clean all the components above and the problem persists, then it's time to consider worn parts or a deeper hardware issue.
Robot Mop Combos: Extra Cleaning, Extra Rules
Robot mop combos add a water tank, a mop pad, and sometimes a self-washing base. Those extras collect grime and bacteria in ways a dry vacuum never will. If yours smells like mildew, the mop system is the first place to look.
Remove the mop pad after every mopping session. Rinse it under running water until the water runs clear. Wring it out and air dry it.
Do not leave it damp on the robot. A damp pad sitting overnight is the number one cause of a musty robot vacuum.
The water tank needs care too. Empty it after each use and let it dry with the cap open. Standing water in the tank breeds algae and bacteria.
If you use cleaning solution, check what the manufacturer allows. Most brands require plain water or their own fluid, and the wrong solution can gum up the pump.
Self-Washing Bases
Newer models come with a base that washes and dries the mop pad automatically. That base has a clean water tank and a dirty water tank. Empty the dirty tank every few days and rinse it out.
Wipe the wash basin and the drying vent to prevent buildup. The clean water tank should be refilled with fresh water and periodically rinsed to avoid stagnation.
If your combo robot has a filter, it still needs the same filter care as a standard robot vacuum. Water tanks do not change the filter schedule. A washable filter still needs a full 24 hours to dry before going back in.
Many owners swap to a second filter, which makes rotation much easier.
The Deep-Clean Schedule: Daily, Weekly, and Monthly
Stick to this pace and your robot will run like new.
| Frequency | Task | Time needed |
|---|---|---|
| Every run | Empty the dustbin | 1 minute |
| Weekly | Remove brushroll hair, check mop pad | 5 minutes |
| Monthly | Wash bin, clean filter, wipe sensors and contacts | 10 minutes |
| Seasonally | Deep-clean the base, inspect wheels | 15 minutes |
A daily bin empty matters most if you have pets or a busy household. Adjust the schedule to match your debris load, not the calendar.
Common Mistakes That Ruin Robot Vacuums
These errors cause more damage than normal wear. Avoid them and your robot will last much longer.
- Washing a non-washable filter with water.
- Using hot water on a washable filter, which warps the frame.
- Reinstalling parts before they fully dry.
- Spraying chemical cleaners on sensors or charging contacts.
- Overtightening brushroll screws and cracking the housing.
- Ignoring the user manual and buying the wrong replacement parts.
When to Replace Parts Instead of Cleaning Them
Cleaning only delays the inevitable for some parts. Know when to swap them out.
| Part | Lifespan | Replacement cost |
|---|---|---|
| Side brushes | 3-6 months | $5-$15 |
| Brushroll | 6-12 months | $15-$40 |
| Filter | 2-3 months (washable, 6 months) | $10-$30 |
| Battery | 24-36 months | $30-$60 |
If the bristles are bent out of shape or the brushroll fins are cracked, replace them. If a filter stays clogged after a wash, it's done.
Expert Tips for Less Frequent Deep Cleaning
- Run the robot more often. Less debris compacts, so less sticks to the bin walls.
- Cut hair off the brushroll with scissors. Do not pull it, since that strains the bearings.
- Use a dry microfibre cloth on sensors. Damp cloths can push moisture into the housing.
- Empty the bin before it looks full. Fine dust clumps are much harder to wash out.
Final Workflow: The 15-Minute Maintenance Routine
Follow this exact order for the best results.
- Turn the robot off and unplug it from the dock.
- Empty the dustbin, wash it with mild soap, and set it aside to dry.
- Remove the brushroll and cut away any hair wrap.
- Tap the filter clean or rinse it if it's washable.
- Wipe the sensors, charging contacts, and wheels with a dry cloth.
- Check the mop pad if your model has one.
- Let all parts air dry completely before reassembling.
- Run a test cycle to confirm everything works.
If error codes persist after a full clean, check your warranty and contact manufacturer support. A recurring code usually points to a worn part, not a missed step.
Frequently Asked Questions
How do I know if my filter is washable?
Check the label on the filter or the manual. Washable filters have a plastic frame and mesh. Non-washable filters look like folded paper.
When in doubt, do not wash it.
Can I use a vacuum to clean my robot vacuum?
Yes, with a soft brush attachment. Use low suction to avoid damaging the filter or sensors. This works well for the dustbin and the filter housing.
Why does my robot vacuum smell like mildew?
Damp debris is usually the cause. The dustbin, filter, or mop pad holds moisture. Wash them, dry them fully, and the smell should disappear.
How long does the dustbin need to air dry?
About two to four hours. A washable filter needs a full 24 hours. Never rush the drying step.

