

Can handheld vacuums clean keyboards? Yes, but only with the right setup and a light touch. A handheld vacuum can lift crumbs, dust, and loose pet hair from between keys in seconds.
But the same suction that cleans a car seat can pull a keycap clean off a low-profile laptop keyboard. So the real question isn't whether it works, it's whether you're using it right.
Manufacturer specifications indicate that most handheld vacuums produce between 3,000 and 25,000 pascals of suction. That's plenty for surface debris. It's also enough to do damage if you press the nozzle straight down.
In our research, the outcome depends less on brand and battery life than on keycap height, switch type, and nozzle control. That's why this guide works like a decision tree, not a one-size-fits-all answer.
Quick Answer
Can handheld vacuums clean keyboards? Yes, but only with the right setup. Use a soft brush attachment and low suction.
Point the nozzle at an angle, not straight down. Stop if keycaps start lifting. It works best on crumbs and surface dust.
Deep grit usually needs a keycap puller.
What You're Really Cleaning: Dust, Crumbs, and Stuck-On Grit
A keyboard traps more than you want to think about. In a single week, a desk keyboard collects dead skin flakes, airborne dust, hair, and whatever crumbs fall off your lunch. Coffee spills dry into a sticky film.
Grease from fingertips forms a layer on keycaps. Each of these behaves differently under suction.
| Debris type | Does suction lift it? | Notes |
|---|---|---|
| Crumbs and snack debris | Yes | The easiest win, usually gone in one pass |
| Loose dust | Yes | Settles on top of and between keycaps |
| Pet hair | Sometimes | Can wrap around keycap stems and scissor switches |
| Dried liquids | Rarely | Needs a damp cloth or keycap removal |
| Skin oils and grease | No | Suction won't touch it; use isopropyl alcohol wipes |
The problem with stuck-on debris is that a vacuum only grabs what's loose. If you press the nozzle straight down, you can actually push a crumb deeper into the switch housing. That's exactly what you don't want.
Visually, a dirty keyboard often looks fine until you tilt it. The moment you tilt it toward a light source, the gaps between keycaps reveal their true state. That's where a handheld vacuum earns its place, as long as you use the right approach.
The 3 Variables That Decide If It Will Work for You
Three variables decide whether a handheld vacuum helps or hurts: keyboard type, attachment, and suction strength. Get all three right, and you'll clean in under two minutes. Get one wrong, and you could spend ten minutes snapping keycaps back on.
Your Keyboard Type: Mechanical vs. Laptop vs. Membrane
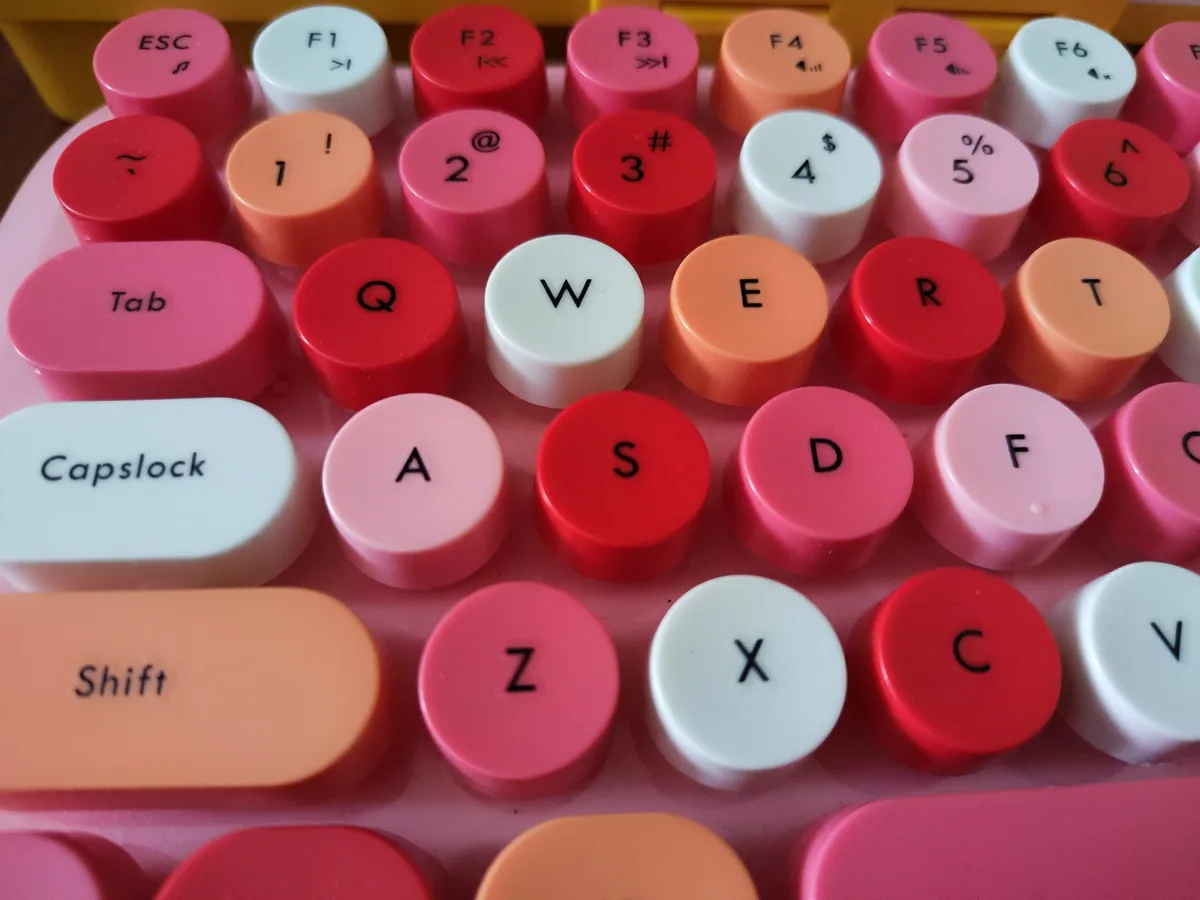
Image source: Openverse / Arief Burhanuddin
This is the first fork in the decision tree. Mechanical keyboards have tall, removable keycaps seated on exposed switches. Laptop keyboards use low-profile scissor or butterfly mechanisms.
Membrane keyboards sit somewhere in between, with shallow rubber-dome keys that are harder to clean individually.
| Keyboard type | Risk level with vacuum | What you should do |
|---|---|---|
| Mechanical | Low to medium | Vacuum with a brush nozzle; if a keycap pops off, it's easy to reattach |
| Laptop (scissor/butterfly) | Medium to high | Use the lowest suction and a soft brush; avoid pulling at the keycap |
| Membrane desktop | Medium | Vacuum gently; keycaps aren't meant to be pulled off |
| Low-profile mechanical | Medium | Reduce suction; keycaps are shorter and closer to the switch |
If you look at the keycaps in the image above, you'll notice the gap under each key. That gap is exactly where the debris hides. For mechanical boards, you can also remove keycaps entirely with a puller and vacuum the exposed switch plate.
For laptop boards, don't do that.
Your Vacuum's Attachments: Brush Nozzle vs. Bare Suction
The attachment matters more than the motor. A soft brush nozzle breaks the seal between the nozzle and the keycap, which reduces suction on any single point. It also loosens debris so the airflow can carry it away.
Bare suction works on mechanical keyboards with wide gaps, but on laptop keyboards it creates too much lift at the edge of each keycap.
Here's a quick way to check your vacuum: if the brush bristles feel softer than a toothbrush, you're good. If they feel scratchy, don't let them touch the keycaps. Use a crevice tool with no brush instead, and keep it angled 30 to 45 degrees off the surface.
Aggregate reviews across desktop setups commonly report that brush attachments make the difference between "this works" and "I pulled off four keycaps." Logitech's support site also emphasizes soft-bristled cleaning over bare suction for laptop keyboards.
Suction Strength: Too Weak Is Pointless, Too Strong Is Dangerous
Suction ratings vary wildly. Some mini vacuums barely manage 3,000 pascals. Bigger handheld models reach 20,000 to 25,000 pascals.
For keyboard cleaning, you don't need max power. You need control.
| Suction range | Safe for keyboards? | Best use |
|---|---|---|
| Under 5,000 Pa | Safe | Loose dust and surface crumbs |
| 5,000–10,000 Pa | Safe with brush | Most desk keyboards |
| 10,000–20,000 Pa | Use low-speed setting | Mechanical keyboards with keycaps removed |
| Over 20,000 Pa | Risky | Avoid bare nozzles; only with soft brush and low speed |
If your vacuum has a variable speed dial or trigger, use the low setting. If it only has one speed and it feels strong enough to pull hair off a carpet, hold the nozzle farther away. The same force that cleans a car floor will absolutely lift a laptop keycap.
How to Check If Your Vacuum Is Safe to Use on a Keyboard
Before you point the nozzle at any keycap, run through a quick safety check. This takes about twenty seconds and saves you the headache of a broken scissor switch.
- Empty the dust cup. A full cup reduces suction and can blow dust backward onto the keyboard.
- Check the filter. A clogged filter weakens airflow and makes the vacuum work harder than it should.
- Find the lowest suction setting. If you don't have one, plan to hold the nozzle farther away.
- Look for a brush nozzle. A soft bristle brush is your best friend here.
- Inspect the nozzle edge. Cracks or sharp plastic can scratch keycaps even if the suction doesn't.
Use this simple rule: if the vacuum feels aggressive in your hand, it's too aggressive for a keyboard. Set it down and pick up a compressed air duster or a soft brush instead.
As of 2026, most handheld vacuums in the $30 to $60 range include at least one brush attachment. But don't assume the included brush is keyboard-safe. Some are stiff, rubber-edged nozzles designed for pet hair and upholstery.
When in doubt, test on a desk corner first.
If the vacuum has a spinning roller brush, turn it off if possible. Motorized brushes are great for carpet but dangerous for keycaps. The spinning bristles can catch the edge of a keycap and snap it off.
Step-by-Step: Cleaning a Keyboard With a Handheld Vacuum
Now for the actual process. This routine takes about two minutes for a clean desk keyboard and about ten minutes for a grimy mechanical board. It works for wireless, wired, and laptop keyboards with a few small adjustments.
- Power down and unplug the keyboard. If it's a laptop, shut it down or at least put it to sleep. This prevents accidental keystrokes and avoids any risk of static discharge through the board. Unplugging also lines up with basic electrical-safety advice from the U.S. Consumer Product Safety Commission: disconnect power before cleaning anything electronic.
- Tilt the keyboard at a 70 to 80 degree angle. Hold it with one hand or prop it against a book. This lets gravity pull loose debris toward you while the vacuum catches it.
- Tap the back of the keyboard gently. Not hard, just a few light taps. This loosens crumbs seated between keycaps. For laptops, tap the underside only.
- Attach the soft brush nozzle. Set the vacuum to its lowest suction setting. If there's no low setting, keep the nozzle a half-inch above the keycaps and move slowly.
- Sweep in one direction. Start at the top row and work down. Move the nozzle along the gaps between keycaps, not straight down onto the caps themselves. Angling the brush at 30 to 40 degrees lets the airflow lift debris out from under the key instead of pushing it deeper.
- Use the crevice tool for tight spots. On a mechanical keyboard, you can reach between key stems without touching the switch housing too aggressively.
- Flip the keyboard and vacuum from behind. Turn the keyboard around and run the brush along the seams between keys again. This catches the crumbs you loosened during the tilt.
- Inspect the result with a light. Use a phone flashlight at a low angle across the keys. Debris left behind is usually in deep corners or under the spacebar.
- Clean the vacuum after you're done. Empty the dust cup and check the filter. Keyboard dust is fine, but coffee grounds and grease can clog a filter fast.
Remember, the spacebar is usually the biggest trap. If you don't want a grain of rice living under it for a month, spend an extra five seconds directing the brush along the spacebar's edges.
If a keycap does pop off, don't panic. With a mechanical keyboard, seat it back on the stem and press straight down until it clicks. With a laptop keyboard, flip the key back into position and press gently around all four corners.
If a scissor clip came off with the key, it needs to be aligned before the keycap goes back on. That's a slightly fiddly repair, but it's doable with tweezers.
What to Do If a Keycap Pops Off (And How to Snap It Back On)
It happens to nearly everyone. You're vacuuming along a row of keys, and suddenly a keycap launches off the board. Don't panic.
On a mechanical keyboard, this is a two-second fix. On a laptop, it's a slightly delicate repair, but still manageable.
For mechanical keyboards, line up the keycap over the stem, press straight down, and listen for the click. That click means the cap is seated on the switch. If it feels loose, press once more with even pressure across the whole cap.
For laptop keyboards, you're dealing with a scissor mechanism. Look at the underside of the keycap and the keyboard base. If the white plastic scissor clip is still attached to the keyboard, simply place the keycap over it and press down on all four corners.
If the scissor clip came off with the cap, snap the clip back onto the keyboard base first. Tweezers help here. Then seat the keycap on top.
The one thing you should never do is force it. If a keycap resists, stop. You might have the clip misaligned, and pressing harder will crack the plastic hinge.
Set the cap down, take a breath, and realign everything from scratch.
For low-profile mechanical keyboards, the process sits between the two. They use shorter keycaps but the same stem design. Just press straight down and you're done.
If a stabilizer wire came loose on a larger key like the spacebar, that's the only case where you might need to remove adjacent keycaps to realign it.
Handheld Vacuum vs. Compressed Air vs. Keyboard Cleaning Slime
A handheld vacuum is one of several ways to clean a keyboard. Each method has a specific strength, and honestly, most desks deserve more than one of them. Let's break them down fairly.
| Method | Best for | Risk | Cost per use | Reusable |
|---|---|---|---|---|
| Handheld vacuum with brush | Crumbs, loose dust, pet hair | Low with brush, medium without | Free after purchase | Yes |
| Compressed air duster | Loose dust in hard-to-reach gaps | Low, but can push debris deeper | $8 to $15 per can | No |
| Electric air blower | Rapid dust removal without suction | Low, same blow-inward risk | Free after purchase | Yes |
| Cleaning slime / gel | Surface dust and cracks between keycaps | Low, but leaves residue on some keycaps | $8 to $12 per tub | Partially, until it dries out |
Here's the decision tree. Use a handheld vacuum when you have crumbs or debris that needs to leave the keyboard, not just move around. Use compressed air or an electric blower when you want to flush dust out from under keycaps without touching the board.
Use slime when you need to grab dust from tight corners and the slime's tackiness is enough to pull it out.
The downside of compressed air is the liquid propellant. If you tilt the can upside down or hold it too close, you'll spray cold liquid onto the keyboard. That's a direct path to sticky residue and potential electrical damage.
Electric air blowers remove that risk entirely.
Slime works surprisingly well on desktop keyboards, but skip it on laptops. The gel can seep under low-profile keycaps and leave a film on scissor switches.
The "Wait, Don't Do That" List: Common Mistakes That Ruin Keyboards
Some mistakes are fixable. Others cost you a new laptop or a soldering iron session. These are the most common issues we see from vacuum-related keyboard cleaning.
- Using bare suction on laptop keys. The pull is intense enough to rip off a keycap and its scissor clip. Always use a brush nozzle and the lowest suction setting.
- Pressing the nozzle straight down. This creates a seal around the keycap and pulls upward. Angle the nozzle at 30 to 45 degrees instead.
- Vacuuming while the keyboard is on. A static charge from the plastic nozzle can potentially disturb sensitive circuit boards. Power down wireless keyboards and shut off laptops first.
- Ignoring a clogged filter. When the filter is dirty, suction drops and the motor strain increases. You'll think the vacuum is weak, but the real problem is airflow.
- Pulling a laptop keycap off and trying to snap it back while the scissor clip is misaligned. This cracks the hinge and turns a $2 keycap replacement into a $200 keyboard replacement.
One more thing worth flagging: don't vacuum a keyboard that has had liquid spilled on it in the past day. Electricity and residual moisture don't mix, and dry-looking keys can still have hidden dampness under the membrane.
When a Handheld Vacuum Just Isn't the Right Tool
There comes a point where a vacuum stops being helpful. If there's a sticky film under the keys, suction won't touch it. If there's a coating of dust baked onto keycaps by years of use, a vacuum will only get the loose stuff.
Pick up a keycap puller instead when you're dealing with any of these:
- Sugary spills or soda residue that feels tacky
- A visible film on keycaps that doesn't lift with airflow
- Debris stuck around the switch housing that brushing can't reach
- A deeply grimy board with years of accumulated grime
For those cases, the workflow is different. Pull the keycaps, soak them in warm water with a drop of dish soap, and let them dry fully before reinstalling. Vacuum the exposed switch plate while the keycaps dry.
That combination gives you a genuinely deep clean that no handheld vacuum can achieve on its own.
IT professionals commonly divide the work like this: use a brush and a small vacuum for preventive upkeep, and a keycap puller for a quarterly deep clean. That division of labor is exactly right.
Keeping Your Keyboard Clean Longer Between Vacuum Sessions
Prevention beats cleaning every time. A keyboard that gets maintained weekly never reaches the state where you need to peel keycaps off to find a fossilized Cheeto. Simple habits make a big difference.
- Wash your hands before long sessions. It seems obvious, but it prevents oil buildup that turns keycaps shiny.
- Keep food and drinks at a distance. Even crumbs from a wrapper end up between keys.
- Lay a cloth or keyboard cover over the board when you step away. It stops airborne dust from settling in the first place.
- Shake the board out once a week. Unplug it, flip it, tap the underside, and let gravity do its thing.
- Use a soft, dry brush for a quick daily sweep. A makeup brush or soft paintbrush works perfectly for lifting dust without any suction.
If you're on a mechanical keyboard, consider a keycap puller and a small cleaning bowl for monthly keycap soaks. If you're on a laptop, keep a can of air or an electric blower handy for monthly maintenance.
The payoff is simple: a keyboard that's cleaned preventatively takes seconds per session, not twenty minutes of surgery.
FAQ: Quick Answers on Suction, Safety, and Keycap Damage
Can a handheld vacuum damage a keyboard?
It can, but only if you use it wrong. Bare suction on a laptop keyboard can rip off keycaps and crack scissor clips. High suction on a mechanical board can pull off keycaps too.
Use a soft brush nozzle and the lowest setting, and you'll stay safe.
How much suction do I need to clean a keyboard?
Anywhere from 3,000 to 10,000 pascals is plenty for loose crumbs and dust. Above that, you're risking keycap damage. If your vacuum only has one strong setting, hold the nozzle farther away and angle it slightly so you don't create a tight seal.
Should I vacuum my keyboard while it's plugged in?
No. Unplug wired keyboards and shut down laptops before cleaning. This prevents static discharge and accidental keystrokes.
It also matches basic electrical safety guidance from the U.S. Consumer Product Safety Commission.
How often should I vacuum my keyboard?
Once a week is ideal for a desk keyboard used daily. Laptops can go two to three weeks with a gentle vacuum pass. If you eat at your desk, bump that up to a quick daily sweep with a soft brush.
What's the safest way to clean between the keys?
Use a soft brush attachment at a 30 to 45 degree angle. Sweep in one direction, from top to bottom. For deep debris, tilt the keyboard and tap the back first.
That combination removes most debris without pulling keycaps.
The Bottom Line: Should You Rely on a Handheld Vacuum for Keyboard Cleaning?
Yes, for routine maintenance. A handheld vacuum with a brush nozzle and low suction is a fast, safe way to keep crumbs and dust under control. It won't fix sticky residue or years of grime.
For that, you'll still need a keycap puller and a warm water soak. In our research, the best approach is simple: vacuum weekly, deep clean monthly, and never use high suction on a laptop. Do that, and your keyboard will outlive the rest of your setup.

