

If you've been asking, "Why does my robot vacuum smell?" you're not alone. It's one of the most common complaints from robot vacuum owners. The good news?
It's usually a quick fix, not a broken machine.
Manufacturer specifications show that most robot vacuums need their filters cleaned every one to two weeks and replaced every three to six months. As of 2026, lithium-ion batteries in these machines are rated for roughly 400 to 800 charge cycles. Those numbers matter because many odors trace back to a neglected filter or a battery working too hard.
Let's walk through the diagnostic flow so you can fix the right problem the first time.
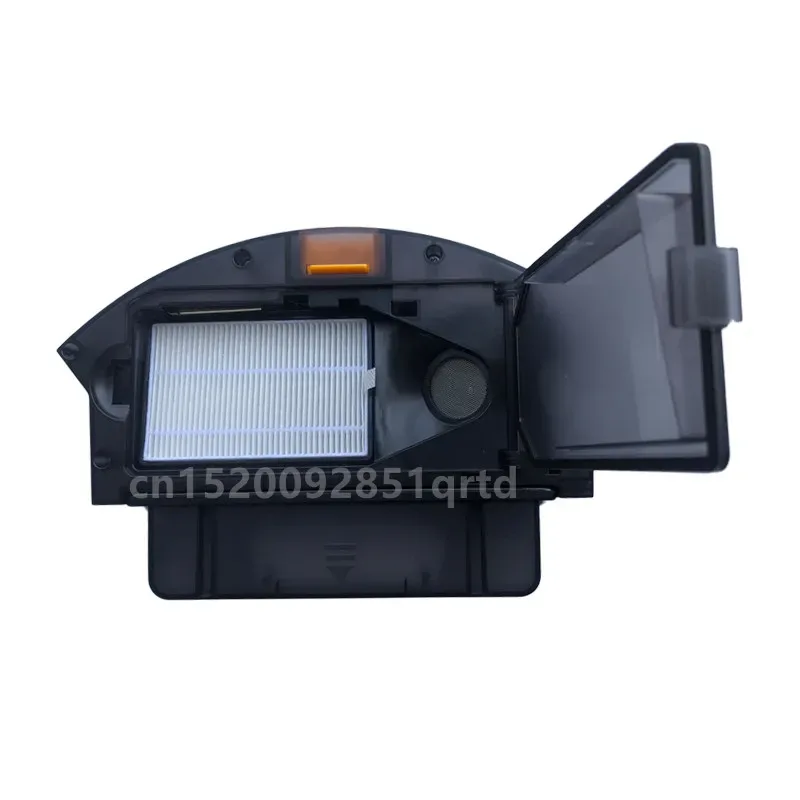
Image source: Web (Bing) / aliexpress.com (Web image (fair-use with source credit))
How to Use This Guide: Follow the Smell, Not the Symptoms
Don't just empty the bin and hope the smell vanishes. That's a gamble. This guide is a decision tree: match your smell to one of three categories, then follow the branch that fits your situation.
You'll save time and avoid unnecessary part-swapping. The order matters, because if you tear everything apart before you know the smell, you're more likely to miss the actual source.
Here's how the flow works:
- Run the 30-Second Smell Test to sort the odor.
- Jump to the matching branch: moisture, friction, or battery.
- If nothing matches, do the full deep clean later in the article.
The 30-Second Smell Test: Which Branch Are You On?
Before you take anything apart, run the robot for about 30 seconds with the bin empty. Put your nose near the exhaust vent, not the bin. That tells you whether the smell is in the airflow path or deeper in the machine.
Run the test on a hard floor if you can, since carpets hold moisture and smells that can confuse the diagnosis.
| Smell | What it usually means | Jump to |
|---|---|---|
| Musty, damp, or sour | Moisture trapped in the bin, filter, mopping pad, or dock | Branch 1 |
| Burnt plastic or rubber | Hair or debris jamming the brushroll, wheels, or motor airflow | Branch 2 |
| Chemical or ozone | Battery swelling, overheating, or failure | Branch 3 |
If you catch a sharp chemical odor, unplug the dock and stop using the robot. That's not a cleaning issue, it's a battery warning. We'll handle that in Branch 3.
Quick Answer: What You Probably Need to Do
Your robot vacuum smells because something is trapped, wet, or overheating. Musty smells mean moisture in the bin, filter, or mopping pad. Burnt smells mean hair or debris is jamming the brushroll or wheels.
A chemical smell means the battery needs immediate attention. Clean the likely part, dry it fully, and the smell should go away.
Deep Dive: Inside the Smell Zones
A robot vacuum has several hidden zones where odors build up. Here's where the trouble usually starts, from most to least common.
Dustbin and Filter: Where Most Musty Smells Breed
Damp debris sits in the dustbin, and the filter traps fine particles right next to it. Leave either one wet, and you'll get bacteria and mold. That's the classic musty smell.
Most bins hold between 300 and 800 ml, so they fill up fast in a pet household.
Check whether your filter is washable before you rinse it. If it is, it needs a full air-dry cycle. Our guide to how long filters should air-dry gives you exact timing so you don't put it back damp.
Brushroll and Side Brush: Where Hair Wraps and Friction Builds
Hair and string wrap around the main brush, which puts strain on the motor and bearings. That friction creates a burnt rubber smell. A tightly tangled brushroll can noticeably increase the motor's current draw, which generates heat.
Side brushes tangle too, but they're easier to spot.
You can use the same de-tangling technique you'd use on a full-size vacuum brush. Most manufacturers, including iRobot, publish official maintenance documentation for their specific models.
Wheels and Caster: The Forgotten Debris Traps
The main wheels collect hair, and the front caster picks up dust and grit. They rarely smell by themselves, but a jammed wheel forces the motor to work harder. That extra strain can push a mild problem into a burnt smell.
Give the wheels a quick spin and clear anything wrapped around them. Every few weeks, flip the robot over and inspect both drive wheels.
Mopping Pad and Water Tank: The Sour-Rag Culprit in Combo Units
If your robot is a mop combo, a damp pad left on the dock becomes a sour smell machine. The water tank can develop bacteria if it sits with stale water. This issue shows up most on hard-floor cleaning models that run frequent mopping cycles.
Remove the pad after every mopping run. Rinse it, hang it to dry, and empty the water tank between uses. Some brands release the dock tray to let the pad air out, so check your manual.
Self-Emptying Dock: The Dirty Base Station Nobody Checks
The self-emptying base collects weeks of debris in its dust bag. If you forget to change it, the whole dock starts to smell like old garbage. The dust bag in a typical self-emptying base holds between 2.5 and 4 liters.
Some docks also have a washable filter inside the base.
Treat it like the robot's main filter: clean it on the same schedule. If your robot uses a HEPA filter, the same principles apply as with top-rated models for healthier homes.
Branch 1: Musty or Damp Smell (The Moisture Clean-Up)
If the smell is damp, sour, or like wet dog, you're dealing with moisture. The fix is simple: find the wet part, clean it, and dry it completely before reassembly.
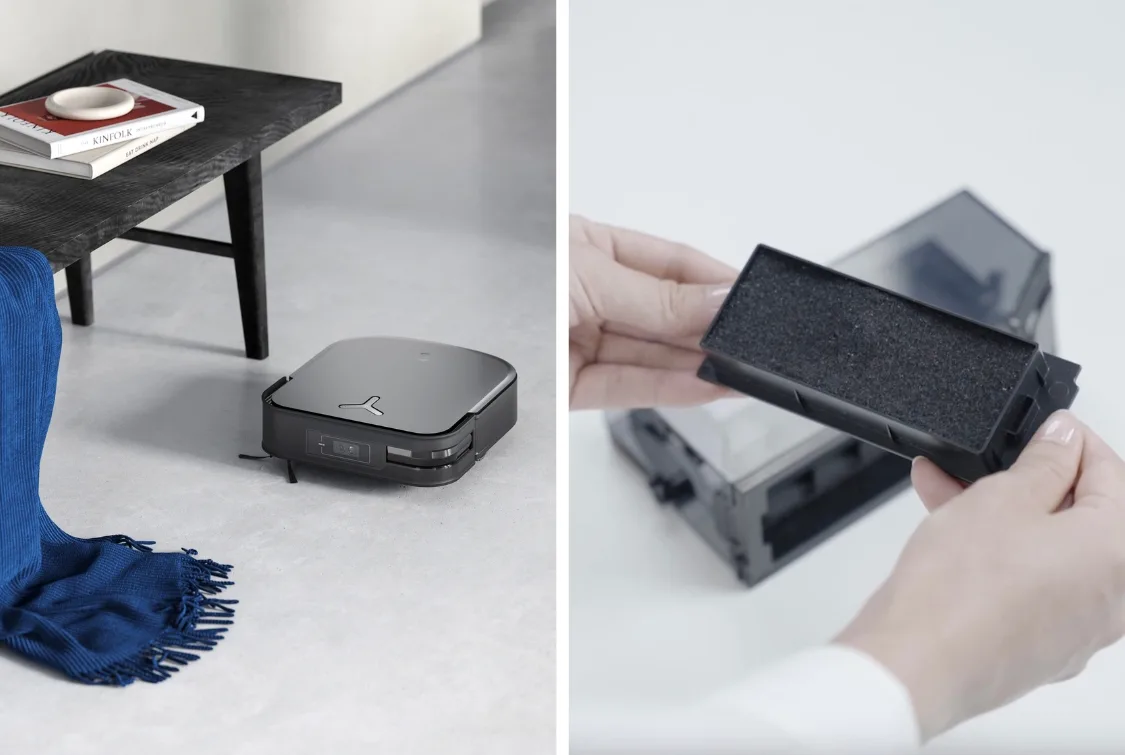
Image source: Web (Bing) / ecovacs.com (Web image (fair-use with source credit))
Step 1: Empty and Wash the Dustbin
Empty the bin over a trash can. Rinse it with warm soapy water. Never submerge the filter while you're at it.
Use a soft brush to scrub the bin corners if you see residue.
Wipe the rubber seal and the vent. Bits of wet debris love to hide there. Let the bin air-dry overnight before you put it back.
Step 2: Clean or Replace the Filter
Tap the filter gently to dislodge loose dust. If it's washable, rinse it under cold running water until the water runs clear. Squeeze it, don't wring it, because wringing tears the fibers.
If the filter looks torn or bent, just replace it.
Air-dry the filter for a full 24 to 48 hours. A damp filter is the fastest way to bring the smell back.
Step 3: Dry the Mopping Pad and Tank (If You Have One)
Remove the mopping pad and rinse it with mild soap. Hang it to dry completely before reattaching it. Empty the water tank and leave the cap open so it can breathe.
If your robot docks with the pad still attached, that's a setup for sour smells. Make it a habit to pull the pad off after every mopping run. In humid climates, give everything a full 24 hours to dry.
Step 4: Check the Dock for Stagnant Water
Look inside the charging dock for standing water or wet debris. Some docks have a tray under the mop pad, and that tray can hold water for days. For combo units, these small trays are a top cause of recurring smells.
For self-emptying docks, check the bag compartment for damp clumps.
If the smell lingers after all this, inspect the suction channel. A large pet mess or wet clump can get stuck in the airflow path.
Remove the brushroll and look down the channel with a flashlight. You'll see the blockage immediately. Pull it out with tweezers or a long screwdriver.
That clears the musty smell at the source.
Quick checklist for musty smells:
- Bin washed and fully dry
- Filter cleaned or replaced, then dried 24 to 48 hours
- Mopping pad removed and air-dried
- Dock tray wiped and dried
- Suction channel cleared of debris
If you've done all five and the smell persists, repeat the filter dry time. A filter that feels dry to the touch can still hold moisture deep in the fibers. Give it another day before you buy replacement parts.
Branch 2: Burning or Acrid Smell (The Friction Check)
A burnt smell means something is rubbing, jamming, or overheating. It's not a moisture problem. It's a friction problem, and it needs your attention before you run the robot again.
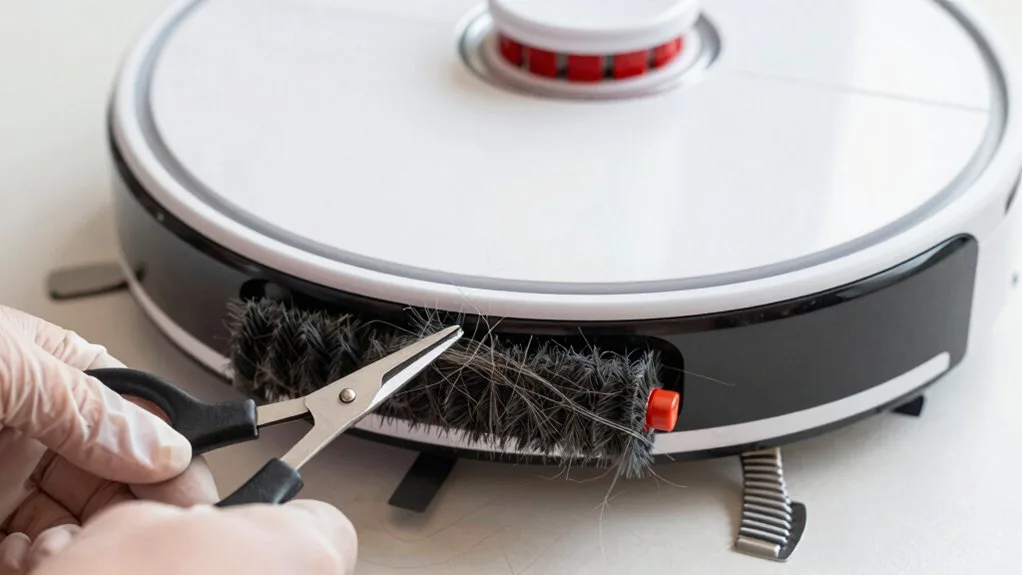
Image source: Web (Bing) / vacuumtips.com (Web image (fair-use with source credit))
The most common culprit is hair wrapped around the main brush. The motor keeps spinning, but the brush can't turn freely. That friction generates heat and a hot plastic or rubber smell.
Left alone, it can burn out the motor entirely.
Step 1: Remove the Main Brush and Clear All Hair and String
Flip the robot over. Release the brush guard clips and lift the brushroll out. Hair typically winds tight around the brush ends, right where the bearings sit.
Pull the hair off with your fingers, or use scissors to cut through thick tangles. Check the end caps too. Those small plastic bearings trap hair that you can't see from above.
If your robot has a rubber brushroll with no bristles, check for string wrapped in the grooves. A cleaning brush is the easiest way to get old strands out.
Step 2: Inspect the Side Brush and Wheels for Entanglements
Hair on the side brush is hidden in plain sight. The side brush spins fast, so tangles heat up quickly. Unscrew it, clear the hair, and reattach it.
Then spin each wheel manually. They should move freely. A wheel that resists turning is a sign of wrapped hair or debris.
Remove the wheel if your model allows, or use tweezers to pull the hair from the gap.
Step 3: Check the Airflow Path for Blockages That Overheat the Motor
A blocked airway makes the motor work harder and run hot. That heat produces a burning smell even when the brushroll is clean.
Check the suction channel where the brushroll sits. Look for clumps of damp dust or a trapped sock. Check the exhaust vent on top of the robot.
If airflow is restricted, the motor strains until a thermal sensor kicks in and shuts the robot down.
Step 4: Manually Spin the Brushroll to Confirm It Moves Freely
After you clear everything, spin the brushroll by hand. It should rotate smoothly without resistance. If you feel a grinding sensation, check the bearing caps again for a hair you missed.
Run the robot on a hard floor for a couple of minutes. If the burnt smell is gone, you're done. If it's still there, move on to the battery check.
Branch 3: Chemical or Ozone Smell (The Battery Red Flag)
This is the one time you skip the cleaning and stop using the robot immediately. A chemical, bitter, or ozone-like smell is not a filter problem. It's a sign that the lithium-ion battery is failing.
Batteries generate that odor when they overheat, swell, or suffer internal damage. It's a genuine safety warning. Don't leave the robot on carpet while you inspect it.
Move it to a hard, non-flammable surface like a kitchen counter or garage floor.
What to Check Right Now
- Is the battery compartment warm or hot to the touch?
- Is the underside of the robot bulging or warped?
- Does the battery have visible swelling, leaking, or discoloration?
If any of those boxes check, don't try to charge it again and don't use the robot. Contact the manufacturer's support line for proper handling and replacement guidance. Many brands offer official battery service under warranty, so check your coverage.
One caveat: a hot motor can also produce a chemical-adjacent smell. If your battery is cool and looks fine, go back to Branch 2 and check the motor airflow path. That should be your final step before you call it a battery problem.
Step-by-Step Deep Clean: Total Odor Reset
If the smell keeps coming back after individual fixes, do a full reset. This is the maintenance flow that the manufacturer's troubleshooting guide usually recommends when a specific culprit can't be identified.
What you'll need:
| Tool | Purpose |
|---|---|
| Warm water and mild dish soap | Washing the bin and pads |
| Microfiber cloth | Wiping sensors and body |
| Soft brush or old toothbrush | Scrubbing brushroll and crevices |
| Tweezers or seam ripper | Pulling hair from tight spots |
| Cotton swabs | Cleaning sensor lenses |
Full Disassembly of Washable Parts
Remove the dustbin, filter, main brush, side brush, mopping pad, and water tank. Lay them all out on a towel so you can see what you're working with. This is where most people find the smell they've been chasing.
Check the crevice between the bin and the robot body. That gap collects fine dust and can be a hidden source of stale odor.
Warm Soapy Water and Air-Dry Instructions
Wash the dustbin, brushes, and mopping pad with warm soapy water. Rinse thoroughly. Pat everything dry with a clean towel, then let it air-dry for a full 24 hours.
Never use heat to dry filters. A hairdryer will melt the fibers and ruin the filtration. The filter alone can take up to 48 hours to dry completely, as covered in our guidance on drying vacuum filters.
Sensor Wipe-Down to Prevent Misfires
Wipe the cliff sensors and bump sensor with a dry cotton swab. Dust on the sensors can cause your robot to behave unpredictably, hitting walls or falling down stairs. Clean sensors also help the robot navigate efficiently, so the motor isn't doing extra runs that generate heat.
Reassembly and Test Run
Put everything back in the correct order. Double-check the filter is seated properly, because an unseated filter leaks dust straight into the motor. Run a test cycle on a hard floor.
Stop it after two minutes and sniff the exhaust vent.
Clean smell means you're done. Recurring smell means there's a deeper mechanical issue, and it's worth a call to the brand's support line.
Mistakes to Avoid: How a Quick Fix Becomes a Pricey Repair
These are the errors that turn a 10-minute fix into a $100 service call.
- Putting filters back while damp. A damp filter grows mold and bacteria. That guarantees the musty smell returns within 24 hours.
- Running the robot with a clogged filter. Restricted airflow forces the motor to overwork. That leads to heat and a burnt smell that isn't from the brushroll.
- Ignoring a swollen battery. Swelling isn't cosmetic. It's the sign of a failing cell that can pose a fire risk. Stopping use is the only safe move.
- Forgetting the self-emptying dock dust bag. If the base smells, the robot will smell after every emptying cycle. Change the bag before you blame the brushroll.
- Wet-cleaning the robot body or motor area. Water and electronics don't mix. Only wash the parts the manual says you can wash.
Maintenance Schedule: Keeping Smells Away for Good
Consistency beats deep-cleaning once a season. Here's a realistic schedule that follows manufacturer maintenance guidance for most brands:
| Frequency | Task |
|---|---|
| After every use | Empty the dustbin |
| Weekly | Remove hair from the main brush and side brush; wipe the sensors |
| Every 1 to 2 weeks | Rinse the filter and let it dry fully |
| Monthly | Deep-clean washable parts; inspect wheels and battery compartment |
| Every 3 to 6 months | Replace the filter; change the self-emptying dock bag |
| As needed | Check battery health and charge cycles |
If you have pets, move everything up a notch. Pet hair and dander clog filters faster, and pet accidents add moisture that breeds odor. The same brushroll maintenance tips that keep big vacuums running smoothly apply to your robot too.
Frequently Asked Questions
Why does my robot vacuum smell like pee?
A urine smell almost always means a pet mess got sucked into the bin or the brushroll area. The ammonia in dried urine reactivates when it gets warm. Remove the brushroll, wash it with soapy water, and wipe the suction channel thoroughly.
The smell is sealed into the plastic if it persists after a deep clean.
Why does my robot vacuum smell when it's charging?
A smell while charging is a battery warning, not a cleaning issue. Lithium-ion batteries release a chemical odor when they overheat or suffer internal damage. Unplug the dock and inspect the battery for swelling or heat.
Contact the manufacturer if you see either.
Is it safe to run a robot vacuum that smells burnt?
No. A burnt smell means friction, heat, or motor strain. Running it longer can cause permanent motor damage or, in rare cases, a fire hazard.
Turn it off, clear the brushroll and wheels, and test again. If the smell returns, stop using it and contact support.
How often should I clean the filter?
Every one to two weeks, depending on usage and pets. The filter sits in the airflow path, and clogs reduce suction while forcing the motor to run hotter. Rarely-used robots can stretch the interval to once a month.
High-pet households should check it weekly.
Can I put the filter in the washing machine?
No. Washing machines agitate the filter too harshly, which tears the fibers and ruins the filtration. Hand-wash with cold water only.
The complete washing guide covers which filters are safe to rinse and which must be replaced.
Final Decision Guide: From Smell to Solution in 60 Seconds
Here's the whole article condensed into a table. Find your smell, do the fix, and you're back to a clean-running robot.
| Smell | Most likely cause | Fastest fix |
|---|---|---|
| Musty, damp, sour | Moisture in the bin, filter, mopping pad, or dock | Wash and dry everything for 24 to 48 hours |
| Burnt plastic or rubber | Hair and string around the brushroll or wheels | Remove the brushroll, clear all tangles, check airflow |
| Sharp chemical or ozone | Failing lithium-ion battery | Stop using, inspect battery, contact manufacturer |
| Smells like ammonia or urine | Pet mess in the bin or suction channel | Deep-clean all washable parts, wipe the channel |
| Smells after every empty | Dirty self-emptying dock or full dust bag | Replace the dust bag, wipe the dock interior |
Run the smell test, follow the branch, and you'll pinpoint the issue in minutes. If you're still stuck after a full deep clean, check whether your model has a diagnostic mode in the companion app. Most brands log error codes that point straight to the failing component.
That's your answer without guessing.

