

The robot vacuum is lost again. It’s spinning in circles, bumping into the same chair, or sitting stuck in a corner with a “navigation error” blinking in the app. If you’ve typed “Why does my robot vacuum keep getting lost?” into a search bar, you’re not alone.
Our research and aggregated user reviews point to a handful of repeat culprits. Sensor dirt, mapping drift, Wi-Fi hiccups, and poor dock placement cause the vast majority of “lost robot” failures. As of 2026, most robot vacuums from major brands use either LiDAR or camera-based navigation systems, and each has its own failure patterns.
Let’s walk through the diagnosis step by step so you can send yours back to work.
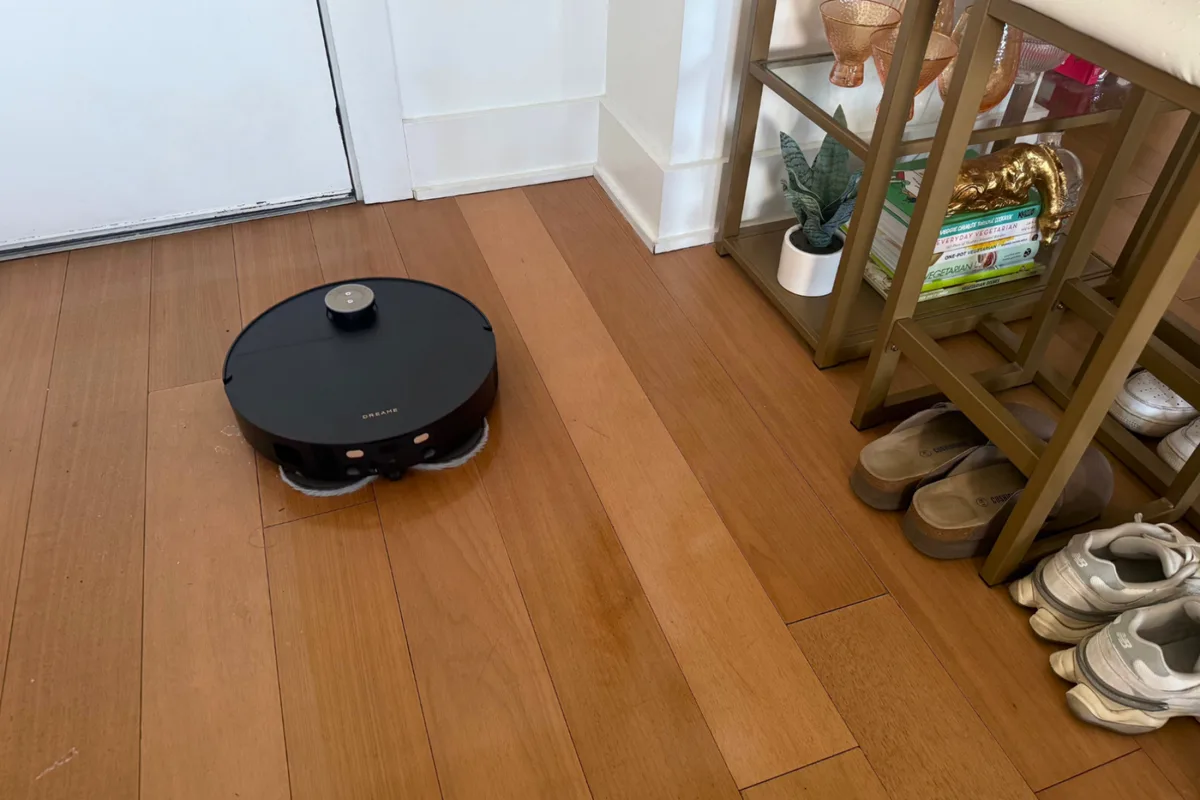
Image source: Web (Bing) / mashable.com (Web image (fair-use with source credit))
Quick Answer
Why does my robot vacuum keep getting lost? Dirty sensors, stale maps, or a poorly placed dock usually cause it. Low battery also stops it mid-route.
Firmware bugs and weak Wi-Fi lead to sync failures. Most fixes take under ten minutes.
How Robot Vacuum Navigation Actually Works (LiDAR vs. VSLAM vs. Gyroscope)
You don’t need to be an engineer to fix this, but understanding the basics helps. Your robot creates a mental picture of your home as it cleans the first time. That picture is called a map, and the robot uses it to plan routes and find its dock.
When something breaks that connection between the real world and the map, the robot gets confused.
Most modern robot vacuums use one of three navigation systems.
LiDAR navigation uses a spinning laser turret on top. It shoots out laser beams, measures how long they take to bounce back, and builds a precise 2D map. LiDAR works well in the dark and handles reflective surfaces better than cameras.
The downside? That little turret collects dust, and a dusty laser lens means a blurry map.
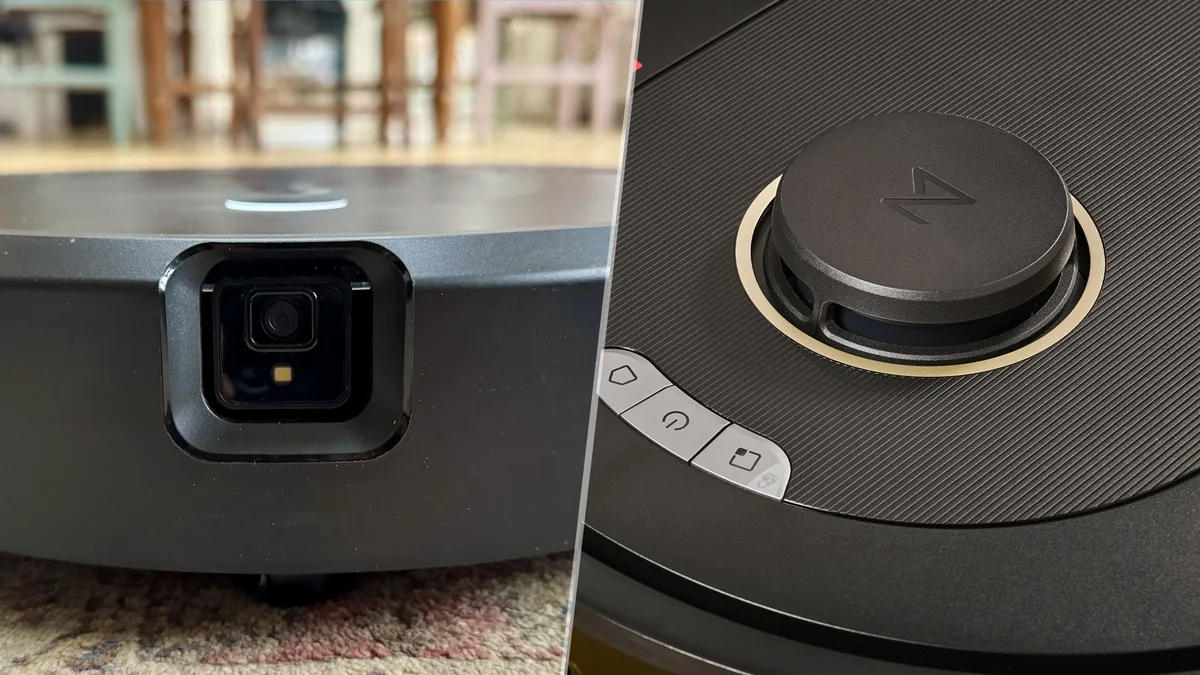
Image source: Web (Bing) / techradar.com (Web image (fair-use with source credit))
VSLAM navigation uses a camera instead. It looks at fixed objects like door frames, sofa edges, and appliance corners to track its position. VSLAM works fine in well-lit rooms, but it struggles when lighting changes or when furniture moves.
If your robot uses VSLAM and you frequently rearrange furniture, that explains a lot.
Gyroscope navigation is the oldest and simplest type. It tracks distance and turns using wheel rotation sensors, like a car’s odometer. It doesn’t build a real map.
Instead, it follows a row-by-row cleaning pattern. It works, but it doesn’t know where rooms are, and it can’t create no-go zones. It also drifts easily.
If your robot has only a gyroscope, it might not be “getting lost” so much as never knowing exactly where it is in the first place.
Here’s a quick comparison:
| Navigation Type | How It Works | Best For | Common Failure |
|---|---|---|---|
| LiDAR | Spinning laser measures distances | Dark homes, large areas, precise maps | Dust on lens, motor wear |
| VSLAM | Camera tracks objects and landmarks | Bright, stable layouts | Low light, furniture moves |
| Gyroscope | Wheel rotation counts distance and turns | Budget models, single rooms | Drift, no real map |
Whichever type you own, the troubleshooting steps that follow work for most models. And if you’re comparing this with other vacuum styles, our guide on choosing an upright vacuum cleaner covers the alternative approach if you ever switch back.
Step 1: Tell Me What Your Robot Is Doing Wrong
This is the fastest way to narrow down the fix. Grab your phone, open the vacuum app, and look at the error message or last cleaning path. Then match what you see to one of these branches.
It Spins in Circles
If your robot spins in a tight circle, especially in one spot, its sensors are almost certainly blocked. The side brushes, cliff sensors, or the main camera lens can pick up dust, hair, or sticky residue. That debris confuses the navigation system into thinking there’s an obstacle nearby.
If the spinning happens only on certain floors, check for dark rugs or shiny surfaces. Cliff sensors can mistake black carpets for a drop-off. They fire off “stop” commands constantly, and the robot whirls around trying to find safe ground.
The fix is a sensor wipe and sometimes a test run on a different floor type, like the hard flooring options we cover separately.
It Misses Entire Rooms
A robot that skips rooms usually has an outdated map. If you moved a sofa, added a chair, or closed a door since the last mapping run, the robot’s stored map doesn’t match reality. It thinks a wall is where that new bookshelf stands, so it plans a route that avoids the whole area.
Sometimes the map itself is fine, but the robot starts from the wrong position. This happens when you pick up the robot manually and move it to another room. It has no idea where it is.
Do this often, and the map drifts apart from the home layout. A stale map causes patchy coverage, much like the cleaning lines on your carpet you might see from a worn upright brush.
It Stops Mid-Clean or Says “Lost”
This error usually means the robot’s position tracking failed and it can’t find any familiar landmarks. If you have a VSLAM model, the cause might be a room that’s too dark or too bright. LiDAR models rarely hit this unless the turret is so dirty that the laser can’t read the room accurately.
It can also happen after a power surge or an unexpected reboot. The robot loses its in-memory position data. Once it reboots, it doesn’t know where it is relative to its last saved map location.
It Can’t Find the Dock
Dock-finding failures are frustrating because the robot cleaned the whole house, then gave up at the end. The most common cause is a dock placed in a location that’s visually confusing. Mirrors, dark walls, or glass surfaces can make the sensor signature of the dock hard to match.
The dock’s infrared beacon also needs a clear line of sight. If you shoved the dock under a couch or behind a stack of storage bins, the robot can’t see the signal until it’s practically on top of it.
A low battery makes it worse. When the battery drops below roughly 10%, most robots will still try to return, but they may take a shortcut through an unmapped area. If that fails, they shut down and wait for you, usually in the middle of the hallway.
Step 2: Check the Map First (Most Common Fix)
Before you touch any hardware, open the app and look at the saved map. This single step solves more “lost robot” cases than any other. The map tells you what the robot thinks your home looks like.
Compare it to your actual floor plan.
Look for three specific issues.
First, check for rooms that are missing or cut off. If the map doesn’t show your kitchen but the robot cleans there, the map is partial or corrupted. You’ll need to delete and remap the whole floor plan.
Second, look for walls that don’t line up with reality. The biggest tell is a map where the walls seem pushed inward or slanted. That indicates the robot’s sensors were dirty during the original mapping run, so it captured a distorted view.
Cleaning the sensors and remapping fixes this.
Third, check for duplicate rooms or overlapping areas. This happens when you carried the robot from one floor to another without switching the map. The robot tries to overlay two different layouts on top of each other, and everything goes sideways from there.
If the map looks fine but the robot still gets lost, try a simpler move. Delete the saved map and let the robot remap the home from scratch. It’s an option in most apps under “Map Management” or “Reset Map.” This takes about 10 to 15 minutes for an average home.
The robot runs a perimeter sweep, then cleans in rows, and builds a fresh map with accurate room boundaries.
One warning: if your robot uses VSLAM, keep the map up to date by moving furniture back to where it was during the original mapping run. For LiDAR models, a small furniture shift doesn’t matter as much. The laser sees the walls, not the sofa cushions, so the map stays accurate even when you swap seating arrangements.
A distorted map is more than an app problem. It leads to repeated coverage and wasted battery, similar to an upright that blows hot air when its airflow is blocked.
Step 3: Give Your Sensors a Quick Clean
This is the most underrated fix in this whole guide. Robot vacuums crawl across floors and pick up dust, pet hair, and sticky kitchen grime. A lot of that junk ends up on the very sensors the robot needs to see.
One good cleaning session can cure navigation errors that no amount of software tweaking will touch.
Image source: Web (Bing) / vacuumtips.com (Web image (fair-use with source credit))
Start by turning the robot over. Use a dry microfiber cloth to wipe the wheels, the charging contacts, and all the little circular openings on the bottom. Those openings are the cliff sensors.
They emit infrared light downward to measure distance to the floor. If dirt blocks them, the robot thinks the floor has disappeared, and it backs away from areas that are actually perfectly safe.
Next, check the front bumper. Most robot vacuums have a row of small sensors hidden behind the bumper’s clear plastic. Wipe that strip with a damp cloth, then dry it completely.
If you see scratches or cracks, that can also scatter the infrared light and confuse obstacle detection.
Now look at the top. If your robot has a LiDAR turret, clean the small lens area around the sides of the turret. Use a soft, dry cotton swab.
Do not use water or spray cleaners on it. Water can seep into the electronics and ruin the laser. For VSLAM models, wipe the camera lens on the front or top with the same dry swab.
According to manufacturer documentation, such as the service notes on iRobot’s official support site, a dry microfiber cloth is the recommended way to clean these sensors.
Finally, check the side brushes and the main brush roll. Tangled hair and debris slow the brush motor, and some robots interpret that resistance as a jam or an obstacle. That makes them stop or turn around at random.
If you have a long-haired household, the brush roll probably needs a deep cleaning every week or two. If you don’t want to do that by hand, there are models with self-cleaning brushes, but you’re still better off patting the roll down after each run. And if you're thinking about switching back to a corded vacuum out of sheer frustration, you'll want to check out the top-rated HEPA models for allergy relief.

