

The Narwal robot vacuum promises a hands-free cleaning experience with its innovative mopping and self-cleaning capabilities. However, like any sophisticated piece of technology, it can sometimes encounter issues. When your Narwal isn’t performing as expected, a systematic approach to troubleshooting can save you time and frustration. Understanding common problems and their solutions is key to keeping your intelligent cleaning companion in optimal working condition, ensuring your floors remain spotless with minimal intervention.
Key Takeaways
- Connectivity Issues: Wi-Fi problems are common; try restarting your router, re-pairing the vacuum, and ensuring it’s on a 2.4GHz network.
- Mopping Performance: If mopping is ineffective, check water tank levels, the cleanliness of the mop pads, ensure proper pad installation, and verify the correct cleaning mode is selected.
- Navigation and Mapping: Obstacles, poor lighting, and sensor obstructions can hinder navigation. Clean sensors, remove clutter, and ensure adequate room lighting.
- Self-Cleaning Station Problems: Issues with the base station often relate to clogged drains, dirty water tanks, or incorrect docking. Regular maintenance of the station is crucial.
- Error Codes: Familiarize yourself with common Narwal error codes and their corresponding solutions, often found in the user manual or app.
- Firmware Updates: Keep your Narwal’s firmware updated, as updates frequently include bug fixes and performance improvements.
- Battery Life: Reduced battery life can be due to aging batteries or excessive use of high-power modes. Consider a battery replacement if it’s significantly degraded.
Troubleshooting Connectivity And App Issues
Connectivity problems are among the most frequent hurdles users face with smart home devices, and your Narwal robot vacuum is no exception. A stable connection between your vacuum and the Narwal app is essential for controlling its functions, scheduling cleanings, and receiving updates.
When your vacuum struggles to connect or the app reports connectivity errors, several factors could be at play.
Wi-fi Network Problems
The most common culprit is an unstable or incorrectly configured Wi-Fi network. Narwal vacuums, like many smart devices, typically operate on the 2. 4GHz Wi-Fi band, not the 5GHz band. If your router broadcasts both bands with the same SSID (network name), the vacuum might have trouble connecting.
- Router Restart: A simple router reboot can often resolve temporary network glitches. Unplug your router, wait 30 seconds, and plug it back in. Allow your network to fully re-establish before attempting to reconnect the vacuum.
- 2.4GHz vs. 5GHz: Ensure your Wi-Fi network is set to broadcast a 2.4GHz signal. If your router has separate SSIDs for each band, make sure you are connecting the Narwal to the 2.4GHz network. Some routers allow you to disable the 5GHz band temporarily during setup.
- Signal Strength: The vacuum needs a strong Wi-Fi signal to maintain a stable connection. If your cleaning area is far from the router, consider a Wi-Fi extender or mesh network to boost coverage. Poor signal strength can lead to dropped connections and incomplete cleaning cycles.
- Network Congestion: Too many devices connected to your Wi-Fi network can cause congestion, impacting performance. Try disconnecting non-essential devices to see if it improves the Narwal’s connectivity.
Re-pairing The Vacuum
If the initial setup fails or a connection is lost, re-pairing the vacuum with the app is often necessary.
- Reset Wi-Fi Settings on Vacuum: Most Narwal models have a method to reset their Wi-Fi settings directly on the device. This usually involves pressing and holding a specific button combination. Consult your user manual for the exact procedure for your model.
- Remove from App: In the Narwal app, remove the existing vacuum device from your account. This ensures a clean slate for the re-pairing process.
- Follow App Instructions: Initiate the pairing process again through the Narwal app, following the on-screen prompts carefully. This typically involves putting the vacuum into pairing mode and selecting your Wi-Fi network.
App And Firmware Issues
Outdated software on either the vacuum or the app can lead to compatibility issues.
- Update the Narwal App: Ensure you have the latest version of the Narwal app installed on your smartphone from your device’s app store.
- Firmware Updates: Regularly check for and install firmware updates for your Narwal vacuum through the app. These updates often contain bug fixes and performance enhancements that can resolve connectivity or operational issues. In my experience, keeping firmware up-to-date is one of the most effective ways to prevent future problems.

Addressing Mopping Performance Deficiencies
The Narwal’s advanced mopping system is a key selling point, but sometimes it may not deliver the sparkling results you expect. Issues can range from ineffective water distribution to poor stain removal. Diagnosing and rectifying these problems ensures your floors get the deep clean they deserve.
Water Tank And Pad Issues
The most fundamental aspects of mopping are water and the mop pads.
- Water Tank Levels: Ensure the water tank is adequately filled with clean water. For models that use cleaning solution, confirm you are using the correct Narwal-approved solution and not exceeding the recommended amount, as too much can sometimes hinder performance or damage components. Never use undiluted cleaning solutions or harsh chemicals.
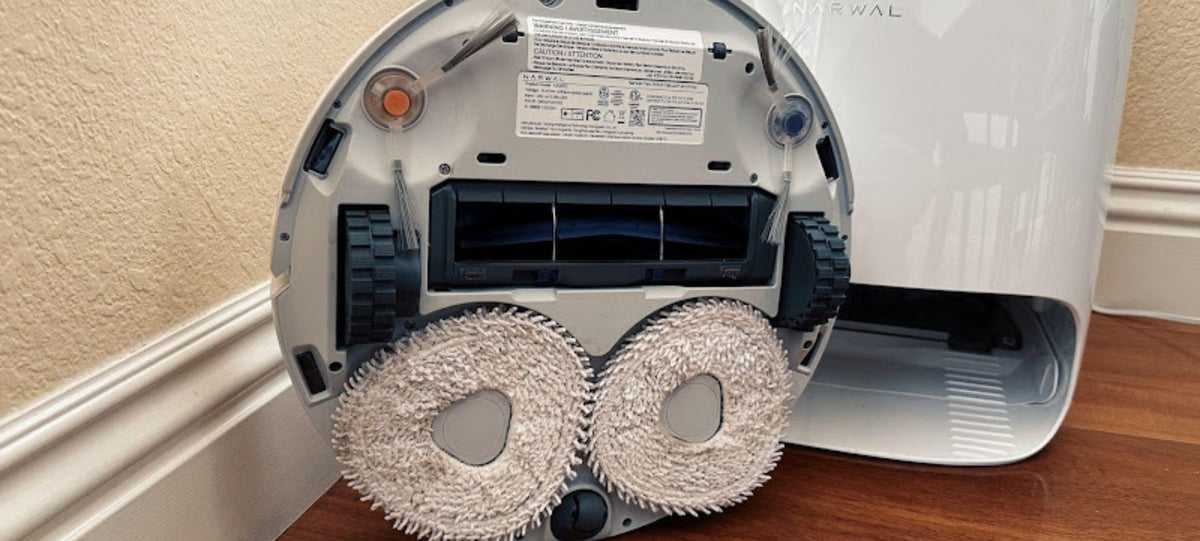
- Mop Pad Installation: Verify that the mop pads are correctly and securely attached to the mopping module. They should be firmly in place, with no loose edges. Ensure you are using the correct type of mop pad for the cleaning task (e.g., standard vs. deep clean).
- Mop Pad Cleanliness: Dirty or saturated mop pads are ineffective. If the pads are visibly soiled or have been used for an extended period without cleaning, they will spread dirt rather than absorb it. Ensure the self-cleaning function is working correctly and that the pads are being rinsed and dried adequately. Some users find pre-wetting the pads slightly before a heavy-duty clean can help.
- Drying Function: If your Narwal has a drying function for the mop pads, ensure it’s operational. Damp pads left in the base station can develop odors or mold, and ineffective drying can lead to the vacuum leaving damp streaks.
Mopping Modes And Settings
The Narwal app offers various cleaning modes and settings that can be adjusted for different floor types and cleaning needs.
- Correct Mode Selection: Double-check that you have selected the appropriate mopping mode for the task. For instance, a “spot clean” mode might not be suitable for an entire room, and a “deep clean” mode might require more water or slower movement.
- Suction Power: While primarily for vacuuming, suction power can influence mopping. For very wet messes, you might need to adjust suction settings to prevent excessive water pickup by the vacuum motor.
- Water Flow Rate: If your model allows, adjust the water flow rate. For tougher stains, a higher water flow might be necessary, while for light maintenance cleaning, a lower setting conserves water and prevents over-wetting.
Obstacles And Dirt Detection
Sometimes, the vacuum might avoid certain areas or not mop effectively due to its environment.
- Object Detection: Ensure there are no small objects or debris that the vacuum might interpret as an obstacle, causing it to avoid an area.
- Dirt Detection Technology: If your Narwal features dirt detection, it might spend more time on particularly soiled areas. If it’s not detecting dirt correctly, ensure the relevant sensors are clean.
Resolving Navigation And Mapping Challenges
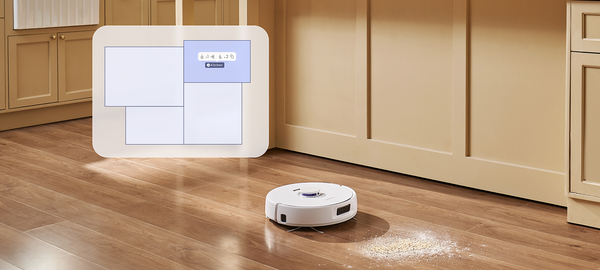
Accurate navigation and mapping are crucial for efficient cleaning. If your Narwal struggles to move around your home, gets stuck frequently, or creates inaccurate maps, it can lead to incomplete cleaning and user frustration.
Sensor Issues
The vacuum relies on various sensors to perceive its environment. Obstruction or dirt on these sensors is a common cause of navigation problems.
- Lidar/Navigation Sensors: The Lidar (Light Detection and Ranging) sensor, usually located on top of the vacuum, is vital for mapping and navigation. Ensure it is clean and free from dust, debris, or obstructions. Gently wipe the sensor lens with a dry, soft cloth.
- Cliff Sensors: Located on the underside, these sensors prevent the vacuum from falling down stairs. If they are dirty or blocked, the vacuum might refuse to clean certain areas or stop mid-cycle. Clean them regularly with a dry cloth.
- Wall Sensors: These help the vacuum navigate along walls and edges. Keep them clean.
- Bumper Sensors: The physical bumper needs to move freely. Ensure it’s not jammed or obstructed.
Environmental Factors
The environment in which the vacuum operates significantly impacts its navigation capabilities.
- Lighting Conditions: While Lidar-based navigation is less dependent on light than camera-based systems, extremely dark or excessively bright environments can sometimes affect sensor performance. Ensure the room has adequate, consistent lighting.
- Obstacles and Clutter: Small, low-lying objects, loose cables, high-pile rugs, or furniture with very thin legs can be challenging for the robot. Clear the floor of as much clutter as possible before starting a cleaning cycle. Consider using virtual walls or no-go zones in the app to block off problematic areas.
- Reflective Surfaces: Highly reflective surfaces, like mirrors or glossy floors, can sometimes confuse Lidar sensors. While less common, be aware if these are present in large quantities.
Mapping And Re-mapping
Creating an accurate map is the first step to efficient cleaning.
- Initial Mapping Run: Perform the initial mapping run in an uncluttered environment with good lighting. Allow the vacuum to complete its entire mapping cycle without interruption.
- Re-mapping: If the map becomes outdated due to furniture rearrangement or significant changes in the environment, you’ll need to re-map your home. Most Narwal apps provide an option to delete the old map and create a new one. Ensure the vacuum returns to its base station to save the map correctly.
- Multi-Floor Mapping: If your Narwal supports multi-floor mapping, ensure you are correctly initiating the mapping process on each distinct floor. The vacuum typically needs to be physically moved to the new floor and its base station placed there for the initial mapping of that level.
Troubleshooting The Self-cleaning Station
The Narwal’s self-cleaning station is a major convenience, but it can also be a source of problems if not maintained properly. Issues can range from the station not cleaning the mop pads effectively to water drainage problems.
Water Tank And Drainage Issues
The station relies on clean water for rinsing and efficient drainage for dirty water.
- Dirty Water Tank: The dirty water tank needs to be emptied regularly. If it becomes too full, the station may stop functioning or fail to rinse the mop pads properly. Always empty it after each cleaning cycle or when prompted by the app.
- Clean Water Tank: Ensure the clean water tank is filled with fresh water. Using dirty water for rinsing will negate the self-cleaning benefit.
- Drainage Blockages: The station’s drainage system can become clogged with debris, hair, or lint. Periodically inspect the drainage port and the associated tubing for blockages. Follow the manual’s instructions for cleaning the drainage system. If you notice water pooling around the station, a blockage is likely.
- Base Station Placement: Ensure the base station is placed on a level surface and that the drainage outlet is positioned correctly to allow water to flow away freely. Avoid placing it on thick carpets that could impede drainage.
Mop Pad Cleaning And Drying
The effectiveness of the station’s cleaning and drying cycles is paramount.
- Mop Pad Rinsing: If the mop pads are not coming out clean after a cycle, the rinsing mechanism might be faulty, or the water intake could be blocked. Check the water filter within the clean water tank for debris.
- Drying Cycle: If the mop pads remain damp after the drying cycle, the heating element or fan within the station might be malfunctioning. Ensure the drying function is enabled in the app settings. Overfilling the dirty water tank can sometimes prevent the drying cycle from initiating.
- Station Cleaning: Regularly clean the entire base station, including the mop pad cleaning brushes and the area where the mop pads rest. Accumulated grime can affect the station’s performance and hygiene. Narwal typically recommends cleaning the station components monthly.
Docking Problems
The vacuum must dock correctly for the station’s functions to engage.
- Obstructions Around Dock: Ensure there are no objects blocking the vacuum’s path to the charging contacts or the mop-cleaning area of the station.
- Charging Contacts: Keep the charging contacts on both the vacuum and the base station clean. Use a dry cloth to wipe away any dust or grime that could interfere with charging.
- Vacuum Alignment: Sometimes, the vacuum may not align perfectly with the station. If this happens repeatedly, check if the station is on a level surface and if the vacuum’s sensors are clean.
Common Error Codes And What They Mean
Narwal robot vacuums are designed to alert users to specific issues through error codes displayed in the app or indicated by voice prompts. Understanding these codes is essential for quick troubleshooting. While the exact codes can vary slightly between models, here are some common ones and their general meanings:
Navigation And Movement Errors
- Error 1: Bumper Activated: The vacuum’s bumper has been triggered repeatedly, indicating it might be stuck or encountering an unexpected obstacle.
- Solution: Clear any obstructions, check for tangled debris, and ensure the bumper moves freely.
- Error 3: Cliff Sensor Error: The vacuum detects a drop, or the cliff sensors are dirty/malfunctioning.
- Solution: Clean the cliff sensors. If the error persists, ensure the vacuum isn’t near an actual drop it shouldn’t be cleaning.
- Error 4: Wheel Stuck: One or more wheels are obstructed or unable to rotate.
- Solution: Check the wheels for tangled hair or debris and remove it. Ensure the wheels can spin freely.
- Error 5: Suction Fan Malfunction: There’s an issue with the vacuum’s primary suction motor.
- Solution: Check the dustbin and filters for blockages. If the problem persists, it may require professional service.
- Error 6: Lidar Error: The Lidar sensor is not functioning correctly, often due to obstruction or internal fault.
- Solution: Clean the Lidar sensor. If the error continues, the sensor may need replacement.
Station And Mopping Errors
- Error 8: Water Tank Issue: This could relate to the clean water tank being empty, the dirty water tank being full, or a blockage in the water system.
- Solution: Check and address the status of both water tanks and look for any blockages in the station’s water lines or drainage.
- Error 9: Mop Pad Malfunction: The mop pads are not detected correctly, are not rotating, or are not being cleaned/dried properly.
- Solution: Ensure the mop pads are installed correctly. Clean the mop cleaning area in the station. Check for debris around the mop pad mechanism.
- Error 10: Drainage Error: The station is unable to drain dirty water.
- Solution: Check the dirty water tank and the station’s drainage port for clogs. Ensure the station is on a level surface.
General Operational Errors
- Error 11: Battery Low/Charging Error: The vacuum’s battery is critically low, or it’s unable to charge.
- Solution: Ensure the vacuum is properly docked and that the charging contacts are clean. If the battery is old, it might need replacement.
- Error 12: Firmware Update Failed: An attempt to update the firmware was unsuccessful.
- Solution: Ensure a stable Wi-Fi connection during updates. Try the update again. If it fails repeatedly, contact support.
- Error 13: Vacuum Cannot Return to Dock: The vacuum is unable to locate or reach its charging base.
- Solution: Ensure the dock is powered on, visible to the vacuum, and not obstructed. Check the vacuum’s navigation sensors.
Always refer to your specific Narwal model’s user manual or the official Narwal support website for the most accurate and comprehensive list of error codes and their solutions.
Battery Life And Maintenance
A robot vacuum’s utility is directly tied to its battery life. If your Narwal isn’t holding a charge as long as it used to, or if it frequently returns to the dock before completing a cleaning cycle, battery issues might be the cause.
Proper battery maintenance can extend its lifespan and ensure consistent performance.
Understanding Battery Degradation
Like all rechargeable batteries, the lithium-ion battery in your Narwal will degrade over time. This is a natural process influenced by factors such as:
- Charge Cycles: Each time the battery is fully discharged and recharged, it counts as a charge cycle. Batteries have a finite number of cycles they can endure before significant capacity loss.
- Temperature Extremes: Exposing the vacuum to very high or very low temperatures, especially while charging, can accelerate battery degradation. Always charge and store the vacuum in a moderate environment.
- Deep Discharges: Frequently letting the battery drain completely can put more strain on it than partial discharges. The Narwal’s smart charging system usually mitigates this by returning to the dock when power is low.
- Charging Habits: While modern batteries are quite robust, consistently leaving the vacuum plugged in indefinitely after a full charge (though less detrimental than in older battery technologies) can still have a minor impact over many years.
Signs Of A Failing Battery
- Reduced Runtime: The most obvious sign is a significantly shorter cleaning time compared to when the vacuum was new.
- Inability to Complete Cycles: The vacuum may return to the dock midway through a cleaning job, even with a seemingly adequate charge.
- Slow Charging: While less common, a failing battery might take longer to charge than usual.
- Error Codes: Some models may display specific error codes related to battery performance or charging issues.
Maximizing Battery Lifespan
- Keep it Charged: While not strictly necessary to keep it topped up 100% of the time, avoid leaving the vacuum in a completely discharged state for extended periods.
- Clean Charging Contacts: Ensure the charging contacts on the vacuum and the base station are clean. Corrosion or dirt can impede charging.
- Use Eco/Standard Modes: High-power modes consume more energy. For regular maintenance cleaning, using standard or eco modes can significantly extend runtime and reduce the strain on the battery.
- Regular Updates: Ensure your vacuum’s firmware is up-to-date. Sometimes, software updates include battery management optimizations.
- Environmental Control: Store and operate the vacuum within recommended temperature ranges.
When To Consider Battery Replacement
If your Narwal is still under warranty and experiencing significant battery issues, contact Narwal support. Outside of warranty, if the battery life has drastically decreased, replacement might be necessary. You can often purchase replacement batteries directly from Narwal or authorized third-party suppliers.
Replacing the battery yourself can be possible for some models, but always consult detailed guides and exercise caution to avoid damaging the device.
Advanced Troubleshooting And Maintenance Tips
Beyond the common issues, a few advanced strategies and consistent maintenance routines can keep your Narwal operating at peak performance and help prevent problems before they arise. Proactive care is often more effective than reactive troubleshooting.
Regular Cleaning And Part Replacement
The longevity and effectiveness of your Narwal depend heavily on the cleanliness and condition of its components.
- Dustbin and Filters: Empty the dustbin after every cleaning cycle. Clean or replace the filters regularly (HEPA filters typically need replacement every 2-3 months, depending on usage and environment). Clogged filters reduce suction power and can strain the motor.
- Brushes: Remove the main brush and side brushes periodically to clean off tangled hair, threads, and debris. Ensure the brushes can spin freely. Replace worn-out brushes, as they become less effective at picking up dirt.
- Mop Pads: Wash the mop pads after each use, either by hand or using the station’s self-cleaning function. Replace them when they show signs of wear, such as thinning fabric or fraying edges.
- Sensors: As mentioned earlier, regularly wipe down all sensors (Lidar, cliff, wall, bumper) with a soft, dry cloth.
- Water Tanks: Clean both the clean and dirty water tanks regularly to prevent mold, mildew, and odors. Use mild soap and water, ensuring they are thoroughly dried before reassembly if necessary.
Firmware Updates And App Management
Keeping software current is crucial for optimal performance and bug fixes.
- Scheduled Updates: Enable automatic firmware updates if available, or make it a habit to check for updates monthly through the Narwal app.
- App Permissions: Ensure the Narwal app has all necessary permissions on your smartphone (e.g., location services, Bluetooth) which can sometimes be required for seamless operation and connectivity.
Resetting The Robot
If you encounter persistent software glitches that basic troubleshooting doesn’t resolve, a factory reset might be necessary.
- Factory Reset: This will erase all custom settings, maps, and Wi-Fi configurations, returning the robot to its original state. You will need to set it up again from scratch. The procedure for a factory reset varies by model; consult your user manual. Typically, it involves holding down specific buttons on the robot for an extended period. Use this as a last resort before contacting customer support.
Seeking Professional Help
If you’ve exhausted all troubleshooting steps and your Narwal robot vacuum is still not functioning correctly, it’s time to contact Narwal customer support.

