

How often should you service a shop vacuum? The short answer is: check the filter every few tank empties, then give the whole machine a deeper look every three to six months. That's the general rule, but the real schedule depends on the job.
Sawdust, drywall dust, and water each change the math.
Manufacturer specifications indicate that most residential wet/dry vacuums handle regular filter cleaning without needing replacement for at least a year. OSHA's guidance on respirable silica dust, though, raises the stakes for anyone doing construction cleanup. Let's break down the signs, the schedules, and the five-step service routine that actually works.
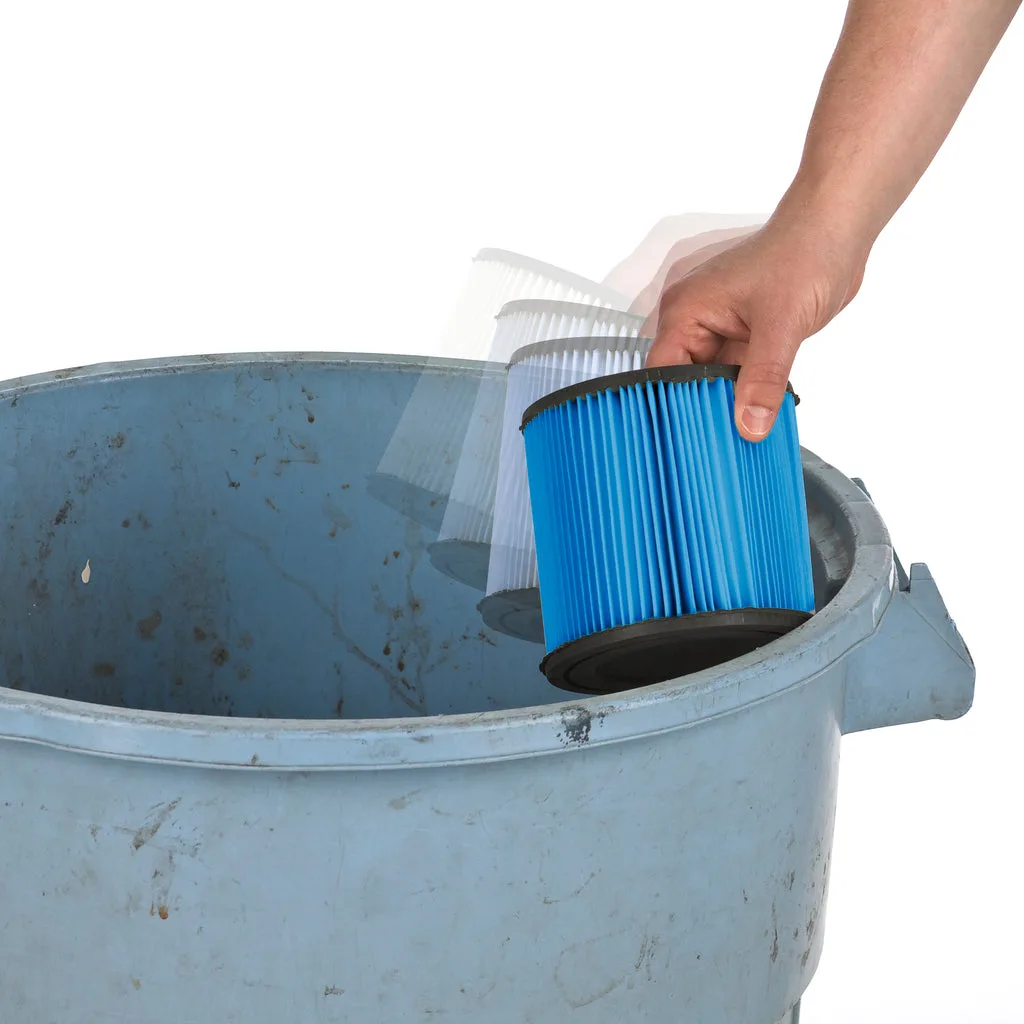
Image source: Bing (Web (fair-use with source credit))
Quick Answer
Service a shop vacuum when suction drops. Check the filter after every three tank empties. Replace it based on how heavy the work is.
Wet pickup needs immediate drying. Heavy jobsite use demands weekly attention.
When Is It Time to Service Your Shop Vac? (Signs You're Already There)
Your shop vacuum doesn't have a dashboard light. It has symptoms. The trick is knowing which signs mean "clean the filter" and which ones mean something is actually broken.
- Suction drops noticeably. If a pickup that used to take a minute now takes three, the filter is likely clogged. This is the most common signal, and the same warning appears in other vacuum systems like pool cleaners.
- The motor sounds higher pitched. That straining whine means the motor is working harder to pull air through a blocked path. Stop using it immediately.
- Dust blows out of the exhaust. The filter has failed or it's so packed that debris is bypassing the media. This is a health hazard, not just a nuisance.
- There's a musty or sour smell. That's leftover moisture in the tank, filter, or hose, and mold is already growing.
- The tank is visibly full. Most shop vacuums have an automatic shut-off, but relying on it is a bad habit. Empty the tank well before it reaches the rim.
If you see any of these, the fix is usually simple. But the key is understanding which part needs attention.
What Actually Needs Servicing on a Wet/Dry Vacuum
A shop vacuum has five main service points. Ignore any of them and the whole system works worse. Here's what's actually inside the machine and what you need to inspect.
The Filter System: Cartridge vs. Foam Sleeve vs. Disposable Bag
The filter is the heart of the vacuum. Cartridge filters are the most common, and they work for both wet and dry pickup, though they need thorough drying after wet use. Foam sleeves are lighter duty and are often used as a secondary layer for finer dust.
Disposable bags capture most of the debris and keep the filter clean for much longer. If you're working with drywall dust or fine sand, use a bag.
The Tank, Gaskets, and Latches
The tank itself needs regular rinsing, especially after wet pickup. Gaskets on the lid and latches can dry out, crack, or let air leak. A small air leak kills suction quietly, so check these areas every time you empty the tank.
The Float Valve, Hose, and Motor Intake
The float valve is your safety net. It rises and cuts suction when water hits a certain level, protecting the motor. If it's stuck, you can flood the motor.
The hose and wands also need visual inspection for blockages and tears. A clogged hose causes the same suction loss as a dirty filter. The motor intake is an often-forgotten spot, so look at the fan area for built-up dust.
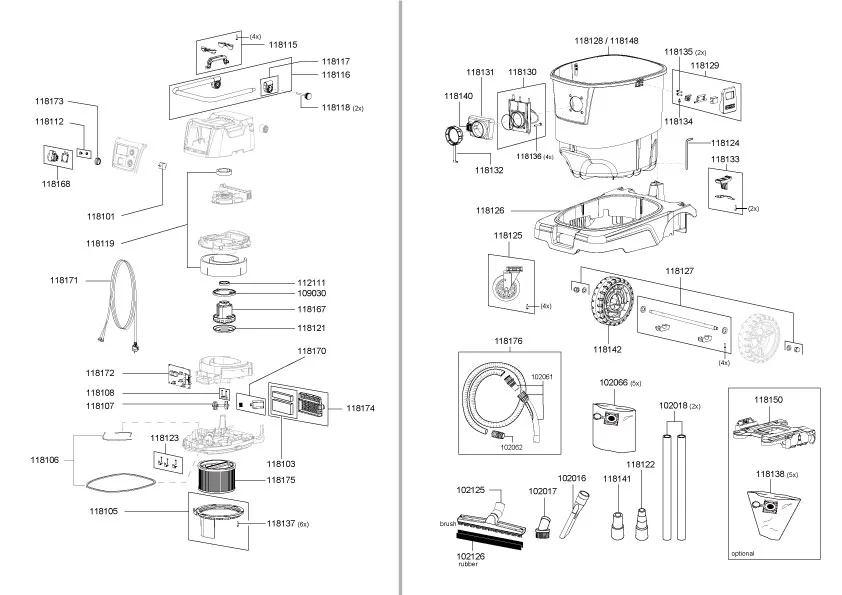
Image source: Bing (Web (fair-use with source credit))
The Real Answer Depends on Your Usage
There is no single "right" interval. Instead, there are four usage profiles. Figure out which one matches you, then follow the corresponding schedule.
If you switch between profiles, service at the stricter rate.
Light Home Use: Tidy Garage, Occasional Car Cleanup
You run the vacuum once every couple of weeks. You pick up dry leaves, a spilled bag of soil, or maybe some crumbs from the car. In this case, check the filter every month and give it a tap-out when it looks dusty.
Empty the tank when it's about half full, and you'll be fine.
Workshop Duty: Sawdust, Wood Shavings, and Everyday Tool Dust
This is the classic shop vacuum on a table saw situation. Sawdust looks fine, but it packs down and clogs filter pores quickly. Expect to clean the filter every two to four tank empties.
Empty the tank before each session if you're doing serious woodworking.
Heavy Jobsite Use: Drywall, Concrete, and Contractor-Grade Grime
This is where servicing becomes weekly, sometimes daily. Drywall dust is extremely fine and loads a filter fast. Concrete dust, especially from grinding, contains silica.
OSHA classifies crystalline silica as a serious respiratory hazard, so using a properly maintained HEPA-filtered vacuum is a safety must. Contractors who clean or replace filters after every major job avoid expensive motor failures.
Wet Pickup: The Special Case That Changes Everything
Water is a different beast entirely. After any wet pickup, the foam sleeve or cartridge filter must be removed, rinsed, and dried completely. Mold can start growing within 24 to 48 hours.
The tank also needs a rinse and wipe-down to keep odors at bay.
Quick Reference: Service Schedule by Usage Type
| Usage Profile | Filter Check | Tank Empty | Full Service |
|---|---|---|---|
| Light home use | Every 4 weeks | When half full | Every 3 to 6 months |
| Workshop sawdust | Every 2 to 4 tank empties | After each session | Monthly |
| Heavy jobsite drywall | After every major job | After every major job | Weekly |
| Wet pickup | Immediately after each use | Immediately after each use | After every wet job |
This table is a starting point. Always default to the manufacturer's owner's manual when your vacuum comes with one. The intervals in the manual are based on testing, not guesswork.
How to Service Your Shop Vac in About 10 Minutes
Once you know the schedule, the actual servicing is quick. You won't need specialized tools, just a little water and a free afternoon.
Step 1: Empty the Tank Before It's Full
Unplug the vacuum first. Take the lid off and dump the debris into a trash bag. For wet pickup, pour the water down a drain, then wipe out the tank with a damp cloth.
This step alone prevents most clogs and odor issues.
Step 2: Clean or Replace the Filter the Right Way
Remove the filter carefully. Tap it gently against the inside of a trash can to dislodge loose dust. If it's a cartridge filter and you're doing a deeper clean, rinse it with water from the inside out.
The filter needs to dry for up to 24 hours before you reinstall it, so having a spare is smart. For a disposable bag, replace it when it's about three-quarters full.
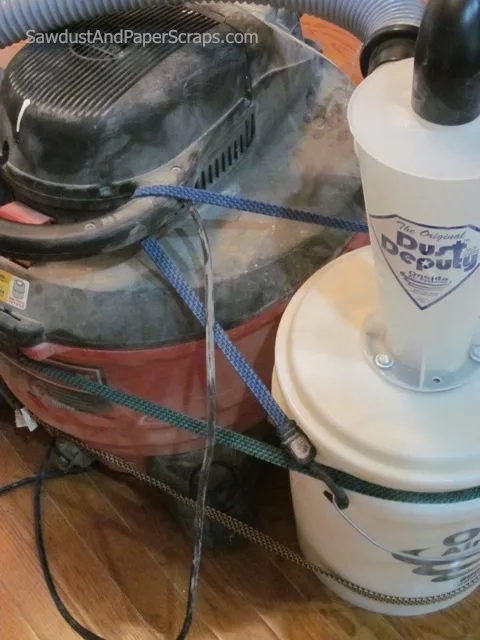
Image source: Bing (Web (fair-use with source credit))
Step 3: Dry Everything Out, No Exceptions
Moisture is the enemy. Whether you cleaned the filter or just did a wet pickup, set the filter and tank in a dry, airy space. Don't snap it all back together while anything is damp.
Step 4: Inspect the Hose, Latches, and Float Valve
Run your hand along the hose to feel for clogs. Check for cracks that could kill suction. Make sure the latches on the lid are snug and that the gasket isn't flattened.
Test the float valve by pushing it up and down. A tiny blockage here can lead to a flooded motor.
Step 5: Run a Suction Test Before Storing
Plug the vacuum back in and place your hand over the end of the hose. You should feel strong, steady pull. If it feels weak, recheck the filter seating and inspect the hose again.
Once everything's good, coil the hose and you're done.
Pro Tips for Making Filters Last Longer
The easiest way to save money on shop vacuum parts is to treat the filter like a consumable, not a permanent fixture. A few small habits will stretch its life considerably.
Tap, don't bang. When the cartridge filter looks dusty, tap it gently against a trash can. Aggressive banging can crack the pleats and collapse the paper folds. One careless thump can ruin a $30 filter in seconds.
Brush the pleats. A soft paintbrush or dedicated filter brush works wonders. Run it along the grooves to lift embedded dust. This works far better than compressed air, which pushes particles deeper into the media.
Use a pre-separator for big jobs. If you routinely vacuum sawdust, drywall chunks, or tool debris, add a cyclone separator in front of the vacuum. It spins the heavy stuff into a separate container before it reaches the filter. This single accessory can double or triple filter life.
Know when the foam sleeve is enough. A foam sleeve alone works for coarse dust and wet pickup. For fine powders like drywall joint compound, you need a cartridge filter or a disposable bag. If you see dust blowing out of the exhaust, upgrade the filter setup before you run the motor again.
Never mix wet and dry filters. A foam sleeve that's been used for water will clog instantly when you switch to dry debris. A cartridge filter packed with drywall dust will turn to mud if you vacuum water with it. Always switch back and forth or use a dedicated setup for each task.
Common Mistakes That Kill Shop Vacuums
Most shop vacuum failures are not manufacturing defects. They're user errors that repeat over time. Skip these mistakes and your vacuum will outlive every tool in the shop.
Running it with a clogged filter. The motor works harder, overheats, and eventually burns out. It doesn't matter how tough the brand is. Motors need airflow to stay cool.
Vacuuming water with the wrong filter. If you use a dry paper cartridge for wet pickup, it falls apart within seconds. Always swap in a foam sleeve or a wet-rated cartridge first. This is the single most common reason a shop vac dies mid-job.
Leaving wet debris in the tank. That leftover puddle turns into stagnant water, odor, and corrosion. Dump the tank and wipe it out after every wet job.
Ignoring the float valve. The float valve is your motor's last line of defense. If it gets stuck in the down position, water reaches the motor. Check it every time you empty the tank.
Push it up and down to make sure it moves freely.
Forgetting about the hose. The filter gets all the attention, but the hose is where blockages hide. A lump of debris can cut suction in half while the filter looks clean. This is similar to a collapsed pool vacuum hose, where the restriction isn't at the source but somewhere along the line.
Run a quick check before you pull the filter apart.
Skipping the bag with fine dust. A bag captures the fine particles that would otherwise clog the filter instantly. If you're doing drywall or sanding work, use one. Yes, it costs a few dollars, but it saves you from buying filters twice as often.
Service Costs: What's Worth Replacing vs. Fixing
Filter prices vary widely depending on type and brand. You don't need the most expensive option for every job, but you do need the right one.
| Filter Type | Typical Price Range | Best For |
|---|---|---|
| Foam sleeve | $5 to $15 | Wet pickup, coarse debris |
| Standard cartridge | $15 to $40 | General-purpose dry use |
| HEPA cartridge | $30 to $80 | Fine dust, renovation work |
| Disposable bag (pack) | $10 to $25 | Drywall dust, extended filter life |
When to replace vs. clean. Clean a filter if it still has shape and the pleats aren't torn. Replace it if you see holes, if the paper looks warped, or if you've been doing heavy fine-dust work. Once drywall dust packs into the media, no amount of tapping will get it out.
When replacement parts are a waste. If the motor itself has failed, stop spending money on filters. A new shop vacuum can cost less than a motor rebuild. A mid-range carton of replacement filters plus labor will exceed the price of an entry-level machine.
The one cheap fix that saves money. A new gasket or latch costs under $10. It restores the lid seal and fixes quiet suction leaks. If you see air escaping around the lid, replace the gasket before anything else.
Safety Notes: Fine Dust, Combustible Materials, and Wet Pickup
Shop vacuums are powerful tools, but they're also a source of risk when misused. Here's what matters.
Fine dust is a health hazard. Crystalline silica from concrete grinding and drywall dust are both dangerous to breathe. OSHA sets strict exposure limits for respirable silica. A standard shop vacuum will blow fine particles back into the air unless it has a proper HEPA filter that's clean and correctly sealed.
Never vacuum flammable liquids. Gasoline, solvents, acetone, and any fuel vapors can ignite inside the motor. Shop vacuums are not rated for that use, and some explosions have caused serious injuries. It's simply not worth the risk.
Hot ash is a fire hazard. Ash from a fireplace or grill may look cold but still contain embers that can smolder for hours inside the tank. Empty the tank immediately and check for any glowing spots.
Wet pickup requires GFCI protection. A ground-fault circuit interrupter outlet is essential when water is involved. If your garage isn't equipped with GFCI receptacles, use a GFCI adapter or extension cord. Local electrical codes in most regions require this for damp locations.
Keep the float valve clean. A stuck float valve can let water reach the motor. Clean the float chamber regularly, especially if you pick up debris that could jam the mechanism.
FAQs: Quick Answers for Common Situations
Can I wash my cartridge filter in a bucket of water?
Yes, but only if the filter is rated for it. Rinse with water flowing from the inside out to flush out embedded dust. Then let it dry completely, which takes up to 24 hours.
Never reinstall a damp cartridge, since moisture collapses the media and leads to mold.
How do I get rid of the musty smell after wet pickup?
Rinse the tank with warm water and a small amount of mild soap. Wipe it dry and leave the lid off to air out. Remove and clean the filter as well.
If the smell persists, replace the filter. The odor is mold, and it won't go away on its own.
Does running a shop vacuum without a filter ruin the motor?
Yes. Debris and dust get pulled directly into the impeller and motor. They scratch the fan surfaces, clog cooling pathways, and eventually burn out the motor.
Never run the vacuum even for a second without a filter installed.
How long does a shop vacuum motor actually last?
With regular filter cleaning and proper tank emptying, a motor typically lasts between 500 and 1,000 hours of use. Skipping maintenance can cut that down to a fraction of the time. The motor is the most expensive part of the machine, so protecting it is always the smart move.
The Bottom Line: A Simple Servicing Rhythm That Works
If You Remember Only One Number, Make It This One
Check the filter after every three tank empties. That single habit catches most problems before they turn into repairs. A quick look prevents a costly failure.
The 5-Minute Weekly Habit That Saves Expensive Repairs
Once a week, empty the tank, tap the filter, inspect the hose, and glance at the float valve. That's genuinely all it takes. Match your servicing rhythm to how you use the vacuum, respect the wet and dry filter rules, and your shop vac will pull its weight for years.
Regular five-minute upkeep beats expensive repairs every time.

