

How do you unclog a shop vacuum hose? If you're asking, you've probably already heard that whine of a motor running at full tilt while the hose sits dead in your hand. It's frustrating, but the fix is usually simple.
Most clogs happen in the hose itself, not the tank, and clearing one takes about ten minutes.
Manufacturer specifications for wet/dry vacuums list hose diameters from 1.25 to 2.5 inches and lengths from 6 to 20 feet. Those ribbed interiors create plenty of spots where debris can catch and pack solid. As of 2026, the same basic design remains standard across major brands, so this unclogging process applies to nearly any shop vac.
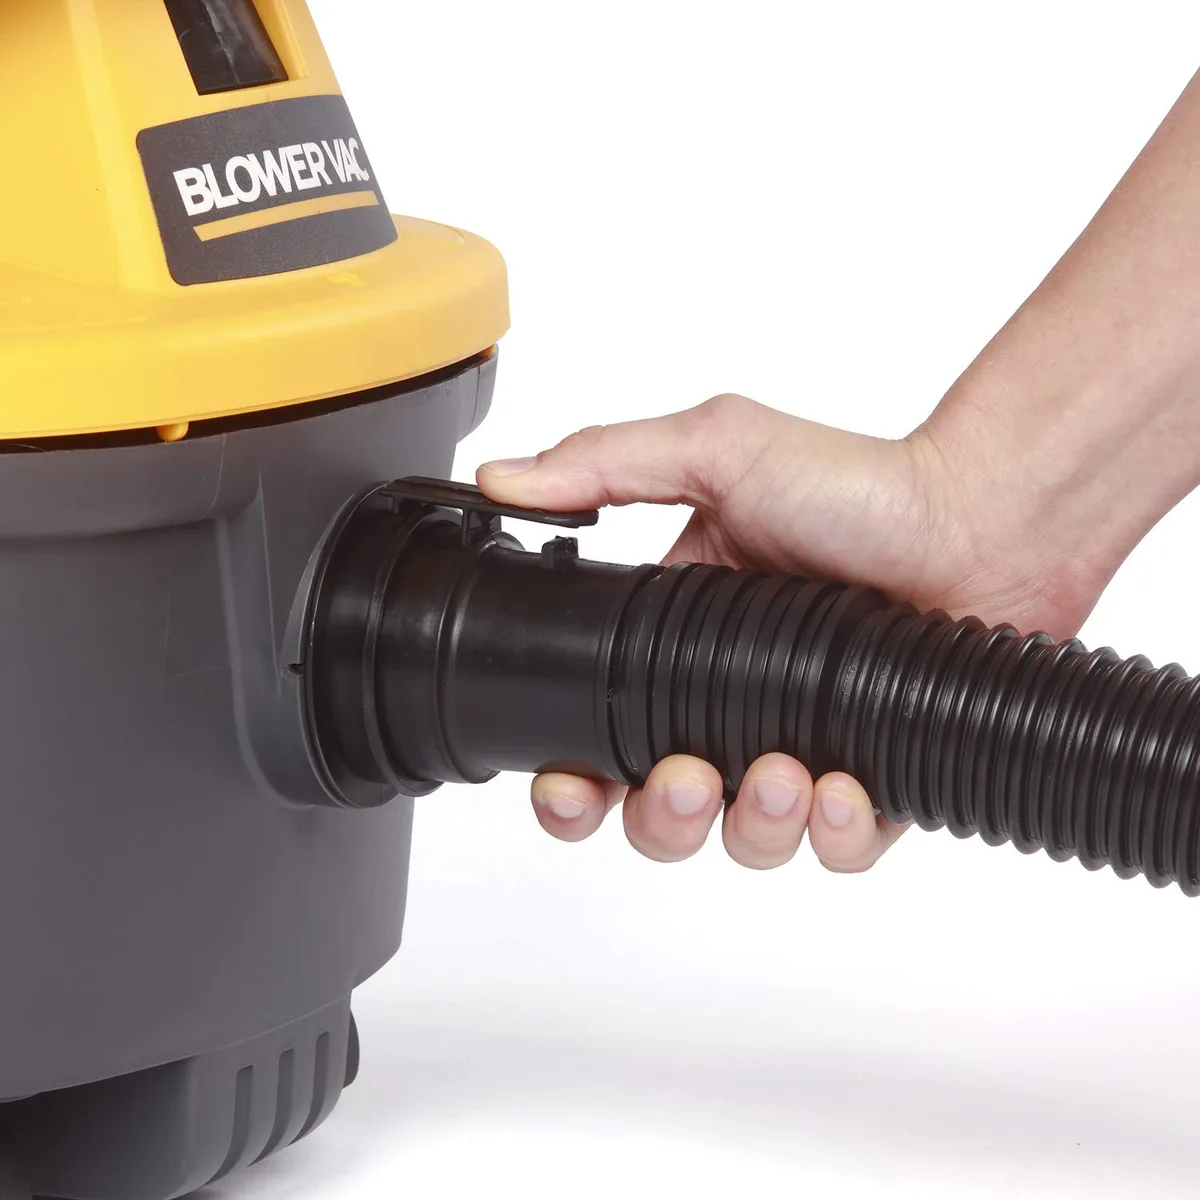
Image source: Web (Bing) / bidfta.com (Web image (fair-use with source credit))
Why Did My Shop Vac Suddenly Lose Suction?
A shop vac that loses suction almost always has one of three problems: a clogged hose, a caked filter, or a tank so full the float valve has shut. The hose is the easiest place to start, because you can inspect it visually from both ends.
Dry sawdust, drywall dust, and wood shavings are the usual culprits. They pile up inside the ribbed walls and form a plug that blocks airflow completely. Wet material like paint sludge, mud, or saturated leaves can pack even harder, turning into a solid mass that refuses to shake loose.
If the suction drops gradually, suspect a dirty filter. If it dies all at once, look at the hose first. A sudden stop usually means a physical blockage, not a surface film.
The same logic applies to your pool vacuum suction problems, though wet debris behaves differently.
The 30-Second Check Before You Touch the Hose
Stop before you start poking things into the hose. The first move is to unplug the vacuum. Do not skip this step, even if the unit is off.
Some machines hold a charge in the capacitor, and a metal rod can deliver a nasty shock.
Once it's unplugged, go through this quick list:
- Remove the hose from the tank and check the inlet port for debris.
- Look inside the tank. Is the float cover stuck? Is the filter wrapped in dust?
- Check the attachments. A clog in the crevice tool or floor nozzle can mimic a hose blockage.
- Give the hose a shake. If you hear something rattling, the clog is likely loose.
If all of those check out, the hose is still the suspect. Set the vacuum aside and move to the next step.
How Shop Vac Hoses Actually Clog
Understanding the clog type tells you which method will work fastest. There are three basic categories.
Dry Debris Clogs
Dry sawdust, wood chips, nails, and spilled rice all fall into this group. These particles tumble through the hose and settle at bends or where the hose connects to the tank. Because they are loose, they often respond to gravity.
Just straighten the hose and tap it along the length.
Wet Sludge Clogs
Thick mud, paint residue, wet drywall compound, and flooded-lumber debris stick to the ribbed walls. Over time, layers build up and narrow the opening. These clogs need water, pressure, or a rod to break the bond.
Fine Dust Plugs
Drywall dust is the sneakiest. It packs into the corrugation ridges like sand in a carpet. The hose may look clear from both ends, but airflow still dies.
This type responds best to flushing or blowing out.
If you've ever dealt with a hose collapse issue, the feel is similar. The system is struggling, but the cause is structural, not mechanical.
Match the Clog to the Unclogging Method
There is no single best technique for every shop vacuum clog. The right move depends on what you vacuumed last.
| Clog Type | What You'll Feel | Best Method |
|---|---|---|
| Dry and loose | Shake the hose, hear debris moving | Tap and gravity, then probe |
| Packed and hard | Nothing moves when you shake | Rod, broom handle, or plumbing snake |
| Wet and slimy | Heavy hose, stuck to itself | Water backflush, then dry |
| Fine dust | Hose looks clean, no airflow | Reverse airflow or blow out |
| Fully sealed | No sound passes through the hose | Probe, or second vacuum |
For stubborn plugs, the plumbing snake is the workhorse. It flexes around bends and grabs debris without tearing the inner wall.
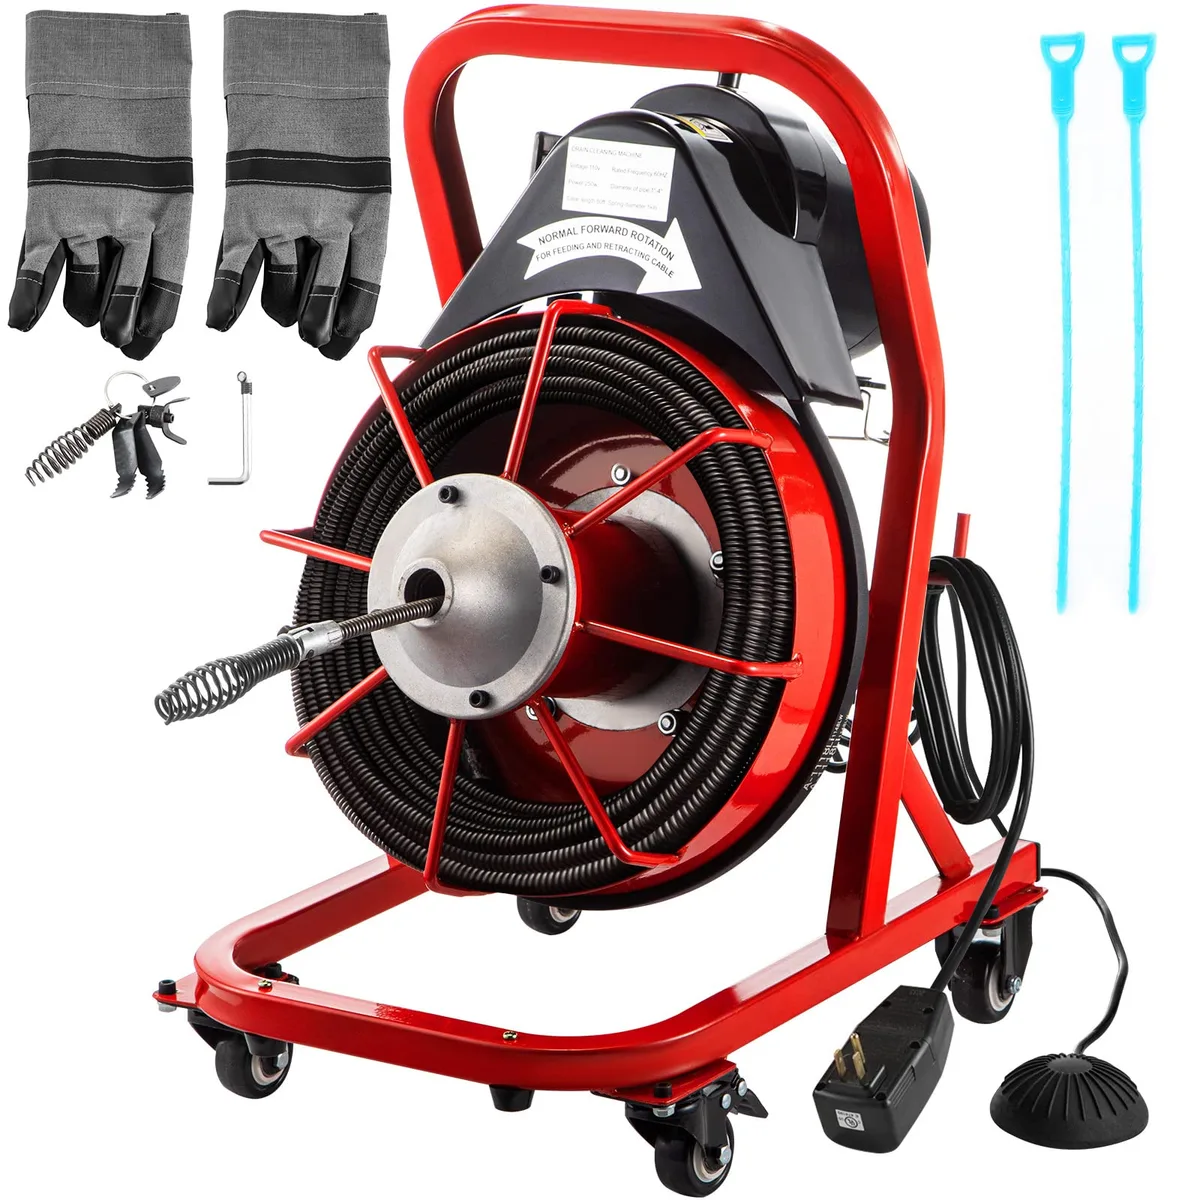
Image source: Web (Bing) / storage.googleapis.com (Web image (fair-use with source credit))
If you need a more delicate approach for a similarly clogged pool vacuum head, the same rod-and-feed technique works there.
Step-by-Step: How to Clear a Clog Safely
Once you know the clog type, the process is straightforward. Work through these steps in order.
- Disconnect the hose. Remove it from the tank and separate any extension wands.
- Inspect both ends. Look through the openings. A dry clog is often visible near the cuff.
- Straighten the hose. Lay it on the garage floor or driveway. Less bends means less friction.
- Knock out loose debris. Hold one end low, grip the hose mid-length, and tap along the outside with your hand. Let gravity do the work.
- Probe from the wider end. If the hose fitting is tapered, the wider end gives you more room to push the clog back toward the opening.
- Flush wet debris. Connect a garden hose to the tank end, run water through, and let it drain out both ends.
After any wet flush, dry the hose completely before reattaching it. Moisture inside a hose can cause mold and can also make the next clog stick harder.
Keep a close eye on the motor during testing. If the vacuum still runs rough after clearing the hose, check the filter next. A saturated foam sleeve can choke airflow just as easily.
How to Probe Without Damaging the Hose
Do not use a wire coat hanger. The sharp end can punch a hole through the hose wall. Use a smooth wooden dowel, a long plastic rod, or a plumbing snake.
If you go with a snake, rotate it gently while pushing. That helps the tip work around the plug without catching the ribs.
When to Use Water
For wet sludge clogs, water is your ally. Remove any electrical connections first. Run a steady stream through the hose at the tank end and let it push the muck out the other side.
Some dirt will always cling to the ribbed walls, so repeat the flush until the water runs clear.
When to Use Reverse Air
Most shop vacuums have a blower port on the side of the motor. Connect the hose to that port and power on. The air flows backward through the hose, pushing the clog out the open end.
This works brilliantly for fine dust and dry debris.
Point the open end into a trash bag or toward an open doorway. You do not want a cloud of drywall dust blowing back into your face.
What If the Hose Isn't the Problem?
Before you tear the hose apart, double-check the rest of the vacuum. A clogged filter is the number one cause of weak suction that doesn't improve when you bypass the hose.
- Look at the cartridge filter or foam sleeve. If it's gray with dust, clean or replace it.
- Check the float valve inside the tank. When the tank fills, the float rides up and seals off airflow. If it sticks, the motor revs but pulls nothing.
- Inspect the tank outlet port. Large chips can jam right at the bend where the hose connects.
A filter that's saturated with moisture can also block airflow. Dry it out before running the motor again, or you risk burning it out. Manufacturers rate filters for a specific surface area, and fine dust fills them fast.
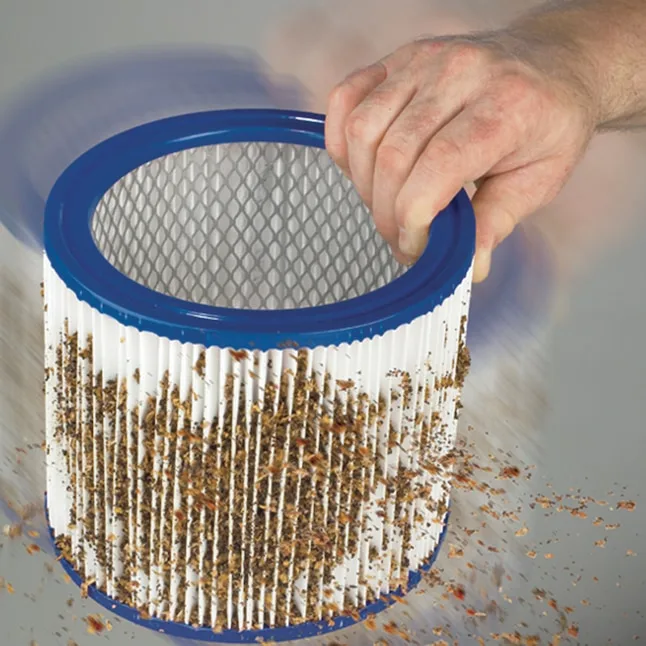
Image source: Bing (Web (fair-use with source credit))
If your shop vacuum has a washable foam sleeve, rinse it and let it dry completely. For a cartridge filter, knock off the dust outside and tap the frame. A quick blast of compressed air from the inside works wonders too.
The same filter maintenance routines apply to many wet/dry machines, even if the design looks different.
Common Mistakes That Make It Worse
Most people fail at unclogging because they grab the wrong tool. A wire coat hanger is the classic culprit. It punches a hole through the hose wall, and then you're buying a new hose anyway.
- Don't push from the narrow end. The clog jams harder as the taper compresses it.
- Don't run the vacuum while the hose is blocked. The motor overheats without airflow.
- Don't ignore the filter. You'll clean the hose, then wonder why the suction still suffers.
- Don't reuse a punctured hose. Splits let debris leak into the motor and cause real damage.
Another common error is using a rod that's too stiff to bend through the corrugated ribs. If the rod gets stuck, you've just doubled your problem. And don't forget to empty the tank before you start.
A full tank triggers the float valve, and you'll chase a clog that doesn't exist.
Also, never vacuum hazardous materials like asbestos or chemical powders without proper filtration. The Occupational Safety and Health Administration (OSHA) has clear guidance on respirable dust exposure for a reason. A shop vacuum without a HEPA filter will blow fine particles straight back into the air.
The Right Tools for Stubborn Plugs
You don't need a specialty kit. Most homes already have something that works.
| Tool | Best For | Avoid If |
|---|---|---|
| Broom handle or wooden dowel | Pushing dry, loose clogs | Locked wet plugs |
| Plumbing snake | Bent hoses and hard plugs | Very sharp edges |
| Garden hose | Flushing wet sludge | You want to keep the floor dry |
| Compressed air nozzle | Blowing out fine dust | The clog sits right at the cuff |
| Stiff wire with a hook | Pulling out rags and socks | The hose walls are thin |
A plumbing snake is the most reliable option because it flexes around curves without catching the ribs. It's the same tool professional cleaners use. Whatever you pick, work from the wider end of the hose so you don't jam the clog into a taper.
Expert Tips for Clearing the Nastiest Clogs
Every shop vac owner eventually meets a clog that feels like concrete. When tapping and probing fail, think about what the clog is made of.
- For dried paint or glue, soak the hose in warm, soapy water for 10 minutes.
- For fine drywall dust, hook the hose to the blower port and let the motor push it out.
- For wet mud, flush from both ends until the water runs clear.
- For rags or socks, use a wire hook to drag them out. Don't try to push them through.
If you're still stuck, run a steady water stream from the tank end. Water softens the plug and moves it along the hose. Keep the hose outside or over a drain, because the release can be messy.
After any deep clean, hang the hose to dry completely. Moisture inside the ribs becomes a breeding ground for mold. A little patience today saves you a musty smell next week.
Preventing Clogs Before They Happen
The easiest clog is the one that never forms. A few habits will keep your shop vac running at full power.
- Empty the tank before it's three-quarters full.
- Clean the filter regularly, especially after drywall jobs.
- Use a separator or bucket to catch large debris before it hits the hose.
- Store the hose coiled loosely, not folded under a workbench.
When vacuuming fine dust, slow down. Moving the nozzle too fast creates a burst of air that pushes debris forward and lets it pack into the ribs. Regular upkeep habits are just as important for your shop vac as they are for any vacuum you rely on.
If you notice a clog starting, stop and clear it early. A small plug takes minutes to remove. A packed one can turn a 10-minute cleanup into an hour-long fight.
When to Buy a New Hose Instead
Not every hose deserves a second chance. If you spot cracks, deep cuts, or a permanently flattened section, that hose is toast. A kinked ribbed wall can't be reshaped, and the tear will only get worse under suction.
Fix a punctured hose with electrical tape only as a temporary stopgap. The tape won't hold under continuous use, especially with hot air passing through. Replacement hoses are affordable, typically running between $10 and $50 depending on diameter and length.
Match the new hose to your vacuum's fitting style. Some brands use a bayonet lock, others use a tapered cuff. Check your owner's manual for the exact diameter, usually 1.25, 1.5, or 2.5 inches.
The wrong size won't seal, and you'll chase vacuum leaks all day.
If you have a suction-side pool vacuum hose, the same replacement logic applies. A cracked hose will never hold a clean seal.
Quick Decision Guide
Use this cheat sheet when the suction goes weak. Match your situation to the right fix.
| Situation | First Move | If That Fails |
|---|---|---|
| Dry sawdust, sudden loss | Shake and tap the hose | Probe with a broom handle |
| Fine drywall dust | Blow out with the blower port | Water flush |
| Wet sludge or mud | Flush with a garden hose | Soak and probe |
| Rag or sock stuck | Use a wire hook | Probe from the other end |
| No clog in hose, still weak | Clean or replace the filter | Check the tank float valve |
Start with the cheapest, safest option and escalate only if needed. Most clogs clear on the first attempt.
Frequently Asked Questions
Can I use a coat hanger to unclog my shop vacuum hose?
A wire coat hanger is risky. Its sharp end can puncture the hose wall, especially at the ribbed corrugation. Use a smooth wooden dowel or a plumbing snake instead.
They flex around bends without causing damage.
Should I run water through my shop vacuum hose to unclog it?
Yes, backflushing with a garden hose works well for wet sludge, mud, and fine dust. Make sure the vacuum is unplugged and the hose is separated from the tank. Dry the hose completely before reattaching it so mold doesn't form inside.
Why does my shop vac lose suction but the hose is clear?
A clear hose means the blockage sits elsewhere. Check the filter first. A dust-caked cartridge or saturated foam sleeve will choke airflow.
Next, inspect the tank inlet and the float valve. A full tank will trigger the float and kill suction entirely.
How often should I clean my shop vacuum filter?
Clean the filter whenever suction drops noticeably or after every heavy drywall job. Knock off loose dust after each use, and wash the foam sleeve weekly if you vacuum wet material. A clean filter protects both airflow and the motor.
Can a shop vacuum hose be repaired with tape?
Duct tape works only as a short-term fix. The tape won't seal tightly as the hose bends, and vacuum pressure can pull it loose. Replace the hose if the damage is more than a tiny pinhole.
The cost of a new hose is far less than a damaged motor.

