

Image source: Bing (Web (fair-use with source credit))
Getting your above-ground pool ready for swimming after a long winter can feel like a big project, but breaking it down makes it manageable. Knowing exactly how to open an above ground pool after winter ensures you’re not only ready for that first splash but also protecting your investment. This guide walks you through the essential steps, from initial checks to getting your water crystal clear and balanced.
We'll cover what to look for, the tools and chemicals you'll need, and the common mistakes that can turn your opening day into a headache. By following these recommendations, you can confidently transition your pool from its winter slumber to a backyard oasis.
Quick Answer
To open an above ground pool after winter, remove the cover, clean it thoroughly, then clear debris from the pool. Inspect the liner and plumbing for damage. Reassemble and prime the pump and filter system.
Test water chemistry and add necessary chemicals to balance pH and sanitize.
When Can You Actually Open Your Above Ground Pool After Winter?
There's no single calendar date for opening your pool; it really comes down to your local climate and the weather. The biggest clue is when nighttime temperatures consistently stay above freezing, ideally above 50°F (10°C), for at least a week. This helps prevent damage to equipment and allows chemicals to work effectively.
Many pool owners aim for late March to late May, depending on their region.
The most crucial factor is ensuring the ground around your pool has thawed sufficiently and that there's no risk of frost. Manufacturer specifications for many pool pumps suggest priming should only be attempted when ambient temperatures are consistently above 40°F (4.4°C) to avoid condensation issues that could affect electrical components. Waiting until the weather is consistently warm is key to a smooth opening process.
First Things First: Assessing Your Pool's Winter State
Before you even think about adding chemicals or turning on the pump, a thorough inspection is critical. This stage is all about understanding what you're working with and identifying any potential issues that winter might have caused. It's essentially a pre-flight check for your pool.
Is Your Cover In Good Shape?
Your winter cover has been your pool’s shield against the elements. Now it’s time to see how it held up. Look for any tears, holes, or signs of significant wear.
Even small rips can let in debris or pests, which you definitely don't want making a home in your pool.
- Material Integrity: Check for brittleness or degradation of the cover material, especially if it's older.
- Seams and Grommets: Ensure all seams are intact and any grommets or attachment points are secure.
- Drainage (if applicable): If your cover had a pump or drainage system, make sure it’s clean and functional.
Cleaning the cover is a vital step. As soon as you remove it, spread it out on a clean, flat surface like a driveway or lawn. Use a soft brush and a mild detergent or a specialized pool cover cleaner to remove dirt, mildew, and any organic matter.
Rinse it thoroughly and let it air dry completely before storing it. Storing a damp cover can lead to mold and rot, making it useless for next winter.
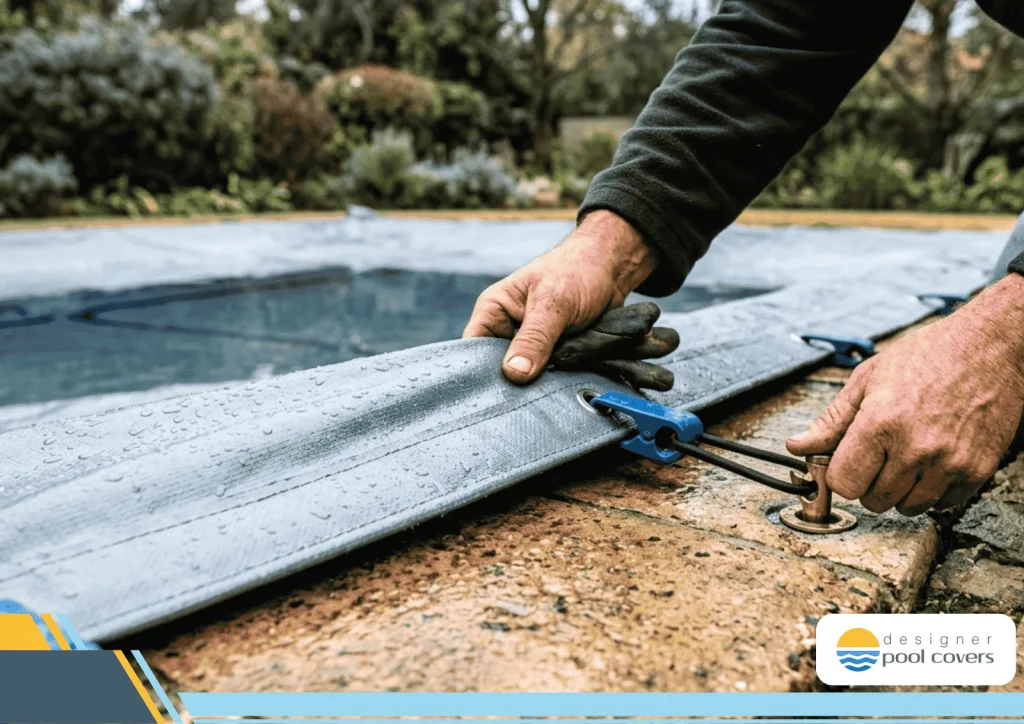
Image source: Bing (Web (fair-use with source credit))
Any Signs of Damage to the Pool Itself?
With the cover off, you can get a clear view of your pool's liner and structure. Gently inspect the vinyl liner for any rips, punctures, or excessive fading. Pay close attention to the seams where the liner meets the top rails and the vertical supports.
These areas can sometimes be stressed over winter.
- Liner Condition: Look for any visible damage or areas that seem loose or stretched.
- Frame and Supports: Check the metal frame, top rails, and vertical supports for rust, bending, or corrosion. Ensure all connections are secure.
- Skimmer and Return Fittings: Inspect the skimmer opening and return fittings for any cracks or damage. These are common spots for winter ice to cause issues if not properly prepared.
If you spot any minor tears in the liner, you might be able to patch them before filling the pool. Larger or more significant damage could mean a liner replacement is needed. Addressing frame damage is also important for the structural integrity of the pool.
The Big Clean-Up: Dealing with Winter's Mess
Once you’ve assessed the condition of your cover and the pool structure, it’s time for the actual clean-up. This phase is all about removing the accumulated gunk from winter and preparing the pool for fresh water.
Removing the Winter Cover
This is often a two-person job, especially for larger pools. Carefully begin rolling or folding the cover towards the center of the pool. If you used a water bag system, remove the bags first.
If you have a safety cover, follow the manufacturer’s instructions for removal and storage.
- Work methodically: Roll or fold the cover in sections.
- Avoid dragging: Try not to drag the cover across the ground, as this can cause damage.
- Designated storage: Have a clean space ready for the cover to dry completely before storing it.
Cleaning the cover is a vital step. As soon as you remove it, spread it out on a clean, flat surface like a driveway or lawn. Use a soft brush and a mild detergent or a specialized pool cover cleaner to remove dirt, mildew, and any organic matter.
Rinse it thoroughly and let it air dry completely before storing it. Storing a damp cover can lead to mold and rot, making it useless for next winter.
Tackling Debris in the Pool
With the cover off, you’ll likely see leaves, twigs, and other organic debris that have found their way into your pool. You'll need a pool leaf rake or a skimmer net for this. Start by removing any large floating debris.
Then, use the net to skim the bottom of the pool.
- Large Debris First: Use a wide leaf rake to scoop out larger items to prevent clogging your skimmer.
- Skim the Bottom: Carefully sweep the pool floor, working towards the skimmer or a central point for easy collection.
- Use a Pool Vacuum: For smaller debris or if the pool is quite dirty, a pool vacuum (manual or automatic) might be necessary. Be cautious if the water level is very low, as you don't want to suck air into the pump.
It's best to remove as much debris as possible before you start filling the pool. This makes the water chemistry balancing process much easier and more effective.
Reconnecting the Heartbeat: Pump & Filter Setup
Your pool’s circulation system, the pump and filter, is its lifeblood. Getting these components reconnected and running correctly is a crucial step in opening your pool. This ensures water can circulate, be filtered, and properly receive chemicals.
Inspecting and Reassembling Your Equipment
Before you connect anything, take a moment to inspect your pool pump and filter. Check the pump for any cracks in the housing or the strainer basket. Ensure the filter is clean; if you have a sand filter, check the condition of the sand and the multiport valve.
For cartridge filters, inspect the cartridge for tears or excessive clogging and clean or replace it as needed.
- Pump Strainer Basket: Remove and clean the pump’s strainer basket. Check for cracks.
- Filter System: For sand filters, check the multiport valve's O-ring and ensure it seals properly. For cartridge filters, remove, clean, and inspect the filter element.
- Plumbing Connections: Ensure all hoses, clamps, and threaded fittings are in good condition. Look for any signs of wear or potential leaks.
When reassembling, make sure all connections are snug but not overtightened, as this can damage threads or seals. Refer to your pool equipment manual for specific reassembly instructions if you’re unsure.
Getting the Pump Primed and Running
Priming the pump means filling its housing and the suction lines with water before starting it. This is vital to prevent the pump from running dry, which can damage the motor.
- Ensure Water Level: Make sure your pool has enough water to cover the skimmer opening, usually at least halfway up the skimmer.
- Open Valves: Open the main drain valve (if applicable) and the skimmer valve.
- Remove Pump Lid: Unscrew the lid of the pump’s strainer pot.
- Fill with Water: Fill the strainer pot completely with water from a hose.
- Replace Lid: Screw the lid back on securely, ensuring the O-ring is properly seated.
- Turn On Pump: Turn on the pool pump. You should hear water being sucked into the system.
- Vent Air: If your pump has an air relief valve at the top, open it slightly until a steady stream of water, not air, comes out, then close it.
- Listen Carefully: Pay attention to the pump’s sound. A high-pitched whine might indicate it's still trying to prime or running dry.
- Check for Leaks: While the pump is running, check all connections for any leaks.
If the pump doesn't prime or maintain prime after a few minutes, turn it off and re-check all connections and the water level.
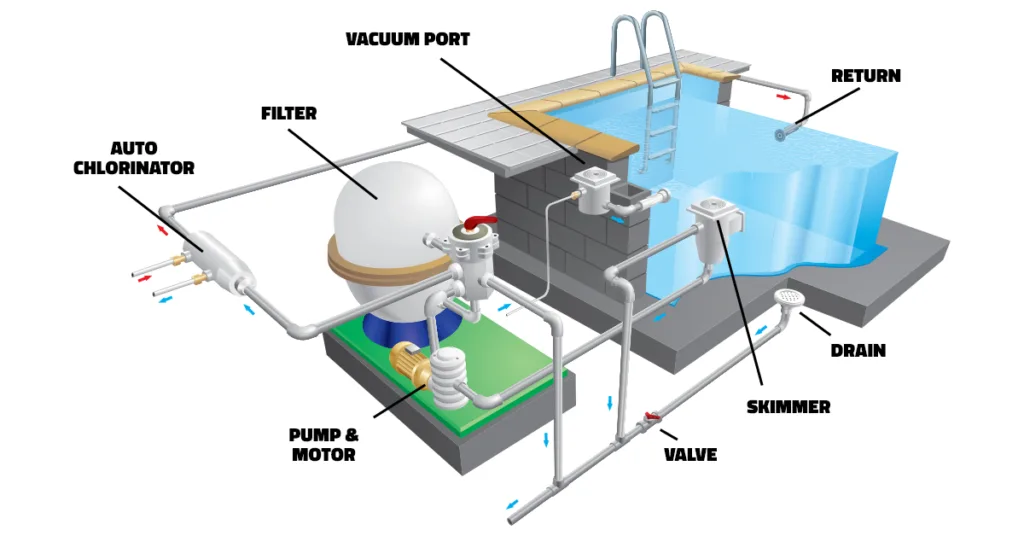
Image source: Web (Bing) / fity.club (Web image (fair-use with source credit))
Re-Introducing Life: Water Balance and Chemicals
Now that your pool is clean and the circulation system is operational, it's time to get the water chemistry right. This is arguably the most critical phase for a safe and enjoyable swimming experience, and it involves precise testing and careful addition of chemicals.
Testing Your Water Chemistry
Before adding any chemicals, you need to know what you’re dealing with. Use a reliable water testing kit, either a liquid reagent kit or good-quality test strips. Test for the following key parameters:
- pH: This measures how acidic or alkaline your water is. The ideal range is typically 7.2 to 7.6.
- Total Alkalinity: This acts as a buffer for pH, helping to keep it stable. The ideal range is usually 80 to 120 ppm (parts per million).
- Chlorine/Bromine: This is your sanitizer, killing bacteria and algae. Free chlorine levels should ideally be between 1 to 3 ppm.
- Cyanuric Acid (Stabilizer): This protects your chlorine from being burned off by the sun. The ideal level is usually 30 to 50 ppm.
If your test kit provides readings for calcium hardness, aim for 150 to 250 ppm for above-ground pools. This helps protect your liner and equipment.
The Shock Treatment: Balancing for the Season
Once you have your test results, you can start adding chemicals. The first major step is often "shocking" the pool. This is done by adding a concentrated dose of chlorine (usually granular shock) to kill any lingering bacteria, algae spores, or contaminants that survived the winter.
- Follow Product Instructions: Always add pool chemicals according to the manufacturer’s instructions for your specific product and pool size.
- Add Slowly: Pour chemicals slowly into the water, ideally near a return jet, to help them disperse quickly. Never mix different chemicals together.
- Circulate Water: Run your pump continuously for at least 24 hours after shocking to ensure the chemicals are thoroughly mixed and distributed.
After shocking, allow the chlorine levels to return to the normal range (1-3 ppm) before swimming. This can take anywhere from 12 to 48 hours, depending on the amount of shock used and water conditions. You may also need to add chemicals to adjust pH and total alkalinity.
If your pH is too high, you’ll add a pH reducer (like muriatic acid or dry acid). If it’s too low, you’ll add a pH increaser (like soda ash). Similarly, adjust total alkalinity with an alkalinity increaser or decreaser as needed.
Re-testing the water regularly after chemical additions is key to achieving and maintaining balance.
Common Pitfalls: Mistakes to Sidestep This Spring
Opening an above-ground pool is pretty straightforward, but a few common mistakes can really complicate things or even cause damage. Being aware of these pitfalls ahead of time will save you a lot of frustration.
- Opening Too Early: Trying to open the pool before the weather is consistently warm can lead to issues. If temperatures drop suddenly, any chemicals you’ve added might not work, or worse, freezing could damage equipment. As a general rule of thumb, wait until your local nighttime temperatures are reliably above 50°F (10°C).
- Skipping the Inspection: Jumping straight into cleaning and filling without thoroughly inspecting the liner, frame, pump, and filter can lead to discovering a major problem mid-process, like a significant liner tear or a faulty pump. This wastes time, water, and chemicals.
- Not Cleaning the Cover Properly: Storing a dirty or damp winter cover can lead to mold, mildew, and a foul smell that can transfer to your pool water. Always clean and dry it thoroughly.
- Over-Chemicalizing or Under-Chemicalizing: Adding too much or too little of a chemical can throw off your water balance, making it unsafe for swimming or causing equipment damage. Always test your water before adding chemicals and follow product instructions carefully.
- Forgetting to Prime the Pump: Running a pump dry can quickly burn out the motor, leading to costly repairs or replacement. Always ensure the pump is full of water before turning it on.
- Not Running the Filter Long Enough: After adding chemicals, especially after shocking, the pump and filter need to run for an extended period to circulate and purify the water effectively. Aim for at least 24 hours of continuous operation.
Essential Pool Opening Checklist
To keep everything organized and ensure you don’t miss a step, using a checklist is incredibly helpful. This list covers the main tasks from start to finish.
- Check local weather for consistent warm temperatures (nighttime consistently above 50°F/10°C).
- Remove winter cover, clean thoroughly, and allow to dry completely.
- Inspect pool liner for tears, holes, or seam damage.
- Inspect pool frame, supports, and top rails for rust or damage.
- Inspect skimmer and return fittings for cracks or wear.
- Remove all large debris from the pool surface and floor.
- Clean pump strainer basket and inspect pump housing.
- Inspect filter: clean cartridge, check sand level, and examine multiport valve/O-ring.
- Reconnect pump and filter, ensuring all plumbing connections are secure.
- Add fresh water to the pool until it reaches at least halfway up the skimmer opening.
- Prime the pump: fill strainer pot with water and start the pump.
- Open air relief valve on filter until water flows steadily, then close.
- Let pump and filter run continuously.
- Test water for pH, total alkalinity, free chlorine, and cyanuric acid.
- Adjust total alkalinity if needed.
- Adjust pH if needed.
- Shock the pool with granular chlorine according to product directions.
- Allow pump to run for at least 24 hours after shocking.
- Re-test water chemistry and adjust free chlorine as needed (target 1-3 ppm).
- Brush pool walls and floor.
- Check for and address any leaks.
- Skim any remaining fine debris.
Frequently Asked Questions About Opening Your Pool
How long does it typically take to open an above ground pool after winter?
Opening an above ground pool usually takes anywhere from a few hours to a full day, depending on the pool’s size, how dirty it is, and whether you encounter any issues. If you’re just doing routine opening, it might be a half-day job. If you have significant debris or need to repair equipment, it could take longer.
When is the earliest I should consider opening my pool?
The earliest you should consider opening your pool is when nighttime temperatures are consistently staying above freezing and ideally above 50°F (10°C). This prevents damage to equipment and ensures chemicals can work effectively. Waiting until the ground has thawed is also important.
Can I use my regular garden hose to fill the pool?
Yes, you can use a standard garden hose to fill your above ground pool. Just make sure the hose is clean and hasn't been used for any chemicals or hazardous materials. It’s a good idea to let the water run for a few minutes to flush out any stagnant water from the hose itself.
What if my pool water is still cloudy after shocking and running the filter?
Cloudy water after opening can be caused by several things. It might mean you didn't shock with enough chlorine, or there’s still organic debris breaking down. You may need to repeat the shocking process, add a clarifier, or run your filter for an extended period.
Ensure your filter is clean and functioning correctly.
Is it safe to swim if my pool water is still a bit green?
No, it's not safe to swim in a green pool. Green water indicates algae growth, which means the water isn't properly sanitized. You need to treat the algae with algaecide and shock the pool, then wait until the water is clear and your chlorine levels are in the safe range (1-3 ppm) before swimming.

