

How do you store a shop vacuum? The honest answer depends on its size, your available space, and how often you use it. Get it wrong, and you'll waste minutes untangling a hose every time you clean up.
You'll also shorten the machine's lifespan.
Manufacturer specs show a full-size 16-gallon wet/dry vacuum can weigh over 40 pounds when full. As of 2026, that weight is the deciding factor in whether you hang it, park it, or build a cart for it. Let's walk through the best storage methods and how to set each one up the right way.
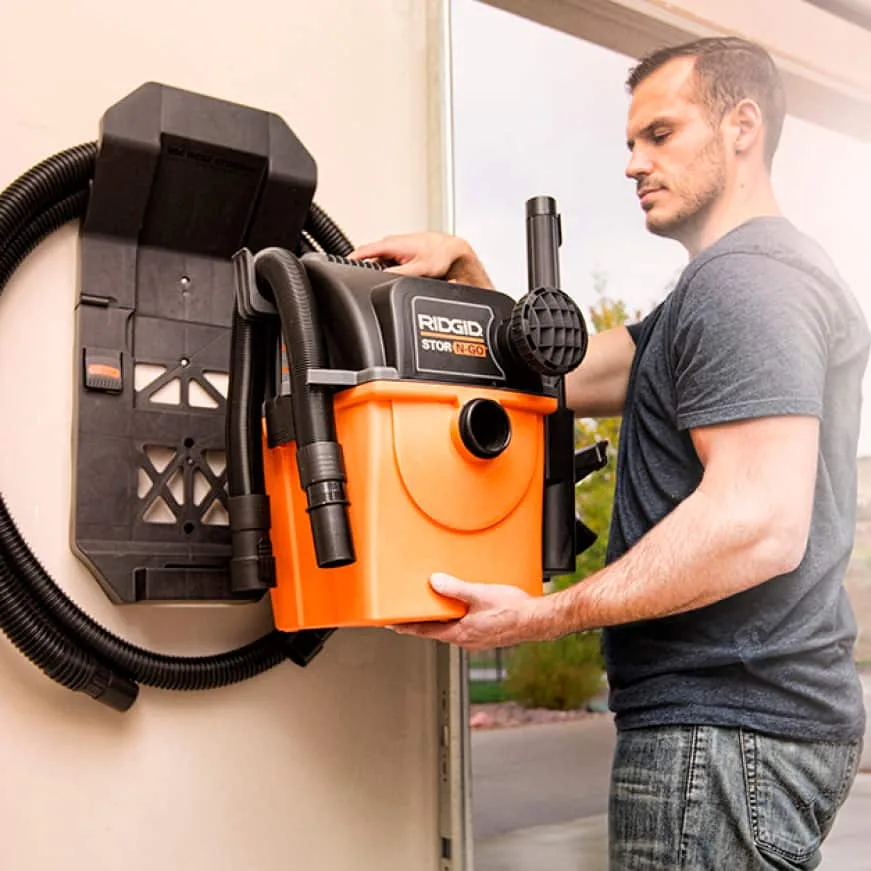
Image source: Web (Bing) / homedepot.com (Web image (fair-use with source credit))
Why Storing a Shop Vac Isn't as Simple as It Looks
The real problem isn't the vacuum body. It's the hose, the cord, and the attachments. The corrugated hose refuses to lay flat, the power cord tangles around casters, and nozzles vanish into toolboxes.
A shop vacuum, also called a wet/dry vacuum, handles sawdust, debris, and standing water. That versatility means the tank collects dirt and moisture. Store it wrong, and you're dealing with mold, clogged filters, and a machine that smells like a swamp.
Your situation changes the answer. A 5-gallon portable unit in an apartment closet doesn't need the same setup as a 16-gallon contractor's model in a garage. A woodshop using the vacuum daily needs faster access than a homeowner who wheels it out once a month.
Quick Answer
Dry the tank, store it upright, and manage the hose and cord. Under 30 pounds with open wall studs, mount it on a bracket. Over 40 pounds, keep it on a rolling cart or the floor.
Match your situation to these methods:
- Tight space + light vacuum → Wall-mounted bracket
- Heavy vacuum + regular use → Rolling cart
- Rare use + open corner → Floor parking
- Workshop + daily cleanup → Built-in workstation
The Four Storage Methods That Actually Work
Every viable solution fits one of these four categories.
Wall-Mounted Bracket Storage
Holds the vacuum vertically on a bracket bolted into wall studs. The hose and cord hang nearby. Best for compact units under 30 pounds in garages or utility rooms.
Lifting a heavy tank overhead violates NIOSH lifting guidelines, so keep the mount at chest height or lower.
Rolling Cart / Workstation Storage
Places the vacuum on a wheeled platform with room for the hose and accessories. Best for full-size units moved around job sites or between workstations. A cart turns a 50-pound machine into something you steer with one hand.
Dedicated Storage Cabinet
Hides the vacuum inside a cabinet or under a workbench cubby. Best for homeowners who want a tidy garage and don't need instant access daily. Wet/dry vacuums stored this way must have a fully dried tank first.
Simple Floor Parking with Cord and Hose Management
Keeps the vacuum in a corner with the hose coiled and the cord wrapped on the handle. Best for occasional use where cost matters and wall space is unavailable. This method relies on routine cleanouts, since the tank stays sealed between uses.
Key Decision Points Before You Choose
Four details drive the decision more than anything else.
Tank Size and Dry Weight
A 5-gallon compact vac weighs 10 to 15 pounds empty. An 8 to 12-gallon model runs 20 to 35 pounds. A 16-gallon unit can hit 50 pounds before you add debris.
Weigh your unit, not just the tank volume, before trusting a wall mount.
| Vacuum Size | Empty Weight (approx.) | Best Storage |
|---|---|---|
| 5-gallon compact | 10–15 lbs | Wall mount |
| 8 to 12-gallon | 20–35 lbs | Wall mount or rolling cart |
| 16-gallon and larger | 40–55 lbs | Rolling cart or floor parking |
Wall Stud Placement
Most bracket bolt patterns match standard 16-inch on-center stud spacing. But not every garage wall has open studs. Older homes sometimes run 24-inch spacing.
Measure the distance between studs before buying a bracket.
Hose Length and Routing
A 6-foot hose stores flat. A 20-foot hose needs serious coil space, and the rubber memory from old kinks makes it worse. Keep the coil natural, not pinched.
Proper hose care avoids collapses like the ones pool vacuum owners face.
Wet Pickup vs Dry-Only Usage
If you vacuum standing water, the tank has to air out after use. Sealing a damp tank breeds mold and ruins the filter. Empty, rinse, dry, then store.
The same preventative care habits that extend a robotic pool cleaner's life apply here.
Hanging It on the Wall: Step-by-Step
Wall mounting is the most popular storage method. Let's set it up correctly.
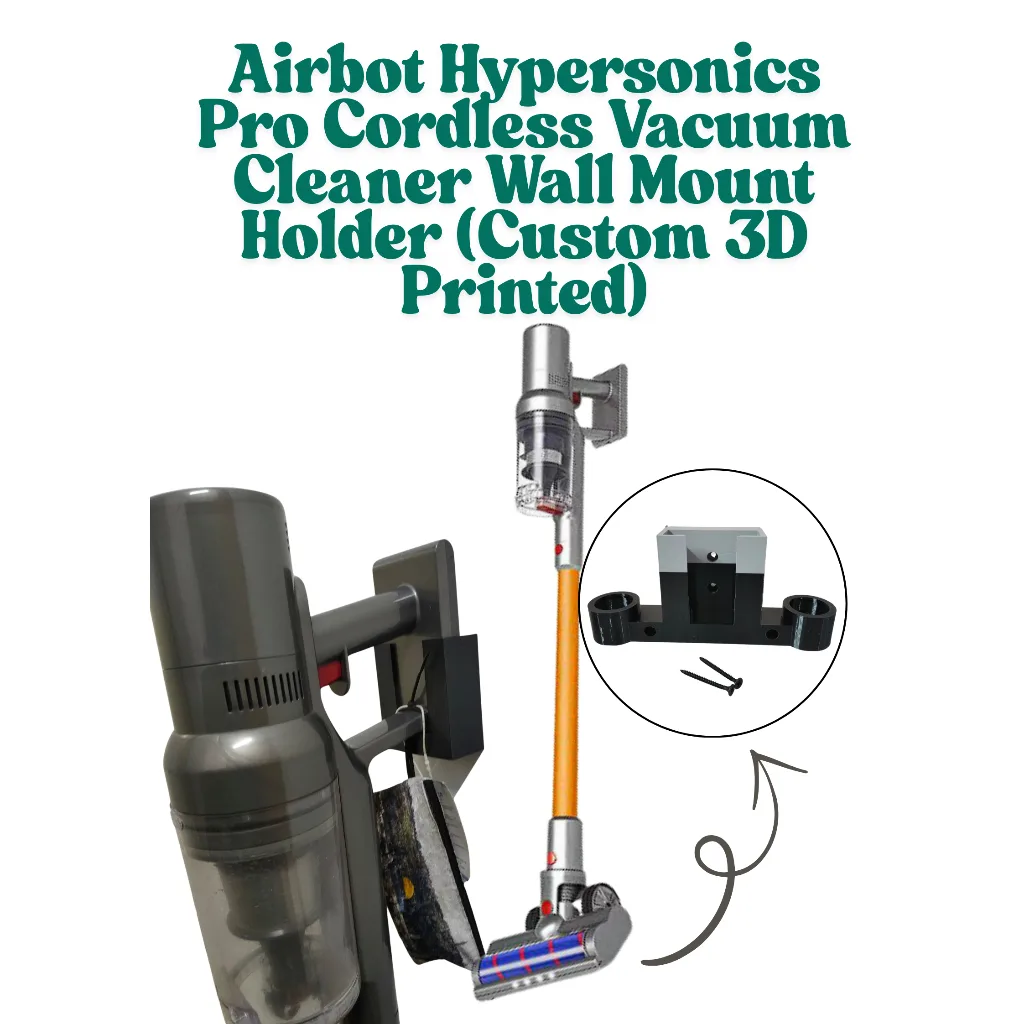
Image source: Web (Bing) / shopee.com.my (Web image (fair-use with source credit))
Step 1: Pick the location.
Choose a wall near a power outlet with at least 12 inches of clearance below the tank. Mounting too high turns every use into a shoulder stretch. Chest height or lower is safer for your back.
Step 2: Locate the studs.
Run a stud finder across the wall and mark both edges of each stud. Most brackets use two bolts spaced for 16-inch studs.
Step 3: Confirm the bracket fits your vacuum.
Check that the bracket's load rating is above your vacuum's empty weight. Confirm the slots line up with the vacuum's handle or lower body ridge. Universal brackets work best on vacuums with flat back panels.
Step 4: Secure the bracket into studs.
Use lag bolts or the included hardware. Skip drywall anchors when studs are available. Unplug the vacuum before mounting anything.
The CPSC recall database shows how often electrical failures start from damaged cords.
Step 5: Seat the vacuum and test it.
Slide the vacuum onto the bracket, then pull down firmly on the handle to confirm it engages. If it moves, adjust the bracket depth before storing anything near it.
Step 6: Store hose and cord nearby.
Add a universal hose hook in the same stud bay. Use a wide cord wrap loop on the wall or bracket arm. Loose loops prevent kinks and keep the cord's copper wires intact.
Rolling Cart Storage: Building or Buying a Cart for Your Vac
A rolling cart is the best answer for heavy wet/dry vacuums that stay in one workspace but move across it. It also suits contractors who load the machine into a truck daily.
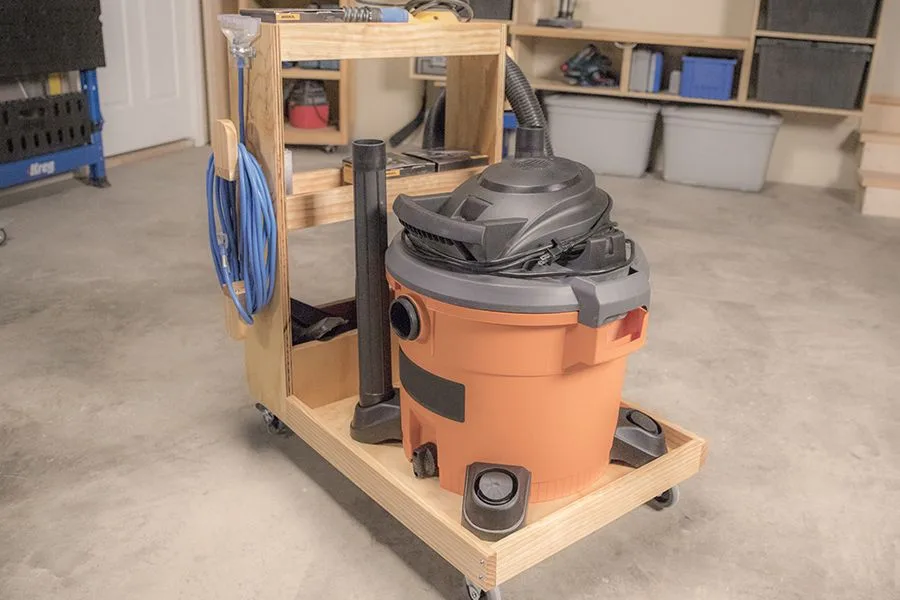
Image source: Web (Bing) / uk.pinterest.com (Web image (fair-use with source credit))
Pre-made carts cost $40 to $120. DIY versions start under $20 if you repurpose a furniture dolly. The cheaper route works when the vacuum already has flat casters.
A sturdy cart needs a wide base and locked wheels. A top-heavy vacuum tips sideways if the cart base is narrower than the vacuum's footprint. Locked wheels prevent drifting mid-cleanup, which is a trip hazard.
Add a hose caddy to the cart's handle or side. Attach a cord hook to the frame. The whole setup, attachments included, stays in one place.
Building It Into a Workbench
A built-in workstation hides the vacuum, frees the floor, and puts the hose right where you need it. It's the endgame for a permanent workshop.
Cut a circular opening into a workbench top or lower shelf. Slide the vacuum underneath, then route the hose through the hole. Mount hose and accessory hooks on the panel beside the opening.
Measure the tank diameter before cutting. Most 8 and 12-gallon units measure 15 to 18 inches wide. Leave a finger gap so the tank slides out for service.
You still need to empty, rinse, and replace filters, so access matters.
The Storage Mistakes That Shorten Your Vac's Life
Most shop vac failures trace back to storage habits, not the tool itself. Avoid these five errors.
Leaving wet debris in a sealed tank. Mold spreads within days. Always empty and dry the tank after wet pickup.
Hanging a heavy vac by its hose or cord. A 40-pound machine stretches the hose and damages internal wire connections. Support the body, not the accessories.
Using drywall anchors for a wall-mounted vac. A 30-pound shock load rips cheap anchors out. Always bolt into studs.
Wrapping the cord tightly until it kinks. Tight wraps stress the copper wires. Use loose loops over a wide hook.
Sealing a damp filter inside the tank. Moisture ruins pleated cartridge filters fast. Pull the filter and let it air dry.
Step-by-Step: The Takedown and Storage Routine
This routine takes three minutes and prevents most storage damage. It works for every method in this article.
- Empty the debris tank after every use. Dump dry debris into a trash bag. Pour wet waste down a floor drain.
- Rinse the tank for wet pickup. Hose out the interior, then flip the tank upside down. Let it drain completely.
- Clean or replace the filter. A clogged filter loses suction fast. Wash reusable cartridge filters monthly.
- Coil the hose loosely. Use your elbow to form a natural loop. Never force the hose into a tight circle.
- Wrap the cord the right way. Loop it into 12-inch circles around your hand and elbow. Hang it on a wide hook.
Costs and Specs to Plan Around
Storage costs range from nearly nothing to about $200. Here's where the money goes.
| Storage Method | Typical Cost | Install Effort | Best For |
|---|---|---|---|
| Wall-mount bracket | $15 to $45 | Moderate | Compact vacs under 30 lbs |
| Universal hose and cord hooks | $10 to $25 | Low | Any vac with wall space |
| Rolling cart (pre-made) | $40 to $120 | Low | Heavy vacs, daily use |
| DIY dolly cart | $10 to $30 | Moderate | Any vac with flat base |
| Workbench build-out | $50 to $200 | High | Permanent workshops |
Free solutions exist too. A corner spot with a $5 hose hanger keeps a light unit organized without drilling a single bracket. Even a heavy unit parks safely on a rubber mat, as long as the cord and hose stay managed.
Use Cases: Which Storage Method Fits Your Situation
Your situation decides which row of that table you should pick.
Home garage with limited wall space. Wall-mount a compact unit under 30 pounds. Use the same stud bay for hose and cord hooks.
Apartment or utility closet. Floor parking with a vertical profile works best. Pick a corner near an outlet and keep the hose coiled on the handle.
Contractor van or job site. Rolling cart with a tool tray is the only real option. You need wheels, a strong base, and space for spare filters.
Woodworking shop with daily use. Build the vacuum into a workbench station. The hose stays routed through the bench, so cleanup takes seconds.
Mistakes That Look Harmless but Cause Real Damage
Three storage mistakes look innocent until they ruin the vacuum.
Storing the vac on its side. Liquid residue from wet pickup seeps into the motor housing. Always store the vacuum upright so the tank drains properly.
Storing it with an empty but dusty tank. Fine particles settle into the motor chamber over time. Wipe the tank interior before long-term storage.
Stacking tools on top of the unit. This crushes the intake hose and bends the lid seal. Suction drops noticeably once the gasket fails.
Frequently Asked Questions
Can I store my shop vacuum outside?
Short answer, no. UV exposure degrades the plastic tank and hose, and moisture creeps into the filter housing. A garage, shed, or basement keeps it in working condition far longer.
Should I store a portable shop vac with the hose attached?
Yes, as long as both components are clean and dry. Most portable units have molded hose clips designed for this. Verify the hose isn't draped over the motor intake, which can strain the connection.
How do I store my shop vac vertically without a wall mount?
Lean it into a corner with the casters facing forward and the handle against the wall. Keep the hose coiled on top and the cord wrapped on the handle. It's not elegant, but it works for light models.
What's the best way to store a wet/dry vac long-term?
Empty the tank, rinse it, and dry it completely. Remove the filter and store it separately in a plastic bag. Leave the lid ajar so air circulates through the tank.
Can I hang my vacuum by its handle?
Only if the manufacturer's manual explicitly allows it. Plastic handles deform under sustained weight, and a 40-pound vac will eventually sag. Use a proper bracket instead.
Final Decision Guide: Choose Your Storage Method
Here's the whole decision process in four lines.
- Under 30 pounds, tight on floor space → Wall bracket on studs.
- Over 40 pounds, daily use, moving across a large area → Rolling cart.
- Rare use, open corner, minimal budget → Floor parking with cord and hose hooks.
- Wet pickup or long-term storage → Any method works, but dry the tank and remove the filter first.
Pair that with the three-minute takedown routine. Your shop vacuum stays ready whenever you need it. Store it dry, store it stable, and it'll run for years without complaint.

