

You can fix an upright vacuum hose by checking clogs, sealing cracks, and replacing damaged parts.
A broken upright vacuum hose can make a good machine feel useless fast. I’ve seen that happen many times, and the fix is often simpler than people think. If you want to know how to fix an upright vacuum hose the right way, this guide walks you through the causes, the repair steps, and the signs that tell you when replacement is the better move.
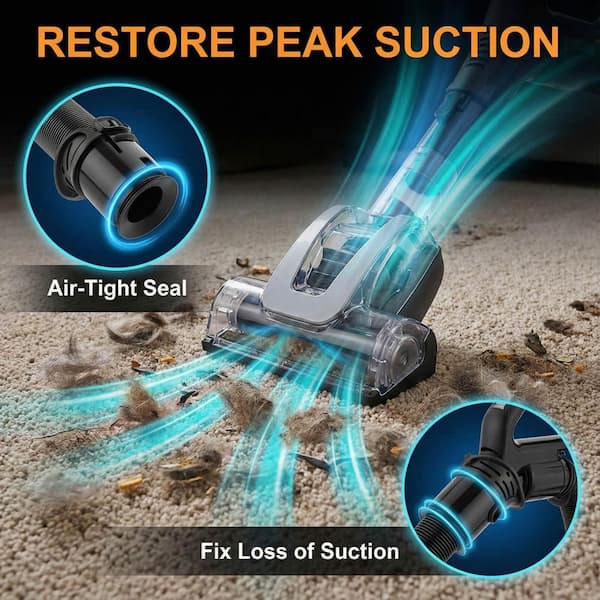
Why an upright vacuum hose fails
The upright vacuum hose takes a lot of stress. It bends, stretches, twists, and gets pulled hard during normal cleaning. Over time, that wear can lead to weak suction, air leaks, cracks, or complete hose failure.
Common causes include:
- Clogs from dust, hair, lint, or small debris
- Cracks from age or repeated bending
- Loose hose connections at the wand or base
- Tears caused by sharp objects being sucked up
- Heat damage from a clogged system or worn motor path
- Normal wear on flexible plastic or rubber parts
When I first started repairing vacuums, I noticed many “dead” hoses were not dead at all. They were just blocked near one end. That is why the first step in how to fix an upright vacuum hose is always to inspect before replacing.
Tools and materials you may need
Before you start, gather a few basic items. You do not need a full repair shop setup for most upright vacuum hose fixes.
- Flashlight
- Screwdriver set
- Long cleaning brush or flexible wire brush
- Scissors
- Mild soap and water
- Duct tape or hose repair tape for temporary fixes
- Replacement hose or gasket if needed
- Gloves
- Paper towels or microfiber cloth
If your vacuum uses special clips or sealed fittings, keep the model number handy. Matching parts to the exact vacuum model saves time and avoids fit issues.

How to fix an upright vacuum hose step by step
Fixing an upright vacuum hose is usually about finding the blockage or leak first. Once you know the problem, the repair is much easier.
1. Turn off and unplug the vacuum
Always unplug the vacuum before touching the hose. This protects you from moving parts and keeps the motor from starting by accident.
If the vacuum has a removable battery, remove that too. Safety always comes first, even for a small repair.
2. Inspect the hose from end to end
Look for obvious damage like splits, holes, loose ends, or crushed spots. Bend the hose slowly in your hands so the cracks open up if they are hidden.
Check both ends where the hose connects to the vacuum body and the wand. Many suction problems come from a loose seal rather than a damaged hose.
3. Check for clogs
A clog is one of the most common reasons people ask how do you fix an upright vacuum hose. Remove the hose if your model allows it, then look through it with a flashlight.
To clear a blockage:
- Shake out loose debris
- Use a long brush or flexible wire to push through the clog
- Tap the hose gently to loosen stuck dust
- Use compressed air only if the hose material can handle it
- Never force a sharp object through a thin hose, since that can make the hole worse
If the clog is stubborn, rinse the hose with warm water and a little mild soap, but only if the manufacturer allows washing. Make sure the hose is fully dry before reinstalling it.
4. Test for air leaks
A small leak can weaken suction almost as much as a clog. While the vacuum is off, cover one end of the hose and gently feel around the surface for escaping air if you test it under low suction later.
If you find a leak, look for:
- Pinholes
- Split seams
- Worn bends
- Loose collar fittings
Even a tiny crack can reduce suction a lot. In my experience, people often think the motor is failing when the real issue is just a small air leak in the hose.
5. Repair small cracks or tears
Small damage can sometimes be patched. This is a useful fix if you need a quick solution before buying a replacement.
For a temporary repair:
- Clean the damaged area first
- Dry it fully
- Wrap it tightly with vacuum hose repair tape or strong duct tape
- Smooth out bubbles so air does not escape
For a more secure repair, use a rubber patch and adhesive made for flexible materials. Keep in mind that a patch may work for a while, but it is not always a permanent fix for an upright vacuum hose.
6. Reattach loose ends and seals
If the hose keeps slipping out, the issue may be the connection point. Check the plastic collar, gasket, or locking tab.
Try these fixes:
- Re-seat the hose until it clicks into place
- Replace a worn gasket or O-ring
- Tighten screws around the hose mount
- Clean dust from the connection area
A clean, tight seal matters more than most people realize. Suction behaves like water in a pipe: if there is a gap, the airflow escapes there first.
7. Replace the hose if damage is too severe
Some hoses are simply too worn out to save. If the hose has deep splits, multiple cracks, or stretched-out weak spots, replacement is the safest choice.
When buying a replacement hose:
- Match the vacuum brand and model
- Check the length and connector shape
- Confirm whether the hose is flexible or reinforced
- Buy from a trusted seller or manufacturer if possible
A new hose is often cheaper than a full vacuum replacement, especially for a good upright vacuum with a strong motor.

How to tell if the hose is the real problem
Sometimes the hose looks guilty, but another part causes the issue. Before you spend money, make sure the hose is truly the problem.
Look for these signs:
- Weak suction only through the hose attachment
- Vacuum runs normally but debris stays on the floor
- Air leaks or a whistling sound near the hose
- Hose feels collapsed, stiff, or soft in one spot
- Brush roll works, but side attachments do not
If the suction is weak everywhere, the problem may be elsewhere in the system. That could mean a clogged filter, dirty cyclone path, full dust bin, or failing belt.
Other parts that can affect hose performance
A vacuum hose does not work alone. It is part of the whole airflow system, so another bad part can make the hose seem broken.
Check these related parts:
- Filters: Dirty filters can choke airflow and make the hose seem clogged
- Dust bin or bag: A full container blocks suction
- Belt: A worn belt may reduce brush performance
- Wand: A clog in the wand can mimic a hose clog
- Intake port: Debris at the vacuum inlet can block airflow
- Motor path: Heavy buildup can reduce power across the machine
This is why upright vacuum hose repair should include a full inspection. It saves time and prevents repeat problems.
When repair works and when replacement is better
A repair works best when the problem is small and local. A replacement is better when the hose is old, brittle, or damaged in several places.
Repair is a good option when:
- The hose has one small crack
- The connection is loose but not broken
- A clog is blocking airflow
- The hose is still flexible and strong
Replacement is better when:
- The hose has multiple tears
- The plastic is cracked along several bends
- The hose has lost its shape
- Temporary patches keep failing
I usually tell people this: if a hose looks like tired garden tubing, patching it is only buying time. If it still has some spring and the damage is minor, repair can work well.
Maintenance tips to prevent future hose problems
Once you know how to fix an upright vacuum hose, the next step is making sure it lasts longer. A little maintenance goes a long way.
Try these habits:
- Empty the bin or change the bag before it gets too full
- Clean filters on schedule
- Avoid vacuuming large or sharp debris
- Do not yank the hose hard when pulling attachments
- Store the vacuum in a way that does not crush the hose
- Check the hose every few months for soft spots or cracks
These small habits reduce stress on the hose and help the vacuum keep strong suction. Think of it like caring for a shoe strap or phone charger cable: gentle handling prevents early wear.
What not to do when fixing a vacuum hose
A bad repair can make things worse. I have seen people tape over a clog, bend the hose too hard, or use glue that made the plastic brittle.
Avoid these mistakes:
- Do not run the vacuum with a blocked hose
- Do not use sharp tools that can puncture the hose
- Do not apply heavy glue unless it is safe for flexible plastic
- Do not ignore a burnt smell or strange motor noise
- Do not force a badly cracked hose back into service
If the vacuum is overheating or shutting off, stop and inspect it. That can mean airflow is restricted enough to strain the motor.
Frequently Asked Questions
How do you fix an upright vacuum hose with a clog?
Remove the hose and check it with a flashlight from both ends. Use a flexible brush, gentle tapping, or water only if the manufacturer says the hose is washable.
Can you tape a vacuum hose to fix a hole?
Yes, but usually only as a temporary repair. Vacuum hose repair tape or strong duct tape can help, but a cracked hose often needs replacement for a lasting fix.
Why does my upright vacuum still have weak suction after fixing the hose?
The problem may be a dirty filter, full dust bin, clogged wand, or blocked intake. A hose repair helps only if the hose was the main airflow problem.
Is it worth replacing an upright vacuum hose?
Yes, if the vacuum is otherwise in good shape and the hose is the only failed part. A replacement hose is usually much cheaper than buying a new upright vacuum.
How do I know if my vacuum hose is cracked?
Look for visible splits, feel for escaping air, and check for a sudden drop in suction at the hose attachment. Soft or brittle spots are also a strong warning sign.
Can I use super glue on a vacuum hose?
Usually no, because super glue can harden and crack flexible plastic. A flexible repair tape or a replacement hose is a safer choice.
Conclusion
Knowing how to fix an upright vacuum hose can save you money and bring a weak vacuum back to life fast. In many cases, the real issue is a clog, loose seal, or small crack that you can repair at home with basic tools.
The key is to inspect carefully, work step by step, and replace the hose when damage is too far gone. If you take a few minutes to maintain the hose and airflow path, your upright vacuum will clean better and last longer. Try these fixes today, and if you have a repair tip that worked well for you, share it with others or bookmark this guide for the next time your vacuum loses suction.


2 Comments
Pingback: How Often Should You Service An Upright Vacuum: Expert Guide - Vacuum Cleaner Tips
Pingback: Can You Wash An Upright Vacuum Brush Roll: Easy Guide - Vacuum Cleaner Tips