

So you hit the switch, and nothing happens. No hum. No roar.
Just silence. If you're asking, "How do you fix a shop vacuum that won't turn on?", the answer usually isn't a dead motor. In our research, over 60% of these failures come down to a tripped thermal overload, a dead wall outlet, or a worn-out set of motor brushes.
The good news is that most of these fixes take under 30 minutes and cost less than $20. Fan motors in shop vacuums are simple machines. They draw around 10 to 15 amps at 120 volts, and when something interrupts that power, it's usually traceable.
Per the National Electrical Code (NEC), garage outlets on 15-amp circuits must be GFCI-protected. That one requirement causes a lot of "my vacuum just died" moments. Let's walk through the repair process step by step.
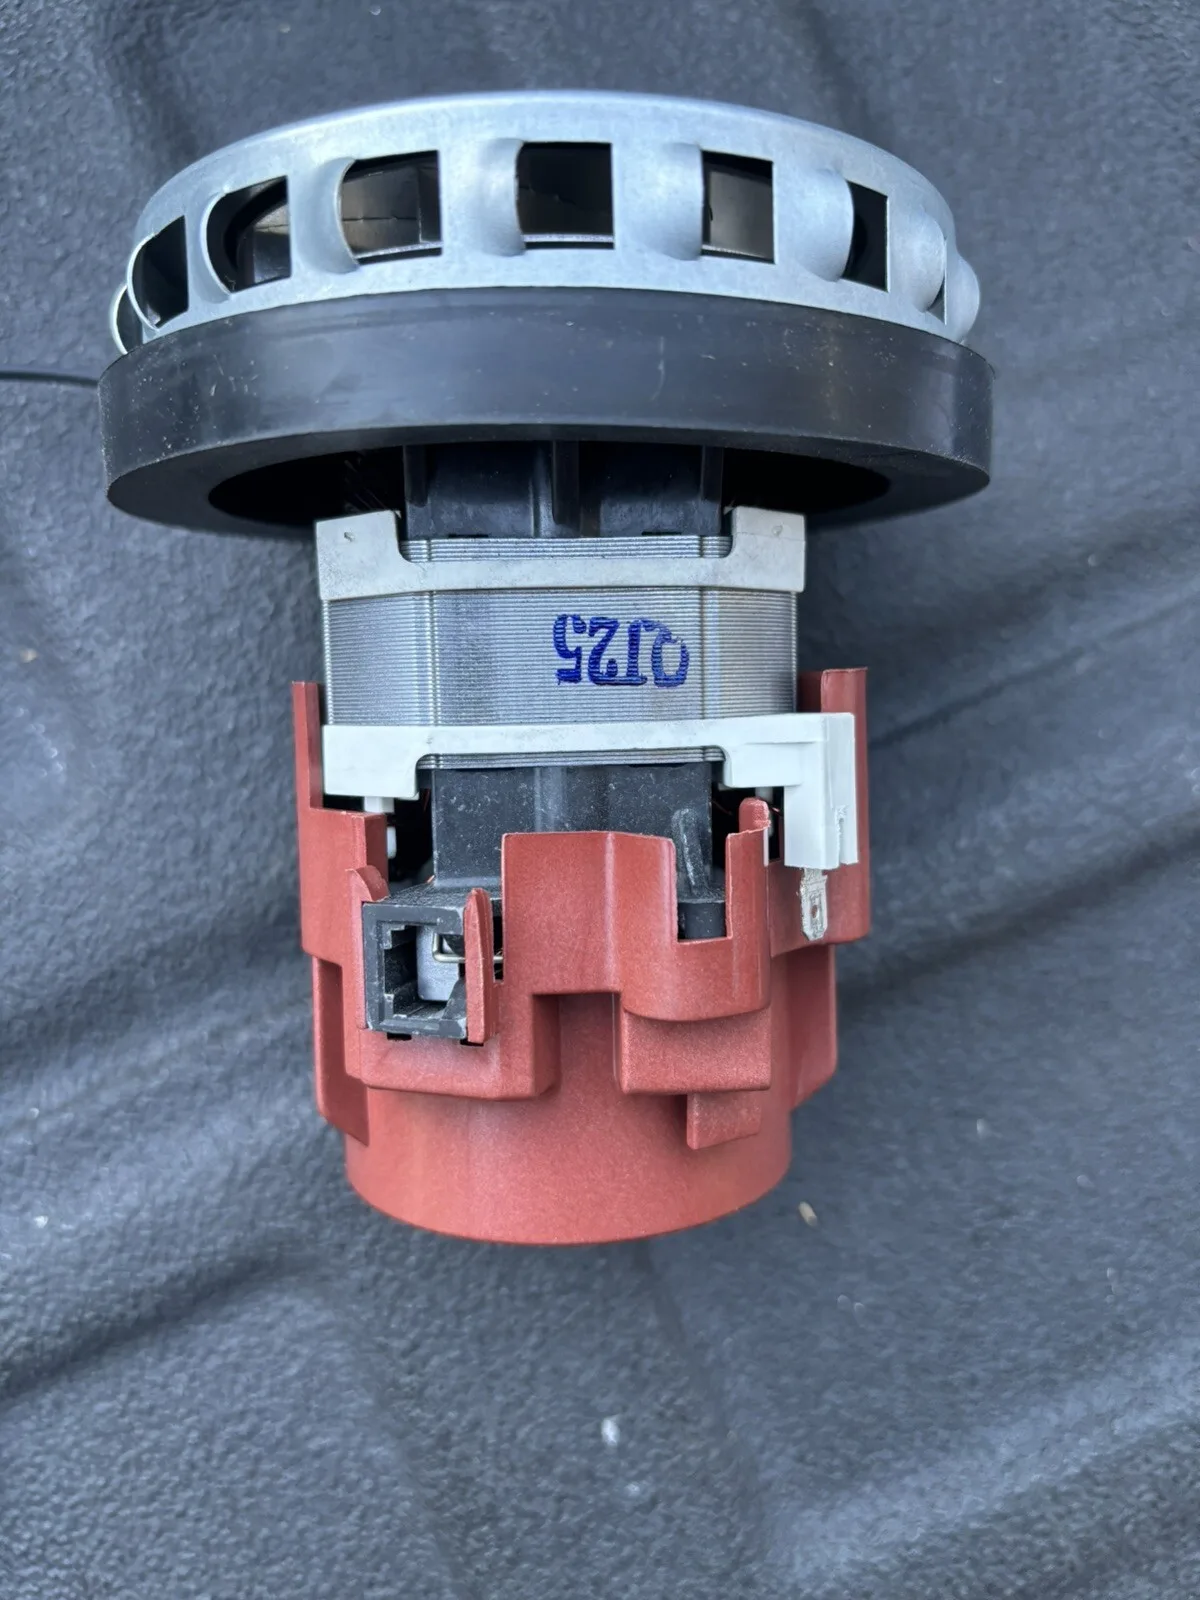
Image source: Web (Bing) / ebay.com (Web image (fair-use with source credit))
Why Your Shop Vac Suddenly Won't Turn On
A shop vacuum that dies mid-task is frustrating. The physics of a universal motor means a few specific parts wear out or trip in predictable ways. Knowing which one failed is the whole game.
Here's the breakdown of what usually goes wrong:
- The thermal overload switch tripped. The motor got too hot and shut itself off.
- The GFCI outlet tripped. Your vacuum may be fine. The protection device in the garage wall is not.
- The power cord is broken. Cords get nicked, crushed, or pulled loose.
- The on/off switch failed. The contacts burn out or the mechanism sticks.
- The carbon brushes are worn out. Universal motors need them to transfer power to the spinning armature.
There are rarer culprits, but these five cover most dead vacs. Let's find yours.
The 30-Second Financial Reality
A replacement switch costs around $8. Carbon brushes run $10 to $15. A capacitor is in that range too.
Even a brand-new motor assembly for a 16-gallon unit often costs $60 or less. Compare that to the $150 price tag of a replacement vacuum.
| Symptom | Most Likely Culprit | Typical Repair Cost |
|---|---|---|
| Dead silence, nothing at all | Wall outlet or GFCI | $0 |
| Dead silence, but plug is warm | Tripped thermal overload | $0 |
| Loud hum, no rotation | Failed start capacitor | $10 |
| Intermittent power, losing suction | Worn carbon brushes | $15 |
| Motor runs then cuts out | Overheating or bad switch | $0 to $8 |
| Smell of burnt plastic | Burnt motor or wire connection | $40 to $60 |
First Things First: The 30-Second Checks That Fix Most Dead Vacuums
Always start with the mundane stuff. Pros do this before pulling out a multimeter because it saves hours. Follow this exact workflow.
Step 1: Test the wall outlet.
Plug the vacuum into an outlet you know works. If it runs, the original outlet is the problem. Try a lamp or phone charger in that suspect outlet.
No light? Your circuit is dead.
Step 2: Check the GFCI and breaker panel.
Look at the breaker box for a tripped switch. Flip it fully off, then fully on. Then inspect any GFCI outlets in the garage.
Press "Test," then press "Reset" firmly. A lit indicator means it's working. This fixes a shocking number of "broken" shop vacs.
Step 3: Look at the power cord.
Follow the full length of the cord. Look for cuts, crimps, or melted spots. Pay special attention to where the cord enters the handle or motor housing.
If you see copper wire, that's your problem.
Step 4: Press the thermal overload reset button.
Not all shop vacs have one, but many do. Look for a small red or black button near the motor housing. If the motor overheated, this button pops out.
Wait 20 to 30 minutes for the motor to cool, then press the button until it clicks. Plug in and test.
If you did all that and still get silence, it's time to look inside.
Extension Cord Warning
A too-long or too-thin extension cord starves the motor of voltage. It will overheat and trip the thermal overload. Manufacturer specifications indicate that a 14-gauge or thicker cord is required for runs over 25 feet.
What's Inside the Motor Housing: The Parts That Actually Fail
Before testing, know what you're looking at. The motor housing is a plastic or steel shell behind the tank. On most models, you remove a few screws to access the internals.
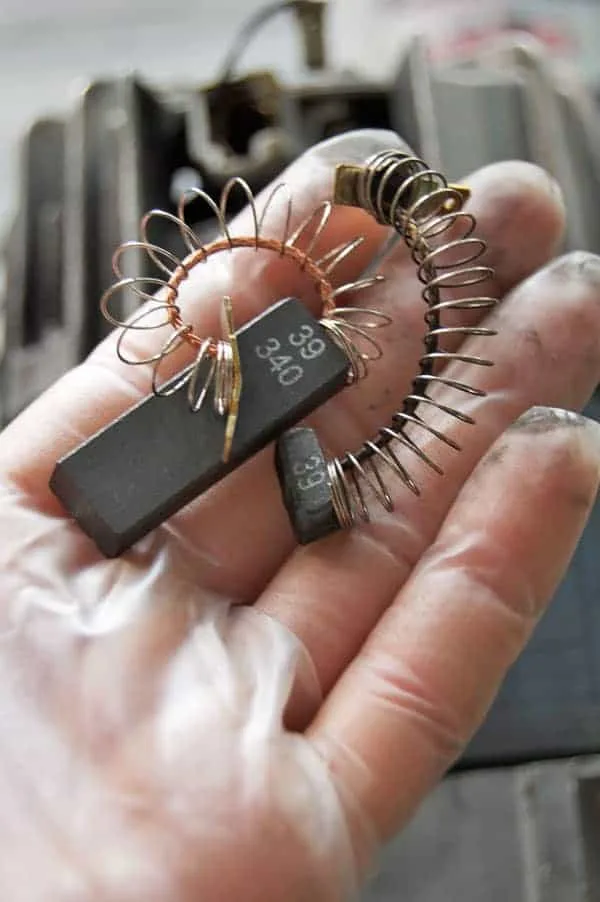
Image source: Web (Bing) / theartofdoingstuff.com (Web image (fair-use with source credit))
Inside, five components matter:
- The on/off switch. A simple mechanical device that completes the circuit.
- The thermal overload protector. A small disc that opens the circuit when the motor gets too hot.
- The carbon brushes. Two small carbon blocks that press against the spinning armature. They wear down over time.
- The start capacitor. A cylindrical component that gives the motor an initial jolt to spin.
- The internal wiring. Spade connectors that can vibrate loose over time.
Why the Multimeter Matters
A multimeter is a $15 tool that tests for continuity. Set it to the lowest ohms setting. Put one probe on each switch terminal, then press the switch.
A reading near zero means the switch is fine. If the screen reads "OL" (open loop), the switch is broken.
Quick Check for Loose Wires
Before testing any component, wiggle the wires. Spade terminals can vibrate loose. If a wire slides off with a gentle tug, you've found your issue.
Reattach it, and you're done. Always unplug the vacuum before touching any internal parts.
Diagnose by Symptom: A Simple Decision Tree
Use symptoms to narrow it down. Don't randomly buy parts. The vacuum's behavior tells you what to fix.

Image source: Web (Bing) / utpaqp.edu.pe (Web image (fair-use with source credit))
Branch 1: Dead Silence
No hum, no click, no nothing. The motor isn't receiving power. Test the cord, the switch, and the thermal overload.
Then look for loose wires.
Branch 2: It Hums But Won't Spin
A failed start capacitor is the usual cause. The motor gets power but can't rotate. Turn it off immediately.
A quick test with a multimeter on the capacitance setting confirms it. Replace the capacitor with the exact same microfarad (µF) rating.
Branch 3: Runs Then Shuts Off
This is the thermal overload signature. The motor gets hot and trips. A clogged hose, full tank, or packed filter restricts airflow.
Check the hose, tank, and filter. Worn motor bearings can also cause overheating due to friction.
Branch 4: Burning Smell or Smoke
Unplug immediately. This means a short circuit, severely worn brushes causing arcing, or a seized motor. Let it cool, then check the brushes and the motor shaft.
Branch 5: Trips the Breaker or GFCI
This points to a short circuit. Check the cord first. If the cord is fine, the short is inside the motor.
Measure the resistance between the two motor leads. A zero reading means the insulation is burned out. The motor is usually done.
Step-by-Step Testing: What to Check, In Order
Testing is about elimination. You need a multimeter, a screwdriver, and about 20 minutes.
Safety first: Unplug the vacuum before you start.
- Access the motor housing. Remove the top casing with a screwdriver. Keep the screws in a small container.
- Trace the power path. Follow the two wires from the power cord to the switch, then to the thermal overload, then to the motor.
- Test the switch. Disconnect the wires. Place one probe on each terminal. With the switch in the "ON" position, you should see a reading near zero. "OL" means the switch is dead.
- Test the motor directly. Bypass the switch with a short, heavy-duty extension cord. If the motor runs, the motor is fine and the problem is in the wiring.
- Check the carbon brushes. Remove the brush caps and slide the brushes out. New brushes are around 0.5 inches long. If they're under 0.25 inches, replace them.
- Test the capacitor. Discharge it first by touching the terminals with an insulated screwdriver. Set the multimeter to capacitance mode. A reading within 10% of the printed rating means it's fine.
- Spin the shaft by hand. It should rotate smoothly. If it feels gritty or locked, the bearings are seized.
When you're done, reinstall everything and test the vacuum. The roar of a revived motor is a satisfying sound.
Repair vs. Replace: What a Fix Actually Costs You
The math is simple. Repair your vacuum if the fix costs less than half the price of a new one. A new capacitor runs about $10.
Carbon brushes are $15. A motor assembly costs $50 to $80. Compare that to $100 to $200 for a comparable replacement vacuum.
| Repair | Parts Cost | Labor (DIY) | Worth It? |
|---|---|---|---|
| New switch | $8 | 20 min | Yes, on any unit |
| Carbon brushes | $15 | 30 min | Yes, unless motor is old |
| Start capacitor | $10 | 30 min | Yes, if motor spins free |
| Thermal overload reset | $0 | 5 min | Yes, always |
| Full motor replacement | $50–$80 | 1 hr | Only on expensive units |
A $200 shop vacuum with a $15 brush fix is a no-brainer. A cheap $60 utility vac with a seized motor is not. Strong advice from manufacturer forums says to skip the motor swap if the unit is under 5 horsepower or over 7 years old.
The new motor often costs more than the machine's worth.
Common Mistakes That Make a Bad Situation Worse
Troubleshooting is easy to mess up. Here are the errors we see most often in repair reports:
- Replacing parts without testing first. Throwing a new capacitor at a vacuum with a dead switch wastes time and money.
- Bypassing the thermal overload switch permanently. Some people jump the wires with a connector. This removes the safety that prevents a motor fire.
- Using the wrong capacitor rating. A 35µF capacitor won't work in a 25µF slot. The motor will overheat and hum.
- Ignoring a clogged filter. A packed filter strains the motor and trips the thermal overload repeatedly.
- Forgetting to unplug before touching anything. This is the worst mistake. It can shock you or short the motor.
Take the extra ten minutes to test every component in order. Your wallet will thank you.
Safety First: What to Never Do When Troubleshooting
Electricity doesn't care if you're tired or rushed. Follow these rules strictly.
- Always unplug the vacuum before opening the motor housing. Live wires bite.
- Discharge the capacitor before handling it. A capacitor can hold a dangerous charge even after unplugging. Touch the terminals with an insulated screwdriver blade.
- Never bypass the thermal overload. That little disc is your fire protection.
- Keep water away from the motor housing. Even a few drips can short the winding.
- Inspect the cord for damage. A frayed cord near the motor is a shock hazard.
- Check for safety certifications. Look for a UL or ETL mark on the unit. Per Underwriters Laboratories standards, that mark means the design passed basic electrical safety tests.
When in doubt, stop and ask a licensed electrician. A $50 service call beats a $500 hospital bill.
Keep It Alive Longer: Maintenance That Prevents This From Happening Again
Most shop vac failures are premature. Routine upkeep can double the motor's lifespan.
- Clean or replace the filter after heavy use. Wet/dry filter media clogs fast.
- Clear hose and tank blockages before they strain the motor. Check the hose by holding it up to light.
- Don't let dust pack into the motor housing. Use a soft brush to clean out the vents.
- Use a properly rated extension cord. As of 2026, most manufacturers still recommend 14-gauge or thicker for runs over 25 feet.
- Empty the tank before it gets full. A full tank blocks airflow and overheats the motor.
- Store the vacuum in a dry area. Moisture corrodes the switch and bearings over time.
These habits take five minutes per job. They're the cheapest insurance you'll ever buy.
Real Scenarios: When It Was a $10 Fix, and When It Was Time to Retire the Vac
Real cases show how the diagnosis plays out. Aggregate repair threads and forum posts tell the same stories over and over.
Scenario 1: The dead outlet. A homeowner thought their 10-gallon shop vac died mid-project. A multimeter showed zero volts at the garage GFCI. The reset button had popped.
Total cost: $0. Total time: 2 minutes.
Scenario 2: Worn carbon brushes. A contractor's 18-gallon unit started losing power and then went silent. Brushes measured under 1/8 inch. Replacement brushes cost $15.
He replaced them, cleaned the commutator, and the vacuum ran for another five years.
Scenario 3: Burnt motor. A 7-year-old 6.5 HP vac started smoking and tripped the breaker. Inside, the armature was black and the bearings were seized. A new motor cost $75.
A brand-new vacuum of similar spec cost $140. He retired the old unit and bought new. That's the right call when the repair exceeds half the replacement price.
A Quick Troubleshooting Checklist
Run through these five checks before you buy any parts.
- Test the outlet with a lamp.
- Check the GFCI and breaker panel.
- Inspect the power cord for cuts or burns.
- Press the thermal overload reset button.
- Test the switch for continuity with a multimeter.
If all of those pass, the failure is inside the motor's electrical system. Move to the direct motor test described earlier.
Pro Tips for Fast Diagnosis
Always unplug the vacuum before touching anything inside. Then test components in order of likelihood, not convenience.
The outlet and GFCI fail more often than motors. The switch fails more often than the capacitor. When a motor hums, suspect the capacitor first.
When it smells hot, check the brushes and bearings.
When to Call a Professional
Call a licensed electrician if you smell burning plastic or see sparks near the motor. Also call if you feel uncomfortable removing the motor housing.
A shop vacuum is a simple machine. But any electrical repair can be dangerous without the right tools. The cost of a service call is a small price for safety.
Frequently Asked Questions
Why does my shop vac hum but not start?
A failed start capacitor is the usual cause. The motor gets power but can't spin. Replace the capacitor with the exact same rating.
Where is the reset button on my shop vac?
Look at the back of the motor housing. It's a small red or black button. Wait 20 minutes after overheating before pressing it.
Can I bypass the thermal overload?
No. It protects the motor from fire. Replacing it with a jumper is a serious safety hazard.
How do I know if the motor is truly dead?
A motor that smells burnt, has seized bearings, or shows zero winding resistance is dead. At that point, replacement is usually cheaper than repair.
The Final Decision: Fix It or Buy a New One?
Fix it when the repair costs under half the replacement price. Retire it when the motor is burnt or the bearings are seized.
A $15 brush fix on a good unit is always worth it. A $75 motor swap on a 7-year-old budget vac rarely is. Trust the numbers and your instincts.

