

Robot vacuums are brilliant, until you flip one over and find a hairy, string-wrapped disaster. So how do you clean robot vacuum brushes without damaging them? The short answer is that you remove the brushes, cut away the tangled hair, wipe them down, and dry everything completely before reinstalling.
As of 2026, most leading robot vacuums use either a bristle brush roll or a solid rubber roller. Manufacturer specifications indicate that ignoring brush maintenance makes suction drop noticeably, especially around pet hair. That's why regular brush care is the best thing you can do for your robot.
Let's walk through the process, starting with why these brushes get so grimy.
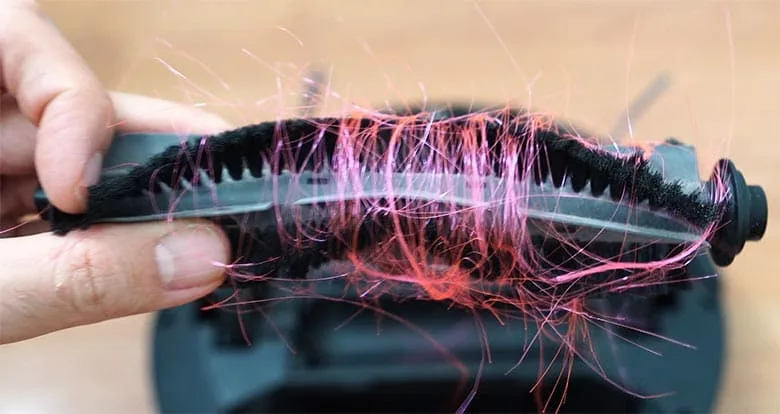
Image source: Web (Bing) / bestcordlessvacuumguide.com (Web image (fair-use with source credit))
The Gunk Happens: Why Robot Vacuum Brushes Get Gross So Fast
The physics of a robot vacuum works against it. The brush rolls along the floor, sweeping debris toward the suction port. That same motion wraps long hair, pet fur, and loose carpet fibers around the axle.
Once one strand wraps around, others join it.
Side brushes get a different type of grime. They spin fast to flick debris out of edges and corners, catching sticky dust, cobwebs, and stray cat litter. Friction melts some hair onto the plastic arms over time.
You'll also see bent bristles if the side brush keeps hitting furniture legs.
A tangled brush no longer touches the floor properly. Hair wraps underneath and lifts the brush off the carpet. Suction drops, and the robot starts leaving trails of dust.
Worse, the motor works harder, which can shorten its lifespan.
Quick Answer: What to Do Before You Even Touch the Brush
Turn the robot off and take it out of the dock. Open the bottom panel according to your user manual. Remove the brush roll and the side brush.
Use the included cleaning tool or scissors to cut away hair and thread. Wipe the brushes with a damp microfiber cloth. Let everything dry completely before reinstalling.
Most cleaning sessions take about 10 minutes.
Before starting, check your model's release clips on the official manufacturer support page. The process varies slightly by brand, and that page will show you the exact tabs and screw locations.
Here's what you need on hand:
| Tool | Why It Helps |
|---|---|
| Robot's multi-tool | Cuts through hair and has a small brush for dust |
| Microfiber cloth | Lifts sticky grime off rubber and plastic |
| Warm water and mild dish soap | Breaks down oils and greasy buildup |
| Scissors or seam ripper | Snips thick hair or thread tangles |
| Replacement brush | Needed if the original is cracked or worn |
Never wash the brushes while they're still attached to the robot. That can push water into the motor, gearbox, or bearing contacts. The entire brush assembly should be 100% dry before it goes back in.
First, Check Your Brush Type: Side Brush vs Main Roller
Two distinct brushes do different jobs, and they need different cleaning approaches. The side brush is a small plastic star with bristles. It spins horizontally to push debris toward the center of the vacuum.
The main roller brush sits underneath the robot and actually sweeps dirt into the suction opening.
Here's a side-by-side look at how they differ:
| Feature | Side Brush | Main Roller Brush |
|---|---|---|
| Location | Under the edge, on one or both sides | Center of the underside |
| Shape | Star with 2, 3, or 6 arms | Cylindrical drum |
| Material | Plastic arms with nylon bristles | Bristles, rubber, or a mix |
| Fastening | Single Phillips-head screw | Quick-release end caps or clips |
| Debris handled | Edges, corners, wall lines | Main floor surface, carpets, rugs |
| Cleaning frequency | Every 1 to 2 weeks | Every 1 to 2 weeks |
Some newer robots use a brushless suction design, but most still carry at least one roller. Check your manual to see which brush is installed before you start. The cleaning method depends on the brush type.
Side Brush Cleaning: The Fast and Simple Path
Side brushes are the easiest to clean. Flip the robot over, find the side brush, and look for a small screw holding it in place. On most models, it's a Phillips-head screw in the center of the brush.
Remove the screw and set it aside in a safe spot. The side brush should lift straight off. If it's stuck, gently wiggle it around the mounting post.
Don't pull so hard that you bend the bristles.
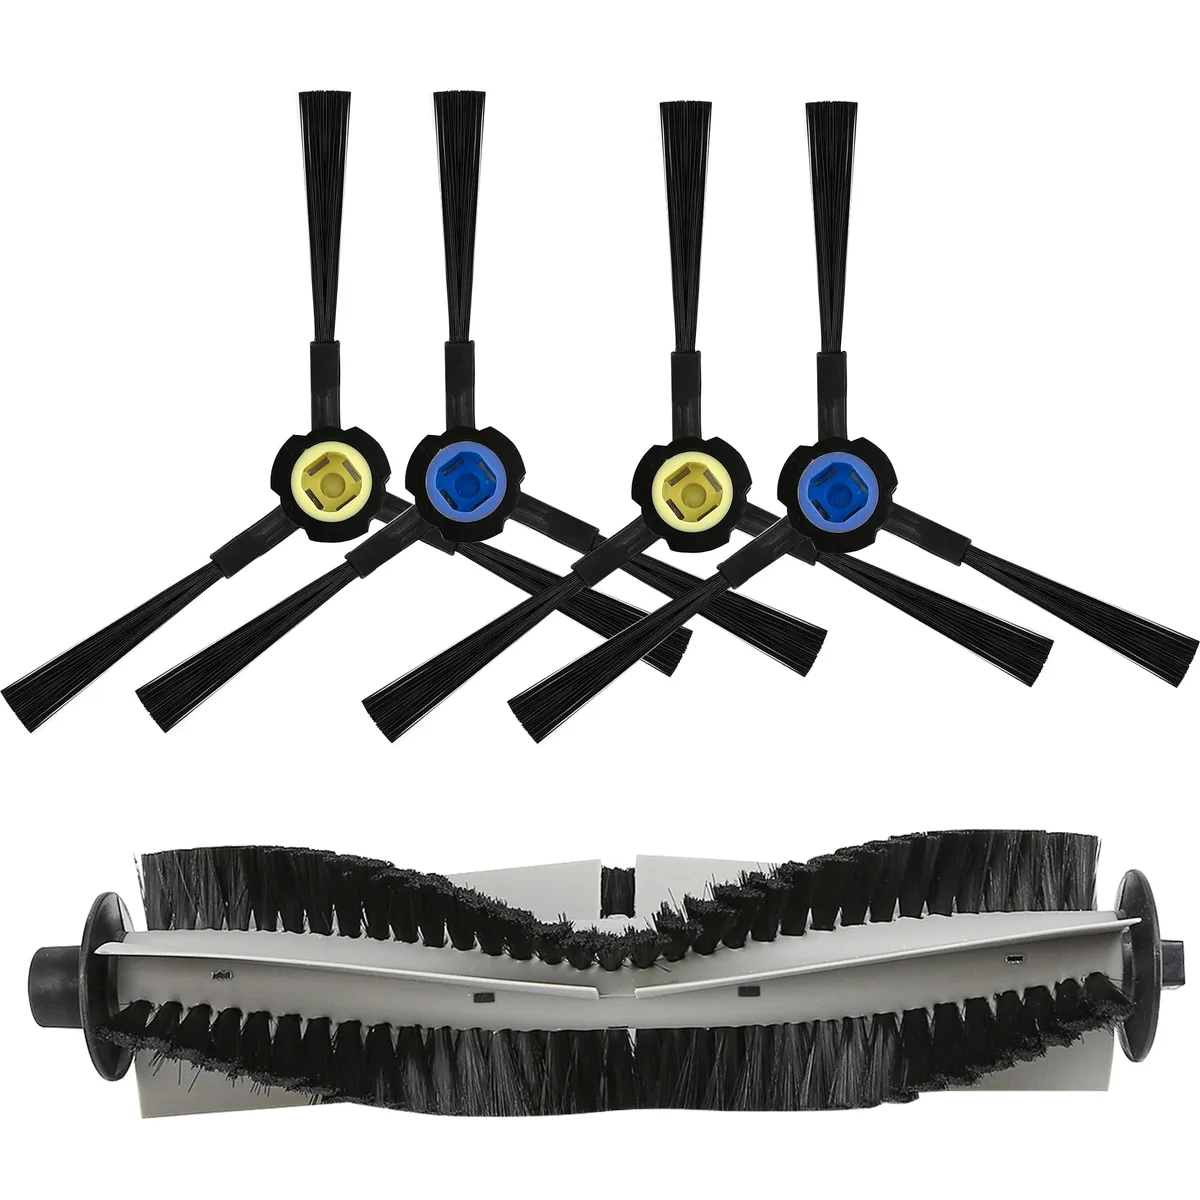
Image source: Web (Bing) / amazon.com (Web image (fair-use with source credit))
Once the brush is off, check both the top and bottom for hair wrapped around the base. Use the hook on your robot's cleaning tool or a pair of scissors to slice through the tangles. Then wipe the bristles with a damp microfiber cloth.
If the bristles are caked with sticky dust, you can rinse the side brush under lukewarm water with a drop of dish soap. Dry it thoroughly before reinstalling. Inspect the mounting post too.
Hair can wrap around the little spindle that spins the brush, so clear that area with your fingers or tweezers.
When you reinstall the side brush, align it over the post and press it down. Tighten the screw until it's snug. Don't overtighten.
A stripped screw hole is one of the most common side brush failures, and it turns a quick cleaning chore into a replacement job.
Main Roller Cleaning: Bristle vs Rubber (They're Not Treated the Same)
The main roller brush is where all the serious tangles happen. But the cleaning method depends heavily on whether your roller is bristle-based, rubber-based, or a hybrid design.
Bristle roller brushes look like a traditional vacuum brush roll, with stiff nylon bristles arranged in a spiral. They're effective on carpets but trap hair deeply between the bristle rows. To clean one, remove the brush from the robot using the release tabs on both ends.
Push the hair toward the center and lift it out. The included cleaning tool has a small blade that slides along the bristle rows and cuts through wrapped hair. Work from one end to the other, then peel the hair off in one long strip.
Rubber roller brushes are solid cylinders with flexible fins or nubs. They're marketed as "tangle-free," but that's not totally accurate. Hair can still wrap around the ends of the roller, and long pet fur has a habit of sliding under the rubber fins.
To clean a rubber roller, pull the brush roll out and run your thumb along each fin to push out trapped hair. Use scissors to cut any strands that are tightly wrapped around the end caps. Then wipe the entire roller with a damp cloth to remove the gray film of floor residue.
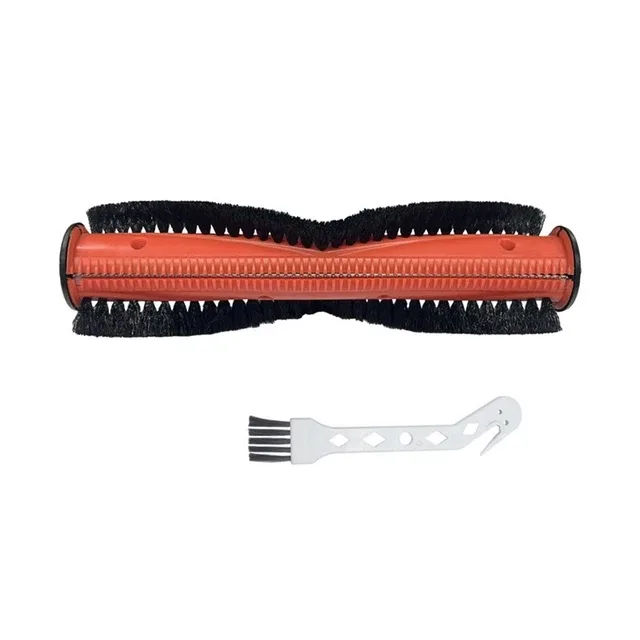
Image source: Web (Bing) / picclick.co.uk (Web image (fair-use with source credit))
| Brush Type | Hair Removal Method | Best Tool | Water Safety |
|---|---|---|---|
| Nylon bristle | Cut along bristle rows, then pull | Included multi-tool or seam ripper | Light wipe; avoid deep soaking |
| Rubber fin | Push clumps out between fins | Fingers or small brush | Wipe with cloth; fully dry |
| Hybrid (mix) | Combine both methods above | Scissors and microfiber cloth | Careful around the bristle base |
No matter which roller type you have, check the end caps and bearings. Hair loves to wrap around the small rotating hubs at each end. Remove the end caps if your model allows it, clean off the hair, and make sure the caps spin freely before you lock them back in.
This small step prevents the dreaded "brush jam" error code.
The Deep Detangle: Hair, Thread, and Carpet Fiber Removal
This is where most people give up. The brush looks like a fuzzy mess, and you're not sure where to start. Start at the ends.
Work toward the middle.
Hair wraps in layers, so don't try to pull a thick loop off in one go. Cut through the top layer first with your robot's multi-tool or a pair of scissors. Then lift the cut strands with your fingers.
Repeat until the brush axle is exposed.
For thread and fishing line, use a seam ripper. Slide the curved hook under the thread and push outward. It's faster and far safer than trying to hack at the tangle with scissors.
This same technique works on larger brush rolls too. If you're dealing with a full-size machine, our guide on removing hair from an upright vacuum brush roll uses the same cutting and pulling method.
Carpet fibers are a different beast. They don't wrap like hair; they weave between bristle rows. Use the comb on your robot's included tool to sweep along the bristle line.
The fibers loosen in seconds. On rubber rollers, run your thumb down each fin in the direction of the row to push fibers out.
Visual check: a clean brush should have visible gaps between bristles. If the bristles lie flat and matted, you've still got residue. Give the whole roller one more sweep with a damp microfiber cloth before reinstalling.
The 10-Minute Routine: How Often to Clean Based on Your Home
There's no single answer for how often to clean robot vacuum brushes. The right frequency depends on what your floors deal with every day. Here's a practical baseline from aggregate user feedback and manufacturer maintenance guides:
| Household Type | Side Brush Cleaning | Main Roller Cleaning | Full Deep Clean |
|---|---|---|---|
| No pets, no long hair | Every 2 to 3 weeks | Every 2 to 3 weeks | Monthly |
| One cat or small dog | Weekly | Every 1 to 2 weeks | Every 1 to 2 weeks |
| Multiple pets or long hair | Every 2 to 3 days | Every 2 to 3 days | Weekly |
| Heavy shedding season | Daily or every run | Daily or every run | Weekly |
The key is to catch tangles early. A few strands in the first day take seconds to remove. Let that same hair sit for two weeks and you're dealing with a solid fused ring around the brush bearing.
Set a recurring reminder on your phone. Pick a day that matches your schedule, like Sunday morning. Stick to it and you'll rarely see a brush jam error again.
If you'd like a broader schedule for the rest of your machine, our guide to sticking to a regular maintenance schedule covers the bigger picture.
The "Stuck" Scenario: When the Brush Won't Spin or Shows an Error
A brush that suddenly stops spinning is usually telling you something. Most robots display an error code like "brush jam" or "roller stuck" in the app. Don't ignore it.
Left unchecked, the motor keeps trying to spin and can overheat.
Start by turning the robot off immediately. Flip it over and remove the brush assembly. Inspect the brush housing, not just the brush.
Hair can wrap around the internal drive axle where the brush meets the motor. That's the sneaky one.
If the side brush stopped spinning, check the mounting screw area. A strand of hair can wind around the post below the brush, making the whole assembly bind. Remove the brush and clear the post.
Also check for a small gear or magnetic coupling, depending on your model.
If everything looks clean but the robot still reports a jam, test the brush by spinning it manually. It should rotate freely. A tight or grinding feel means something is wedged deeper in the housing.
Clear that debris before reinstalling the brush.
Still stuck? Power cycle the robot. Unplug the dock or turn the unit off for 60 seconds.
This resets the motor controller and clears false error codes. If the error returns, the brush motor may have failed. That's a repair job rather than a cleaning job.
Common Mistakes That Ruin Brushes (and Sometimes the Robot)
The most destructive habit we see in verified buyer reviews is washing brushes under a tap. Water creeps into the bearing caps and the motor shaft, which causes rust and squeaking later. Use a damp cloth.
If you absolutely need to rinse a brush, dry it overnight before reinstalling.
Another big mistake is overtightening the side-brush screw. People crank it down to keep the brush from falling off. That strips the plastic threads, especially on models with a soft mounting base.
Snug is enough.
Cutting hair carelessly near the brush ends also causes damage. Scissors can nick the rubber ends or shave off bristles. Use the small blade on your robot's cleaning tool, or push the hair away from the brush surface before cutting.
Don't force a brush back into the housing the wrong way. Some brushes have a D-shape or a notch that only fits one direction. If it doesn't slide in easily, rotate it 180 degrees.
Forcing it can bend the drive socket.
Finally, be careful with third-party replacement brushes. They look identical but often have slightly different dimensions. Some fit so loosely they wobble and trigger noise sensors.
If you're not sure whether your brush roll is splash-safe, this guide on washing an upright vacuum brush roll lays out the differences.
When to Replace vs Just Clean: Wear Signs You Can't Ignore
Cleaning keeps a brush working, but eventually every brush wears out. You need to know when to stop scrubbing and just swap the part.
Replace the side brush when the bristles are permanently bent in one direction. That means the brush has been spinning under heavy load for too long. It won't throw debris properly, even though it looks mostly fine.
Side brushes also crack at the center hub, especially on cheaper robots that grind against door thresholds.
Replace the main roller when you see visible cracks in the rubber fins, or when bristles start falling out in clumps. Another clear sign is when the roller spins freely but the robot sounds louder or picks up less debris. That suggests the brush has lost its sweeping shape and can't maintain floor contact evenly.
Typical replacement windows are every 3 to 6 months for side brushes and every 6 to 12 months for main rollers. Those ranges shift if you have pets, heavy rug use, or a large house. Track how often your brush jams.
Once cleaning becomes a weekly battle against the same tangled mess, the brush geometry is probably already compromised.
Keeping It Clean Longer: Maintenance and Scheduling Tips
Prevention beats deep cleaning. Trim hair off the brush right after heavy runs. That stops tangles from forming in the first place.
Clear floor clutter before each cycle. Cables and carpet tassels cause most brush jams. Set a weekly reminder for brush checks if you have pets, biweekly otherwise.
If your robot mainly handles hard floors, the right brush design matters. Our top-rated models for LVP floors show how a well-designed roller can reduce tangling on smooth surfaces.
Quick Decision Guide: Match Your Situation to the Right Move
Not sure what to do? Follow the logic:
- Weak pickup, clean brush: Check the suction port for clogs.
- Brush jam error returns: Inspect the drive axle and end caps for hair.
- Wobbly side brush: Tighten the screw, or replace the hub if it's cracked.
- Allergy concerns: A HEPA-equipped robot traps more of the allergens your brushes stir up.
Most issues resolve with one deep clean. Start there and see if performance comes back.
Frequently Asked Questions
How Often Should I Clean My Robot Vacuum Brushes?
Weekly in average homes. Every 2 to 3 days in pet households. Clean immediately if you see a jam error or weak suction, regardless of your normal schedule.
Can I Wash Robot Vacuum Brushes with Water?
Side brushes can be rinsed with lukewarm water and mild soap. Main rollers should just be wiped with a damp cloth. Dry everything fully before reinstalling.
Never submerge the brush housing or the motor-driven end caps.
Why Does My Robot Vacuum Keep Getting Tangled?
Hair and thread wrap around the brush axle during normal rotation. Long-haired households and pets make it worse. Check the brush after every third run during shedding season to catch tangles early.
How Do I Know When to Replace the Brush Instead of Cleaning It?
Replace the side brush when bristles bend or the hub cracks. Replace the main roller when rubber fins crack or bristles fall out. Typical lifespans are 3 to 6 months for side brushes and 6 to 12 months for rollers.

