

The allure of a self-cleaning home is powerful, and robotic vacuums, particularly those from Ecovacs, have brought this vision closer to reality. Ecovacs Deebot models offer sophisticated navigation, powerful suction, and convenient app control, promising to automate your cleaning routine.
However, like any advanced technology, these devices can sometimes encounter issues. Whether your Ecovacs robot vacuum is refusing to charge, getting stuck, failing to connect to Wi-Fi, or exhibiting other peculiar behaviors, understanding how to troubleshoot common problems can save you time, frustration, and potentially the cost of a service call.
This comprehensive guide will equip you with the knowledge to diagnose and resolve a wide array of Ecovacs robot vacuum troubleshooting scenarios. We’ll cover everything from basic maintenance that can prevent issues to advanced fixes for more complex glitches. By following these steps, you’ll be able to get your smart cleaning companion back to its optimal performance, ensuring your floors remain spotless with minimal manual intervention.
Key Takeaways
- Regular Maintenance is Crucial: Keeping brushes, filters, and sensors clean significantly reduces the likelihood of common issues.
- Charging Problems: Ensure the charging dock is powered, contacts are clean, and the robot is properly aligned.
- Navigation & Movement Issues: Obstacles, tangled brushes, and dirty sensors are frequent culprits for getting stuck or erratic movement.
- Connectivity Woes: Wi-Fi signal strength, correct network credentials, and app updates are key to resolving connection problems.
- Suction & Cleaning Inefficiency: Clogged dustbins, full filters, and worn-out brushes directly impact cleaning performance.
- App & Software Glitches: Restarting the robot, app, and router, and ensuring software is updated can resolve many software-related problems.

Understanding Your Ecovacs Deebot: Common Issues And Their Causes
Ecovacs Deebot robots are designed for efficiency and ease of use, but like any electronic device, they can encounter problems. Understanding the root cause of an issue is the first step towards a swift resolution. Many problems stem from simple oversights in maintenance or setup, while others might point to a more complex hardware or software malfunction.
Common Problems Encountered
Across the various Ecovacs Deebot models, users frequently report a few recurring issues:
- Not Charging: The robot fails to dock or does not initiate the charging process.
- Not Moving or Moving Erratically: The vacuum remains stationary, moves in circles, or gets stuck frequently.
- Poor Suction Power: The robot is not picking up dirt effectively.
- Wi-Fi Connectivity Issues: The robot disconnects from the home network or cannot be controlled via the app.
- Error Messages or Voice Alerts: The robot announces specific error codes or problems.
- Brushes Not Spinning: The main or side brushes fail to rotate, impacting cleaning.
- Water Leaking (for models with mopping functionality): Water seeps from the mopping module when it shouldn’t.
The Importance Of Basic Maintenance
A significant percentage of troubleshooting Ecovacs robot vacuums can be resolved by adhering to a consistent maintenance schedule. Neglecting this can lead to a cascade of problems. For instance, a clogged filter not only reduces suction but can also cause the motor to overheat, leading to performance degradation or even damage.
Similarly, tangled hair on brushes can impede their rotation, triggering error messages and preventing effective cleaning.
Diagnosing The Problem: A Systematic Approach
Before diving into specific solutions, it’s essential to adopt a systematic approach to diagnosis. This involves observing the robot’s behavior, noting any error messages, and checking basic settings.
- Observe the Behavior: What exactly is happening? Is it a complete failure, or intermittent? When did the problem start?
- Check Error Indicators: Listen for voice alerts and check the Ecovacs Home app for any displayed error codes or messages. These are often the most direct clues.
- Inspect the Robot: Visually examine the robot for obvious obstructions, damage, or dirt buildup on sensors, brushes, and charging contacts.
- Review Recent Changes: Did the problem start after a software update, a change in your Wi-Fi network, or the addition of new furniture?
By following these initial diagnostic steps, you can often narrow down the potential causes and proceed to the most relevant troubleshooting section.

Troubleshooting Charging And Power Issues
One of the most frustrating problems is when your Ecovacs robot vacuum refuses to charge or power on. This can render your automated cleaning device useless. Fortunately, most charging issues are rectifiable with a few straightforward checks and maintenance steps.
Ensuring Proper Docking And Connection
The charging dock is the critical link between your robot and its power source. Several factors can prevent a successful charge.
- Dock Placement: The dock needs to be on a hard, level surface, with adequate clearance on both sides and in front. Ecovacs typically recommends at least 0.5 meters (1.6 feet) of clearance on each side and 1.5 meters (4.9 feet) in front. Obstructions can prevent the robot from aligning correctly.
- Power Supply: Ensure the power adapter is securely plugged into both the charging dock and a working wall outlet. Test the outlet with another device to confirm it has power.
- Charging Contacts: Both the contacts on the charging dock and the robot’s underside must be clean and free of debris. Dust, hair, and grime can create a barrier, preventing electrical conductivity.
- Cleaning: Use a dry, soft cloth or a melamine sponge (like a Magic Eraser, used dry) to gently wipe the metal charging contacts on both the dock and the robot. Avoid using water or abrasive cleaners, as this can damage the contacts.
- Robot Alignment: The robot needs to align precisely with the charging dock. If it stops short, is crooked, or is blocked by an object, it won’t charge. Check if the robot’s anti-drop sensors are clean, as dirt here can sometimes cause misjudgments about proximity.
Addressing Battery-related Problems
If the robot docks correctly but still doesn’t charge, the issue might be with the battery itself.
- Initial Charge Time: For brand-new robots or after a long period of disuse, the battery may require an extended initial charging period, often 4-6 hours. Refer to your specific model’s manual for recommended initial charging times.
- Battery Health: Like all rechargeable batteries, Ecovacs batteries degrade over time. If your robot is several years old and charging issues persist despite cleaning and proper docking, the battery may need replacement. You can often order replacement batteries directly from Ecovacs or authorized third-party retailers.
- Battery Reinstallation (if applicable): Some models allow for user-removable batteries. If yours does, ensure the battery is correctly seated and securely connected. Consult your manual for instructions on how to safely remove and reinstall the battery.
- Temperature: Batteries perform best within a specific temperature range. Avoid charging the robot in extreme heat or cold.
Troubleshooting “no Power” Scenarios
If the robot shows no signs of life at all:
- Check the Power Switch: Some Ecovacs models have a physical power switch, usually located on the side or underside. Ensure this switch is in the “on” position.
- Deep Discharge: If the robot has been unused for a very long time, the battery might be deeply discharged, requiring a longer period on the charger to show any signs of life. Leave it connected to a powered dock for at least 24 hours.
- Hardware Fault: If none of the above steps work, there might be an internal hardware issue with the robot’s power circuitry. In such cases, contacting Ecovacs customer support is the next logical step.
Resolving Navigation And Movement Issues
An Ecovacs robot vacuum that gets stuck, moves erratically, or fails to cover its cleaning area is a common point of frustration. These issues often stem from environmental factors, sensor problems, or mechanical obstructions.
Overcoming Obstacles And Getting Unstuck
The ability to navigate a home environment is complex. Even advanced robots can struggle with certain obstacles.
- Identify Common Culprits:
- Cords and Cables: Loose electrical cords, charging cables, or even phone chargers are notorious for tangling robot brushes and wheels. Tidy up cables using cord organizers or cable ties.
- Rugs with Long Fringe: The fringe on some rugs can easily get caught in the robot’s brushes and wheels. Consider tucking the fringe under or removing it before cleaning.
- Low-Profile Furniture: Very low furniture, like some coffee tables or entertainment centers, can trap the robot underneath. Ensure there’s enough clearance or use virtual barriers or no-go zones in the app to prevent the robot from entering these areas.
- Dark or Reflective Surfaces: Some older or less sophisticated LIDAR or vSLAM sensors can have difficulty with very dark carpets or highly reflective floors (like glossy tiles or mirrors), sometimes misinterpreting them as drops or obstacles.
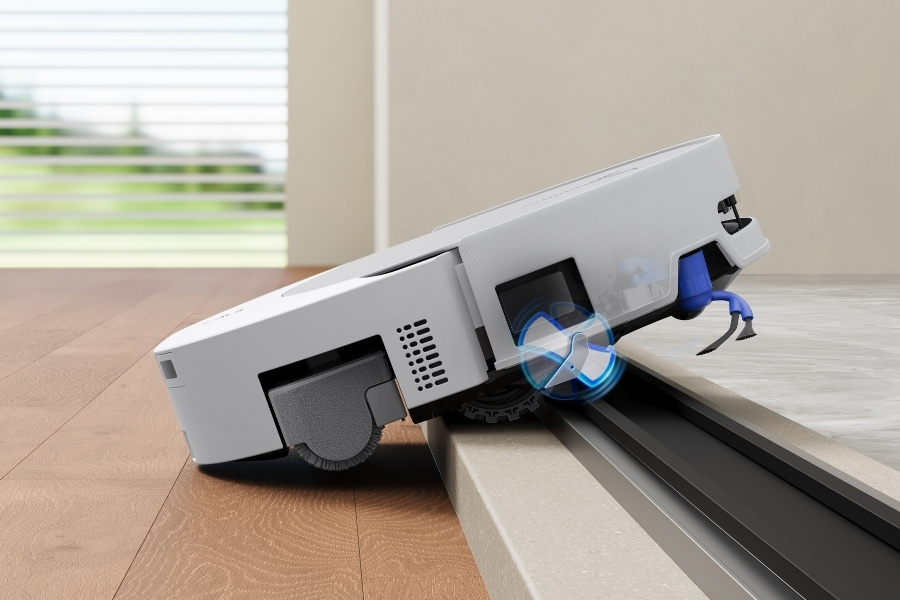
- Thresholds and Transitions: While most Deebots can handle small transitions, steep thresholds between rooms or high-pile carpet edges can pose a challenge.
- Using App Features:
- No-Go Zones: Define areas on the map where the robot should not enter. This is ideal for areas with many cords or delicate items.
- Virtual Barriers: Similar to no-go zones, these create invisible walls.
- Room Mapping: Ensure your robot has correctly mapped your home. If the map is inaccurate, the robot may struggle with navigation. You might need to re-map the environment.
Cleaning And Calibrating Sensors
Ecovacs robots rely heavily on a suite of sensors to perceive their surroundings. Dirty or malfunctioning sensors are a primary cause of navigation errors.
- Types of Sensors:
- Anti-drop Sensors: Located on the underside, these prevent the robot from falling down stairs.
- Wall Sensors: Help the robot navigate along walls and furniture edges.
- Collision Sensors: Detect impacts, though advanced models aim to minimize these.
- Navigation Sensors (LIDAR, vSLAM, etc. ): These are the “eyes” of the robot, mapping the environment.
- Cleaning Procedure:
- Power Off: Turn off the robot.
- Locate Sensors: Identify all sensor openings on the robot’s body (sides, front, underside).
- Wipe Gently: Use a clean, dry, soft cloth to gently wipe each sensor lens. For stubborn smudges, a slightly damp cloth (water only, well wrung out) can be used, followed immediately by drying with a soft cloth.
- Check for Obstructions: Ensure no debris is lodged in or around the sensor housings.
- Sensor Malfunctions: If cleaning the sensors doesn’t resolve navigation issues, one or more sensors might be faulty. This typically requires professional repair or replacement.
Addressing Brush And Wheel Problems
Tangling and debris can impede the proper function of the robot’s core locomotion and cleaning components.
- Cleaning the Brushes: Hair, threads, and debris can wrap around the main brush and side brushes.
- Remove Brushes: Consult your manual for how to detach the main brush module and side brushes.
- Untangle: Use the cleaning tool provided with your Ecovacs (or scissors/tweezers carefully) to remove all tangled debris. Pay close attention to the ends of the main brush where hair often accumulates.
- Check Brush Rotation: Manually spin the brushes to ensure they move freely.
- Checking the Wheels: Ensure the drive wheels and the caster wheel can spin freely and are not obstructed by hair, string, or debris. Sometimes, debris can get lodged in the wheel axle. Gently rotate the wheels by hand to check for resistance.
Troubleshooting Wi-fi And App Connectivity
The smart features of your Ecovacs robot vacuum are accessed via the Ecovacs Home app, which relies on a stable Wi-Fi connection. Connectivity problems can be particularly vexing, but they are often resolvable by addressing network settings and app configurations.
Ensuring A Stable Wi-fi Environment
The robot’s ability to connect and remain connected to your home network is paramount.
- Network Compatibility: Ecovacs Deebots typically support 2.4GHz Wi-Fi networks. Many modern routers broadcast both 2.4GHz and 5GHz bands. Ensure your phone is connected to the 2.4GHz band during setup, and that your router is configured to allow 2.4GHz connections. Some routers combine these bands under one SSID (network name); in such cases, you may need to temporarily separate them in your router settings or ensure the robot can connect to the combined SSID.
- Signal Strength: The robot needs a strong Wi-Fi signal where it operates, especially near its charging dock. Weak signals can cause frequent disconnections.
- Router Placement: Position your Wi-Fi router centrally in your home, away from obstructions like thick walls or large metal objects.
- Wi-Fi Extenders/Mesh Systems: If your home is large or has Wi-Fi dead zones, consider using a Wi-Fi extender or a mesh Wi-Fi system to improve coverage.
- Network Credentials: Double-check that you are entering the correct Wi-Fi network name (SSID) and password. Passwords are case-sensitive.
- Router Settings:
- MAC Filtering: If your router has MAC address filtering enabled, ensure the robot’s MAC address is added to the allowed list. You can usually find the robot’s MAC address in the Ecovacs Home app under device settings.
- Firewall Settings: Overly restrictive firewall settings on your router might block communication. Temporarily disabling the firewall can help diagnose this, but remember to re-enable it afterward.
- Router Reboot: Sometimes, simply restarting your router and modem can resolve temporary network glitches. Unplug them, wait 30 seconds, and plug them back in.
Reconnecting The Robot To Wi-fi
If your robot has lost its connection or you’ve changed your Wi-Fi network:
- Reset Network Settings on Robot: Most Ecovacs models have a function to reset their Wi-Fi settings. This is often done by pressing and holding a specific button (e.g., the “Home” or “Recharge” button) for several seconds until you hear a prompt or see an indicator light change. Consult your model’s manual for the exact procedure.
- Initiate Setup in App: Open the Ecovacs Home app, go to the device settings, and look for an option like “Wi-Fi Settings” or “Connect to Wi-Fi.” Follow the on-screen prompts to reconnect. You’ll likely need to put the robot into pairing mode (often indicated by a flashing Wi-Fi light) and select your 2.4GHz network.
- Check Robot’s Wi-Fi Indicator: Pay attention to the Wi-Fi indicator light on the robot. A solid light usually indicates a successful connection, while a flashing light often means it’s trying to connect or in pairing mode. Refer to your manual for the specific meaning of different light patterns.
Troubleshooting App-related Issues
Sometimes, the problem lies not with the robot’s connection but with the app itself.
- App Updates: Ensure you have the latest version of the Ecovacs Home app installed on your smartphone. Developers frequently release updates to fix bugs and improve performance. Check your phone’s app store (Google Play Store or Apple App Store) for available updates.
- App Cache/Data: Corrupted app cache or data can cause glitches. Try clearing the cache and data for the Ecovacs Home app through your phone’s settings. Note that this might require you to log back into the app.
- Restart the App: Force close the Ecovacs Home app and reopen it.
- Restart Your Phone: A simple phone reboot can sometimes resolve app-related issues.
- Reinstall the App: As a last resort for app issues, uninstall and then reinstall the Ecovacs Home app.
Addressing Suction Power And Cleaning Performance
A robot vacuum is only useful if it effectively cleans your floors. If your Ecovacs Deebot seems to be leaving dirt behind or isn’t picking up debris as it used to, several factors could be at play, primarily related to airflow and brush effectiveness.
Maintaining The Dustbin And Filter System
The dustbin and filter are critical components for capturing dirt and maintaining suction power.
- Emptying the Dustbin: This sounds obvious, but the dustbin can fill up quickly, especially in homes with pets or high foot traffic. Even if it’s not completely full, a tightly packed dustbin can restrict airflow.
- Frequency: Empty the dustbin after every cleaning cycle, or more frequently if needed.
- Cleaning: Remove the dustbin and tap out the debris. For thorough cleaning, wash the dustbin with water (ensure it’s completely dry before reinserting). Check your manual, as not all dustbins are washable.
- Cleaning/Replacing the Filter: The high-efficiency filter (HEPA-type filter) traps fine dust particles. A clogged filter severely reduces suction.
- Cleaning: Most Ecovacs filters are not washable. They should be cleaned by gently tapping them against the side of the dustbin or a trash can to dislodge dust. Some models may come with a small cleaning brush for the filter.
- Replacement: Filters have a limited lifespan (typically 3-6 months, depending on usage and environment). If cleaning no longer improves suction, it’s time to replace the filter. Genuine Ecovacs replacement filters are recommended for optimal performance.
- Checking Airflow Paths: Ensure there are no blockages in the robot’s intake port (where dirt enters the dustbin) or within the dustbin housing itself.
Optimizing Brush Performance
The main brush and side brushes are responsible for agitating and sweeping debris towards the suction inlet.
- Tangled Brushes: As mentioned in the navigation section, hair and debris can wrap around the brushes, preventing them from spinning effectively. Regularly clean the main brush and side brushes.
- Worn Brushes: Over time, brush bristles can wear down, becoming less effective at agitating dirt from carpets and floors.
- Inspection: Visually inspect the bristles. If they are significantly frayed, bent, or missing, it’s time for replacement.
- Replacement: Genuine Ecovacs replacement brushes are recommended. Replacing them can often restore much of the lost cleaning performance.
- Brush Installation: Ensure the main brush and side brushes are correctly installed after cleaning or replacement. They usually have specific slots or mounting points.
Ensuring Correct Cleaning Mode And Settings
The Ecovacs Home app offers various cleaning modes and suction power settings.
- Suction Power: Check the selected suction power in the app. If it’s set to “Quiet” or “Standard,” the robot might not be cleaning as powerfully as you expect on carpets. Increase the suction level for deeper cleaning. Some models automatically adjust suction based on floor type.
- Cleaning Modes: Ensure the robot is set to the appropriate cleaning mode for your needs (e.g., Auto, Edge, Spot).
- Map Accuracy: An inaccurate map might cause the robot to miss areas or clean inefficiently. If you suspect map issues, try having the robot re-map your home.
Handling Error Messages And Voice Alerts
Ecovacs robots are equipped with diagnostic systems that alert users to problems via voice prompts and error codes displayed in the Ecovacs Home app. Understanding these alerts is key to quick troubleshooting.
Common Error Codes And Their Meanings
While specific codes vary by model, some common themes emerge. Always refer to your model-specific user manual or the Ecovacs Home app’s help section for the definitive list of error codes and their solutions.
- “The main brush is entangled.” (Error Code often related to brush motor)
- Cause: Hair, string, or debris wrapped around the main brush.
- Solution: Power off the robot, remove the main brush, clean it thoroughly, and reinstall. Ensure it spins freely.
- “The drive wheel is suspended.” (Error Code often related to wheel sensors)
- Cause: One or both drive wheels are off the ground, typically due to getting stuck on an obstacle or uneven surface.
- Solution: Manually reposition the robot onto a flat surface. Clear any obstructions around the wheels and the area the robot was stuck in. Clean the wheel sensors.
- “The bumper is stuck.” (Error Code often related to bumper sensor)
- Cause: The robot’s front bumper is depressed and not returning to its normal position, indicating it might be jammed or obstructed.
- Solution: Gently tap the bumper to dislodge it. Check for debris trapped between the bumper and the robot’s body. Ensure the bumper moves freely.
- “The cliff sensor is dirty.” (Error Code often related to anti-drop sensors)
- Cause: Dirt or debris on the anti-drop sensors is preventing them from functioning correctly, potentially causing the robot to stop operation to avoid perceived drops.
- Solution: Power off the robot and clean all anti-drop sensors located on the underside with a dry, soft cloth.
- “Dustbin is full

