

We've all been there. A screw slips from your fingers, hits the floor, and vanishes into a pile of sawdust. Can shop vacuums pick up screws?
Yes, in most cases they handle this job without any trouble. The real question is how you set up your machine before you start.
As of 2026, most wet/dry shop vacuums from brands like Shop-Vac, Ridgid, and DeWalt produce 50 to 90 inches of water lift. That's plenty of suction for common screws up to three inches long. The challenge is keeping screws from getting stuck in the hose or lost in the tank.
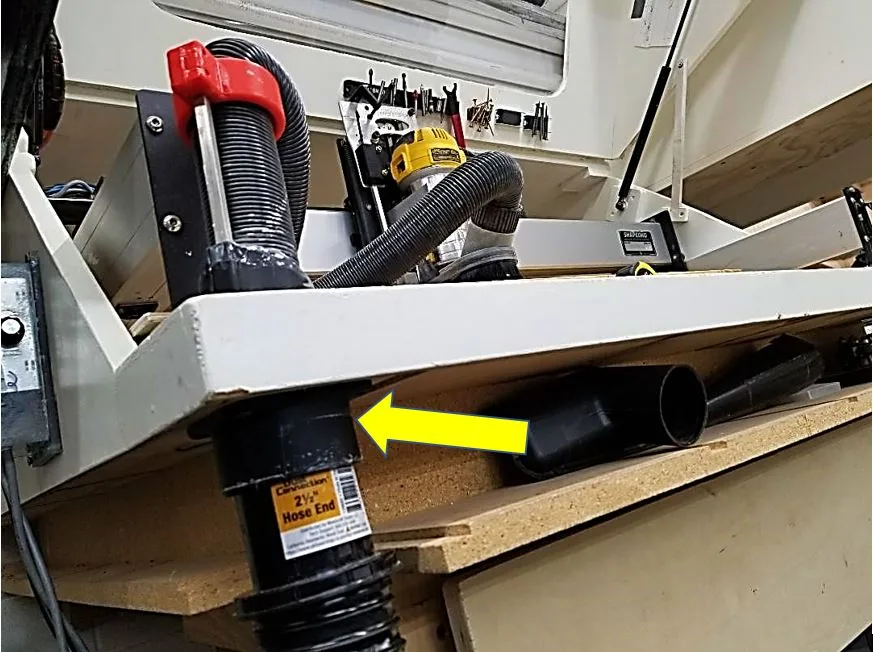
Image source: Bing (Web (fair-use with source credit))
Can Shop Vacuums Pick up Screws?
Quick Answer
Yes, shop vacuums pick up screws in most situations. A standard wet/dry vacuum with a clean filter and the right nozzle handles screws from bare floors, carpet, and sawdust. Screws up to three inches long and #12 gauge move through a 2.5-inch hose easily.
Smaller screws work too, but they need lower suction and a crevice tool.
What You Need to Know About Your Shop Vac Before Testing It
Not all shop vacuums handle screws the same way. The difference comes down to water lift, airflow, hose diameter, and filter setup. Water lift measures suction strength in inches.
Most shop vacuums rate between 50 and 90 inches. Airflow, measured in CFM, tells you how much air moves through the hose. Both matter for screw pickup.
Strong suction lifts the screw off the floor. Good airflow keeps it moving through the hose without stalling.
Hose diameter is the biggest variable. A 2.5-inch hose swallows most screws easily. A 1.25-inch hose works for smaller screws but clogs fast on anything over an inch long.
If you have a narrow hose, swap it for a larger one when you need to pick up hardware.
Your filter setup also matters. A pleated cartridge filter works well for dry pickup. Foam sleeves let more debris pass through.
Never run screws through a vacuum with a torn filter, because metal can reach the impeller and destroy the motor.
Why a Shop Vac Beats a Regular Home Vacuum
Standard household vacuums use narrow hoses and high-speed impellers. They generate strong suction with tight clearances, but that design fails on heavy items like screws. Shop vacuums use larger motors and wider hoses.
They move more air at a lower velocity. That combination lets them pick up heavier objects without choking. A home vacuum will often launch a screw back out or wedge it in the hose.
Wet/Dry Mode and Why It Matters
Most shop vacuums have wet and dry modes. For screws, always use dry mode. Wet mode removes the filter for liquid pickup.
Without the filter, screws and metal shavings travel straight toward the motor housing, which can cause permanent damage.
Check your machine's manual to confirm the dry setting. Some models automatically bypass the filter when you remove it. Others require a manual switch.
A quick glance at the manufacturer's documentation prevents an expensive repair.
Screw Types and Sizes: What Picks Up Cleanly vs. What Gets Stuck
Screw design matters more than most people expect. A smooth wood screw moves through a hose easily. A self-tapping screw with sharp threads and a drill-point tip can snag on a hose rib or nozzle edge.
| Screw Type | Typical Gauge | Pickup Success | Notes |
|---|---|---|---|
| Drywall screws | #6 to #8 | High | Sharp point can snag on narrow hoses |
| Wood screws | #4 to #12 | High | Best with a 2.5-inch hose |
| Sheet metal screws | #6 to #10 | Medium | Sharp threading catches on hose interiors |
| Self-tapping screws | #8 to #14 | Low to Medium | Drill-point tips dig into plastic nozzles |
| Machine screws | #4 to #12 | High | Clean threads, no point to catch |
| Lag screws | 1/4 to 1/2 inch | Medium | Heavy, need high CFM or a larger hose |
The Size Ceiling for Screw Pickup
Screws up to about three inches long move through a typical 2.5-inch hose without issue. Anything longer can tumble and wedge sideways inside the hose. If you're vacuuming lag screws or long deck screws, hold the nozzle at a steep angle so the screw enters head-first or point-first.
Screws smaller than #6 work fine but behave differently. Light screws hover near the nozzle tip without getting pulled in. They also hide deep in carpet fibers.
The fix is simple: reduce suction if your model allows, or use a crevice tool to aim directly at the screw.
When Screw Shape Causes Problems
Flat-head screws with sharp edges can seal against the nozzle opening. This creates a suction lock that holds the screw in place. The vacuum sounds like it's working, but the screw just spins or sticks.
Tilt the nozzle slightly so air leaks around one edge. The screw releases and gets pulled in. It's a small trick that saves you from prying a stuck screw loose.
The Right Setup for Picking Up Screws (Step-by-Step Guide)
Follow these steps to maximize your chances of picking up every screw on the first pass.
Step 1: Choose the Correct Nozzle
Use a crevice tool for tight spaces and corners. Use a wide floor head for open areas. The floor head covers more ground, but the crevice tool concentrates suction into a smaller area, which helps lift heavier screws.
Skip the brush attachment. Bristles push small screws around and make pickup harder. A bare nozzle opening gives you maximum contact with the surface.
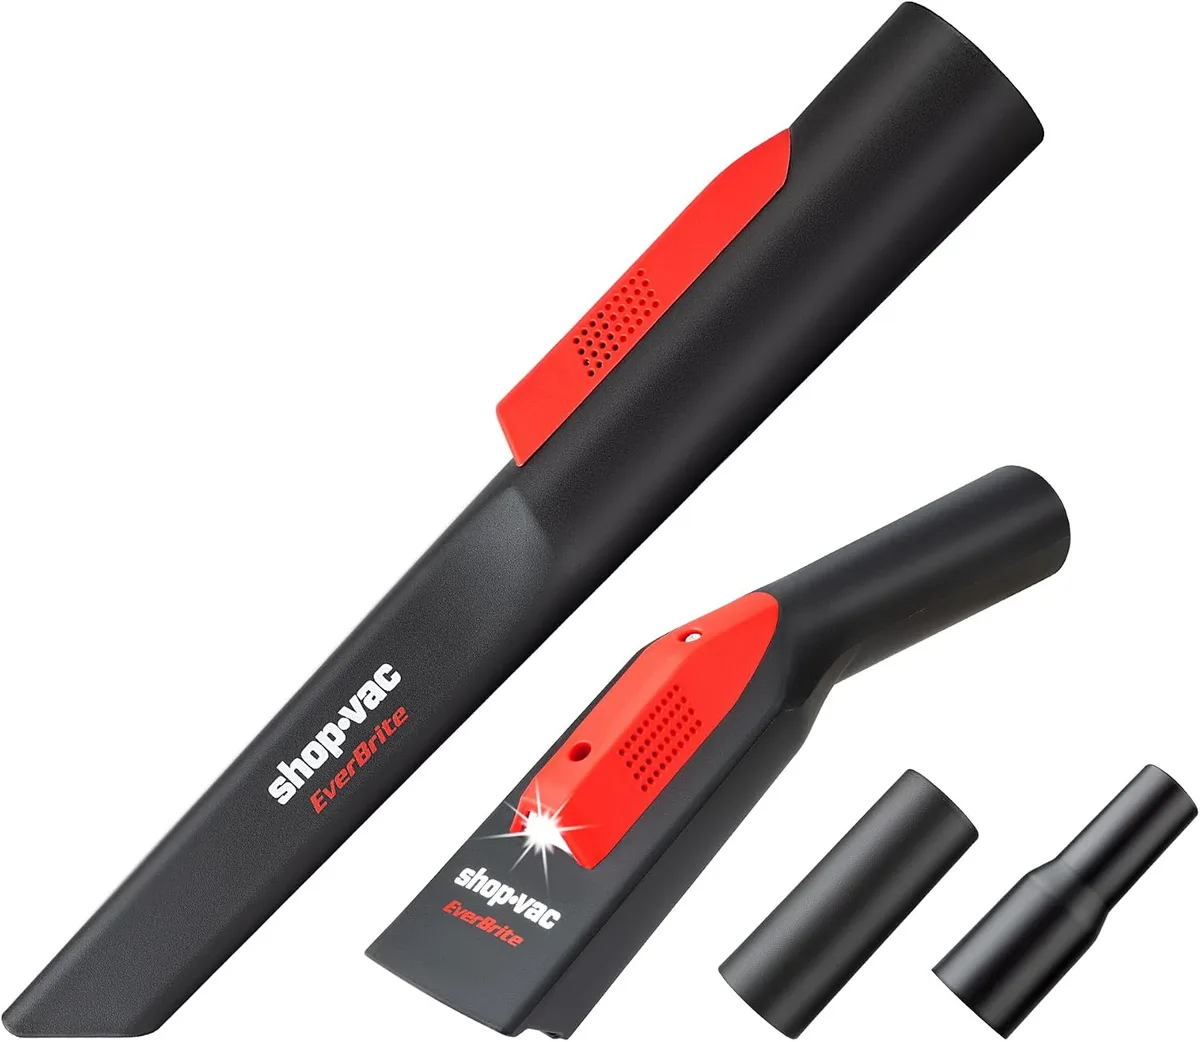
Image source: Web (Bing) / vacuumop.com (Web image (fair-use with source credit))
Step 2: Adjust Suction If Possible
Many shop vacuums have a variable speed dial or a suction-release port. If your model offers this, start at medium. High suction can press a screw firmly against the nozzle or blow it away from the intake.
For small screws under #6, lower suction works best. The screw stays on the surface until the nozzle gets close, then gets pulled in cleanly.
Step 3: Use the Right Angle and Approach
Hold the nozzle at a 30 to 45 degree angle to the floor. This lets air flow around the screw and helps it slide into the hose. A flat, perpendicular angle creates a suction seal that holds the screw stuck.
On bare floors, move the nozzle slowly in a straight line. On carpet, press down slightly so the nozzle reaches the base of the fibers.
Step 4: Work in a Grid Pattern
Sweep the area in overlapping passes, like you're mowing a lawn. This ensures you don't miss screws hidden in sawdust or under a thin layer of debris. If you're looking for a specific screw, focus on where you dropped it and work outward in a spiral.
Step 5: Listen During the Pass
Your ears are a great tool. When a screw enters the hose, you'll hear a distinct clatter. If you hear nothing, the screw may be stuck near the nozzle.
Stop, check the nozzle opening, and clear any debris before continuing.
Step 6: Recover Screws From the Tank Safely
Unplug the vacuum first. Open the tank and inspect the contents. Screws settle at the bottom, mixed with dust or shavings.
Pour everything onto a drop cloth or tray. Use a magnet to separate the screws from loose debris quickly.
The "Screw Retrieval Hack": How to Keep Screws From Getting Lost in the Tank
Collecting screws alongside sawdust creates a sorting problem. You vacuum up the debris, then dig through it to find your hardware. It works, but it's slow.
There's a better way.
A cyclone separator keeps heavy items like screws from reaching the main tank. It spins incoming air at high speed, dropping screws and debris into a separate collection cup. Only fine dust reaches the vacuum's filter.
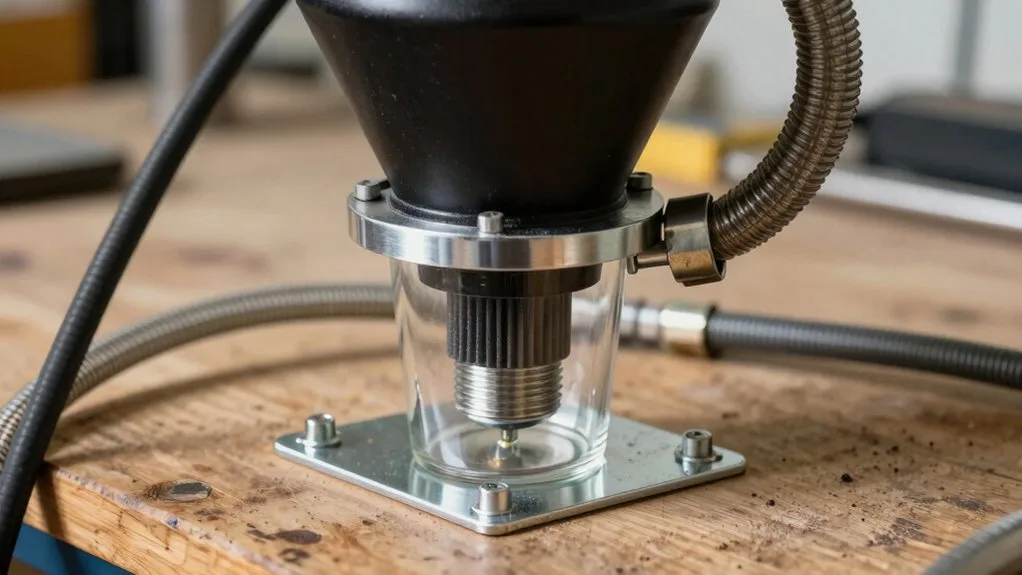
Image source: Web (Bing) / smallboatsmonthly.com (Web image (fair-use with source credit))
Cyclone separators attach between the hose and the vacuum. They cost between $30 and $80 depending on size and brand. For workshop use, they save time and protect your filter.
Dust doesn't pack into the pleats, so suction stays strong longer. Screw recovery becomes fast, because screws land in a small, accessible container.
The Sock Hack
If you don't want to buy a cyclone, try this cheap alternative. Stretch a piece of pantyhose or a thin sock over the hose inlet inside the tank. Secure it with a zip tie.
Screws and larger debris collect in the sock, while dust passes through to the tank. When you're done, untie the sock and dump the screws where they belong. This hack works well for small jobs and costs almost nothing.
The Drop-Cloth Method
Lay a canvas drop cloth inside the tank before you start vacuuming. The cloth catches screws and larger debris. When you're finished, lift the cloth out and fold it.
Dust still passes through the weave into the tank. This method doesn't separate as precisely as a cyclone, but it prevents screws from mixing with the bottom layer of debris.
Why These Hacks Matter
Screws that sit in your tank get scratched and rust over time. They also mix with metal shavings, which are sharp and dangerous to handle. A separate collection method keeps your hardware clean, dry, and ready to reuse.
It also reduces the risk of accidentally throwing away expensive stainless steel screws with your sawdust.
Comparing Methods: Shop Vac vs. Alternatives for Screw Pickup
A shop vacuum works great, but it's not the only tool for the job. Depending on your situation, another method might be faster or safer.
Shop Vac vs. Magnetic Sweeper
A magnetic sweeper rolls across the floor and picks up steel and iron screws without needing power. It works well on hard floors and construction sites. It does nothing for brass, aluminum, or stainless steel screws, so it's not a full replacement for a vacuum.
Shop Vac vs. Magnetic Pickup Tool
Extendable magnetic wands are great for tight spaces. Under workbenches, inside cabinets, behind appliances. They retrieve one screw at a time and let you place it directly into a container.
The downside is speed. A vacuum covers a large area in seconds while a magnetic wand takes much longer.
Shop Vac vs. Broom and Dustpan
For a few screws on a smooth floor, a broom and dustpan works fine. It's quiet and doesn't disturb the dust. The limitation is obvious: screws roll, bounce, and hide in gaps.
A broom can also scratch delicate floors. For anything more than a dozen screws, the vacuum wins on time and comfort.
Comparison Table
| Method | Speed | Screw Types | Surface Limitations | Cost |
|---|---|---|---|---|
| Shop vacuum | Fast | All types | Carpet hides small screws | Already owned |
| Magnetic sweeper | Fast | Ferrous only | Hard surfaces only | $30 to $60 |
| Magnetic pickup wand | Slow | Ferrous only | One screw at a time | $10 to $25 |
| Broom and dustpan | Slow | All types | Misses gaps and cracks | $10 to $20 |
Common Mistakes That Ruin Your Vacuum (or Lose Your Screws)
A few common errors turn a simple cleanup into a frustrating repair job. Here's what to watch for.
Using Full Suction on Small Screws
Cranked to maximum power, many shop vacuums press small screws firmly against the nozzle intake. The screw plugs the opening, your vacuum starts humming in a higher pitch, and you're stuck with a blockage. Start at medium suction if your machine has a dial.
If it doesn't, hold the nozzle at an angle to break the seal. That one move prevents most clogs.
Vacuuming Metal Shavings Without a Bag or Cyclone
Metal shavings are sharp. They get pulled into the filter pleats and stay embedded there for good. They also scratch plastic tanks and dull the impeller over time.
A cyclone separator or a filter bag prevents most of this damage. Filter bags are cheap and disposable. They stop metal debris from reaching the filter entirely.
Ignoring Hose Blockages Mid-Pass
If the vacuum stops collecting anything, you probably have a clog. Continuing to push the nozzle down stretches the hose and stresses the motor. A blockage can also keep a screw lodged in place.
Stop immediately. Unplug the vacuum. Check the nozzle, then the hose, then the tank inlet.
Clear any jammed screw with a long, flexible rod or by bending the hose to break the obstruction.
Letting Screws Sit in the Tank
Screws left in a damp tank rust quickly. That rust transfers to other metal items and stains the tank interior. If you vacuumed anything wet before or after, the screw will corrode even faster.
Empty the tank right after the job. If you're saving the screws, pour the contents onto a tray and pick them out with a magnet.
Vacuuming Fine Dust Alongside Screws
Fine sawdust and drywall dust clog a standard pleated filter in seconds. If your screws are buried in dust, use a collection method to keep the dust out of the intake. A fine dust bag or a cyclone separator keeps the filter clean and maintains airflow.
That airflow is what makes the screw pickup work in the first place.
When a Shop Vac Won't Work (And What to Do Instead)
There are a few genuine exceptions where a shop vacuum won't solve your problem. Knowing what they are saves you from wasting time.
Embedded or Partially Driven Screws
If a screw is partially driven into wood, your vacuum will not pull it out. Suction isn't strong enough to overcome the wood's grip. Pulling this way also damages the screw threads.
Unscrew it with a drill or screwdriver first, then vacuum it up.
Screws Buried in Thick Mud or Clay
Wet, heavy mud clings to screws and makes them too heavy for most vacuums to lift. The mud also coats your filter and tank, creating a mess. Let the mud dry first.
Once it's dry, chip away the bulk of it or brush it off. Then vacuum the screw normally.
Extremely Small Screws in Shaggy Carpet
Miniature screws from eyeglasses or electronics disappear into thick carpet fibers. A shop vacuum may not generate enough directed suction to pull them out from deep in the pile. For this situation, use a flashlight and a pair of tweezers, or a small magnetic pickup tool.
Wet Surfaces and Rust Concerns
A steel screw on a wet floor gets pulled into the tank with water and rusts quickly. If you're working with untreated steel hardware, dry the floor first. Or empty the tank right after pickup.
Rusted screws are weaker and more likely to strip. Keeping them dry protects your hardware.
Safety and Maintenance: Protect Yourself, Your Vacuum, and Your Floor
A few basic precautions keep you safe and your equipment running for years.
Unplug Before Clearing Blockages
Always disconnect the vacuum from power before reaching into the hose or tank. A spinning impeller can cause serious injury. A screw that's stuck near the motor can also become a projectile.
Unplugging is quick, and it eliminates the risk.
Avoid Vacuuming Live Electrical Components
Never use a shop vacuum to pick up screws near exposed wiring or live electrical panels. Conductive debris can bridge connections inside the machine or at the outlet. If any wires or components are live, shut off the power at the breaker before starting cleanup.
Protecting Your Filter from Metal Debris
A cyclone separator or filter bag keeps metal shavings and sharp screw threads away from your filter. This simple addition prevents damage and reduces how often you need to clean the filter. Inspect your filter before each use.
A small tear lets debris through, which can cause serious damage to the motor.
Cleaning the Hose and Tank After Metal Pickup
After picking up screws, check the hose for embedded threads. Run a soft-bristle brush through the hose to dislodge stubborn shavings. Wipe down the tank interior with a damp cloth to remove fine metal dust that causes rust spots.
Routine upkeep keeps your vac ready for the next job.
According to the Occupational Safety and Health Administration, keeping work areas clean and free of debris is a core requirement for construction sites. You can review their housekeeping standards on the OSHA website to see how proper cleanup practices support worker safety.
FAQs: Quick Answers to Common Screw + Vacuum Questions
Can I use a shop vac to find a screw I dropped in a carpeted room?
Yes, usually. Set your vacuum to dry mode and use a crevice tool. Move slowly across the carpet, pressing the nozzle down so it reaches the base of the fibers.
If the screw is tiny and deeply buried, a magnetic pickup tool might work better.
Will screws damage my shop vac?
Screws can damage a shop vac if they get pulled into the impeller, usually through a torn filter. They can also scratch the tank interior and lodge in the hose. Using a filter bag, a cyclone separator, or the sock hack protects everything.
How do I get screws out of the vacuum hose?
Unplug the vacuum first. Remove the hose and flex it repeatedly to break the obstruction. If that doesn't work, push a broom handle or a long flexible rod through the hose.
Never use water to flush a stuck screw, as it can damage the motor.
Can I use a home vacuum instead of a shop vac?
Only for tiny screws on bare floors, and even then it's risky. Home vacuums have narrow hoses that clog easily, and their impellers can be destroyed by metal debris. For any serious screw pickup, use a shop vac or a magnet.
Are cordless shop vacuums as good as corded for this?
Cordless models work well for small jobs and tight spaces. They typically have lower water lift and airflow, so they may struggle with larger screws. They also run down quickly under heavy load.
A corded model is better for longer cleanups.
Final Verdict: What Works Best for Most People
For most homeowners and DIYers, a standard corded shop vacuum with a 2.5-inch hose is the best setup for picking up screws. Add a cyclone separator or a simple sock hack, and you'll recover your hardware in seconds without digging through dust.
If you work in tight spaces or move around a lot, a cordless model gets the job done on small spills. For large cleanups or job sites, stick with a corded unit.
The bottom line: don't overthink this. Your shop vacuum already has the power you need. Set it up correctly, use the right nozzle, and keep your filter protected.
Screws are just another piece of debris.

