

Can a wet/dry vacuum pick up sand? Yes, it can, but the real answer is a little more nuanced than that. Dry sand, wet sand, and fine dust each behave differently inside the machine.
Get it wrong, and you're looking at a clogged filter or a wrecked motor.
Most people only think about the mess on the floor. The mess inside the tank is where the trouble starts. Manufacturer specs show that a typical wet/dry vacuum moves anywhere from 50 to 200 cubic feet of air per minute, and water lift ranges from 40 to 100 inches.
As of 2026, most shop vacuums also ship with a basic cartridge filter rated around 30 to 50 microns. That filter is great for sawdust, but sand is a whole different beast. Let's walk through exactly how that plays out.
Quick Answer: Yes, But It Depends on a Few Things
Yes, a wet/dry vacuum can pick up sand with the right setup. Dry sand uses a standard utility nozzle. Wet sand needs a squeegee attachment.
Ultra-fine sand clogs filters fast. Match the nozzle and filter to the sand type.
How Wet/Dry Vacuums Handle Sand: What’s Happening Inside
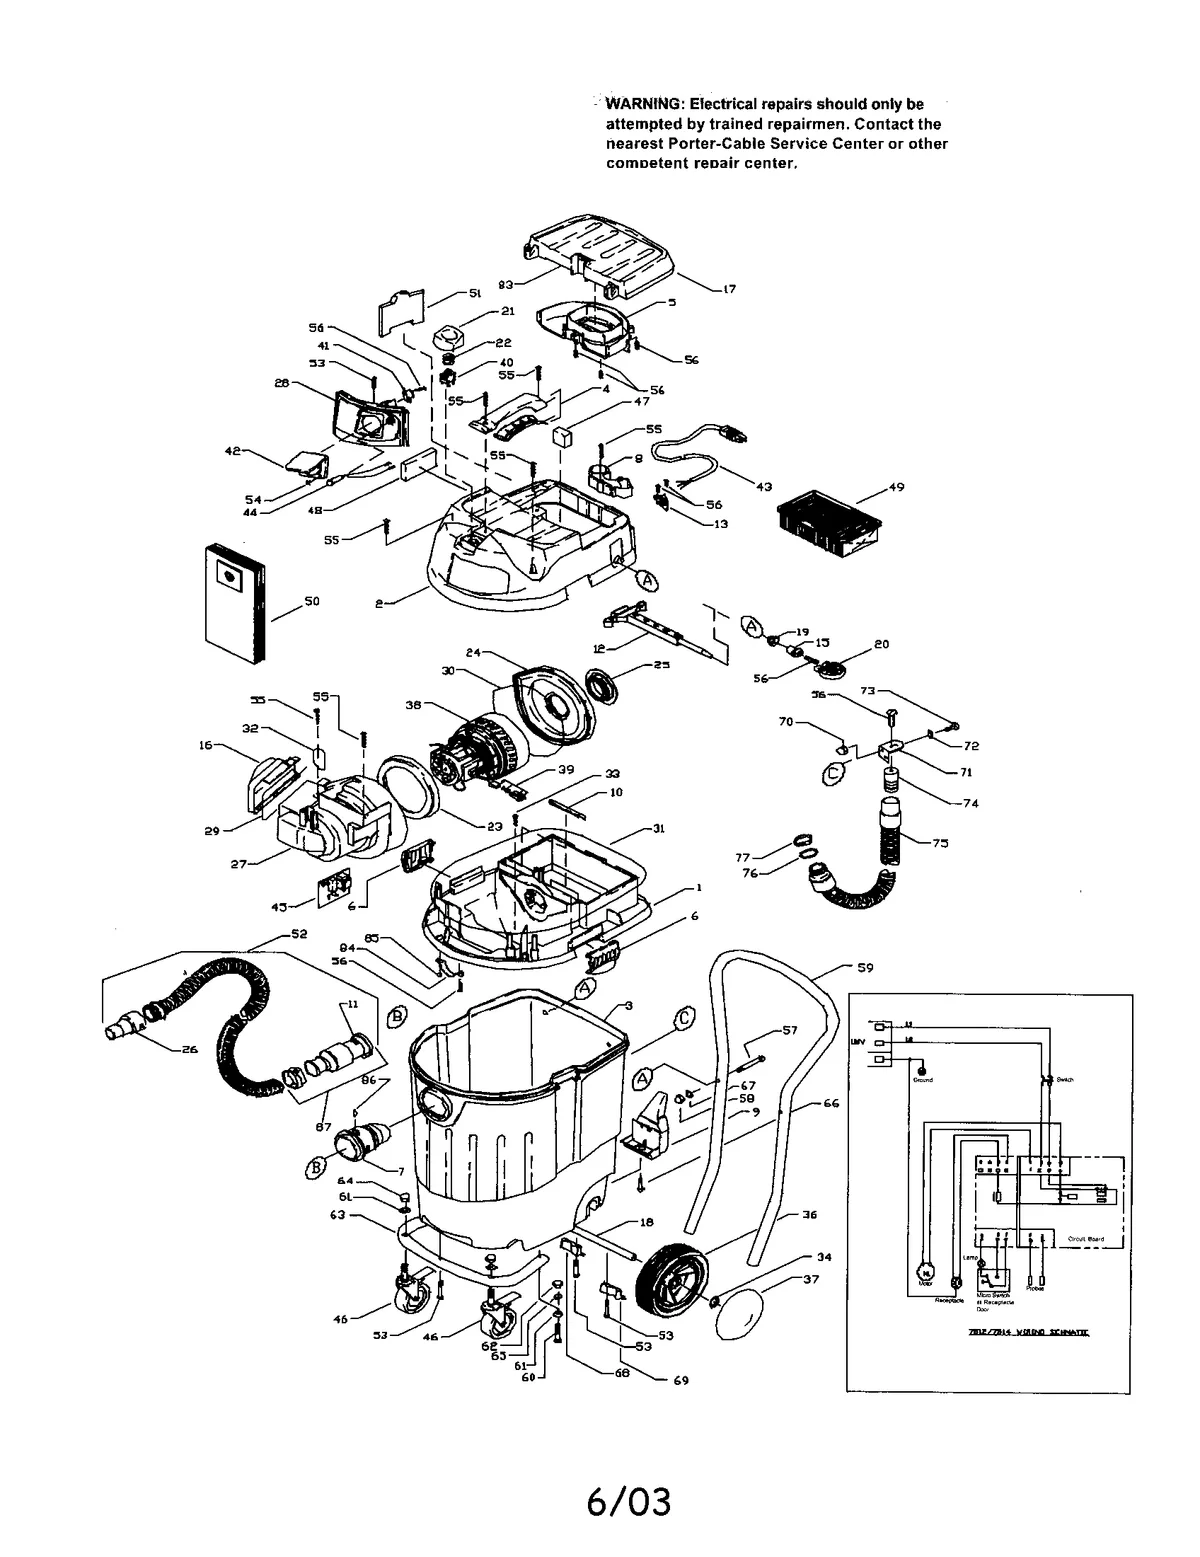
Image source: Bing (Web (fair-use with source credit))
A wet/dry vacuum is built like a big metal bucket with a motor on top. The motor pulls air through the hose, into the tank, and across a filter before pushing it back out. Sand travels through that system as a solid particle, which means it hits every surface along the way.
The impeller spins fast, the air moves quick, and the heavy grit keeps momentum.
When sand enters the tank, it immediately falls to the bottom because it's too heavy to stay suspended in the airflow. That's good news. The filter only sees the fine dust that stays airborne.
The problem starts when the tank fills up, or when the filter gets coated with micro-particles. Then the airflow drops, and the sand that was happily falling to the floor suddenly backs up in the hose.
If you're vacuuming wet sand, the water clinging to each grain adds another layer of trouble. It clumps together, sticks to the hose walls, and often plugs the drain port before you can empty it. The float valve, which stops water from flooding the motor, can get jammed by grit.
That's why the condition of the sand matters more than the type of vacuum you own.
Most shop vacs handle this kind of load without issue, as long as the filter is properly selected and the tank isn't overfilled. The key is matching your setup to the specific sand situation in front of you.
The Key Decision Branches: Dry Sand, Wet Sand, or Fine Dust?
The easiest way to figure out your next move is to ask one simple question: how much water is mixed in with the sand? From there, the decision tree branches into three clear paths.
Dry Sand: The Easiest Case
If the sand is completely dry, like the spill from a sandbox or a tracked-in pile from the beach, you're in the clear. Use a standard utility nozzle and a cartridge filter. Set the vacuum to dry mode if it has one.
The sand will flow up the hose like a river of grit and settle harmlessly in the tank.
Keep the suction on a lower setting if you can, because high airflow can cause the sand to ricochet and blast the filter with extra dust. For most dry sand, this is a five-minute job.
Wet Sand: The Messy Middle Ground
Wet sand is a different story. It sticks to everything, and it tends to pack into the hose or around the float valve. The best approach here is to switch to a squeegee nozzle.
That lets you scrape the surface and pick up the sand as a slurry instead of individual grains.
If you have a foam sleeve filter, swap it in over the cartridge, because it handles moisture without getting ruined. Plan to rinse out the tank and hose immediately after you finish. Letting wet sand dry inside the unit is how you end up with a crusty layer on every interior surface.
Ultra-Fine Sand and Dust: The Filter Problem
Fine sand, the kind that feels like powdered sugar, is the real filter killer. It's light enough to hang in the airstream, so it gets pulled directly into the filter media. A standard cartridge filter will plug up within minutes.
In our research, the best fix is to use a HEPA filtration bag inside the tank, or a high-performance cartridge rated for fine dust. If you don't have those, try vacuuming slowly and emptying the filter frequently. You'll lose suction fast, but you can still get the job done.
Picking the Right Filter and Nozzle Before You Start
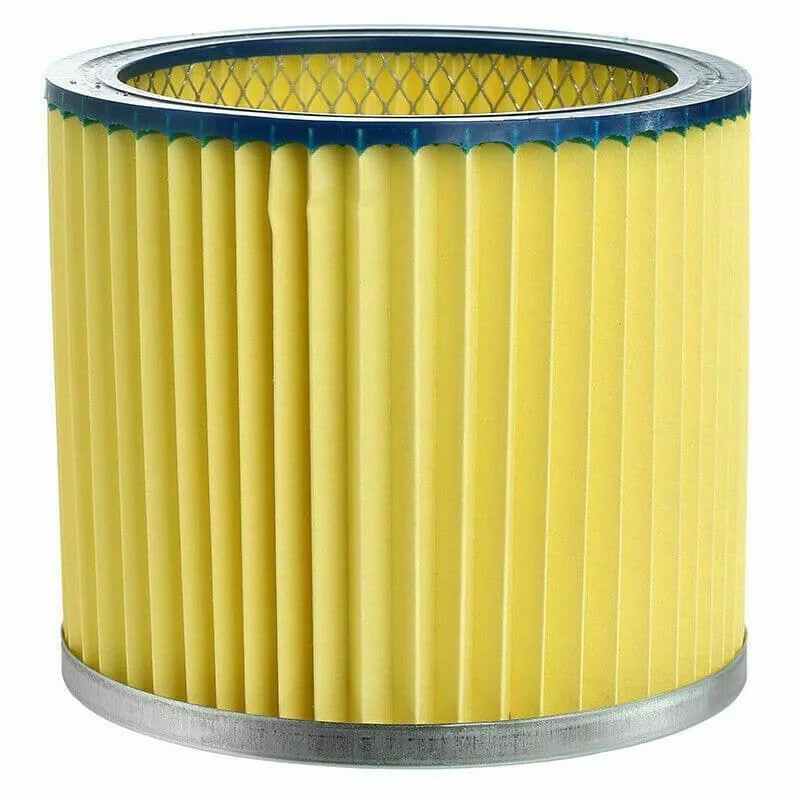
Image source: Bing (Web (fair-use with source credit))
The filter is the single most important decision you'll make. With the wrong one, sand can damage the motor or blow back into the room. Here's a quick rundown of what actually works for sand:
- Standard cartridge filter: Good for dry sand and sawdust, but needs frequent shaking or cleaning.
- Foam sleeve: Best for wet sand, slides over the cartridge, and rinses clean in a few minutes.
- HEPA filter: Expensive but ideal for ultra-fine sand and dust. Captures 99.97% of particles down to 0.3 microns, per the U.S. Department of Energy standard.
- Paper vacuum bag: A clever trick. Put a bag in the tank and it catches the sand before it reaches the filter. Just be ready to throw it away when it's full.
As for nozzles, you don't need a fancy set. A utility nozzle handles most dry sand. A squeegee nozzle works wonders for wet sand and outdoor surfaces.
A crevice tool reaches into car edges and tight corners. Skip the brush attachments for sand, because they just push the grit around.
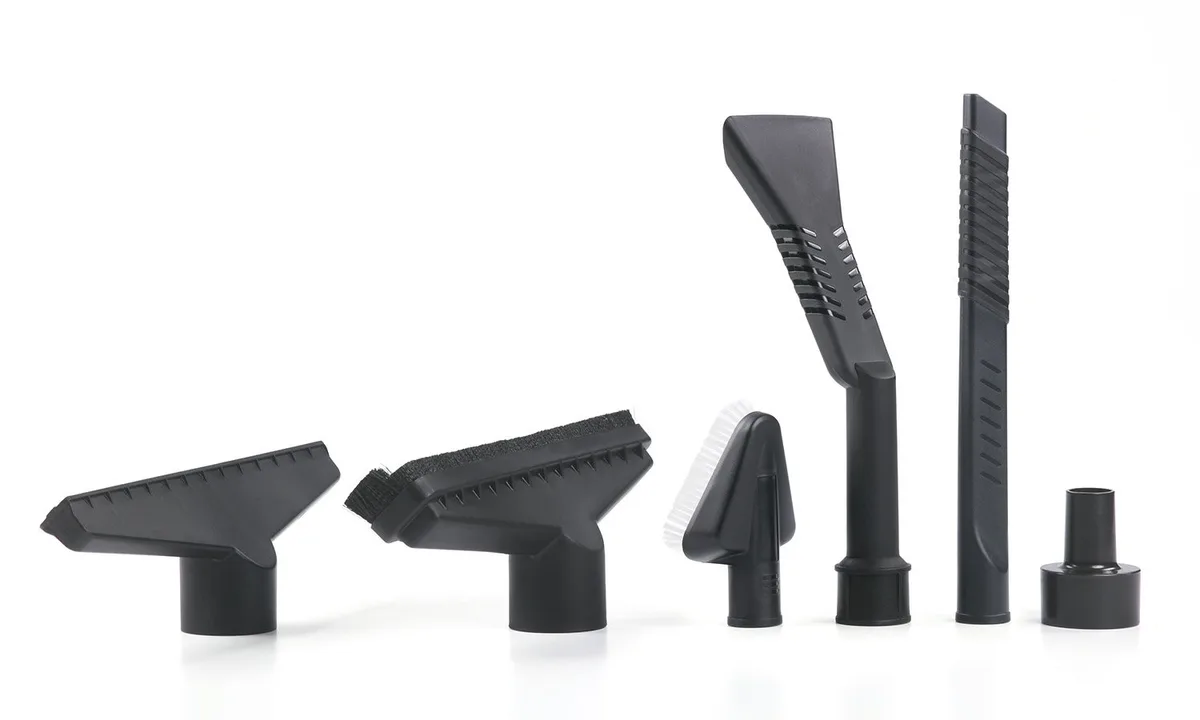
Image source: Web (Bing) / storage.googleapis.com (Web image (fair-use with source credit))
You can also apply the same thinking to other fine debris like sawdust. If you've been wondering about vacuuming that, the filter strategy is nearly identical, and we have a guide that walks you through the same setup for sawdust pickup. The short version is that fine materials clog filters faster and need more frequent maintenance.
Step-by-Step: How to Vacuum Sand Without Ruining Your Shop Vac
Start by clearing the area of anything metal, like nails or screws. Sand alone is fine, but mixed with stray hardware can scratch the impeller and ruin the motor.
- Choose the right filter for the sand type. Use a foam sleeve for wet sand, a cartridge for dry, and a HEPA around for fine dust.
- Attach the correct nozzle. Utility for dry, squeegee for wet, crevice for tight spots.
- Vacuum slowly and let the machine do the work. Fast sweeping makes the sand bounce and clog.
- Keep an eye on the tank level. A full tank of sand is heavy, and the float valve can stick.
- Empty the tank before it reaches the bottom of the motor housing.
- Rinse the tank and hose with water after wet sand. Let it dry completely before closing the lid.
If you notice suction dropping, stop immediately. Check the filter, the hose, and the tank for clogs. Continuing to run a blocked vacuum is the fastest way to burn out the motor.
For general suction issues, the same troubleshooting steps apply whether you're using a shop vac or a pool cleaner. The principle of checking the hose, the filter, and the water flow is universal. If you're dealing with a pool vacuum that keeps losing suction, you'll find the same logic in our guide on fixing suction problems in pool vacuums.
But the core idea here is simple: stop the machine, find the blockage, and clear it before you continue.
One extra tip from our research: if you're vacuuming large amounts of sand outdoors, connect the exhaust port to a leaf blower hose. That pushes the fine dust away from your face and helps you see the floor you're actually cleaning.
Common Mistakes That Kill Suction or Damage the Motor
The biggest mistake people make is vacuuming wet sand with a dry filter setup. That turns the sand into a paste that sticks to the cartridge and blocks airflow almost immediately. If you see water or damp sand, switch to a foam sleeve filter first.
The second mistake is running the vacuum with a full tank. A full tank pushes sand right up against the float valve, and once that valve seals, your suction drops to zero. Another common error is using a brush attachment for sand.
Brushes just push the grit around and grind it into the fibers of your carpet or mat. Use a hard utility nozzle instead.
Never vacuum sand that's mixed with nails, screws, or broken glass. Those can punch holes in the hose, crack the impeller, or dent the inside of the tank. In our research, most shop vac repairs trace back to debris impact damage, not normal wear.
Finally, don't ignore the filter. A clogged cartridge makes the motor work harder, and that extra load generates heat. Run it too long and you can burn out the motor entirely.
If you hear the pitch of the motor rise, that's your warning sign. Stop and check the filter before you keep going.
What to Do When Sand Clogs the Filter Mid-Cleanup
The first sign of a clog is a sudden loss of suction. The second is a whistling sound from the motor housing. The third is a stream of fine dust blowing out of the exhaust port.
When you see any of those, stop the vacuum right away.
For a dry sand clog, remove the cartridge filter and tap it against the side of a trash can. Most of the fine particles will fall off. You can also use a soft brush to sweep the pleats clean.
If the filter still looks loaded, rinse it under a running tap and let it dry completely before reinstalling.
For wet sand, the filter is likely caked into a paste. Rinse it with a garden hose until the water runs clear. Then squeeze it out, never twist it, and set it aside to dry.
While the filter dries, check the hose for clumps of wet sand. A quick visual inspection along the length of the hose saves you from reinstalling everything and finding the clog again.
If you're still losing suction after cleaning the filter, look at the tank bottom. A layer of sand can build up around the float valve and jam it shut. Reach in and clear that debris before you resume.
How to Empty, Rinse, and Drain a Vacuum Full of Sand
Emptying a dry sand load is straightforward. Carry the vacuum outside and tip it into a trash bag. Better yet, use the drain port if your model has one, though most small shop vacs don't.
If you want to trap the dust as you empty, hold a garbage bag around the opening and turn the tank upside down.
The bigger the tank, the heavier it gets. A 16-gallon shop vac completely full of dry sand can weigh well over 200 pounds. That's a real problem if you try to carry it up a set of stairs.
Wet sand needs a different approach. Start by opening the drain port at the bottom of the tank. Let the water drain out first, then tilt the tank to push the remaining slurry out.
If the drain port is clogged with sand, use a stick or screwdriver to break the crust free. Never stick your hand in there while the vacuum is connected to power.
After both dry and wet loads, rinse the inside of the tank with a garden hose. Wipe it down with a rag and let it air dry with the lid open. This step prevents rust and keeps odors from building up.
A clean, dry tank also stops fine sand from baking into a hard layer that's tough to remove later.
Don't forget the hose. Run water through it after wet sand pickup, then hang it up to dry. Clean the filter before storing the unit too.
A filter left dirty will grow mildew, and the fine sand will seal the pores permanently. If you like to keep equipment running like new, you'll find the same care principles apply to pool vacuums. The routine upkeep for robotic pool vacuums works on the same flush, dry, and store logic.
Shop Vac vs. Household Vacuum vs. Broom and Dustpan
| Option | Best for | Watch out for |
|---|---|---|
| Wet/dry vacuum | Large areas, wet sand, construction debris | Heavy when full, noisy, needs filter care |
| Household vacuum | Small dry spills indoors | Ruins the motor on water, clogs fast |
| Broom and dustpan | Tiny spills, fine sweeping control | Slow for big areas, doesn't capture dust |
| Leaf blower | Dry sand on driveways or patios | Sends dust everywhere, useless on wet sand |
A wet/dry vacuum wins for almost every sand cleanup because it's built to handle coarse, heavy material. A household vacuum is a bad idea, especially if the sand is damp, because moisture reaching the motor is a shock and fire hazard. A broom works fine for a few grains tracked in by the dog, but it won't cut it for a full sandbox spill.
If you're dealing with a completely dry surface and you have outdoor space, a leaf blower is actually a clever trick. Blow the sand off a patio or driveway into a pile, then vacuum the pile. That combination saves time and keeps the filter cleaner.
The same logic applies to pool vacuums: using the right tool for the particle size matters. If you're comparing how different setups handle fine debris, you'll find parallel lessons in our guide on whether suction-side pool vacuums handle small debris well. For a traditional shop vac, this works especially well because the blower handles the bulk of the surface area first.
If you notice your suction is weak even with a clean filter, check the hose for leaks or a collapsed section. That same issue happens with pool vacuums, and it's usually a simple fix once you trace the cause of a collapsible hose. The principle is identical: find where the airflow is blocked or escaping.
Real-Life Scenarios: Garage, Car, Beach Entryway, and Sandbox Spills
For a garage floor with dry sand tracked in from a project, use the utility nozzle with a cartridge filter. Sweep first to gather the sand into a pile, then vacuum the pile in slow passes. You'll finish faster and keep the filter cleaner.
For a car interior, sand tends to hide in carpet fibers and seat tracks. Switch to a crevice tool and run it along the edges. Tilt the nozzle at a shallow angle to pull sand out of ruts where the floor mats meet the carpet.
Expect to empty the filter once or twice during a full detail. Fine beach sand especially will clog a cartridge faster than you expect.
For a beach entryway, you have a mix of wet sand, dry sand, sunscreen, and maybe a little water. The squeegee nozzle is your best bet. Use it to pull wet sand off tile or hardwood, then switch to a utility nozzle for the dry corners.
A foam sleeve filter beats a cartridge here because it won't get ruined by lingering moisture.
For a sandbox spill, you might be moving five gallons or more. Work in stages. Vacuum heavily, then empty the tank.
Don't let the tank fill past the halfway point, because sand is dense and heavy.
Pro Tips for Making Sand Cleanup Faster and Easier
Preparation beats effort every single time. Spend one minute setting up the right filter and nozzle, and you'll save ten minutes of unclogging and swearing later. Keep a dedicated sand-cleaning kit ready.
A spare cartridge filter, a squeegee nozzle, and a crevice tool stored together means you never have to hunt for parts mid-cleanup.
For big dry sand spills, use the leaf blower trick first. Blow the sand into a single pile, then vacuum that pile. You'll move twice as fast and keep the filter far cleaner.
For fine sand that refuses to leave carpet fibers, try a carpet rake before vacuuming. It pulls the sand to the surface where the vacuum can actually reach it.
Aggregate reviews from users confirm that slow and steady really does beat fast passes. Rushing creates a cloud of dust that settles right back where you started. Let the vacuum do the heavy lifting.
You're basically guiding the tool, not shoving it around.
One more pro move: empty the tank before it's half full. Dry sand might look light, but volume adds up quickly. A half-empty tank stays portable.
Maintenance Checklist: Keeping Your Wet/Dry Vac Ready for the Next Mess
| Part | How Often | What To Do |
|---|---|---|
| Filter | After every sand use | Tap, brush, or rinse clean |
| Tank | After every wet pickup | Rinse, wipe dry, leave lid open |
| Hose | After every sand use | Flush with water, hang to dry |
| Float valve | Monthly | Clear debris and check movement |
| Gasket/lid seal | Monthly | Wipe clean, inspect for cracks |
Wet sand is the most corrosive thing you'll put through a shop vac. After a wet pickup, always flush the hose with water. Then dry the tank with a rag.
That prevents rust from forming inside the drum and keeps odors from starting.
Check the rubber gasket around the lid, too. Sand can get trapped there and break the seal, which ruins suction and lets dust blow back into the room. If the gasket looks flattened or cracked, replace it.
Most manufacturers sell replacement gaskets for under $20.
Also give the power cord a quick look each month. Sand and water are a bad mix with frayed wiring. The [U.S.
Consumer Product Safety Commission](https://www.cpsc.gov) has published guidance on electrical safety for wet locations. If you spot damage, replace the cord or the unit before the next job.
Frequently Asked Questions
Will a regular shop vac pick up sand?
Yes, a standard wet/dry vacuum picks up sand without issue if the filter is clean and the tank isn't overfilled. Dry sand works best with a cartridge filter and a utility nozzle. Wet sand needs a foam sleeve filter and a squeegee attachment.
The motor itself can handle the load either way.
Can sand ruin a wet/dry vacuum?
Sand can damage a vacuum if you use the wrong filter or ignore clogs. Fine sand will pass through a basic filter and grind against the impeller over time. A HEPA filter or paper bag catches those small particles before they reach the motor.
Emptying the tank early also prevents the float valve from jamming.
Which filter is best for vacuuming sand?
A HEPA cartridge filter is the best choice for dry, fine sand. Foam sleeves are better for wet sand because they rinse clean and won't degrade in water. For very fine sand, a paper vacuum bag inside the tank captures most of the dust before it reaches the main filter.
Pair any of these with regular cleaning to maintain suction.
Do I need to change the vacuum setting for sand?
If your vacuum has a wet/dry switch, set it to the correct mode before you start. Dry mode for dry sand keeps the airflow strong. Wet mode uses a different airflow path that handles moisture and slurry better.
Forgetting to switch modes can cause water to pool inside the filter housing and cut suction quickly.
The Bottom Line: Should You Use a Wet/Dry Vac for Sand?
Use it, but use it smart. A wet/dry vacuum is genuinely the best tool for sand cleanup in most home and workshop situations. It handles the heavy load without damaging the household vacuum, and it cleans both wet and dry versions of the mess.
In our research, the failures almost always trace back to filter selection and tank capacity decisions. Pick the right filter for the moisture level, empty the tank before it overflows, and clean everything before you store it. That simple workflow keeps the vacuum healthy for years.
Respect the tool, and it will respect you back.

