

Keeping your Roomba J9+ in top shape means more than just pressing “Clean.” Regular cleaning of your robot vacuum ensures it works efficiently, lasts longer, and gives your floors a true deep clean. Many owners forget that even a smart robot needs a little care. Dirt, tangled hair, dust, and debris can build up in the Roomba’s brushes, sensors, and bin, lowering suction power and navigation. Learning to clean your Roomba J9+ properly is simple, but there are easy-to-miss steps that make a big difference. This guide will walk you through everything you need to know, using clear steps, tips, and practical examples so your Roomba delivers a flawless clean every time.
Why Cleaning Your Roomba J9+ Matters
A clean Roomba isn’t just about looks. When dust and debris gather inside your robot, several problems can occur:
- Reduced suction: Clogged filters and brushes mean weaker cleaning power.
- Navigation errors: Dirty sensors can confuse your Roomba, causing it to miss spots or get stuck.
- Shorter battery life: Motors work harder when parts are dirty, draining the battery faster.
- More maintenance costs: Neglecting cleaning can lead to part failures or expensive repairs.
Regular cleaning is a small effort that saves money and trouble in the long run. Most owners only clean when there’s a problem, but a weekly or bi-weekly routine keeps your Roomba running like new.
What You’ll Need To Clean Roomba J9+
Before you start, gather these basic items:
- A clean, dry cloth or paper towels
- The cleaning tool included with your Roomba (for hair on brushes)
- Soft-bristled brush or old toothbrush
- Mild dish soap (for washing the bin)
- Compressed air (optional, for deep cleaning)
- Replacement filters and brushes (as needed)
- Small screwdriver (for removing stubborn parts, if needed)
Having these tools ready makes the process faster and ensures you won’t miss any spots.
Step-by-step Guide: Cleaning Your Roomba J9+
1. Power Off And Unplug
Always start by turning off your Roomba J9+ and removing it from the charging base. For safety, press and hold the “Clean” button until the lights turn off. If you’re cleaning the Clean Base, unplug it from the wall.
2. Remove And Clean The Dust Bin
Press the bin release button and pull out the dust bin. Empty any debris into the trash. For a deeper clean:
- Wash the bin with warm water and a drop of dish soap.
- Rinse well and dry completely before reinserting.
- Never wash the filter or electronic parts—these are not waterproof.
Pro tip: Let the bin air-dry for at least 12 hours to prevent mold or smells.
3. Clean Or Replace The Filter
The Roomba J9+ filter traps fine dust and allergens. To clean:
- Remove the filter from the bin by pulling the tab.
- Tap it gently against the trash to shake out loose dust.
- For a deeper clean, use compressed air to blow out trapped particles.
- Replace the filter every 2 months for best results.
Non-obvious insight: Many users forget that a clogged filter can make the Roomba seem less powerful even if the rest of the robot is clean.
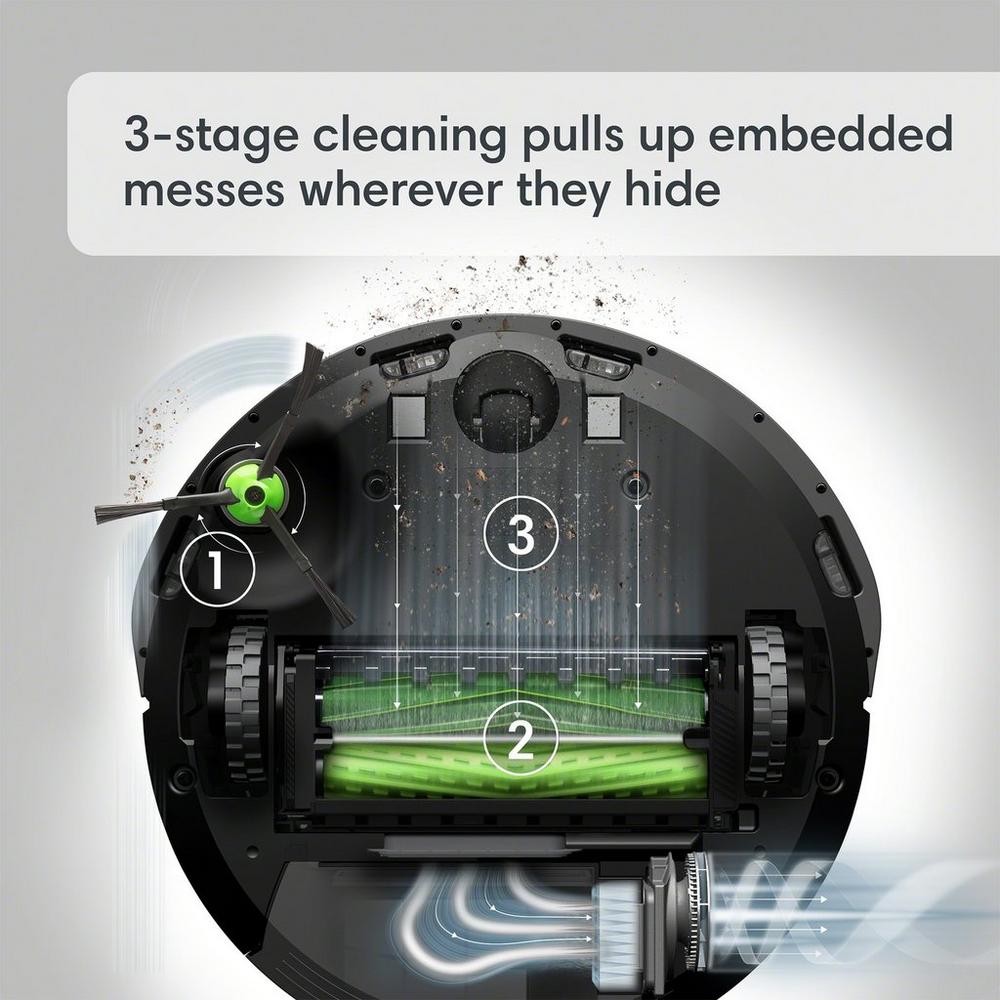
4. Brush And Roller Maintenance
The brushes and rollers pick up most of the dirt. Keeping them hair-free is key.
- Flip the Roomba over and remove the brush guard.
- Pull out both the main brush and side brush.
- Use the cleaning tool or your fingers to remove hair, string, and debris.
- If needed, rinse the brushes under water (dry completely before reinstalling).
- The side brush can be wiped with a damp cloth.
If you notice wear or bent bristles, replace the brushes for peak performance.
5. Clean The Wheels
Dirt and hair can wrap around the front caster wheel and drive wheels.
- Pull out the front caster wheel (it pops out with a gentle tug).
- Remove hair or debris from the axle.
- Wipe the wheel with a damp cloth and dry.
- Spin the drive wheels by hand to check for stuck debris.
Hidden tip: Wheels with trapped hair can cause navigation problems or strange noises.
6. Wipe Sensors And Charging Contacts
Sensors help your Roomba avoid stairs, find dirt, and dock correctly.
- Use a dry cloth to wipe all sensors on the bottom and sides.
- Clean the charging contacts (both on the Roomba and the base) with a slightly damp cloth to remove dust or residue.
- Never use harsh chemicals; plain water or a gentle wipe is enough.
7. Empty And Clean The Clean Base (automatic Dirt Disposal)
The Roomba J9+ comes with a Clean Base that empties the robot’s bin. Over time, dust can build up in the bag and chute.
- Open the base, remove the vacuum bag, and replace it if full.
- Wipe the inside of the base with a dry or slightly damp cloth.
- Check the base’s suction port for blockages.
- Replace the bag every 60 days or sooner if you have pets or allergies.
8. Final Checks And Reassembly
Once everything is clean and dry, reassemble the parts:
- Insert the filter and dust bin.
- Reinstall the brushes and caster wheel.
- Place the Roomba back on its base and plug in the Clean Base.
Run a short cleaning cycle to be sure everything works smoothly.
How Often Should You Clean Your Roomba J9+?
Frequency depends on how much you use your Roomba and your home’s environment. This table gives simple guidelines:
| Part | Light Use (1-2x/week) | Heavy Use (daily/pets) |
|---|---|---|
| Dust Bin | After every use | After every use |
| Filter | Every 2 weeks | Every week |
| Brushes/Rollers | Every 2 weeks | Every week |
| Sensors | Monthly | Every 2 weeks |
| Clean Base | Monthly | Every 2 weeks |
Tip: If you have long-haired pets, expect to clean more often. Hair wraps around brushes faster than you think.

Common Mistakes To Avoid
Cleaning your Roomba J9+ is simple, but it’s easy to make mistakes that reduce its life or cleaning power:
- Washing non-washable parts: Never soak the filter or electronic components. Only the dust bin (if marked washable) and brushes can be rinsed.
- Using harsh cleaners: Avoid bleach, alcohol, or abrasive pads; these can damage sensors and plastic.
- Forgetting the Clean Base: Many owners clean the robot but ignore the base, leading to blockages.
- Not drying parts fully: Damp parts can cause mold or short circuits. Let everything air-dry before reassembly.
- Neglecting the wheels and sensors: These tiny parts are easy to miss but crucial for smooth operation.
Signs Your Roomba Needs Cleaning
Sometimes, your Roomba will tell you it needs attention. Watch for these signs:
- Weaker suction or poor cleaning
- Unusual noises (rattling, squeaking)
- Frequent error messages
- Getting stuck or lost
- Dirty streaks on floors after cleaning
- Smelly bin or base
If you notice any of these problems, a deep clean usually solves them.
When To Replace Filters, Brushes, And Other Parts
Even with perfect cleaning, some parts wear out over time. Here’s when to consider replacements:
| Part | Average Lifespan | Signs to Replace |
|---|---|---|
| Filter | 2 months | Visible dirt, low suction |
| Main Brush | 6-12 months | Bristles worn, uneven cleaning |
| Side Brush | 6-12 months | Bent or missing bristles |
| Vacuum Bag | 60 days | Bag is full or torn |
Pro insight: Buying a maintenance kit with all the replaceable parts often saves money over buying items one by one.
Extra Tips For Roomba J9+ Owners
- Use the app: The iRobot app can remind you when it’s time to clean or replace parts. Set up notifications for easy maintenance.
- Keep the base area clear: Don’t let cords, shoes, or other items block the Roomba’s path to the Clean Base.
- Store accessories nearby: Having your cleaning tool, spare filters, and brushes in one spot makes routine care quick.
- Update software: Regular updates can improve cleaning patterns and battery life. Check the app for firmware updates.
Real-world Example: Deep Cleaning After A Party
Imagine you’ve hosted a party. Your Roomba J9+ has cleaned up confetti, crumbs, and dirt from dozens of shoes. After a heavy job like this, do a full cleaning:
- Empty the bin and wash it.
- Clean the filter thoroughly or replace it.
- Remove and check all brushes for stuck debris.
- Wipe all sensors and charging contacts.
- Check the Clean Base for blockages and replace the vacuum bag if needed.
This deep clean ensures your Roomba is ready for regular use again—no lingering odors or missed dirt.
Comparing Roomba J9+ Cleaning Needs With Other Models
How does the J9+ compare to older or simpler Roomba models when it comes to cleaning? Here’s a quick look:
| Model | Clean Base | Washable Bin | Filter Type | Maintenance Level |
|---|---|---|---|---|
| J9+ | Yes | Yes | High-Efficiency | Moderate |
| i7 | Yes | Yes | High-Efficiency | Moderate |
| 600 Series | No | No | Standard | Low |
| s9+ | Yes | Yes | High-Efficiency | High |
You’ll see that the J9+ offers more advanced features, but this means a bit more cleaning is needed—especially the Clean Base and high-efficiency filter.
Keeping Your Roomba J9+ Like New
A little regular care keeps your robot vacuum at its best. Cleaning the bin and filter often, checking the brushes, and wiping down sensors all work together to prevent breakdowns. Make a habit of quick weekly checks, and schedule a deeper clean every month.
This not only improves cleaning results but also extends your Roomba’s lifespan.
If you want more details on specific part replacements or official cleaning instructions, check the iRobot website or trusted resources like iRobot Support.
Frequently Asked Questions
How Do I Know When My Roomba J9+ Filter Needs Replacing?
If you see visible dust sticking to the filter or notice weaker suction and more dust left behind, it’s time to replace the filter. The iRobot app may also remind you.
Can I Wash The Roomba J9+ Filter With Water?
No, never wash the filter with water. Tap it gently to remove dust, but water will ruin the filter and reduce its performance.
How Often Should I Replace The Clean Base Vacuum Bag?
Replace the vacuum bag every 60 days or whenever the app notifies you it’s full. If you have pets or allergies, you may need to change it more often.
What Should I Do If My Roomba J9+ Gets A “cliff Sensor” Error?
Wipe the cliff sensors on the bottom of the robot with a dry cloth. Dust can block the sensors and trigger false errors, making your Roomba avoid safe areas.
Is It Safe To Use Compressed Air To Clean Inside The Roomba?
Yes, using compressed air can help remove dust from tight spots like the filter area or around sensors. Just don’t blow air directly into electronic components or motors.
With these steps and tips, your Roomba J9+ will continue to give you spotless floors and reliable service for years to come. Regular care is quick, easy, and truly pays off.

