

How do you remove hair from robot vacuum brushes? It's one of those small chores that turns a perfectly good robot into a paperweight if you ignore it. Hair wraps around the brush roll, the motor slows down, and the suction drops.
Before long, your smart vacuum is dragging a clump of fur across the floor and sounding like a dying blender.
Here's the good news. As of 2026, most robot vacuum brush rolls come out with a simple latch or quarter-turn release. In our research, the whole cleanup takes roughly two to three minutes once you know which brush you're dealing with and what tool to grab.
Let's walk through it step by step.
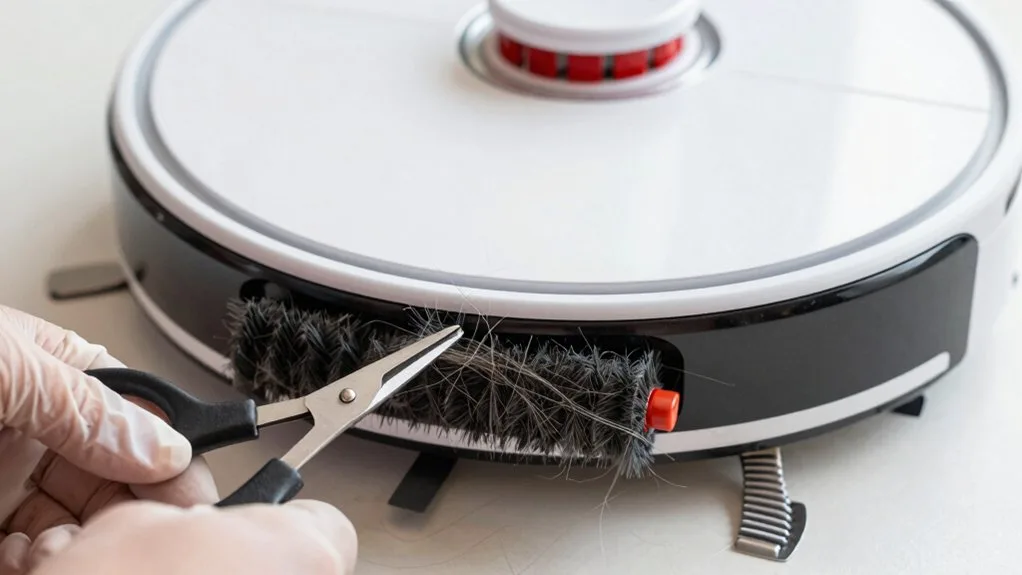
Image source: Web (Bing) / vacuumtips.com (Web image (fair-use with source credit))
Quick Answer: What to Do First
How do you remove hair from robot vacuum brushes? Power down the robot and flip it over. Pull the brush out and pull loose hair off with your fingers.
Use a seam ripper for tight tangles around the axle. Reinstall the brush and run a test cycle. If hair is loose, pull it.
If it's wrapped tight, cut it off.
What Type of Brush Are You Cleaning?
Your first move is a quick visual check. The main roller brush is the long cylinder near the middle of the robot. The side spinning brush is the smaller star-shaped piece that sticks out from one edge.
Each one gets tangled differently.
| Brush | Where It Lives | Why Hair Wraps | Best First Tool |
|---|---|---|---|
| Main roller brush | Center of the robot, underneath | Hair knots around the axle and between bristles | Seam ripper or fingers |
| Side spinning brush | One corner of the body | Hair coils around the mounting screw and neck | Fingers or small scissors |
If the motor stalls or suction drops, check the main roller first. If the robot spins in circles or misses edges, check the side brush. Some robots use a combo brush with bristles on one side and rubber fins on the other.
Treat it like a bristle brush, but be extra careful around the rubber since it tears easily.
Step-by-Step: How to Remove Hair from a Main Roller Brush
The main roller causes the most trouble. You'll need about three minutes and a flat workspace.
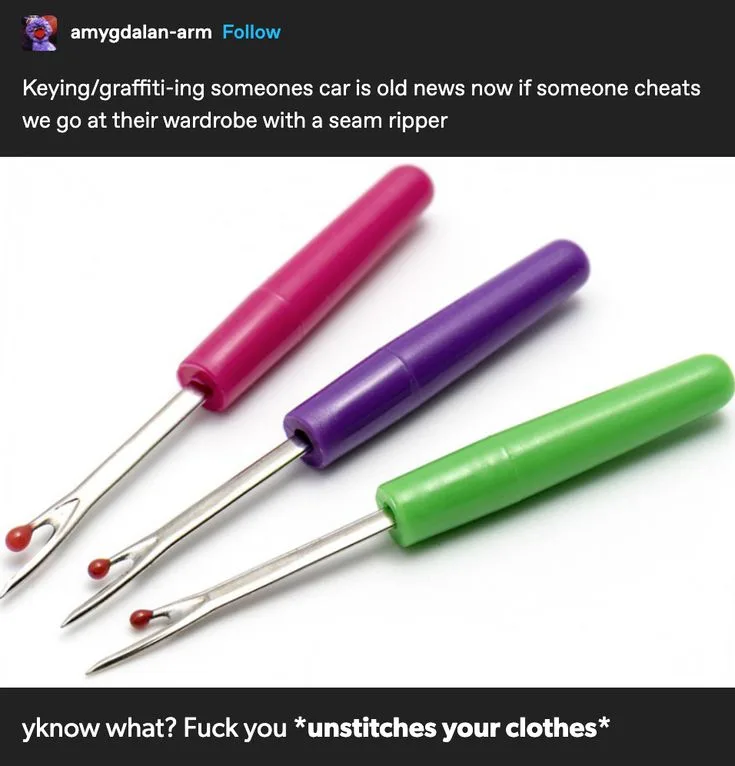
Image source: Bing (Web (fair-use with source credit))
Here's the order that works best:
- Power off the robot and flip it over.
- Push the release latch or undo the brush guard. Some models use a small screwdriver.
- Lift the brush roll straight out of its cradle.
- Pull off loose clumps with your fingers. Most hair comes off like a matted wig.
- Slip a seam ripper under the strands wrapped around the end caps.
- Cut in short strokes, working from the outside in.
- Wipe the brush cavity with a microfiber cloth.
- Spin the end caps by hand to make sure they move freely.
- Drop the brush back in, replace the guard, and run a test cycle.
Don't use scissors near the bristle strip. One slip and you'll cut a chunk out of the brush. A seam ripper only touches the hair, so it's safer.
You'll notice the robot brush is easier to reach than a traditional roller. The brush roll comes out completely, so you're not fighting the machine for space. Compare that to untangling the full-size upright version, where the brush stays fixed inside the nozzle.
Check your robot's manual for the exact release mechanism. Most brands use the same latch design across their lineup.
Step-by-Step: How to Remove Hair from a Side Spinning Brush
The side brush is easier to ignore because it doesn't kill suction as fast. But when it gets wrapped, the robot starts missing corners and bumping into furniture oddly.
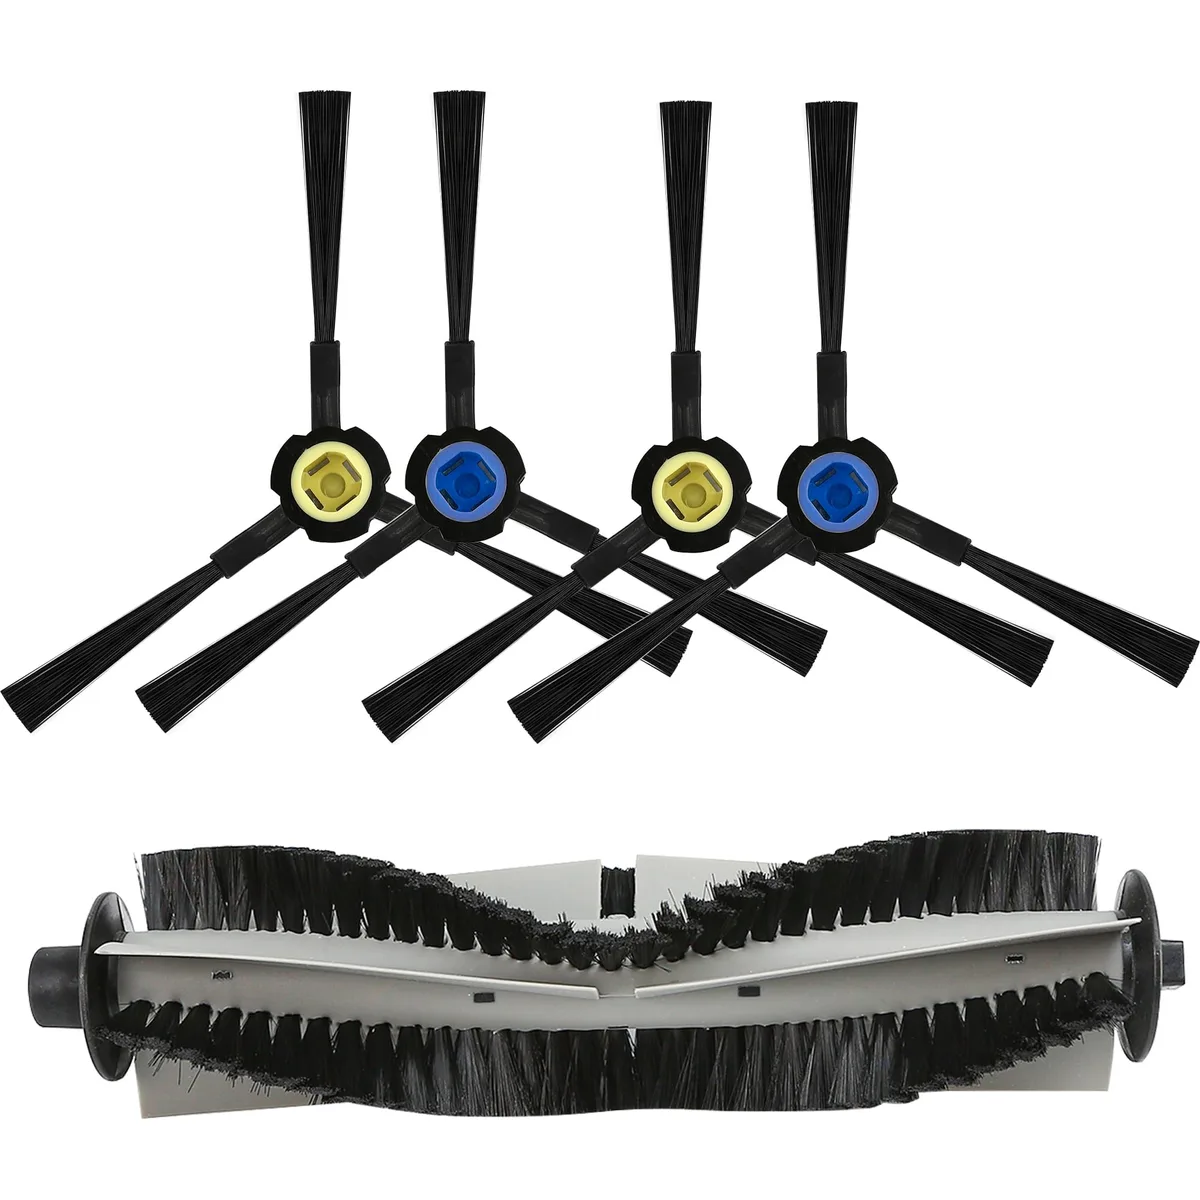
Image source: Web (Bing) / amazon.com (Web image (fair-use with source credit))
Here's how to clear it:
- Turn the robot upside down.
- Find the side brush screw, usually a Phillips head in the center.
- Unscrew it and set the screw in a safe spot.
- Lift the brush off the spindle.
- Pull away hair from the base and around the screw hole.
- If the bristles are bent, run the brush under warm water and straighten them.
- Let it dry completely before putting it back.
- Reattach the brush and hand-tighten the screw.
Don't overtighten. A snug screw is enough. Overtightening strips the plastic mount.
If your robot has two side brushes, repeat the same steps on the other side. The side brush picks up more debris in corners, especially on hard floors. That's why hair wraps there first.
A quick monthly check is usually enough unless you have a heavy shedder in the house.
Tool Comparison: Seam Ripper vs Scissors vs Included Cleaning Brush
You don't need a special gadget. A seam ripper, a pair of small scissors, and the little brush that came with the robot cover nearly every case.
| Tool | Best For | The Catch |
|---|---|---|
| Seam ripper | Tight tangles around the axle and end caps | Move the point away from the brush body |
| Small scissors | Loose, visible strands and side brush necks | Easy to slice bristles by accident |
| Included cleaning brush | Loosening dust and hair after you pull big clumps | Don't expect it to cut anything |
If you're facing a thick, matted wrap, use the seam ripper. It's the best balance of speed and safety. If you're just pulling a few long hairs off the side brush, your fingers are faster than any tool.
For the final stubborn strands near the screw, tweezers work better than scissors. You can grab the hair close to the base and twist it out.
Common Mistakes That Damage Robot Vacuum Brushes
Most robot vacuum failures aren't caused by the robot. They're caused by how we clean the brushes. A few mistakes show up over and over in user reviews and repair forums.
- Cutting blindly. Scissors work, but they also destroy bristles. One slice into the rubber fin and you're shopping for a replacement brush.
- Pulling while the brush is mounted. You can't unwrap hair that's wound around the axle without full access. Lift the brush first. Aggressive pulling while it's still installed shears the end cap tabs right off.
- Skipping the end caps. The hair that matters most is packed around the bearings. It's easy to clear the visible strands and miss the hidden tangle. That leftover hair slows the brush and burns out the motor.
- Forgetting to power down. Your robot might detect an obstruction and spin the brush while you're tugging. That's how fingers get pinched and gears get stripped.
- Losing the tiny screws. The side brush screw is small and easy to drop into the carpet. Put it in a small dish or stick it to a magnet.
After cleaning, inspect the bristles. If they're bent or frayed, straightening the brush in warm water helps. If chunks are missing, replace the entire roll.
A broken brush scrapes the floor and pushes debris around instead of lifting it.
Pro Advice: How to Prevent Hair Tangles in the Future
Prevention beats cleanup every single time. A few small habits seriously cut down on how often you need to pull hair out of your robot vacuum brushes.
- Run the robot more often in pet homes. Short daily cycles pick up hair before it works deep into carpet fibers. A daily pass wraps less than a weekly deep clean.
- Check the brush after every few runs. Pull out the brush every week or two. Pluck loose strands for two minutes. That quick check beats a half-hour detangling session later.
- Use the cutter groove in the dustbin. Some models include a small slot designed to slice hair as it passes. It's not a total fix, but it works together with regular brush checks.
- Trim long hair before it wraps. When you pull strays off the brush, cut them free rather than unwinding. Freshly cut strands slide off far easier than stretched knots.
- Consider an anti-tangle brush roll as a replacement upgrade. These use a curved fin pattern that moves hair toward the middle and away from the end bearings.
Your floor type also matters. Hard surfaces hold hair differently than carpet. If your robot lives on plank flooring, choose a model with a brush profile designed for that surface.
Our roundup of robots that handle plank flooring well highlights the right specs.
Maintenance Tips Beyond Brushes
Cleaning the brush is step one. The robot needs a bit more attention to run at its best.
- Empty the dustbin every time. A full bin lowers airflow, so the brush works harder to pick up anything.
- Wash the filter every two to four weeks. Check your model's manual for whether it's washable or replaceable.
- Check the wheels and sensor eyes for hair buildup. Clear it before it stops the robot mid-run.
- Wipe down the cliff sensors and charging contacts with a dry microfiber cloth.
Know when to replace the brushes. If the bristles are permanently bent, the rubber fins are torn, or the end caps wobble, a new brush costs far less than a new robot. Most OEM brush rolls run $15 to $40 and last six to twelve months with regular maintenance.
Also check whether your brush roll is water-safe. Some brands let you rinse the roller under a tap. Others fall apart when soaked.
If you're unsure, our guide on washing brush rolls cover the differences between models.
Robot vacuums sold in North America are certified under UL safety standards. Those standards assume the brush motor won't sit locked under a full hair wrap for hours. A monthly strip-down keeps you well inside the safe operating window.
If you run an upright vacuum alongside your robot, keep both on the same maintenance calendar. A quick monthly check prevents the worst tangles on either machine. Our guide to upright vacuum service intervals outlines what a realistic schedule looks like.
Frequently Asked Questions
Can I wash my robot vacuum brush with water?
Yes, but only if the brush is fully detachable and the manual says it's water-safe. Use lukewarm water and mild dish soap. Then let the brush dry completely for 24 hours before reinstalling.
A damp brush attracts dust and makes hair stick even worse.
Why does my robot vacuum say "brush error" after cleaning?
The brush error message usually means the roller isn't spinning fast enough. This triggers when hair is still wrapped around an end cap, the brush isn't seated properly, or the plastic guard isn't locked back into place. Take it apart, spin the bare brush by hand to confirm free movement, and re-fit the guard until it clicks.
Is a stuck brush damaging the motor?
Yes, a blocked brush taxes the motor. The motor keeps trying to spin, draws more current, and runs hot. On models without overload protection, even brief use with a jammed brush can shorten motor life.
Stop the robot at the first sign of stalling and clear the tangle.
How often should I clean the side brush compared to the main roller?
The main roller needs attention every one to two weeks in a home with pets. The side brush can go twice as long. In a home with long human hair, check both more often.
Hair wraps tightest at the roller axle and around the side brush screw.
Will anti-tangle brushes stop all hair wrap?
No, they reduce it. Anti-tangle brush rolls keep hair from packing around the bearings, but they can still catch strands in heavy shedding seasons. Most owners report far fewer jams, but you'll still pull hair off every few weeks.
Pair them with regular checks for the best result.
Final Decision Guide: Clear the Tangles, Keep It Spinning
If you're standing over your robot vacuum with a clump of hair in your hand, here's your decision tree:
| Situation | Action |
|---|---|
| Loose hair on brush surface | Pull it off with your fingers or tweezers |
| Tight wrap around the axle | Use a seam ripper, cutting from the outside in |
| Mat packed around end caps | Remove end caps, then cut hair off the bearing |
| Bent bristles after a heavy tangle | Soak in warm water, reshape, and let dry fully |
| Torn rubber fins or broken tabs | Replace the brush entirely |
No matter which branch you land on, the principle stays the same. Lift the brush first, clear the full length, check the bearings, and let everything dry before reassembly. Two minutes of maintenance now saves a $300 repair or replacement later.
Your robot is designed to be worked on. The brushes come out for a reason. Use that access, keep them clean, and your robot will keep spinning well past the warranty date.
Set a recurring reminder on your phone for the same time each week. Call it "Brush Day." Ten minutes, no more, and your robot will keep chugging like the day you unboxed it.

