

Your robot vacuum's side brush is the hardest-working part of the whole system. How do you clean robot vacuum side brushes? It's easier than you think, and it takes less than ten minutes.
That little sweeper flicks dust, pet hair, and crumbs toward the main roller so your bot can actually suck them up.
In our research, most manufacturers recommend inspecting the side brushes every two to four weeks. Pet owners with shedding cats or dogs should bump that up to a weekly check. As of 2026, many robot vacuum apps even send a reminder when the brushes need attention.
Let's start with the most common issue you'll run into.
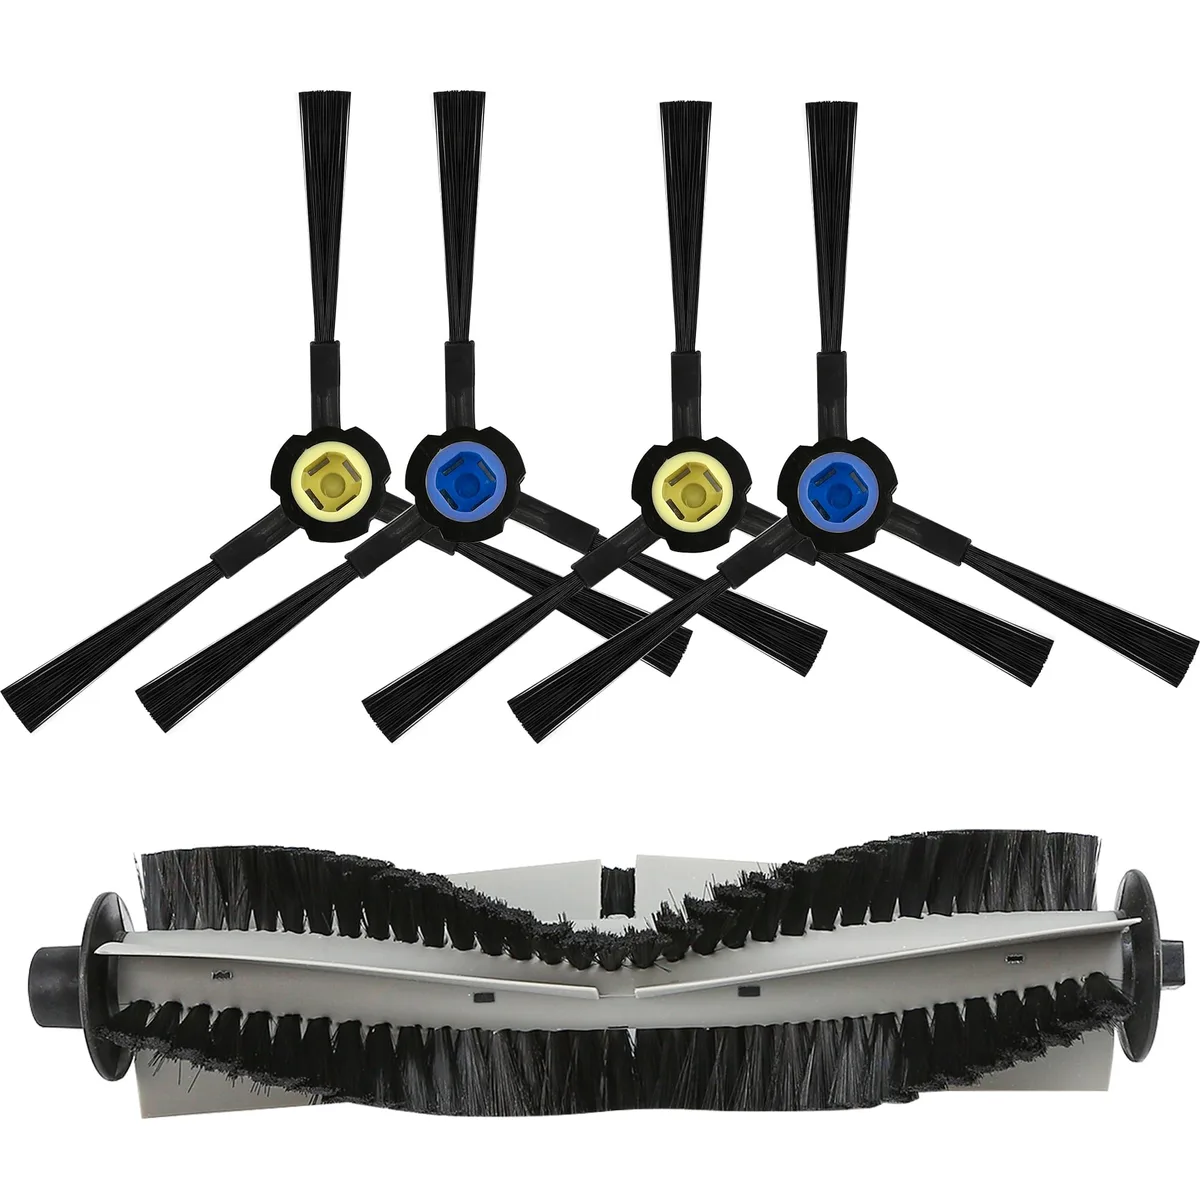
Image source: Web (Bing) / amazon.com (Web image (fair-use with source credit))
The Problem: I Took the Brush Off and It's Gross. Now What?
You flip your robot over, pop off the brush, and things look sticky. Hair is wrapped around the hub. Dust and gritty film are caked between the bristles.
If you've seen that, you're not alone. Aggregate user reports say hair wrap and debris buildup are the top two reasons side brushes stop spinning effectively.
Here's the real issue. A dirty side brush can't flick debris properly. Your robot leaves streaks of dirt along edges and in corners.
When hair wraps tight enough, it jams the brush hub completely. Some robots then show an error code or shut down that motor.
The core fix is simple: clean the brush, remove the wrap, and reinstall it correctly. If the bristles are bent or worn out, a quick clean won't solve it. We'll cover that later.
Quick Answer / Key Insight
How do you clean robot vacuum side brushes? Remove the brush from the robot. Pull off all hair and string.
Wipe the bristles and hub with a dry cloth. Reinstall it securely.
Do this every two to four weeks. Check more often if you have pets or a high-traffic home. A clean brush keeps your robot's edge-cleaning performance strong.
First, Figure Out What's Holding the Brush On
Before you tug on anything, you need to know which attachment system your robot uses. That decision determines the whole workflow. There are two common designs: screw-mounted and tool-free snap-fit or twist-lock.
Screw-mounted brushes are held in place by a single Phillips screw. You'll see a small screw at the center of the brush hub. Many iRobot, Roborock, and Eufy models use this style.
You'll need a Phillips #0 or #1 screwdriver, the same size found in eyeglass repair kits.
Tool-free brushes are secured with a simple press-fit or quarter-turn lock. Shark and Ecovacs models often use this design. You don't need any tools, but you do need to know the correct release direction.
Sometimes there's a small tab that needs to be pressed in.
If you're unsure, check your user manual or search the manufacturer's official support site. Never yank a brush straight off. You risk snapping the plastic posts.
| Attachment Type | Common Brands | Removal Method |
|---|---|---|
| Screw-mounted | iRobot, Roborock, Eufy | Unscrew with Phillips #0 |
| Snap-fit | Shark, Ecovacs | Press release tab, pull off |
| Twist-lock | Some newer models | Twist counterclockwise, lift |
Step-by-Step: How to Clean a Screw-Mounted Side Brush
If you've confirmed your brush has a screw, here's the clean routine.
Turn Off and Flip the Robot
Turn your robot off first. Flip it upside down so the brush faces you. Use the correct Phillips screwdriver to remove the center screw.
Keep that screw safe in a small tray or cup.
Pull the Brush Straight Up
With the screw out, the brush should lift off the shaft with minimal effort. If it feels stuck, wiggle very gently side to side. Never pry it with a screwdriver.
That damages the hub.
Clean the Brush and Hub
Check the underside and the shaft opening. Use the included cleaning tool or a soft-bristle brush to sweep away debris. A dry microfiber cloth handles most of the job on the bristles.
Hair wrap removal gets its own section later.
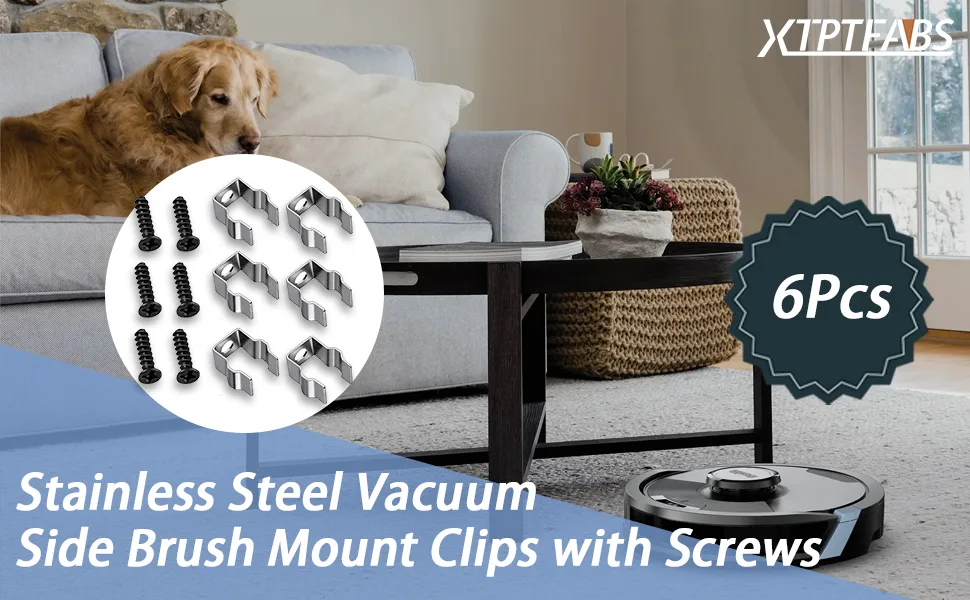
Image source: Bing (Web (fair-use with source credit))
Reinstall the Brush
Line up the brush's indentation with the shaft. Press it down until it feels seated. Replace the screw and tighten gently.
Over-tightening strips the plastic threads, so only go until snug.
Test the Spin
Give the brush a manual spin with your fingers. It should rotate freely without wobbling. Then run your robot for one minute to confirm everything works.
This method applies to nearly all screw-mounted side brushes, including the standard three-arm design on most Roomba and Roborock models. Following the official iRobot support guidelines will keep your warranty intact.
Step-by-Step: How to Clean a Snap-Fit or Twist-Lock Side Brush
These tool-free designs look effortless until a bit of dirt locks them in place. Here's the safe way to handle them.
Find the Release Mechanism
Inspect the hub area carefully. You'll see either a small notch, a raised tab, or printed arrows. That's your release point.
Press or push in the direction the arrows point.
Pull the Brush Off Gently
Once the tab is released, pull the brush upward with steady, even pressure. If it resists, don't force it. Check for a second release tab.
Many designs have one on each side.
Clean and Dry the Parts
Clean the brush the same way as a screw-mounted one. Use a dry cloth for dust and debris. If you plan to wash it with soap and water, check your manual first.
Some rubber materials degrade with prolonged soaking.
Reinstall with the Click
Align the brush key with the mounting slot on the robot. Press down evenly until you hear or feel a click. Then give the brush a spin to confirm the fit.
If you're dealing with a tight connection, parallel pressure works better than wiggling. Jiggling it side to side can torque the plastic housing. The same goes for clearing tangled hair, which causes most maintenance issues across all vacuum types.
Hair Wrap Removal: The Most Important Part
Hair wrap is the number one reason side brushes fail early. Long human hair, pet fur, and loose carpet fibers wind around the hub, not the bristle tips. It tightens with every spin, eventually squeezing the brush against the mounting shaft until it stops rotating.
Use Blunt Tools Only
Your fingers are the safest starting point. Pull away any loose hair loops before you wet or wipe anything. For tight wraps, a seam ripper is perfect.
It slides under the hair and slices it without cutting the nylon bristles. Tweezers work too, just slower.
Image source: Bing (Web (fair-use with source credit))
Work from the Hub Outward
Start at the center where hair is most compressed. Loosen one wrap, then pull downward toward the bristle tips. That direction reduces resistance.
Pulling upward through the gap between the brush and shaft risks bending the mounting post.
Never Use Scissors
Scissors are too easy to slip with. One wrong snip cuts bristles flush, and now your brush can't reach the floor properly. A damaged brush leaves a visible gap in edge cleaning along your baseboards.
Use the Included Cleaning Tool
Most robot vacuums come with a small multitool. It usually has a curved blade, a brush, and a hook. The hook is designed to drag out hair from tight spots.
If you lost yours, a bent paper clip works just as well.
Once the hair is gone, you're ready to decide between a dry wipe and a wet wash. That decision depends on what residue is left behind.
Wet Wash vs Dry Wipe: When Each One Is Right
Not every side brush needs soap and water. In fact, many models are designed for dry cleaning only. The wrong method can do more harm than the dirt itself.
When a Dry Wipe Is Enough
If the brush has dust, dry pet hair, and harmless grit, a microfiber cloth handles it. Wipe each arm from the hub outward, then flick the cloth between bristle clusters. This clears out fine debris and takes about a minute per brush.
When a Wet Wash Is Better
Sticky buildup is a different story. Cooking grease, spilled soda, and tracked-in floor wax adhere to the bristles and reduce flexibility. A brush that stays stiffened can't flick dirt effectively.
In this case, a careful wash is justified.
Check the Manual First
Some manufacturers explicitly warn against water on side brushes. The plastic may swell, or the color-coded L/R markings can fade. iRobot's official documentation recommends dry cleaning methods for most brush types. If your manual says dry only, trust it.
If You Do Wash, Do It Right
Use warm water with a drop of mild dish soap. Do not use vinegar, bleach, or aggressive degreasers. They damage nylon and rubber over time.
Swish the brush gently for a couple of minutes, then rinse thoroughly.
Blot with a towel and set it on a counter to dry completely, usually two to four hours. Never reinstall a wet brush. Water can seep into the motor housing.
The same water-based cleaning caution applies to full-size brush rolls.
The Drying Rule
The single most common mistake is clicking a wet brush back into the robot. That sends moisture into the gear cavity. Corrosion follows, then electrical faults.
If you must wash, give yourself a half-day to let it air dry.
| Condition | Dry Wipe | Wet Wash |
|---|---|---|
| Dust and pet hair | Yes | No |
| Sticky residue | Only if mild | Yes |
| Water-sensitive models | Always | Only if manual allows |
| Time available | 1 minute | 15 minutes plus drying |
Clean vs Replace: How to Tell If Your Side Brush Is Worn Out
Cleaning restores a healthy brush to working condition. But at some point, the brush is simply worn out. Replacing it is the smart move, not an extra expense.
Look at the Bristle Shape
A new side brush has straight, fairly firm bristle arms. When they start looking like a bent whisk, that's wear. Bristles that flare outward or curl under lose their sweeping angle.
They push debris instead of guiding it toward the intake.
The Bend-and-Release Test
Bend one bristle arm to a 90-degree angle. Release it and watch how it springs back. If it snaps back straight quickly, it still has life left.
If it stays bent or feels limp, the plastic has fatigue. Replace the brush now.
Replace Every 3 to 6 Months
Manufacturer guidance varies, but most brands suggest replacing side brushes every three to six months. Homes with pets and heavy foot traffic trend toward the shorter end. Hard-surface flooring like LVP can often stretch the interval.
But robots designed for LVP floors tend to run longer daily cycles, so watch their brushes closely.
OEM vs Third-Party Brushes
OEM brushes cost more but guarantee the exact fit and material spec. Third-party options are cheaper, but quality varies widely. A poorly made brush may be too stiff, too soft, or incorrectly aligned.
For a component that costs five to fifteen dollars, stick with OEM unless you've already tested a brand you trust.
The same logic applies to your main roller. Regular removal of hair wraps prevents premature wear on any vacuum type.
Getting the Left and Right Brushes Straight
Your robot's side brushes are marked with L and R for a reason. Installing them backward is one of the most common DIY mistakes.
Most models use mirrored brushes, not identical ones. The left brush spins clockwise, and the right brush spins counterclockwise. They work together to pull debris toward the center, funneling it into the main roller.
If they get swapped, the airflow pattern breaks. You may see debris thrown outward instead of inward. Your robot starts scattering dirt instead of collecting it.
Look for the printed L or R on top of the brush hub. Some models use visible cutouts instead. If the marking is worn off, check the manual diagram.
Match the brush to the side of the robot it came from.
Certain models, like some Roborock units, use left-hand and right-hand threading on different sides. Forcing a screw into the wrong one strips the threads instantly. If it doesn't turn easily, stop and verify the brush orientation.
Ongoing Maintenance: The 5-Minute Monthly Routine
The easiest way to clean a side brush is to keep it from getting seriously dirty. Routine maintenance turns a potentially tedious job into a five-minute task.
Once a month, flip your robot upside down and inspect both brushes. Clear any hair wraps at the hub. Wipe the bristles with a dry cloth.
Check the screws or clips for looseness. That's the entire routine.
Since 2026, most robot vacuum apps include maintenance alerts for side brushes. They trigger based on runtime, not calendar days. When the reminder pops, a quick visual check takes thirty seconds.
If the brush looks fine, tap the reset button.
Debris also accumulates on the mounting shaft underneath the brush. Once the brush is off, swipe the shaft with a cloth. Dropping dust back into the gear cavity accelerates wear.
This is also a good time to check for scraping or metal fatigue on the shaft.
After reinstalling, run your robot on a short cycle and listen at the brush area. A healthy brush spins quietly. Grinding or rattling means loose fittings, misalignment, or a brush worn beyond cleaning.
Full-size vacuums have the same basic upkeep needs, just with bigger parts.
Common Mistakes to Avoid
These errors show up again and again in user forums and manufacturer troubleshooting pages.
Over-Tightening the Screw
The screw holds the brush in place. It doesn't need to be torqued like a lug nut. Crank it too hard, and you strip the plastic threads.
Once the threads are gone, the brush won't stay seated. Tighten gently until snug.
Cleaning While Docked
Never clean the brushes while the robot is charging. Water on the charging contacts can short the system. Even if you're just dry-wiping, the robot can power on and catch your fingers.
Turn it off, put it on a flat surface, and then work safely.
Skipping the Dry Time
Wet brushes slipping into the gear cavity is a top cause of moisture-related failure. Dry time matters even if you're in a hurry.
Ignoring Excessive Wear
A bent brush won't straighten itself. Don't let it ride for another month. You'll lose corner cleaning coverage and overwork the main roller.
Pulling a Stuck Brush with Pliers
If the brush won't come off, do not grab pliers. You can crack the mounting hub, which means an expensive repair instead of a five-dollar replacement. Step back and consult the manual.
Frequently Asked Questions
Can I use a vacuum to clean the side brush itself?
Yes, but only with caution. Use a narrow crevice tool on low suction to pull loose dust and hair from the bristles. Never run the brush through a vacuum while attached to the robot.
Remove it first, and avoid aggressive suction that could bend the bristles.
Is it safe to soak the brush in vinegar or soapy water?
It depends on the manual. Vinegar is too acidic for most nylon and rubber brush materials, so it causes brittleness over time. Mild dish soap and warm water are safer.
Always confirm the manufacturer allows wet cleaning before you soak anything.
How do I know if the dirt is stuck in the shaft, not the brush?
If the brush spins freely when off the robot but makes grinding noise when attached, the shaft or gear cavity has debris. Clean the shaft directly with a cloth and a soft brush. If noise continues, check for visible gear damage or contact support.
Can a dirty side brush trigger a maintenance error in the app?
Many modern robot vacuums monitor motor current. A jammed brush pushes the motor to work harder, and the app interprets that as a "brush stuck" error. Cleaning the hair wrap and debris usually clears the fault.
If the error persists, the brush motor may need service.
Your Decision Guide: Step-by-Step Summary Flow
- Turn the robot off and flip it upside down.
- Identify the attachment type: screw or snap-fit.
- Remove the brush with the correct method.
- Clear hair wrap using a seam ripper or the included tool.
- Decide between a dry wipe and wet wash based on the residue.
- Dry completely if you washed it.
- Check for wear with the bend-and-release test.
- Replace if the bristles are too bent or damaged.
- Reinstall with the L/R marking facing the correct direction.
- Run a test cycle and listen for clicking or grinding.
That's the entire process. It looks longer in writing, but once you've done it twice, it becomes muscle memory. And it's easily the most effective maintenance you can do for your robot's edge-cleaning performance.

