

Robot vacuums are brilliant right up until they start dragging sideways. One minute they're cleaning your floors, the next they're throwing a wheel error code and spinning in place like a confused puppy. How do you clean robot vacuum wheels?
The short answer is: remove the visible hair, wipe the tread, clean the axle, dry everything, and snap it back together. Most robots take ten minutes max, and you don't need any special tools beyond tweezers and a cloth.
Most modern robot vacuums, including popular models from iRobot Roomba, Roborock, and Ecovacs Deebot, rely on two motorized drive wheels plus a free-spinning caster wheel. As of 2026, manufacturer specs indicate that the caster collects the most hair in pet households, which is why many owners clean it every one to two weeks. The motorized wheels usually need attention on a similar schedule, especially if you hear squeaks or your robot leaves faint track marks on carpet.
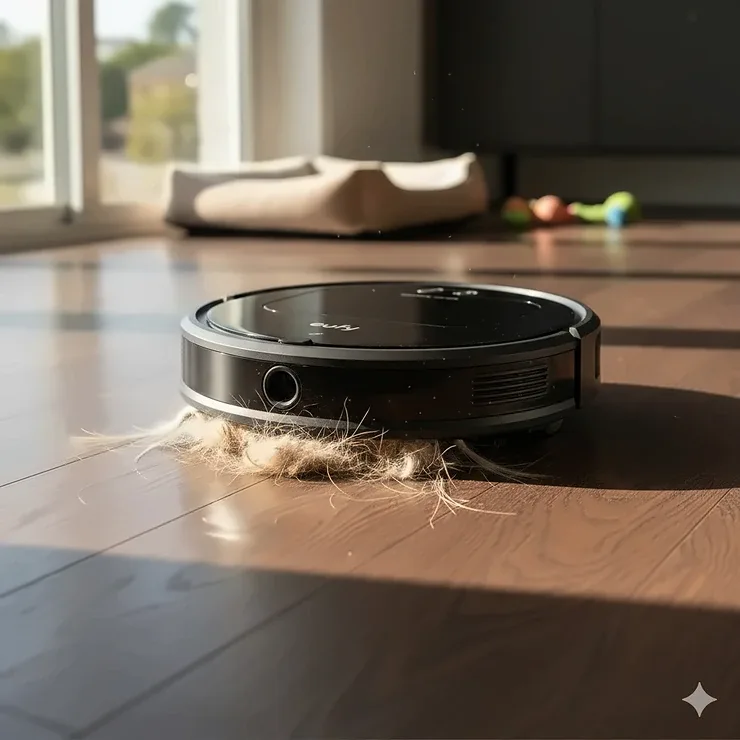
Image source: Web (Bing) / cleanhome360.com (Web image (fair-use with source credit))
Your Quick Answer: How to Clean Robot Vacuum Wheels (Without Breaking Anything)
Turn off your robot and flip it over. Check if the wheels are removable. Brush away hair, wipe the wheel with a damp cloth, dry it completely, and reattach.
Do this every one to two weeks.
That's the whole routine in a sentence. Now let's slow down and explain exactly what to do for each wheel type so you don't accidentally damage the motor or sensors.
First Check: Does Your Robot Have Removable Wheels or Fixed Ones?
Flip the robot over and look at the wheel housings. Motorized drive wheels sit on the left and right sides, and they're usually larger with rubber treads. Caster wheels are small, round, and located near the front or rear, depending on the model.
This distinction matters because motorized wheels need gentle handling and water-free cleaning near the electrical contacts. Caster wheels are far more forgiving, and most can be popped out with light pressure. Some budget robots use fixed wheels that are clipped into the chassis, while premium models feature tool-free removable modules.
Check your manual for the exact procedure, but the table below gives you a useful starting point.
| Feature | Motorized Drive Wheel | Caster Wheel |
|---|---|---|
| Typical size | 2 to 4 inches across | 0.5 to 1.5 inches across |
| Movement | Powered by an internal motor | Free-spinning, no motor |
| Removal | Often removable with a screwdriver or release tab | Usually pops out or snaps in |
| Cleaning caution | Never submerge in water near electrical contacts | Can handle more moisture, but still dry fully |
If you see wires connecting the wheel housing to the chassis, it's motorized. If you can spin the wheel freely with no resistance, it's a caster. That simple test tells you which cleaning branch to follow below.
Branch 1: Cleaning Motorized Drive Wheels on Roomba, Roborock, and Similar Models
Motorized drive wheels are the workhorses of your robot, which means they pick up the tightest tangles of long hair and pet fur. The good news is that most drive wheel modules are designed to be removed. The safer approach is to detach the module completely before cleaning, because you'll get better access to the axle without risking moisture near the motor.
Start by powering down your robot and unplugging it from any dock. Flip it over so the underside faces you. Locate the drive wheel module, which is usually held in place by one or two Phillips-head screws or a spring-loaded release tab.
Remove the fasteners and pull the module straight out. Don't force it. If it resists, double-check for a second screw you missed.
Once the module is in your hand, use tweezers to pull hair away from the axle and the motor shaft. This is where most tangles hide. Then grab a soft brush, like a clean toothbrush, and loosen any caked-on dirt from the rubber tread.
The tread pattern can trap fine dust, and that's often what causes the wheel to slip on hard floors.
| Tool | Why you need it |
|---|---|
| Tweezers | Pull hair from the axle and motor shaft |
| Soft brush | Loosen caked-on grime from tread grooves |
| Microfiber cloth | Wipe the wheel and housing |
| Small screwdriver | Remove the wheel module if screws hold it in |
Now dampen a microfiber cloth with warm soapy water. Wipe the tread, the wheel hub, and the inside of the housing. Important: wring the cloth out well first.
You want a barely damp cloth, not a wet one, because water inside the motor module can short the electrical contacts. For really stubborn hair knots, use your tweezers to work the hair free rather than yanking, which could bend the axle.
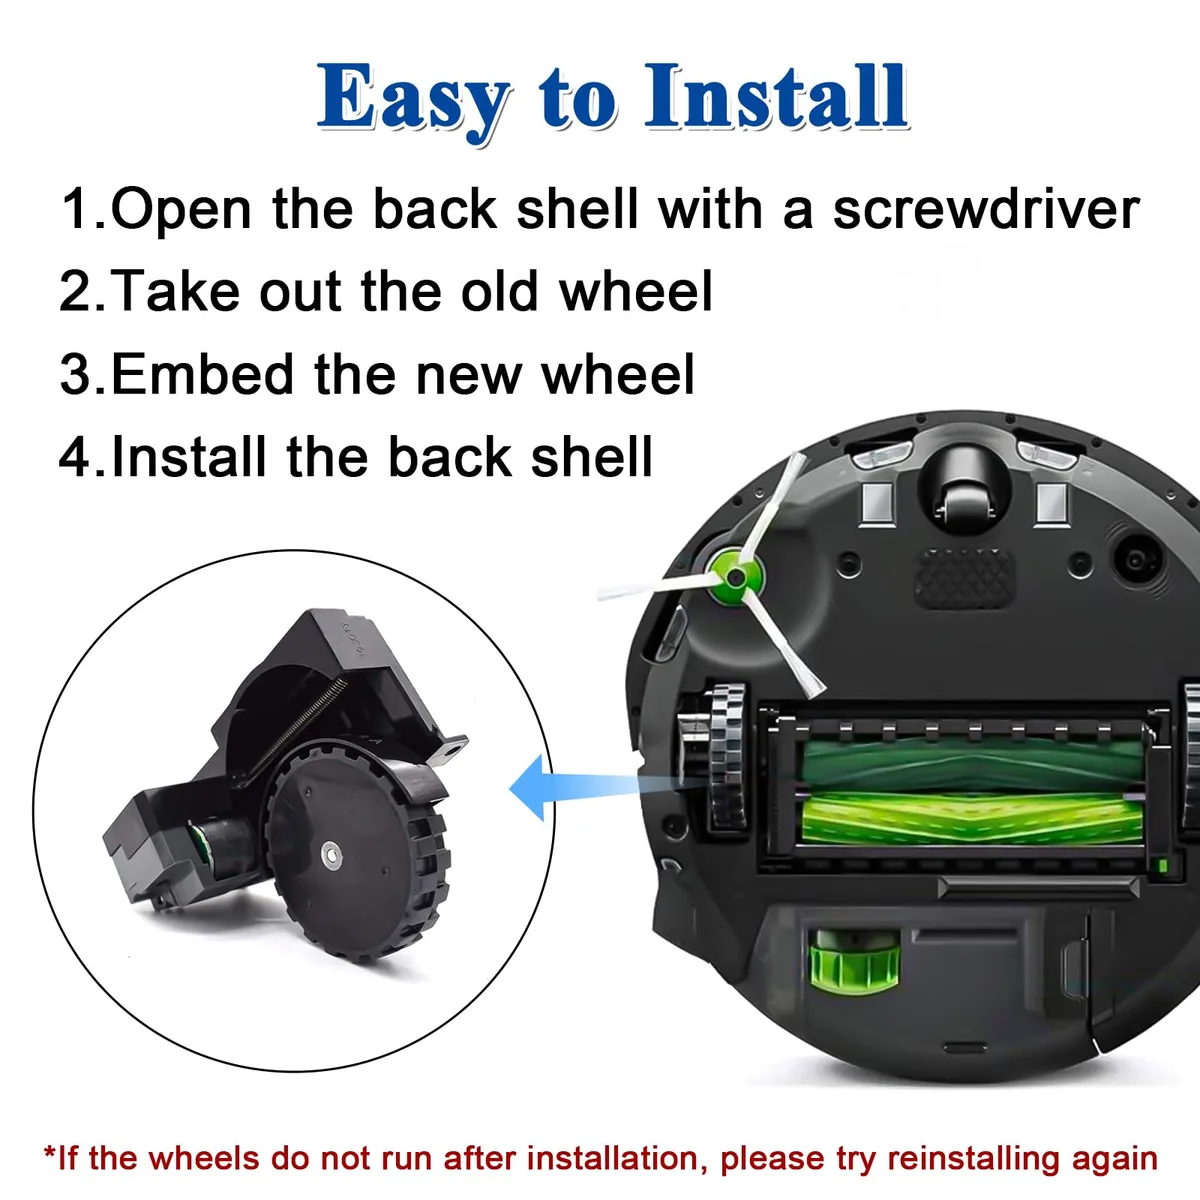
Image source: Web (Bing) / walnutmediacompany.com (Web image (fair-use with source credit))
After wiping, let the wheel module air-dry for 20 to 30 minutes. That pause feels annoying, but moisture trapped inside is one of the leading causes of premature wheel failure. You can speed it up by setting the module in a well-ventilated area or giving it a few puffs of compressed air.
Once fully dry, snap it back into place, replace the screws, and run a test cycle. If you still get a wheel stuck error, check the sensor windows near the wheel for debris. The same tackling wrapped hair approach applies to upright vacuums, even though the brush roll is a different part entirely.
Branch 2: Cleaning the Caster Wheel: Quick, Simple, and Often Overlooked
Now the caster wheel. This is the sneaky one. It's small, tucked under the robot, and easy to ignore, but it's often the first wheel to fail because it's constantly rolling through every dusty corner.
The good news is that it takes about two minutes to clean, and you don't have to unplug anything to do it.
In most designs, the caster wheel sits in a plastic housing with a retaining clip. Grip the wheel firmly and pull it straight out. It might pop out with a small click.
If it doesn't move, check for a tiny screw on the bottom of the housing rather than tugging hard. Once it's out, use tweezers to unwind hair from the small axle or pin. This is usually where the tangle lives.
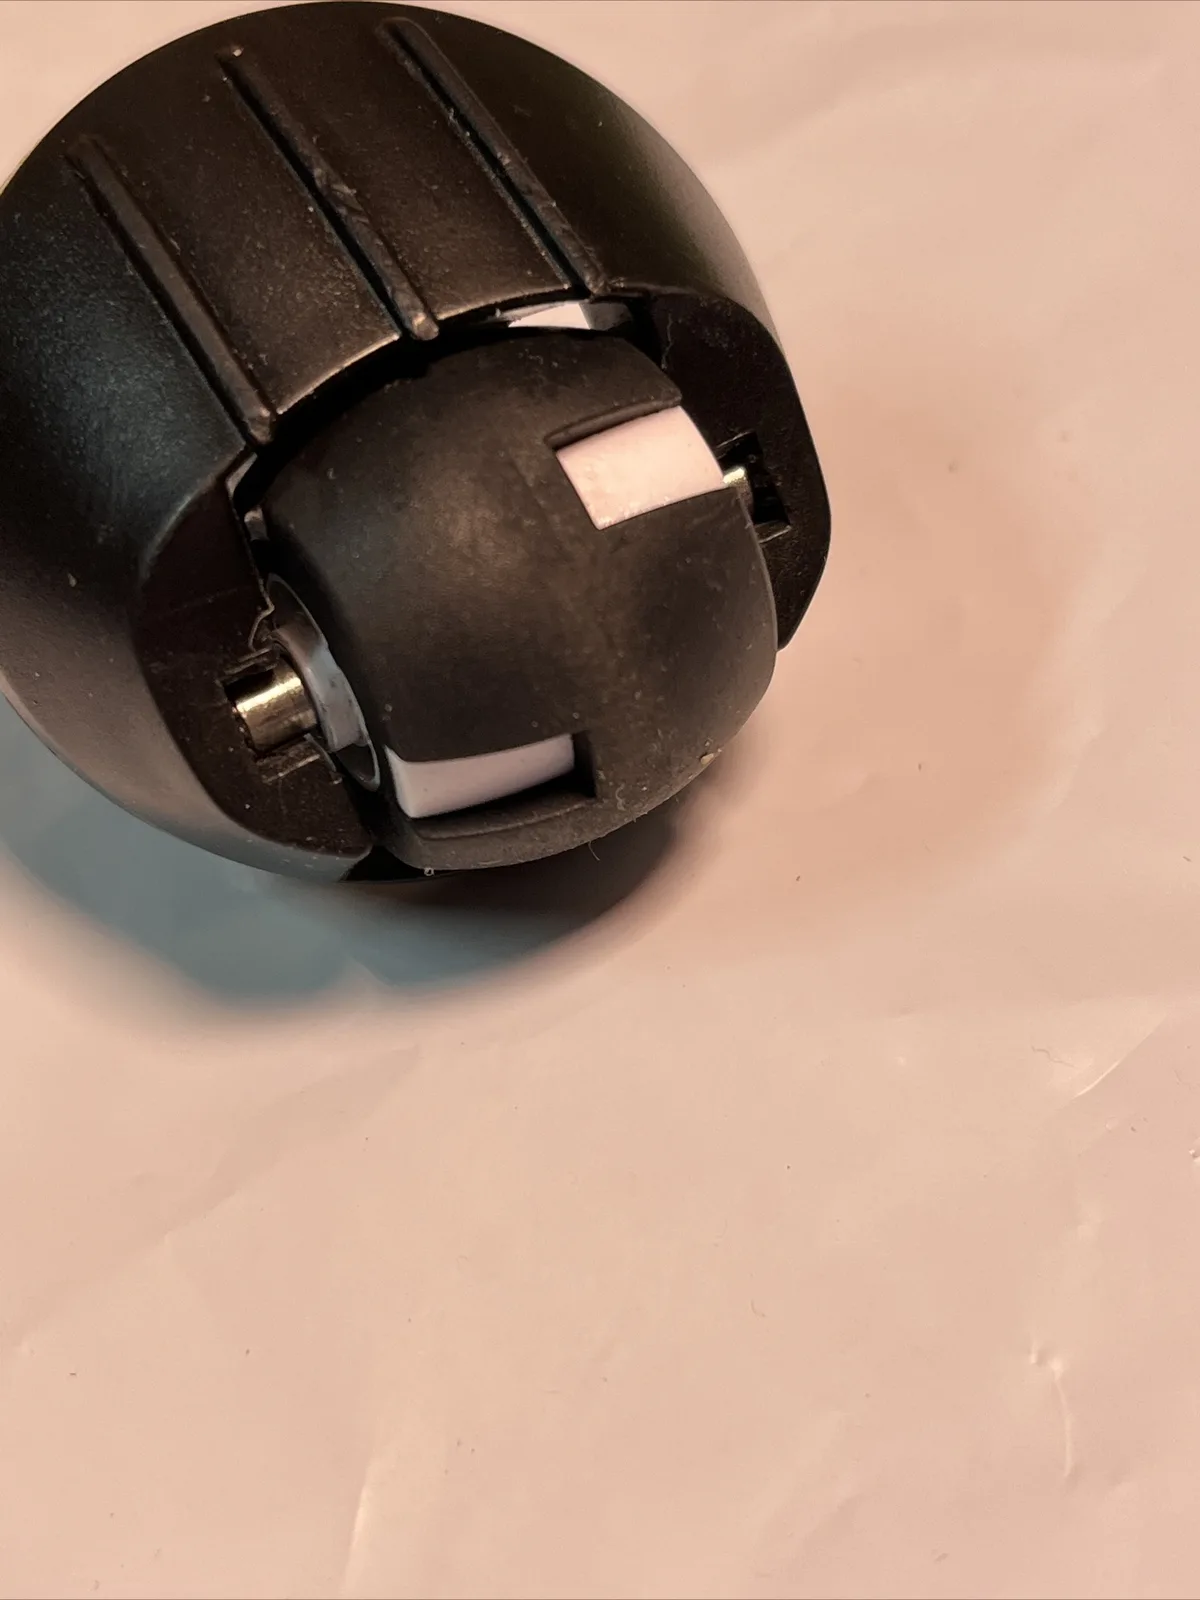
Image source: Web (Bing) / ebay.com (Web image (fair-use with source credit))
After the hair is gone, wipe the wheel and the inside of the housing with a damp microfiber cloth. You can be slightly more generous with water here because there's no motor nearby, but still dry the parts thoroughly before reattaching. Let the caster air-dry for about 10 minutes while you move on to the next section.
If the wheel spins freely after cleaning, you're done. If it still feels stiff, a drop of silicone lubricant on the axle usually fixes it. Avoid oil-based sprays, which attract more dust and create a sticky mess.
This quick maintenance can save you a lot of frustration later, especially in homes with pets. And if you're considering a new robot for hard floors, our robot vacuums for hard floors guide includes models with more accessible wheel designs.
Branch 3: When Hair, Grime, or Sticky Debris Won't Come Off Easily
Sometimes brushing and wiping just isn't enough. Sticky spills, dried-on mud, or hair wrapped so tight it looks like it's fused to the axle can make the wheel smack the floor with every rotation. That's when you need to decide between soaking, soaking and scrubbing, or replacing the part.
For a caster wheel that's truly gross, remove it and soak it in a bowl of warm water with a drop of dish soap for 15 minutes. This loosens the grime without any risk to the robot. After soaking, scrub the wheel with a toothbrush, rinse it under the tap, and dry it completely before snapping it back in.
For a motorized wheel module, never soak it. Instead, use a cotton swab dipped in rubbing alcohol to break down sticky residue on the tread. Work slowly and keep the swab well away from the electrical contacts.
If the wheel is still jammed after that, the issue might be hair wrapped around the motor shaft inside the housing. That's where replacement comes in. Many brands offer a complete wheel module for around $10 to $30, and swapping it is usually easier than trying to disassemble the motor.
You can check the manufacturer's official support center, like iRobot's help page, for model-specific replacement guidance. Honestly, sometimes replacing a worn-out wheel is the most practical move, especially if the plastic axle is bent or the tread has worn smooth. Replacing it makes your robot feel new again and saves you from a frustrating, unpredictable cleaning session.
If the robot is still under warranty, skip the DIY replacement and contact support first, because opening the wheel module can void coverage.
Decision Guide: Wheel Still Stuck or Noisy? Time to Replace the Wheel Module
If you've cleaned everything and the wheel still doesn't spin freely, you're at the decision point. Here's how to think it through.
- If the wheel spins roughly or catches, try one more pass with tweezers around the motor shaft. Hair can be sneaky.
- If it still catches, turn the wheel by hand. A smooth straight spin means you're fine. A wobbly spin means the axle is bent.
- If the tread depth looks shallow or the rubber has worn smooth, the robot won't grip carpets. Replace it.
- If the plastic housing is cracked, replace it. A broken housing lets dirt into the motor.
| Situation | Best Move | Cost |
|---|---|---|
| Hair wrapped tightly | Pull free with tweezers | $0 |
| Sticky residue on tread | Wipe with rubbing alcohol | $0 |
| Wheel still stiff after cleaning | Replace the wheel module | $10 to $30 |
| Axle bent or housing cracked | Replace the module | $10 to $30 |
| Tread worn smooth | Replace the module | $10 to $30 |
Replacement wheel modules are widely available for Roomba, Roborock, Shark, and Eufy models. They typically ship with the wiring attached, so swapping takes only a few minutes. If your robot is under warranty, contact the manufacturer before buying anything.
Mistakes to Avoid: What Almost Everyone Gets Wrong (Especially Water and Tools)
Most wheel damage comes from good intentions. People see a mess and grab the nearest tool. The instinct is right, but the method is often wrong.
- Submerging a motorized wheel module in water. That's the number one killer. Water seeps into the motor and ruins it.
- Using a wet cloth straight from the sink. A damp cloth is fine. A dripping one is trouble.
- Pulling hair hard instead of unwinding it. Yanking the wheel can bend the axle.
- Using a screwdriver to pry off the caster wheel. A small flathead works, but plastic cracks easily.
- Forgetting the caster wheel entirely. It's small, so it gets ignored.
- Using oil-based lubricant. It attracts dust and turns into a greasy mess.
These mistakes affect upright vacuums too. Aggressive cleaning can cause scratched hardwood floors or damage to carpets. The same gentle approach applies to any vacuum.
Safety First: Battery, Electrical Contacts, and Sensor Precautions
Before you start, power down your robot completely. Unplug the charging dock. If the battery is removable, take it out.
This simple step prevents short circuits and accidental motor starts.
- Never clean while the robot is charging.
- Keep water away from the charging contacts and sensor lenses.
- Don't use metal tools near the cliff sensors.
- If your robot has a sealed battery, don't open it.
- Check the manual for specific removal steps.
Most robots use a fixed battery pack. That means you should focus on unplugging the dock and flipping the unit over. The main electrical risk is water near the wheel motor.
Wring your cloth well and dry every part before reassembly. Following the manufacturer's guide for your model is the only way to be sure you're safe. Regular service intervals help catch these issues early.
Maintenance Schedule: How Often to Clean Wheels and Signs You're Slacking
We recommend cleaning the caster wheel every one to two weeks. Motorized wheels can go two weeks, sometimes three, depending on your floors. Pet hair changes the math completely.
If you have a shedding dog or cat, check both wheels weekly.
| Component | Frequency | Time needed |
|---|---|---|
| Caster wheel | Every 1 to 2 weeks | 2 minutes |
| Motorized drive wheels | Every 2 weeks | 10 minutes |
| Deep clean both | Monthly | 15 minutes |
Signs you're slacking:
- Squeaking or clicking sounds while rolling.
- Robot slows down on carpets.
- Error messages like "wheel stuck" or "clear wheels."
- Track marks on hard floors.
- Visible hair wrapped around the axle.
Don't wait for those signs. A quick monthly clean is cheaper than a replacement module. If you notice uneven wear on the treads, it might be time to check the wheel alignment.
Some users find their robots run better with a low-maintenance design, but even the best robot needs this upkeep.
Frequently Asked Questions
Can I use water to clean robot vacuum wheels?
Yes, but keep it away from the motor. Use a barely damp cloth for motorized wheels. Caster wheels can handle a brief soak in soapy water, but dry them fully first.
How do I remove hair from the wheel axle?
Use tweezers to grab the hair close to the axle and pull gently. If it's tightly wound, unwrap it in layers. Never yank hard or you might bend the axle.
Why is my robot vacuum wheel not spinning?
Hair is usually the culprit. It wraps around the motor shaft and locks the wheel. If cleaning doesn't fix it, the motor may be dead.
A replacement module costs around $10 to $30.
How often should I clean robot vacuum wheels?
Clean the caster wheel every one to two weeks. Motorized wheels need attention every two weeks. Pet households should check weekly.
Do I need to replace a worn wheel or just clean it?
If the tread is smooth or the axle wobbles, replace it. If the wheel just has dirt on it, clean it. Tread wear happens after years of use, so don't replace too soon.
Final Verdict: Pick Your Cleaning Path Based on Your Robot and Situation
You now have everything needed to keep your robot rolling smoothly. The right approach comes down to a simple decision tree.
- If you own a pet: Clean both wheel types weekly. Start with the caster wheel, then move to the motorized drive wheels.
- If your robot throws a wheel error: Check the motorized drive wheels first. Remove the module, clear the hair, and inspect the axle.
- If the caster wheel squeaks: Pop it out, clean the axle, and apply a tiny drop of silicone lubricant.
- If a wheel still won't spin after cleaning: Replace the module. It's cheaper than a new robot and takes minutes.
Regular maintenance costs you only 15 minutes a month and a damp cloth. Skipping it can cost you $30 and a frustrating week of a robot that spins in circles. Most owners find that a quick monthly clean prevents 90 percent of wheel issues entirely.
If you're still choosing a robot and want fewer maintenance headaches, compare models with accessible wheel designs before you buy. But for the robot you already own, the answer stays the same. Flip it over, clean the wheels, dry them fully, and let it get back to work.

