

"Why is my robot vacuum losing suction?" is one of the most common questions in any robot vacuum owner group. Your robot still wheels around, beeps, docks, and acts like it's doing the job, but the floor suddenly looks dirtier than before. The answer is rarely a burned-out motor and almost always a blocked airflow path.
Aggregate owner reports and manufacturer maintenance guides point to the same pattern. As of 2026, typical robot vacuums deliver between 2,000 and 5,500 Pa of suction, but a dirty filter or a full dustbin can cut effective pickup before the robot ever shows an error message. The good news is that most fixes take under ten minutes.
Let's work through them in order.
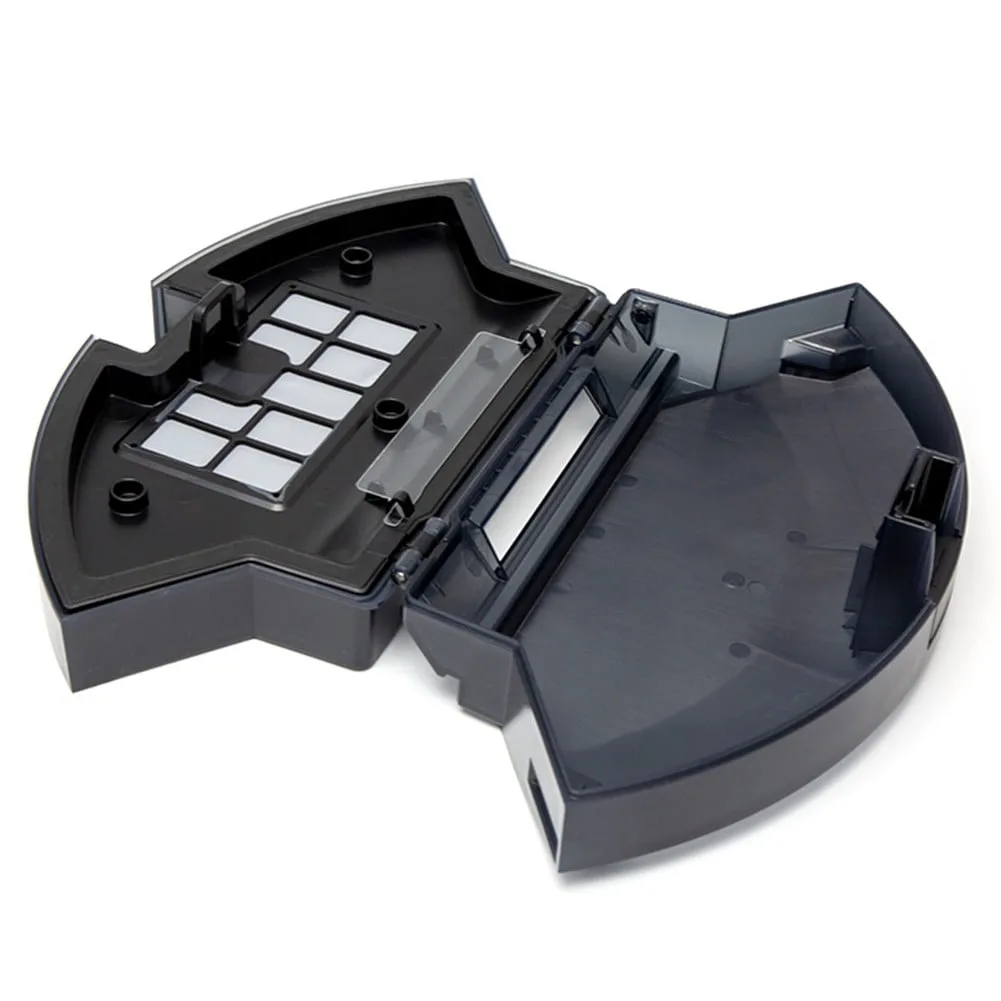
Image source: Web (Bing) / walmart.com (Web image (fair-use with source credit))
It Still Runs, But Pick-Up Is Weak. Here's What's Actually Happening
A robot vacuum creates suction with a motor that spins a fan. That fan pulls air through a specific path: the brush roll, suction inlet, dustbin, filter, motor, then out the exhaust. If anything blocks that path, the air speed drops and debris stays on the floor.
The motor might still be working perfectly.
It's just choking on air it can't pull. You can usually tell which kind of problem you have before you take anything apart.
- Listen to the tone. A high-pitched, strained motor sound means the fan is working harder against a blockage.
- Watch the cleaning pattern. If debris is left in a straight line, the brush roll isn't agitating the surface properly.
- Check the robot's behavior. If it reverses early on carpet or stops mid-room, the battery may also be involved.
Here's the decision-tree logic that actually saves time. If the motor sounds normal and the robot still leaves dust, focus on the brush roll. If the motor sounds strained or labored, focus on airflow.
The fix is usually one of the four causes below, starting with the cheapest and most common. Regular vacuum servicing is in the same skill family, so you can apply these habits to a full-size machine too.
Quick Answer: The 4 Most Common Causes
In most cases, suction loss comes down to one of these four issues.
| Cause | What You'll Notice | Quick Fix |
|---|---|---|
| Tangled brush roll | Debris left in a strip, motor straining | Remove hair and fibers from the roller |
| Clogged filter | Pickup drops slowly over a few weeks | Tap it clean, wash it, or replace it |
| Full dustbin or blocked inlet | Debris stays near edges, robot stops early | Empty the bin and clear the suction duct |
| Aging battery or motor issue | Short runtime, weak suction only when low | Charge fully or replace the battery |
Now follow the branches.
- If the brush roll doesn't spin freely when you turn it by hand, clean that first.
- If the brush roll spins fine, move to the filter.
- If the filter looks clean, empty the dustbin and check the suction inlet.
- If all of those are clear, the problem is likely the battery or the motor itself.
Don't jump around. Test one variable at a time. That's how you avoid replacing parts that weren't broken.
Check the Brush Roll First. Tangles Kill Suction Instantly
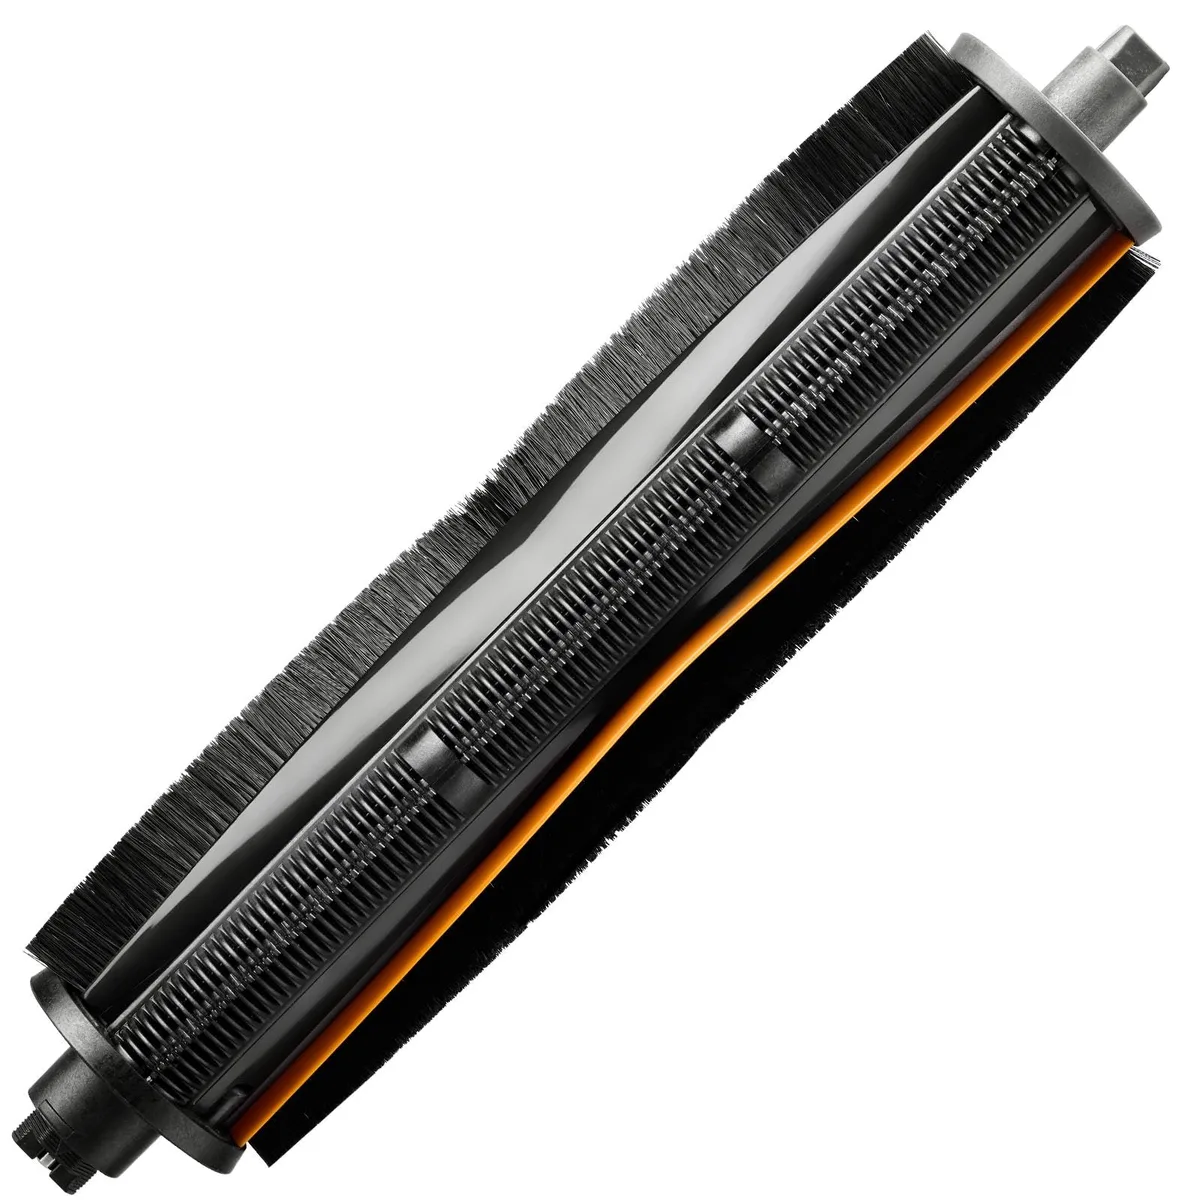
Image source: Bing (Web (fair-use with source credit))
The brush roll's job is to agitate the floor so suction can pull debris in. When hair, carpet fiber, or string wraps around the axle, the roller stops turning or spins slowly. Without agitation, even a strong motor can't pick up fine dust or pet hair.
You can test this in about thirty seconds. Flip the robot over, look at the brush roll, and try to spin it with your fingers. If it doesn't move freely, that's your culprit.
Hair often wraps around the end caps and bearings, not just the visible middle section.
Here's how to fix it:
- Turn the robot off and remove it from the charging dock.
- Remove the bottom plate or release the brush roll clip. Some models need a Phillips screwdriver, others just snap out.
- Slide the brush roll out and cut away any hair or fiber with scissors or a seam ripper.
- Check the end caps. Hair packs into those tiny spaces and stops the roller from spinning.
- Wipe the brush roll clean and reinstall it until it clicks into place.
If the bristles are bent permanently or the plastic housing is cracked, replace the brush roll instead of reusing it. The same tangle problem hits upright vacuums, and the fix for a stuck roller is nearly identical. If you want a step-by-step visual, our guide to removing hair from a vacuum brush walks through the same process.
Most brush rolls can also be rinsed under warm water if the manufacturer allows it.
Inspect the Filter. The #1 Silent Airflow Killer
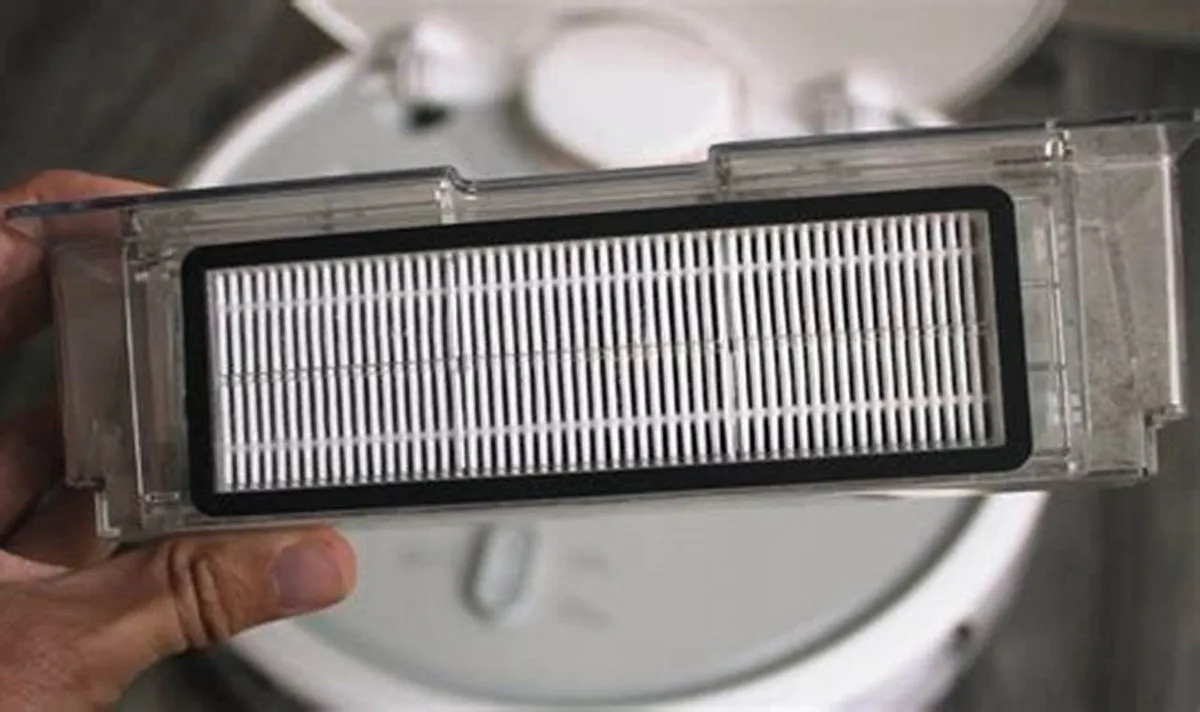
Image source: Web (Bing) / therobotacademy.com (Web image (fair-use with source credit))
If the brush roll spins freely, the next suspect is the filter. Most robot vacuums use two layers: a foam or fiber pre-filter and a HEPA final filter. The pre-filter catches larger dust.
The HEPA filter traps fine particles and is rated to catch 99.97% of particles at 0.3 microns per the standard. When either layer clogs, the airflow through the entire robot drops.
This one is silent because it happens gradually. Today the robot misses a few crumbs. Next week it leaves a visible dust line along the baseboards.
By the time you notice weak pickup, the filter is often dark gray and saturated.
Here's the correct filter routine:
- Remove the dustbin and take out each filter layer.
- Tap them firmly over a trash can to dislodge loose dust.
- If the manufacturer says the filter is washable, rinse it under cold water until clear.
- Let it dry completely for 24 hours. A wet filter blocks even more airflow.
- If the filter is discolored, smelly, or damaged, replace it.
Never wash a HEPA filter unless the manual explicitly says it's washable. Water collapses the fine fiber layer and destroys the filter's ability to trap particles. Check your model's support page first.
iRobot's support documentation clearly marks which parts are washable and which are not.
As of 2026, most brands recommend replacing the HEPA filter every two to three months. That interval shortens in homes with pets or heavy dust. If you're not sure whether your foam filter can be rinsed, read our guide on washable vacuum filters before you soak anything.
The drying step matters too, so we've covered how long a vacuum filter needs to dry if you want the exact timeline.
Clear the Dustbin and Suction Inlet. Blocked Airflow Mimics a Weak Motor
If the brush roll is clean and the filter looks clear, the next thing to inspect is the dustbin itself and the duct leading to it. A full dustbin doesn't just reduce capacity. It physically blocks the airflow path.
The motor can't pull air through a bin that's packed to the top, so the robot keeps running but leaves debris behind.
The same thing happens when a larger object gets stuck in the suction inlet. This is the opening underneath the robot that connects the floor to the dustbin. Coins, Lego pieces, or a crumpled receipt can wedge in there and cut suction dramatically.
Work through this in order:
- Empty the dustbin completely. Press the release latch and remove every bit of debris.
- Shine a light through the suction inlet and look for objects stuck in the duct.
- Check the rubber gasket where the dustbin meets the filter housing. A cracked or misaligned gasket lets air escape before it reaches the motor.
- Look at the dustbin lid and the rubber seal around it. Cracked seals let air leak in, and leaked air means lost suction.
- If your robot has a self-emptying base, empty that canister too. A clogged dock can't create enough vacuum to pull debris from the robot's bin.
If you recently cleaned the robot, double-check that the filter is seated correctly. A filter that isn't clicked into place leaves a gap, and suction drops from the air that leaks around it. This is one of the most common mistakes after maintenance.
Once you've cleared everything, reassemble the robot and run it on a straight section of hard floor. If it picks up cleanly in one pass, the airflow path is clear. For hard-surface homes, some models handle the job better than others, and we've rounded up the best LVP-friendly robots if you're also comparing options for the future.
Look for a Battery or Sensor Issue. When the Robot's "Brain" Causes Weakness
If the airflow path is clear but the robot still underperforms, the cause isn't blockage. It's power.
Battery degradation is common after 500 to 800 charge cycles. As lithium-ion cells age, they deliver less voltage under load. The motor spins slower, and suction drops noticeably, even though the robot still navigates fine.
This is why some robots lose power mid-clean and then seem fine after a full recharge.
The diagnostic is simple:
- Check the battery percentage in your app. Suction loss below 20% charge is normal for many models.
- Run a cleaning cycle at full charge. If pickup improves, the battery is the weak link.
- Find your model's error code for battery health. Some brands surface warnings before failure.
Sensor issues are trickier but less common. Cliff sensors and drop detectors can misfire when dusty, making the robot hesitate or turn away from certain areas. Wipe each sensor lens with a dry microfiber cloth.
If the robot stops early near thresholds, a blocked sensor is often the reason. Clean sensors won't cause suction loss, but they can create the illusion of weak pickup by skipping dirty sections entirely.
Pet Owners and Multi-Surface Homes. Why Your Robot Needs Extra Attention
Homes with pets and mixed flooring expose the weakest point of any robot vacuum: the airflow path gets saturated faster.
Pet hair wraps around the brush roll quickly, often after just one or two cleaning cycles. Dander and fine fur pack the HEPA filter far faster than standard household dust. Carpets shed fibers too, and those fibers tangle into the roller while slowly plugging the filter.
This is why manufacturer filter replacement intervals read "every two to three months." They're designed for the median home. With two shedding dogs, expect to clean the brush roll weekly and replace the filter monthly. With thick carpets, add another layer of vigilance.
Watch for these signs in a multi-surface home:
- The robot picks up well on hardwood but leaves debris on carpet.
- Suction sounds strained on area rugs but normal on tile.
- The brush roll is visibly matted after a single run.
If any of those match your experience, shorten your maintenance interval. A weekly two-minute check beats a frustrating deep-clean every few weeks. And when you're deciding whether a robot can handle your home, pick a model with a self-cleaning brush roll or a higher Pascal rating, since those designs are engineered for heavier debris loads.
Common Maintenance Mistakes That Cause Suction Loss
Most suction problems aren't from wear. They're from well-meaning cleanup that made things worse.
The top mistake is washing a non-washable HEPA filter. Water collapses the fine fiber structure, and the filter becomes a solid mat. It still looks clean, but airflow drops sharply, and the robot leaves debris behind.
Always check the manual for the filter's washability status before running it under water.
The second common error is reassembling parts incorrectly. A filter snapped in at an angle, a dustbin lid that isn't sealed, or a brush roll that didn't click into place all let air leak. Air leaks reduce suction at the floor, but the motor doesn't sound strained.
When in doubt, remove the dustbin and reinstall it slowly.
Here's what our research flags as the most repeated mistakes:
- Skipping the 24-hour drying time for washable filters.
- Overfilling the dustbin because the robot stops mid-run.
- Ignoring the "maintenance required" notification in the app.
- Threading the brush roll back in backward, so the roller scrapes but doesn't spin.
- Leaving a reusable filter in a self-empty dock that never gets emptied.
One more: pushing the filter too tightly into its housing can deform the gasket, which ruins the seal over time. Push it in only until it nests naturally.
When to Replace vs. Upgrade. The Real-World Decision Guide
After you've cleaned the brush roll, replaced the filter, and cleared the dustbin, the next question is money. Do you fix this unit or buy another one?
Here's the rough framework we use:
| Condition | Best Move | Why |
|---|---|---|
| Clogged filter or stuck debris | Replace the part | Costs $5 to $25 |
| Tangled brush roll with bristle damage | Replace the brush | Costs $15 to $40 |
| Battery holds less than 50% of original runtime | Replace the battery | Restores suction for $40 to $80 |
| Motor sounds weak after full maintenance | Repair or upgrade | Motor replacement is 50% of the price of a new unit |
| Dustbin, gasket, or housing is cracked | Upgrade | Air leaks can't be fixed reliably |
If the robot is less than two years old, repair usually makes sense. If it's four years old, the robot's navigation algorithm, battery, and brush system are all aging together. A $70 repair might extend life by a year, but a current mid-range model will clean faster and handle carpets better.
When your current unit's replacement parts cost more than a third of a new robot, we suggest upgrading.
Quick Verification Routine for After Any Fix
Once you've cleaned or replaced parts, verify the fix so you're not guessing. This takes five minutes and tells you exactly what's still wrong.
- Place the robot on a hard floor with a light dusting of flour or baking soda.
- Run it in a straight line without the brush roll touching the floor, if the robot allows that mode.
- Observe the pickup pattern. One clean pass means airflow is good.
- Run the same test on a low-pile carpet. Watch for debris left in the center or along the edges.
- Listen to the motor. A calm, consistent hum beats a whining motor struggling for air.
A few red flags mean you're not done:
- Dust settles in the same spots every run.
- The robot leaves two distinct lines beside the brush path.
- The chosen app shows suction error codes (like E16 or E28 on some models).
If the test passes on hard floor but fails on carpet, check the brush roll again. If it passes on carpet but not near walls, look at the edge brushes. The system works when every component is doing its own job.
When one part fails, the whole flow collapses.
Frequently Asked Questions
Why does my robot vacuum lose suction only on carpets?
On carpets, the brush roll hits more resistance and carpet fibers block the airflow path at floor level. That makes any hidden blockage in the filter or dustbin feel worse. Hard floors hide airflow problems.
The fix is the same, but you'll notice it on carpeted rooms first.
Can I just vacuum the filter instead of washing it?
Yes, for loose dust, but vacuuming doesn't unclog the filter's pores completely. It's a good quick fix when you're between cleanings. For a washable foam filter, rinse it when it looks gray.
For a HEPA filter, follow the manufacturer's guidance. Vacuuming alone just delays the deeper clean.
How often should I replace the filter?
Most brands say every two to three months. Pet homes and dusty spaces shorten that interval to four to six weeks. If the filter looks discolored or smells even after tapping, replace it.
Don't wait for a visible suction drop. By then, the airflow has been weak for days.
Is it normal for suction to fade over a single run?
Yes, and it's expected. The dustbin fills up, and debris packs against the filter as the cycle goes on. That's why the biggest pickup loss happens near the end of a cleaning session.
If the fade is extreme, the dustbin or filter was already close to full when the run started.
Does the self-empty base fix suction issues or create new ones?
It solves the full-dustbin problem, but the base can clog too. A blocked dock can't pull debris from the robot's bin, leaving the robot packed and airflow restricted. Empty the base monthly and replace its filter on schedule.
It's one more part that needs maintenance, not a cure-all.
Final Verdict: You Usually Don't Need a New Robot Vacuum
In most cases, suction loss comes from a clogged path, not a dead motor. Work the checklist in order: brush roll, filter, dustbin, battery. Each fix takes minutes and costs little.
Most robots respond to a good cleaning routine and a fresh filter.
Only consider a new robot when the repair cost tops a third of the replacement price, or the unit shows multiple failures at once. Before that, your robot is likely fine. Give the airflow a clear path, and it'll pick up like it did on day one.

