

Cleaning a vacuum filter usually means removing dust, washing only washable parts, and drying everything fully before use.
Learning how to clean a vacuum filter can restore suction, reduce dusty smells, and help your machine work longer. The right method depends on the filter type, so this guide explains each step clearly, including what to wash, what to replace, and which common mistakes can damage a vacuum.
Why a Clean Vacuum Filter Matters
A vacuum filter traps fine dust, pet hair, pollen, and other small particles. As the filter fills, air cannot move through the machine as easily. This can reduce suction and place extra stress on the motor.
A dirty filter may also cause:
- Weak or uneven suction
- A hot motor or burning smell
- Dust blowing back into the room
- A full-bin warning
- Loud or strained operation
- Poor cleaning on carpets and floors
Think of the filter as the vacuum’s lungs. When it is blocked, the machine has to work harder to breathe. Regular filter care helps maintain airflow and supports cleaner indoor air.
A clean filter does not fix every vacuum problem. A blocked hose, worn brush roll, cracked seal, or full dust bin can also cause poor performance. Still, the filter is one of the easiest parts to check first.

Check the Filter Type Before Cleaning
Before learning how to clean a vacuum filter, find out whether the filter is washable. Check the owner’s manual, the label on the filter, or the vacuum manufacturer’s product page.
Most vacuum filters fall into these groups:
- Foam filters: These are often washable with cool or lukewarm water.
- Felt filters: Some can be rinsed, but others must stay dry.
- Pleated paper filters: These are usually disposable and should not be washed.
- Washable HEPA filters: These can be rinsed only when the manufacturer says so.
- Non-washable HEPA filters: These need gentle tapping or replacement.
- Cartridge filters: These may be washable or dry-clean only, depending on the model.
Never assume that every HEPA filter is washable. “HEPA” describes the filter’s ability to trap small particles. It does not always describe how the filter should be cleaned.
If the filter says “do not wash,” do not soak it, scrub it, or spray it with soap. Water can damage the filter material and reduce its ability to capture dust.
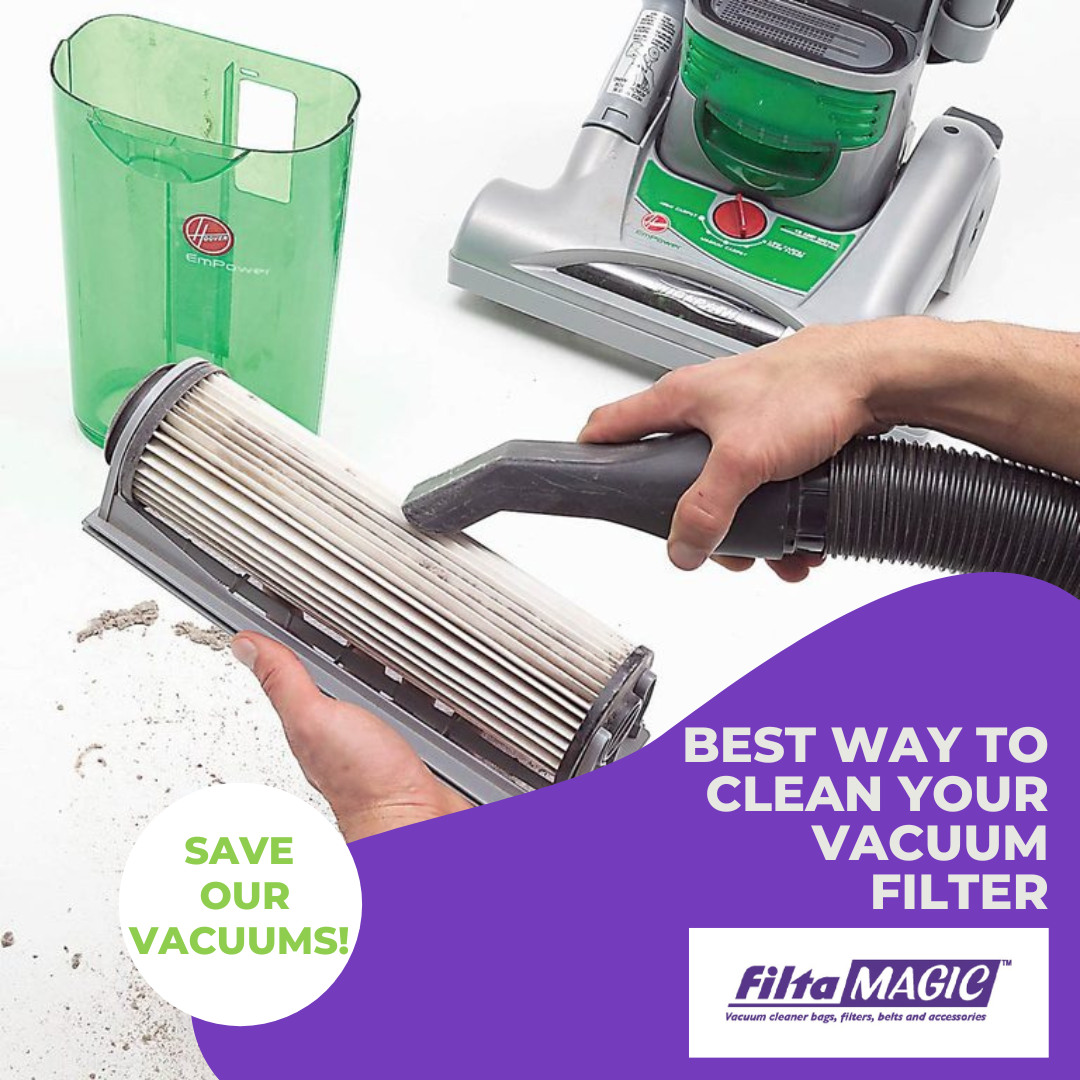
What You Need to Clean a Vacuum Filter
Gather your supplies before you open the vacuum. This makes the process quick and helps prevent dust from spreading around your home.
You may need:
- A clean sink, basin, or outdoor area
- Cool or lukewarm water
- A soft brush
- A clean towel
- Mild dish soap, only if the manual allows it
- A replacement filter, if the current one is damaged
- A face mask, especially if you have allergies
- Disposable gloves, if the filter contains mold or heavy dirt
Avoid bleach, strong cleaners, disinfectant sprays, and hot water. These products can weaken filter fibers, leave residue, or create fumes.
If you have asthma or strong allergies, clean the filter outdoors. Ask another household member to do it if the filter is very dusty. A few minutes of protection can prevent hours of sneezing and irritation.
:max_bytes(150000):strip_icc()/how-to-clean-a-vacuum-filter-5217137-04-8da1b28a6a6d4b36af8215294813b38a.jpg)
How to Clean a Vacuum Filter Step by Step
The safest method for how to clean a vacuum filter starts with the power off. Never clean a filter while the vacuum is plugged in or charging.
1. Turn Off and Unplug the Vacuum
Switch off the vacuum and unplug it from the wall. For a cordless model, remove it from the charging dock and follow the manual’s battery safety instructions.
Allow the machine to cool if it feels warm. A hot motor can make cleaning less safe, and heat may signal a deeper airflow problem.
2. Remove the Dust Bin or Bag
Take out the dust bin or bag over a trash can. Move slowly to avoid releasing a cloud of dust.
Empty the bin before removing the filter. This keeps loose dirt from falling into the filter housing. If the bin is washable, clean it separately and let it dry completely.
3. Locate and Remove the Filter
Look for the filter near the dust bin, motor, or air outlet. Some vacuums have more than one filter. One may protect the motor, while another filters air before it leaves the machine.
Take a photo before removing any part. This simple step helps you replace each filter in the correct direction.
4. Remove Loose Dust
For a washable foam or felt filter, gently tap it over a trash can. Do not hit it against a hard wall or use sharp tools.
For a non-washable filter, tap it lightly outdoors. Do not use strong compressed air unless the manufacturer approves it. High-pressure air can tear filter material or force dust deeper into the filter.
5. Rinse a Washable Filter
Place the washable filter under cool or lukewarm running water. Rinse from the clean side toward the dirty side when the filter design allows it.
Gently squeeze a foam filter. Do not twist it like a wet towel. Twisting can create small tears that let dust pass through.
Continue rinsing until the water runs mostly clear. If the manual permits soap, use a small amount of mild dish soap. Rinse well so no soap remains.
6. Clean the Filter Housing
While the filter dries, wipe the filter compartment with a dry or slightly damp cloth. Keep water away from the motor, wires, circuit boards, and charging parts.
Remove loose dust from seals and vents. A poor seal can allow dirty air to bypass the filter.
7. Dry the Filter Completely
Press the filter gently between clean towels. Then place it in a warm, well-ventilated area.
A washable filter may need 24 hours or longer to dry. Do not place it on a heater, use a hair dryer, or put it in direct high heat. Heat can shrink foam and damage adhesives.
This is the step people skip most often. A damp filter can restrict airflow, create a musty smell, and allow moisture to reach the motor.
8. Reinstall the Filter Correctly
When the filter is fully dry, put it back in the same position. Make sure it sits flat and that all seals are secure.
Replace the dust bin or bag. Run the vacuum for a few seconds and listen for unusual sounds. Stop at once if you smell burning or notice weak airflow.

How to Clean Different Vacuum Filter Materials
The best answer to how to clean a vacuum filter changes with the material. Using the wrong method can shorten the filter’s life.
Foam Filters
Foam filters are often washable. Rinse them with cool water and squeeze them gently. Let them air-dry fully before returning them to the vacuum.
Replace foam if it feels brittle, crumbles, or has permanent holes.
Felt Filters
Felt filters collect fine dust and can be delicate. Some models allow rinsing, while others require dry cleaning or replacement.
If the manual does not clearly approve washing, treat the felt filter as non-washable. Tap it gently and replace it when dirty.
Pleated Paper Filters
Do not wash pleated paper filters unless the manufacturer specifically says they are washable. Water can cause the paper to swell, split, or lose its shape.
Tap off loose dust and install a new filter when airflow drops. A paper filter is usually cheaper than motor damage caused by using a blocked one.
HEPA Filters
Washable HEPA filters may be rinsed with water. Non-washable HEPA filters should only be tapped gently or replaced.
Do not scrub the pleats with a brush. Damaged pleats can reduce filtration even when the filter looks clean.
:max_bytes(150000):strip_icc()/how-to-clean-a-vacuum-filter-5217137-06-5b4834b69db34abfa2c0a980f363f509.jpg)
How Often Should You Clean a Vacuum Filter?
Most households should inspect the filter once a month. Homes with pets, children, allergies, or heavy traffic may need more frequent care.
Use these general guidelines:
- Check the filter every two to four weeks.
- Wash a washable filter every one to three months.
- Replace disposable filters according to the manual.
- Inspect the filter after vacuuming fine dust, ash, drywall dust, or construction debris.
- Check the filter sooner if suction drops or the vacuum smells hot.
Robot vacuums may need filter checks every week because their bins are small. Stick vacuums can also load filters quickly when used on pet hair and thick carpets.
These are starting points, not strict rules. A filter may need cleaning sooner in a busy home. Watch the vacuum’s performance and follow the model’s maintenance schedule.

Common Mistakes to Avoid
Knowing how to clean a vacuum filter also means knowing what not to do. Small mistakes can damage the filter or the vacuum motor.
Avoid these problems:
- Washing a filter labeled non-washable
- Reinstalling a filter while it is damp
- Using hot water
- Scrubbing delicate pleats
- Applying bleach or strong chemicals
- Cleaning the filter while the vacuum is plugged in
- Running the vacuum without its filter
- Forgetting a second filter near the motor
- Crushing a filter to make it fit
- Ignoring a damaged seal or torn filter
One mistake I have seen often is placing a freshly rinsed filter back into the machine after only a few hours. The outside may feel dry, but the center can still hold moisture. Waiting a full day is safer than risking a damp motor.
Another common error is washing every part that looks dusty. The dust bin may be washable, but the motor housing usually is not. When in doubt, wipe the area with a dry cloth and check the manual.

How to Tell When a Filter Needs Replacement
Cleaning cannot restore a filter that is torn, crushed, or permanently clogged. Replace it if you notice:
- Holes or visible tears
- Missing foam or loose fibers
- A broken frame
- A poor fit inside the housing
- A strong odor that remains after cleaning
- Reduced suction after proper cleaning
- Dust escaping around the filter
- A filter that no longer returns to its original shape
A filter can look clean and still be worn out. Fine fibers may lose their structure over time. If the manufacturer lists a replacement interval, follow it even when the filter appears usable.
Use the exact filter made for your vacuum when possible. A filter that is too small may let dust bypass it. One that is too thick may restrict airflow.
What to Do if Suction Is Still Weak
If the vacuum remains weak after you clean the filter, check the rest of the airflow path. The filter may not be the only problem.
Inspect these parts:
- Dust bin or vacuum bag
- Hose and wand
- Floor nozzle
- Brush roll
- Air inlet
- Exhaust vent
- Rubber seals
- Cyclone chamber
Turn off and unplug the vacuum before removing hair or blockages. Use a long, blunt tool for a hose only if the manufacturer allows it. Never push a sharp object through the hose.
A burning smell, repeated shutdown, sparks, or unusual motor noise needs professional attention. Do not keep running the machine to “see if it improves.” A small blockage can become an expensive motor repair.
Tips for Cleaner, Longer-Lasting Filters
Good vacuum habits reduce the amount of work your filter must do. They also help prevent early replacement.
Try these simple habits:
- Empty the dust bin before it reaches the maximum line.
- Remove large debris by hand before vacuuming.
- Check for coins, socks, and toys in the cleaning path.
- Brush pet hair from the floor when practical.
- Store the vacuum in a dry place.
- Keep spare filters on hand.
- Mark the cleaning date on a calendar.
- Use a pre-filter when the vacuum supports one.
Do not use a household vacuum for wet spills unless it is designed as a wet-dry vacuum. Moisture can clog filters and harm electrical parts.
A clean filter supports good airflow, but it cannot make a poor-quality or damaged vacuum perform like a new one. Regular maintenance is helpful, not magical. That honest limit matters when deciding whether to clean, replace, or repair a machine.
Frequently Asked Questions About How to Clean a Vacuum Filter
Can I wash every vacuum filter?
No. Some foam and HEPA filters are washable, but many felt, paper, and cartridge filters are not. Check the label or owner’s manual before using water.
How long should a vacuum filter dry?
Allow a washable filter to air-dry for at least 24 hours. Thick foam or layered filters may need longer, and they should feel dry inside and out before installation.
Can I use soap to clean a vacuum filter?
Use soap only if the manufacturer permits it. A small amount of mild dish soap may work for some foam filters, but strong cleaners can damage the material or leave residue.
Can I vacuum without the filter?
No. Running a vacuum without its filter can send dust into the motor and back into the room. It may also void the warranty or cause serious damage.
How often should I replace a vacuum filter?
Replacement timing varies by model and use. Replace a filter when it is torn, misshapen, permanently clogged, or still causes poor airflow after proper cleaning.
Can I dry a vacuum filter with a hair dryer?
It is safer to let the filter air-dry. Heat can shrink foam, damage adhesives, and change the filter’s shape.
Conclusion
Learning how to clean a vacuum filter is a simple way to protect suction, reduce dust, and support a longer machine life. Turn off the vacuum, identify the filter type, remove loose dust, wash only approved filters, and let every washable part dry fully.
Check the filter each month, especially if you have pets, allergies, or a busy home. When a filter is torn, worn, or permanently blocked, replace it rather than forcing it to work.
Use these steps during your next cleaning session, and share your favorite vacuum care tip in the comments.


1 Comment
Pingback: How To Maintain A Vacuum Cleaner: Easy Care Tips - Vacuum Cleaner Tips