

Wet/Dry Vacuum 101: It’s Not Magic, It’s Airflow
Ever stood over a flooded basement or a tipped-over washing machine and wished you had a real tool, not a mop? Then you’ve probably asked: How does a wet/dry vacuum work? The short answer is that it’s a cleverly simple air pump with a tank instead of a bag.
The motor pulls air through a hose, and the mess gets left behind in the drum.
Manufacturer specs make the trick easier to see. As of 2026, most residential wet/dry vacuums pull between 100 and 200 CFM of airflow, with water lift ratings from 50 to 90 inches. That airflow is the whole secret.
Once you picture the pathway, everything else makes sense.
Quick Answer
A wet/dry vacuum works by pulling air through a hose into a large tank. Debris and liquid drop to the bottom of the tank. The air then passes through a filter before reaching the motor.
A float valve shuts off airflow when the tank is full of liquid. That’s the entire system in four sentences.
The Anatomy of a Wet/Dry Vacuum: Parts You Can Actually Identify
You don’t need to be an engineer to spot the key parts. Once you know what each piece does, the whole machine makes sense.
| Component | What it does | What you’ll see |
|---|---|---|
| Collection tank | Holds all debris and liquid | A sturdy drum with a drain port near the bottom |
| Lid assembly | Seals the tank and carries the motor | A removable cap with latches and a gasket |
| Motor head | Creates the suction | The bulky housing on top with switches |
| Hose ports | Let air in and out | Two openings on the lid or tank, one labeled suction, one blower |
| Filters | Protect the motor from dust and water | A pleated cylinder or a foam sleeve, plus a cage |
| Float valve | Stops liquid from reaching the motor | A small floating ball or disc inside the tank |
The motor sits above the tank, never inside the mess zone. That separation is what makes the design work. The hose connects to the suction port, and the air path runs straight into the drum.
Everything heavy lands at the bottom. The motor only ever sees filtered air.
If you look at the lid from above, you’ll also see the exhaust side. Many models let you attach the hose there for a blower function. That’s handy for clearing sawdust.
The motor still spins the same way. The airflow just reverses where the hose connects.
For small-debris pickup, the tank size matters more than the motor. A bigger drum gives debris more room to settle before the air turns toward the filter. That’s why even a modest 5-gallon shop vac picks up fine dust without strangling the motor.
The Airflow Path: How the Motor, Tank, and Filters Work Together
The fastest way to understand a wet/dry vacuum is to trace one piece of air from the floor to the exhaust. It’s not complicated, but it is non-negotiable: air moves through the vacuum in a very specific order.
First, the motor spins a fan, called an impeller. That creates a low-pressure zone. Air rushes in through the hose to balance pressure.
The air carries along anything light enough to move. That debris ends up in the tank. Then the air passes through a filter on the way to the motor.
Finally, the cleaned air exits through an exhaust port.
Here’s what a diagram would show you: a straight line from hose to tank, then a sharp turn upward through the filter, then into the motor. The turn is intentional. Debris and liquid drop to the bottom of the tank before the air makes the turn.
That’s why a flooded garage floor can become a clean concrete slab instead of a soaked motor.
Keep that pathway in mind and everything else falls into place. A clogged hose blocks step one. A soaked filter blocks step two.
A full tank blocks both. It’s the same kind of airflow trouble that makes a pool vacuum lose suction in routine use.
Wet Mode vs. Dry Mode: One Machine, Two Different Setups
Here’s where most first-time users trip up. The vacuum isn’t magic. It filters wet and dry messes in two different ways, and the difference comes down to which filter you install.
For dry pickup, you use a pleated cartridge filter. It traps dust and chips while letting air pass. For wet pickup, you swap in a foam sleeve.
The foam catches water and droplets while still letting airflow through. It looks like a sponge, and it works a bit like one too.
A common mistake: leave the dry cartridge filter on and vacuum water. The fibers soak up liquid. Suction drops fast.
Then the filter becomes heavy and saggy. In some cases, water seeps through and reaches the motor. That’s a bad day.
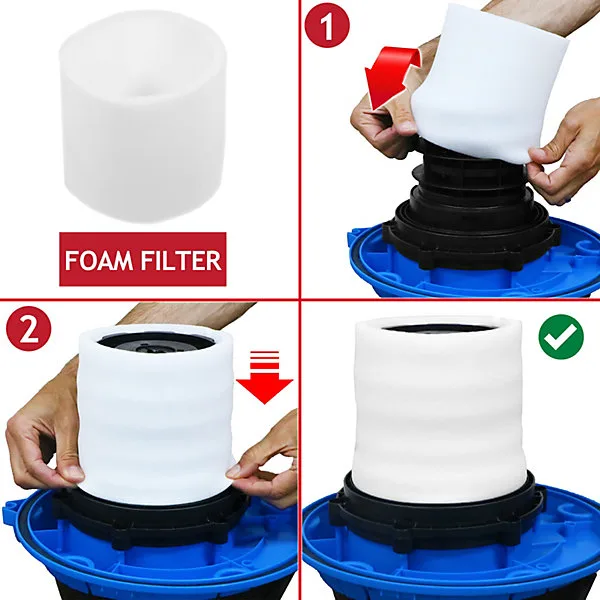
Image source: Bing (Web (fair-use with source credit))
Manufacturer instructions are clear on this. You remove the cartridge filter for wet use and replace it with the foam sleeve. The opposite also applies.
Don’t run the foam sleeve for a bag of drywall dust. Fine particles will pass straight through the foam and into the motor housing. A cartridge filter keeps that dust contained.
If you need both in one session, the sequence matters. Do dry pickup first, clean the tank, then switch to the foam sleeve. Or finish the wet job first, dry the tank, then put the cartridge back.
It adds a minute of setup, but it protects the motor. For cleaning the filter, the same gentle-rinse and fully-dry rule applies here too.
The Float Valve: The Small Part That Saves the Motor
The float valve is the unsung hero of a wet/dry vacuum. Without it, a full tank of water would get sucked straight into the motor. That would burn out the motor in seconds.
Here’s how it works. When you vacuum water, it collects in the tank. As the water level rises, the water lifts a lightweight float.
Eventually the float reaches a sealed valve at the top of the intake opening. That blocks the airflow. The suction stops, and the motor spins freely in air instead of swallowing water.
It feels like the machine quit on you. That’s normal. The motor is still running.
The float has simply shut off the airflow path. Inspect the tank and you’ll see why: the water level is right at the top.
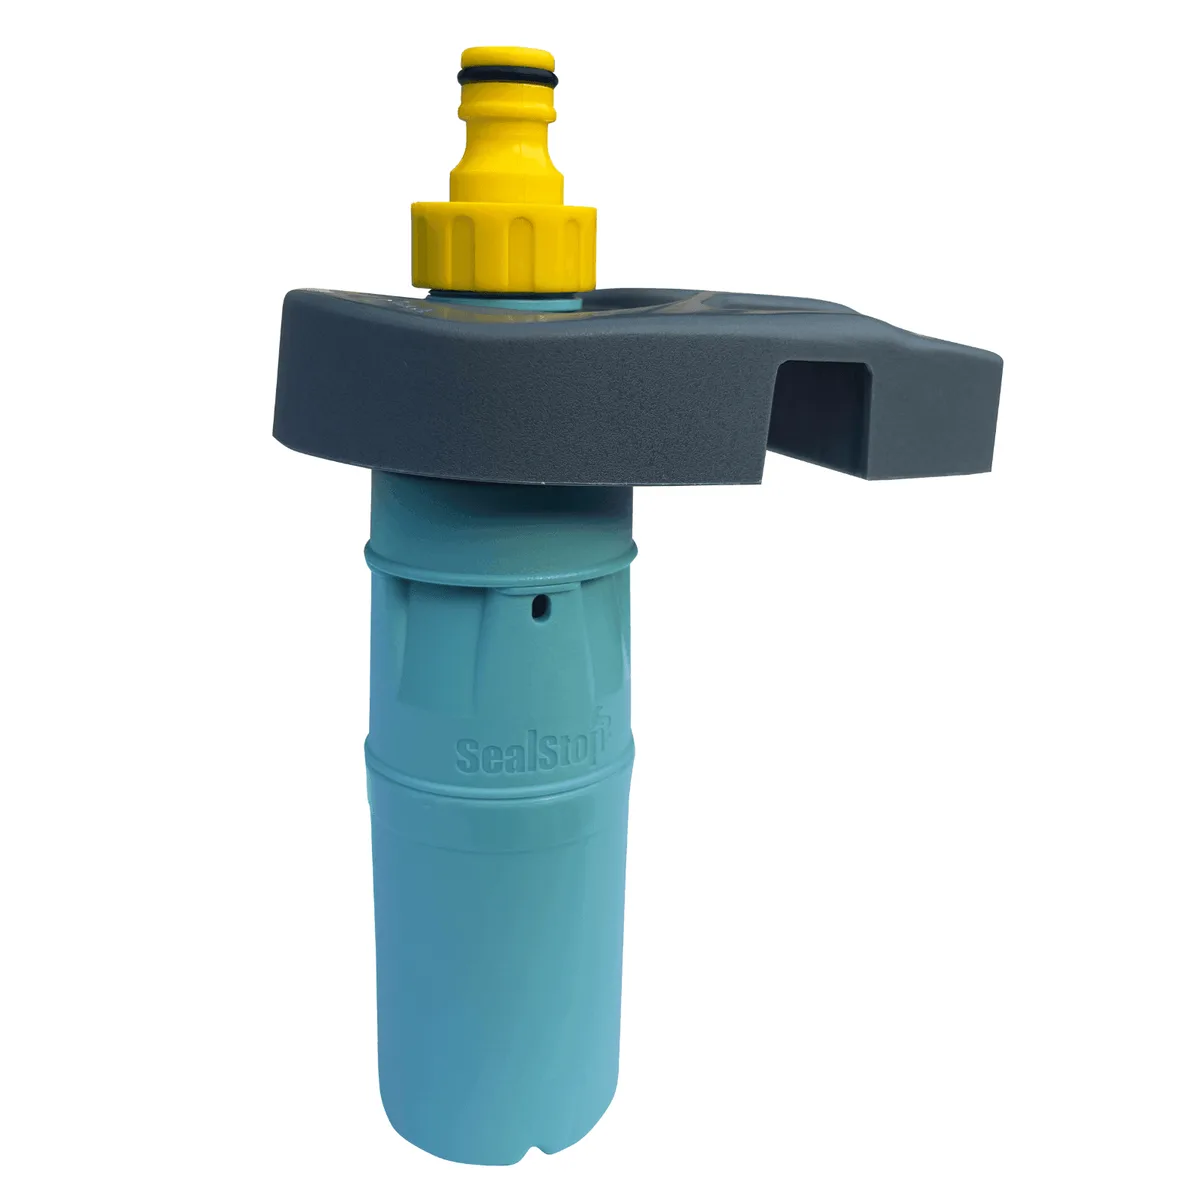
Image source: Web (Bing) / guttervacuumsystems.co.uk (Web image (fair-use with source credit))
This isn’t a breakdown. It’s a safety feature doing its job. To restart, turn off the vacuum, open the lid, and drain the tank.
Then reset the float if it has stuck to the top of the valve. It will drop back down on its own in most models.
Some vacuums have a visual indicator on the lid to tell you the float has tripped. Others are quieter. Listen for the sound.
When a wet/dry vacuum suddenly goes almost silent while the motor hums, check the tank first. That trick saves you from tearing apart the motor for no reason.
The same principle applies to household plumbing. A collapsing spray hose can mimic a similar blockage, and it’s worth knowing how a collapsed hose feels when airflow stalls.
Visual Cues That Tell You Which Filter Is Right
The fastest way to avoid a ruined motor is to read the filter before you start vacuuming. One glance tells you everything. A pleated cartridge means dry-only.
A foam sleeve means wet work.
Here’s what to look for in real life.
| Filter type | What it looks like | Safe to use with |
|---|---|---|
| Cartridge filter | Pleated paper-like cylinder with a plastic cage | Dry dust, sawdust, debris |
| Foam sleeve | Thick open-cell sponge over a mesh cylinder | Water, damp spills, small amounts of wet debris |
| HEPA filter | Dense white pleats in a sealed frame | Fine toxic dust when labeled for it |
Some models let you stack a foam sleeve over the cartridge for wet pickup. That works, but it needs the right sleeve design. Check the manual if you’re not sure.
The visual rule is simple. If it looks like a sponge, it belongs on wet messes. If it looks like a folded paper filter, keep it far away from water.
Common Visual Mistakes That Ruin Suction or the Motor
The worst mistakes all share one cause: not reading the airflow path. Here are the ones we see repeated in service forums and owner complaints.
- Using the dry cartridge for water. The fibers swell, suction drops, and water eventually seeps into the motor.
- Ignoring the float trip. You hear the motor run, but nothing picks up. The tank is full, not broken.
- Letting a clogged hose happen. Both ends look clear, but something is stuck in a bend. Air can’t flow.
- Fine dust blowing out the exhaust. That means the filter isn’t catching it, and you need a HEPA rated unit.
When suction fades, check the hose first, then the filter, then the tank level. In our research, most “broken” vacuums turned out to be one of those three issues. It’s exactly the same logic as a collapsed pool hose stopping airflow at the inlet.
When Understanding the Mechanics Actually Saves You: Real Scenarios
Picture a basement that’s taken on two inches of water after a storm. You start vacuuming. The tank fills, the float valve trips, and the motor keeps humming.
Before you learned the mechanics, you’d have assumed the unit failed. Now you drain the tank through the port, and you’re back to work in under a minute.
A workshop mess of drywall dust needs the opposite setup. A fine dust load clogs the cartridge quickly. You’ll notice suction dropping as the pleats fill.
Stop, tap the filter clean, and you’re done. Repeating this every few minutes beats overheating the motor.
For car detailing, the foam sleeve is your friend. It handles wet spills and muddy floor mats. Rinse it out afterward and let it dry.
That one habit prevents the mildew smell from ruining the next job. If you ever hit a solid object jam, you’ll recognize the same airflow stall as a clogged vacuum head.
Maintaining the Airflow: Filter Cleaning, Tank Rinsing, Seal Care
A vacuum that can’t move air is just a heavy plastic bucket. Routine maintenance keeps the path open.
| Task | When | Time needed |
|---|---|---|
| Rinse tank | After wet use | 2–3 minutes |
| Tap out cartridge filter | After heavy dry use | 1 minute |
| Rinse foam sleeve | After wet use | 1 minute |
| Wipe lid gasket and latches | Every few uses | 1 minute |
| Check hose for blockages | When suction seems weak | 1 minute |
For wet use, empty the tank and rinse it with fresh water. Then let the tank air out before you store it. The same applies to the foam sleeve.
A damp filter sealed in a dark garage will grow mold quickly.
For dry use, the cartridge can be brushed clean or rinsed with mild soap and water, but only if it’s fully dry before the next job. A wet cartridge blocks airflow and invites mold. Keep the gasket on the lid free of debris and check the latches for a tight seal.
Regular upkeep also extends the life of cheaper parts. A worn gasket leaks air, so suction drops and dust bypasses the filter. It’s a simple basic maintenance habit that pays off in reliable performance.
How This Design Differs From a Regular Vacuum
Look at a normal upright vacuum, and you’ll see bags, brushes, and a motor that lives near the floor. Now look at a wet/dry vacuum. The differences aren’t cosmetic.
They’re structural.
A regular vacuum pulls air through a small bag or a sealed cyclone. That bag catches dust and blocks it from the motor. A wet/dry vacuum uses a much larger tank and relies on gravity to let heavy material drop out of the airflow.
That simplicity is why it can handle water, screws, nails, and even soaked leaves.
Regular vacuums also push air through their own motor cooling fan. Wet/dry vacuums do it too, but with a critical twist. The float valve protects that cooling path from liquid.
Some models route cooling air through a separate sealed chamber, so moisture can never reach the motor even if the filter fails.
There are real safety standards behind this design. Under OSHA’s crystalline silica guidance, construction crews must use vacuums with dust-rated filters when collecting concrete and masonry dust. A standard shop vac without a HEPA or dust-class filter won’t cut it.
That’s not a minor point. Fine silica dust is a serious health hazard.
The wet/dry vacuum also has a blower port, something household vacuums almost never have. You attach the hose to the exhaust side, and it becomes a leaf blower for the garage, a gutter cleaner, or a tool for inflating an air mattress. That dual function comes from the same motor and tank design, just with a diverted airflow path.
Pressure-side pool cleaners work on a similar idea. They use water pressure instead of suction to push debris, and the airflow logic is different, but the concept of directing power through a hose stays the same. You can see how pressure-side models use that redirected flow in a whole different setting.
The Two Safety Rules That Really Matter Here
Rule one: plug into a GFCI protected outlet for any wet pickup. Water and electricity don’t mix, and a ground fault circuit interrupter cuts power in milliseconds if something goes wrong. Dry garage outlets aren’t always protected.
Rule two: never vacuum flammable liquids. Gasoline, solvents, and alcohol create explosive vapors. A standard wet/dry vacuum is not explosion-proof.
Ignoring that warning has caused garage fires and worse.
There’s also a dust rule if you do renovation work. Fine silica dust from concrete and masonry requires a vacuum rated for hazardous dust. Standard shop vacs aren’t built for that job.
The EPA’s renovation program sets clear expectations for lead-safe work that protects you and your family.
Stick with these rules, and the vacuum stays a tool. Ignore them, and you’re gambling with expensive equipment, possibly your home. That’s never worth the shortcut.
Frequently Asked Questions
Why does the motor keep running but the suction stops?
The float valve has tripped. When the tank fills with liquid or debris, the float blocks the air intake to protect the motor. The motor keeps spinning, but no air can pass.
Drain the tank through the drain port or lift it out, then the float drops back and suction returns.
Can I vacuum fine drywall dust with a standard wet/dry vac?
Yes, but you need the right filter. A standard cartridge filter catches large particles, but fine drywall dust clogs it fast and pushes dust out the exhaust. Use a HEPA rated filter or a dust collection bag inside the tank.
Concrete and masonry dust also require a vacuum rated for hazardous silica, per OSHA guidance.
How full can the tank actually get before shutoff?
Most consumer models shut off when the tank is roughly 80 to 90 percent full. The water level reaches the float valve before the tank overflows. Manufacturer specs vary by model.
Expect the shutoff point to sit a few inches below the lid on larger drums.
Do I really need to change the filter for wet and dry jobs?
Yes. The foam sleeve handles liquid, and the cartridge handles dry dust. Using the wrong one risks poor suction, a soaked motor, or fine dust blowing into the air.
One minute of swapping filters is cheaper than replacing a motor.
The Five-Second Mental Model: Picture It, and It All Makes Sense
Here’s the whole machine in one sentence. Air enters through the hose, drops debris into the tank, passes through the filter on the way up, and exits through the motor exhaust.
Water never reaches the motor. Dust never blows past the filter if the right one is installed. The float valve protects the system when the tank is full.
You keep four parts healthy, the airflow path, the filter, the seals, and the tank, and the vacuum does everything it’s built for.
That mental model is the difference between guessing and knowing. When suction fades, you’ll check the clogged hose first. When water spills, you’ll reach for the foam sleeve without hesitation.
When the motor hums but nothing picks up, you’ll know exactly what happened.
A wet/dry vacuum is one of the simplest powerful tools in any garage. Understand the airflow, respect the filters, and it will handle the messes a regular vacuum never could.

