

Getting an above-ground pool set up properly starts with one crucial, non-negotiable step: leveling the ground. Skipping this basic prep work can lead to a host of problems, from a pool that looks lopsided to serious structural damage that could even make it unsafe. You want your pool to be a source of joy, not a headache, so taking the time for proper site preparation is key.
Our research shows that most pool manufacturers specify a level foundation is required for safe installation and to prevent voiding warranties. Generally, the ground should be level within plus or minus one inch across the entire diameter of the pool. Failing to achieve this can put uneven stress on the pool walls and base, leading to issues like leaks or structural failure.
Quick Answer
To level ground for an above-ground pool, you must first select a suitable site and mark your pool's perimeter. Then, excavate high spots and compact the soil thoroughly to create a firm base. Use a long spirit level or laser level to check for flatness across the entire area, adjusting as needed by adding or removing soil until it's within one inch of level.
Why Level Ground is Non-Negotiable for Your Above Ground Pool
You might be tempted to think a slight slope is no big deal, but when it comes to supporting thousands of gallons of water, even a small difference can cause major issues. Think of it like building a house on a crooked foundation, it’s just not going to end well. An unlevel pool puts concentrated stress on specific points of the pool wall and frame.
This uneven distribution of weight can cause the pool structure to warp, buckle, or even collapse.
Manufacturer specifications consistently highlight the importance of a level base. For instance, many above-ground pool manuals state the ground must be level within a tolerance of +/- 1 inch across the pool's diameter. Going beyond this can void warranties and, more critically, compromise the pool's structural integrity.
This means it’s not just about aesthetics; it’s about safety and the longevity of your investment.
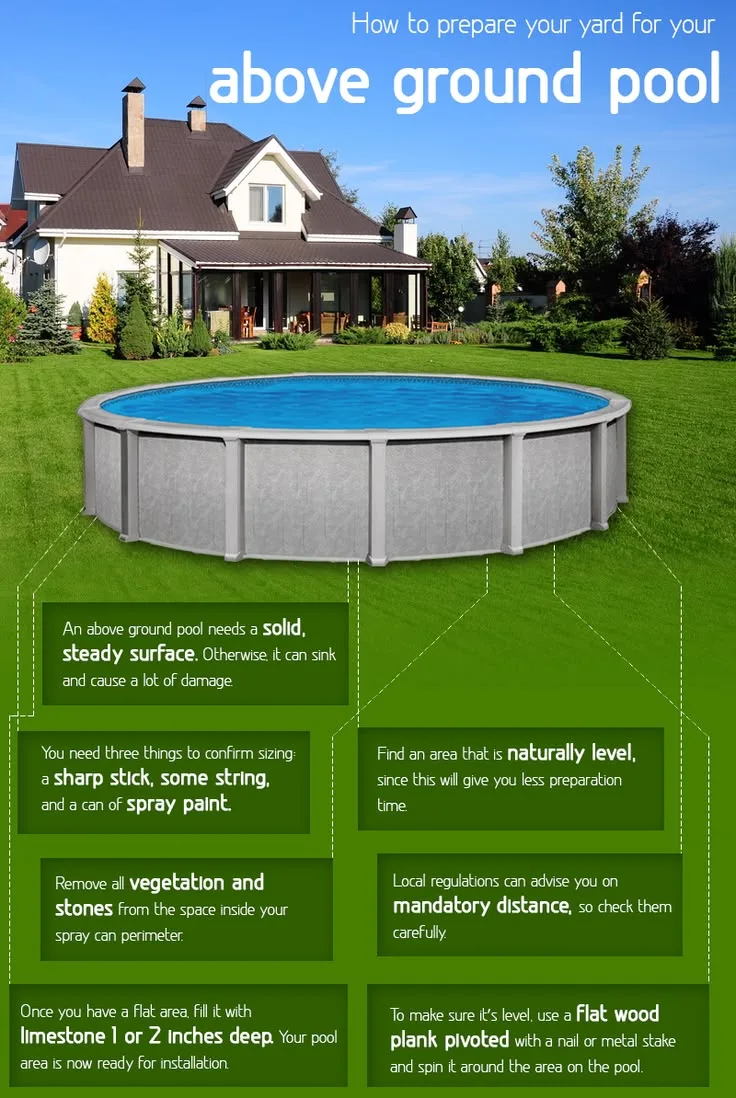
Image source: Bing (Web (fair-use with source credit))
The Cost of an Unlevel Pool Foundation
The immediate consequences of an unlevel pool are often visible. You might notice the water level is consistently higher on one side, or the top rim of the pool appears to tilt. Over time, this leads to more serious problems.
The frame can rust prematurely in certain areas, liners can stretch unevenly, and fittings might develop leaks because they aren't seated correctly.
Beyond the visible issues, an unlevel pool can create a safety hazard. Uneven ground can make getting in and out of the pool treacherous, especially for children or older adults. Drainage can also be affected, potentially leading to water pooling around the base, which can damage the liner or even erode the ground beneath the pool, exacerbating the leveling problem.
Assessing Your Pool Site: What to Look For
Before you even grab a shovel, you need to pick the right spot and understand what you're working with. Not all areas in your yard are created equal for housing an above-ground pool. Our research suggests that besides being reasonably flat, the site should also be free from obstructions and have good drainage.
When you're scouting potential locations, remember that you'll need space not just for the pool itself, but also for a deck or surrounding area, and for easy access for maintenance. Think about where the sun hits throughout the day and any potential shade from trees, as this can affect water temperature and evaporation.
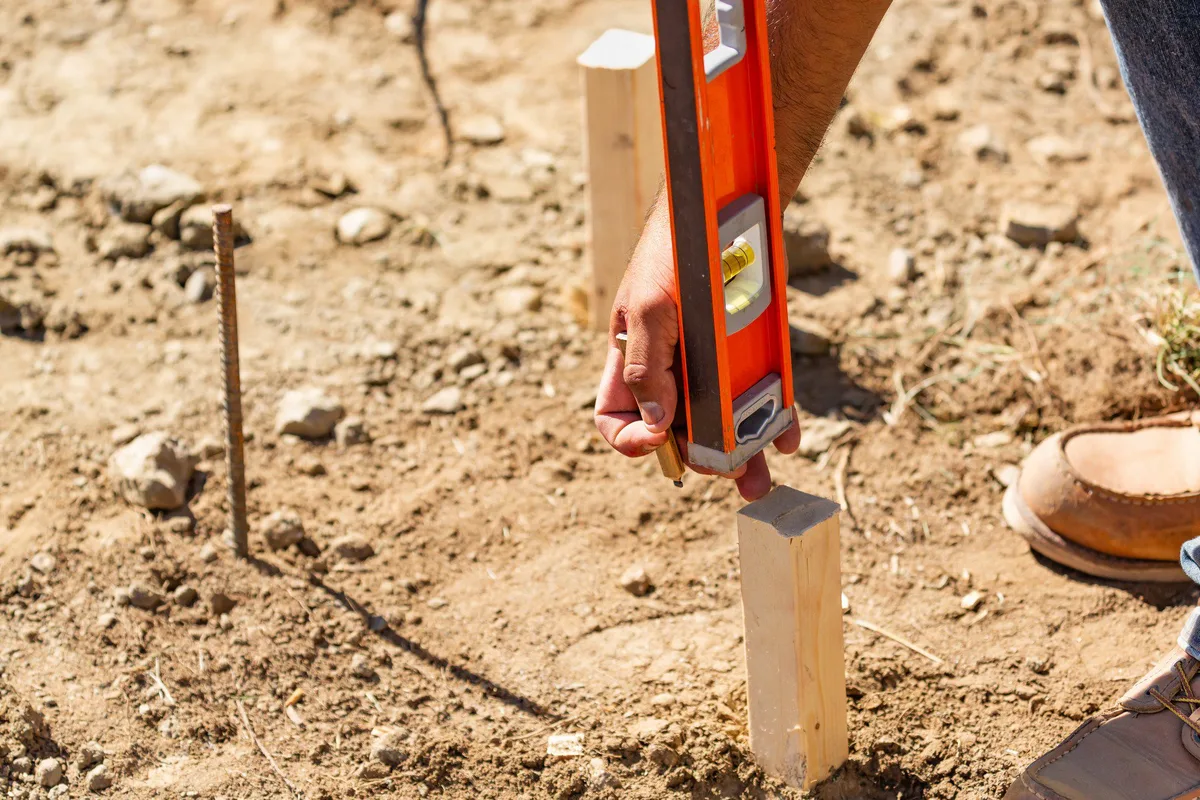
Image source: Bing (Web (fair-use with source credit))
Identifying Slopes and Uneven Spots
The most critical factor is the topography of the land. You need to find an area that is as close to perfectly flat as possible. Even a gentle slope can become exaggerated once you start digging and preparing the site.
A simple way to start is by looking at your yard with a critical eye and walking it to feel for any significant dips or rises.
For a more precise assessment, you'll want to use tools. A long spirit level, ideally 6 feet or more, is invaluable here. Place it on the ground and visually check if the bubble is centered.
If it’s not, you’ve got a slope. You can also use stakes and string lines to create a level plane over a larger area, or a laser level, which is especially useful for larger pools and provides a highly accurate horizontal reference.
Checking Soil Stability
Once you've identified a relatively flat area, you need to assess the soil. Is it firm and compact, or is it loose and sandy? Different soil types behave differently.
Clay soil, for instance, can be very stable when dry but can become waterlogged and lose its structure when wet, which can be a problem for a pool foundation. Sandy soil drains well but can shift easily if not properly contained.
Manufacturer guidelines often advise against installing pools on backfilled areas or on soil that is prone to significant settling. You want a base that will remain stable throughout the life of the pool, resisting the immense pressure of the water. If your soil is too soft or has a lot of organic material, you might need to consider additional ground stabilization measures or a different location.
The Essential Tools for Pool Site Leveling
Getting the ground ready requires a few basic tools, most of which you might already have or can easily borrow. Having the right equipment makes the job much faster and more accurate. For a medium-sized pool, you're looking at a few hours of work, depending on how much the ground needs adjustment.
Here’s a rundown of what you’ll likely need to ensure a perfectly level foundation for your above-ground pool.
Measuring and Marking Your Area
Precision is key from the very beginning. You need to know the exact dimensions of your pool and have a clear way to mark out the area where you'll be working.
- Measuring Tape: A long, sturdy measuring tape (at least 25 feet, longer if possible) is essential for accurately marking the pool's footprint.
- Marking Stakes and String: Wooden or metal stakes, along with durable string, are used to outline the pool area and create straight lines for measuring.
- Spray Paint or Flags: Brightly colored spray paint (like marking paint used for construction) or flags can be used to directly mark the ground's outline and any high or low points you identify.
Digging and Moving Earth
Once you know where to dig, you'll need tools to move the soil. The size of your pool and how much leveling is required will dictate the scale of this task. For minor adjustments, hand tools are sufficient; for larger jobs, power equipment might be considered.
- Shovels: A good quality round-point shovel is best for digging and scooping soil, while a flat spade is helpful for scraping and leveling surfaces.
- Rake: A sturdy garden rake helps to smooth out the soil after digging and before compaction.
- Wheelbarrow: Indispensable for moving excavated soil away from the pool site.
- Tamper or Compactor: This is crucial for firming the soil. A hand tamper is adequate for smaller areas, but a plate compactor (rentable) is far more effective for larger, compacted bases.
Step-by-Step: Leveling the Ground for Your Pool
Now that you've got your site picked out and your tools ready, it's time to get down to business. This process focuses on achieving that critical level surface that manufacturers demand. Take your time here; rushing this stage is where most problems start.
For a standard 15-foot round pool, this phase can take 2-5 hours, depending on the terrain.
Step 1: Mark and Measure Your Pool Footprint
Using your measuring tape and stakes, carefully mark out the exact diameter of your pool. Double-check your measurements to ensure you have a perfect circle or the correct dimensions for an oval or rectangular pool. This outline is your guide for the entire leveling process.
Step 2: Digging and Excavating the High Spots
Place your spirit level or laser level across different points within your marked area. Identify where the ground is highest. You'll need to excavate, or dig down, these high spots to bring them closer to the lowest point.
It's better to remove a little soil at a time and re-check your level frequently.
For larger adjustments, you might need to dig out a shallow trench around the perimeter to establish a consistent depth. Aim to remove soil in manageable amounts, placing it in a wheelbarrow to be moved away from the site.
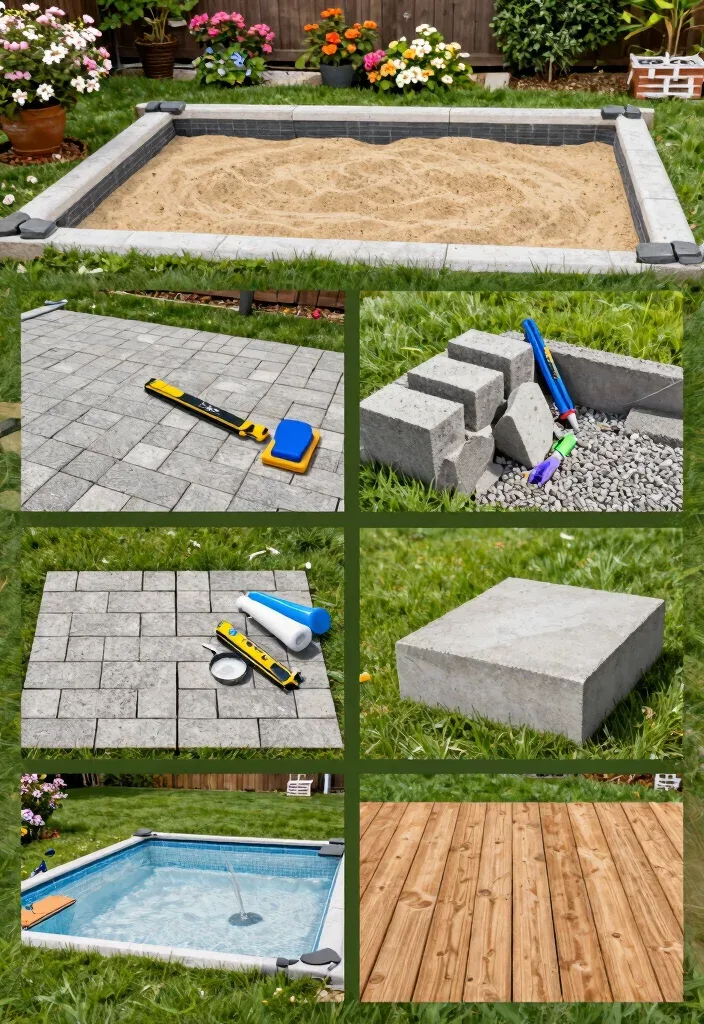
Image source: Bing (Web (fair-use with source credit))
Step 3: Compacting the Soil for Stability
Once you've removed the high spots, you need to compact the exposed soil. This removes air pockets and creates a firm, stable base that won't settle further under the weight of the water. Use your hand tamper for smaller areas or rent a plate compactor for larger sites.
Go over the entire area thoroughly, ensuring it's dense and firm to the touch.
Compacted soil is essential because even a small amount of settling after the pool is filled can create an unlevel surface, undoing all your hard work. Per aggregate user reviews and manufacturer advice, proper compaction is a critical step for long-term pool stability.
Step 4: Checking for Level (The Critical Part)
Now for the moment of truth. Use your spirit level or laser level across the entire surface within your marked area. Place it along the diameter, then across several other lines, and diagonally.
The goal is to achieve a reading that is within the manufacturer's tolerance, typically no more than a 1-inch difference across the entire pool diameter.
If you find low spots after compacting, you'll need to add soil back in small increments, compacting each addition thoroughly before re-checking the level. It's a meticulous process, but absolutely vital for the pool's safety and lifespan. As of 2026, this level of precision remains the industry standard.
Step 5: Filling Low Areas and Re-Leveling (If Needed)
It’s common to discover low spots after excavating high areas. If you find them, use the soil you excavated or bring in new, compactable soil. Add it in thin layers, no more than a few inches at a time, and compact each layer thoroughly.
Re-check the level after each addition. This iterative process ensures the ground is uniformly firm and flat.
Repeating the checking and adding/compacting cycle might be necessary multiple times. Be patient; achieving a truly level surface is a gradual process. If the low spots are significant, you might need to dig out a larger area and build up from a more stable base.
Common Mistakes That Ruin Your Pool's Foundation
Even with the best intentions, some missteps can undermine your efforts to level the ground for your above-ground pool. Being aware of these common errors can help you avoid them and ensure your pool installation goes smoothly.
- Over-Compacting or Under-Compacting: Too much compaction can sometimes lead to soil instability, especially in certain soil types. Conversely, under-compacting leaves air pockets that will settle later. You're aiming for firm, dense soil, not rock-hard or spongy.
- Relying Only on Visual Cues: Your eyes can be deceiving, especially on larger areas or in uneven light. Always use a level (spirit or laser) to confirm your work. What looks flat to you might be a slope to a pool full of water.
- Ignoring Manufacturer Specs: Every pool manufacturer has specific requirements for ground preparation. Failing to meet these, particularly the leveling tolerance, can void your warranty and lead to costly repairs or replacement down the line.
- Adding Soil Just Before Pool Setup: If you need to add soil to low spots, make sure it's well-compacted and has had some time to settle if possible. Adding loose soil right before filling can lead to immediate settling and an unlevel pool.
Expert Tips for a Flawless Pool Installation
To go from just "level enough" to "perfectly level," consider these pro tips. They address common challenges and help ensure your pool is set up for success from day one.
Using a Laser Level for Precision
While a spirit level is good for small areas, a laser level is a game-changer for larger pools or when you need extreme accuracy. It projects a level beam of light around your site, allowing you to see any variations instantly. This tool significantly speeds up the process and provides a higher degree of confidence in your work.
Many DIYers find renting one is well worth the investment for peace of mind.
Dealing with Different Soil Types
As mentioned, soil type matters. If you have sandy soil, ensure you compact it very well and consider adding a layer of gravel for better stability, especially in areas with high rainfall. For clay soils, allow them to dry somewhat before compacting, and be aware they can expand and contract with moisture changes.
In some cases, a geotextile fabric under the sand base can help stabilize problematic soils.
The Importance of Pool Wall Support
Remember, the level base doesn't just support the water; it supports the entire structure. An uneven foundation means uneven pressure on the pool walls, causing them to bow inward or outward. This can damage the liner and, over time, compromise the integrity of the entire frame.
A perfectly level and stable base ensures the load is distributed evenly, just as the engineers intended.
Optional Base Layers (Sand, Gravel)
After you’ve achieved a perfectly level and compacted base, you might consider adding an optional layer. Many homeowners opt for a few inches of fine-grain sand. This creates a slightly softer surface for the pool liner to rest on, potentially offering a bit more comfort underfoot and acting as a protective cushion.
It also helps to fill any minor imperfections that might have been missed.
Alternatively, some choose a layer of fine gravel. This can provide even better drainage and stability, especially if your soil type is prone to holding moisture. However, it’s crucial that this layer is also perfectly level and compacted, and that no sharp edges are exposed, as these could puncture the pool liner.
Always check your pool manufacturer's recommendations before adding any base material.
Frequently Asked Questions About Pool Site Leveling
What's the maximum acceptable slope for an above-ground pool?
Manufacturers generally specify that the ground should be level within a tolerance of plus or minus one inch across the entire diameter of the pool. Exceeding this can compromise structural integrity and void warranties.
How long does it typically take to level a pool site?
The time required varies based on the pool size and how much the ground needs adjustment. For a moderately sized pool, expect anywhere from 2 to 6 hours for site assessment, excavation, compaction, and leveling. Larger pools or significantly sloped terrain will take longer.
Can I just use sand to level my pool area?
Sand can be used as a leveling aid or a cushion layer, but it's not ideal for creating the primary level base on its own. You must first excavate and compact the native soil to create a firm foundation. Adding sand on top of unlevel or uncompacted ground will likely result in settling and an unlevel pool.
What happens if my pool is not level?
An unlevel pool puts uneven stress on its structure, which can lead to wall collapse, liner damage, premature rust, and leaks. It can also create safety hazards from uneven entry/exit points and affect water distribution and filtration efficiency.

