

Keeping your pet vacuum’s filter clean is crucial for its performance and the air quality in your home. A clogged filter makes your vacuum work harder, reducing suction power and potentially leading to overheating. Regular cleaning also prevents dust and allergens from being blown back into the air.
This guide will walk you through how to clean your pet vacuum filter effectively. We’ll cover different types of filters, the tools you’ll need, and step-by-step instructions. Following these steps will help your vacuum run smoothly and keep your home cleaner and healthier for you and your furry friends.
Why Cleaning Your Pet Vacuum Filter Matters
Pet hair, dander, and dirt are tough on vacuum cleaners. These particles get trapped in the vacuum’s filter, which is designed to catch them before they can be released back into the air or damage the motor. Over time, filters become saturated with debris.
This saturation has several negative effects on your vacuum cleaner and your home environment.
Firstly, a clogged filter significantly reduces the suction power of your vacuum. When air cannot easily pass through the filter, the vacuum struggles to pick up dirt and debris from your floors. This means you have to make more passes, and even then, your floors might not be as clean as they should be.
Secondly, a dirty filter can cause your vacuum to overheat. The motor has to work much harder to pull air through the obstruction, generating excess heat. This can shorten the lifespan of your vacuum cleaner and, in severe cases, cause permanent damage.
Finally, and perhaps most importantly for pet owners, a dirty filter can degrade your home’s air quality. Instead of trapping allergens like pet dander, dust mites, and pollen, a saturated filter can start to release them back into the air. This is especially problematic for individuals with allergies or asthma. Regular cleaning ensures the filter effectively traps these particles, contributing to a healthier living space.
Understanding Your Pet Vacuum Filter Type
Most pet vacuums use one of two main types of filters: washable foam or HEPA filters. Some models may have a combination of both. Knowing what type of filter you have is the first step to cleaning it correctly.
Washable Foam Filters are typically made of porous foam material. They are designed to be rinsed under water and reused multiple times. These are common in many upright and canister vacuums.
HEPA (High-Efficiency Particulate Air) Filters are designed to trap very small particles, including allergens and fine dust. They are usually made of a pleated paper-like material. While some HEPA filters are washable, many are not and need to be replaced periodically. Always check your vacuum’s manual to confirm if your HEPA filter is washable.
Some vacuums also have pre-motor filters and post-motor filters. The pre-motor filter protects the vacuum’s motor from larger debris, while the post-motor filter (often a HEPA filter) cleans the air before it’s released back into the room. Both types require regular cleaning or replacement.

Tools You’ll Need For Cleaning
Gathering the right tools before you start will make the cleaning process much smoother. You likely have most of these items already in your home.
- Soft Brush or Old Toothbrush: Useful for gently scrubbing away stubborn debris from foam filters.
- Water: For rinsing washable filters.
- Mild Soap or Detergent (Optional): For more thorough cleaning of foam filters, if recommended by the manufacturer.
- Clean Cloths or Paper Towels: For drying the filter.
- Gloves: To keep your hands clean.
- Small Trash Can or Bag: To collect the debris you remove.
- Screwdriver (Possibly): Some vacuums require a screwdriver to access the filter compartment.
Always refer to your vacuum cleaner’s user manual for specific instructions. Manufacturers may have particular recommendations or warnings about cleaning their filters.
Step-by-step Guide To Cleaning Your Pet Vacuum Filter
The cleaning process will vary slightly depending on whether you have a washable foam filter or a HEPA filter.
Cleaning Washable Foam Filters
Washable foam filters are the most common type and are relatively easy to maintain.
- Locate and Remove the Filter: Consult your vacuum’s manual to find the filter’s location. It’s often near the dustbin or the motor. Carefully remove it, being mindful not to spill any collected dirt.
- Tap Out Loose Debris: Take the filter outside or over a trash can and gently tap it to dislodge as much loose dirt, hair, and dust as possible.
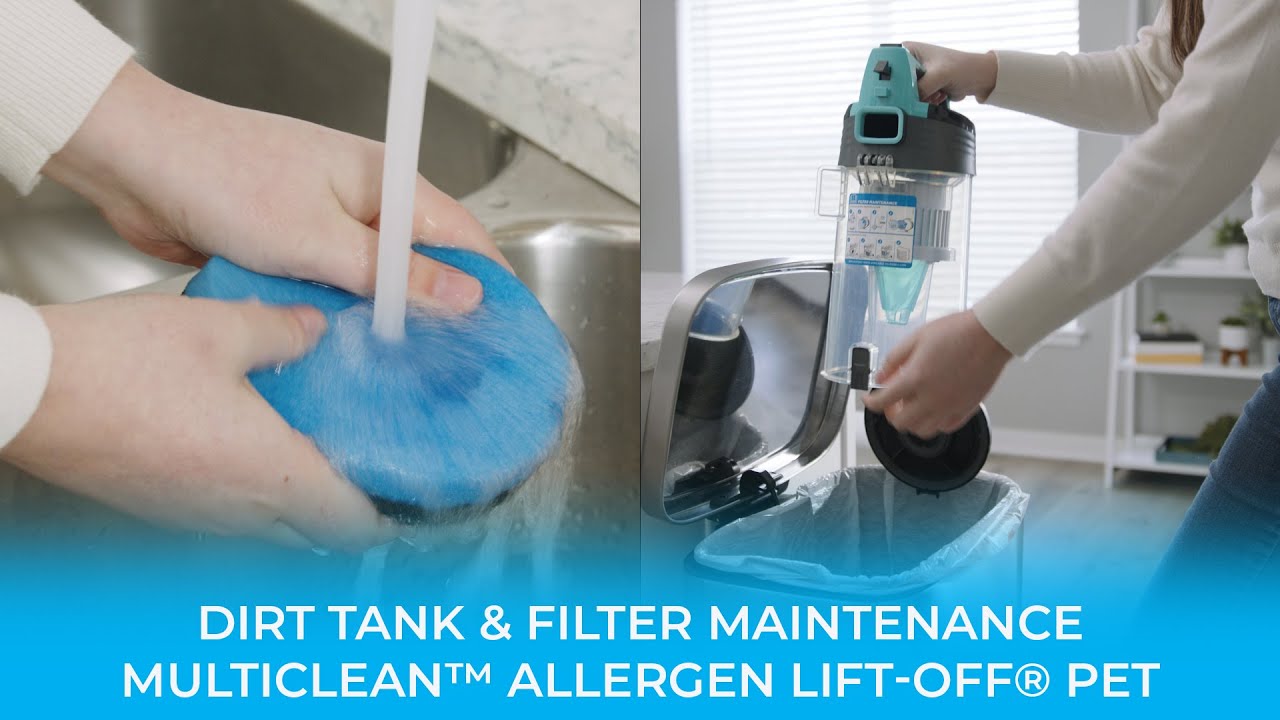
- Rinse Under Cold Water: Hold the filter under a stream of cold running water. Rinse it thoroughly until the water runs clear. Avoid using hot water, as it can damage the foam.
- Gentle Scrubbing (If Needed): If there’s still visible dirt or grime, you can use a soft brush or an old toothbrush to gently scrub the foam. For very stubborn dirt, you can use a small amount of mild soap or detergent, but ensure you rinse it out completely.
- Squeeze Out Excess Water: Gently squeeze the foam filter to remove as much water as possible. Do not wring or twist it, as this can distort its shape.
- Air Dry Completely: This is a critical step. Place the filter in a well-ventilated area to air dry completely. This can take 24 hours or more. Never put a damp filter back into your vacuum, as moisture can damage the motor and promote mold growth.
Cleaning Non-washable Hepa Filters
Many HEPA filters are not designed to be washed. Washing them can damage the delicate material and ruin their filtering capabilities.
- Locate and Remove the Filter: As with foam filters, find the HEPA filter using your vacuum’s manual. Carefully remove it.
- Tap Out Loose Debris: Take the filter outside and gently tap it against the side of a trash can to remove loose dust and hair. You can also use a soft brush to lightly brush away debris from the surface.
- Do NOT Use Water: Unless your manual specifically states it’s washable, do not use water to clean a HEPA filter. Water can break down the filter media and make it ineffective.
- Consider Replacement: For non-washable HEPA filters, regular cleaning by tapping and brushing will only do so much. These filters have a limited lifespan and need to be replaced periodically. Check your vacuum’s manual for the recommended replacement schedule, typically every 6-12 months depending on usage.
Cleaning Combination Filters
Some vacuums have a system with both a foam pre-filter and a HEPA post-filter. In this case, you would clean the foam filter as described above and handle the HEPA filter by tapping and brushing, with eventual replacement.
How Often Should You Clean Your Pet Vacuum Filter?
The frequency of cleaning depends on how often you use your vacuum and the amount of pet hair and dirt it encounters. A good rule of thumb is to check your filters once a month.
- Light Use: If you vacuum only once or twice a week, cleaning monthly might be sufficient.
- Heavy Use: If you vacuum daily or have multiple pets shedding heavily, you may need to check and clean filters every two weeks.
- Visible Dirt: If you notice a significant decrease in suction power or see visible dust and debris accumulating on the filter, it’s time to clean it, regardless of the schedule.
Remember that HEPA filters, even if cleaned by tapping, need replacement based on the manufacturer’s recommendations, usually every 6-12 months. Overlooking this can negate the benefits of cleaning other parts of your vacuum.
When To Replace Your Vacuum Filter
Even with regular cleaning, filters don’t last forever. They eventually lose their effectiveness.
- Washable Filters: While washable, these filters can wear out over time. If you notice they are cracked, torn, or misshapen after washing, it’s time for a new one

