

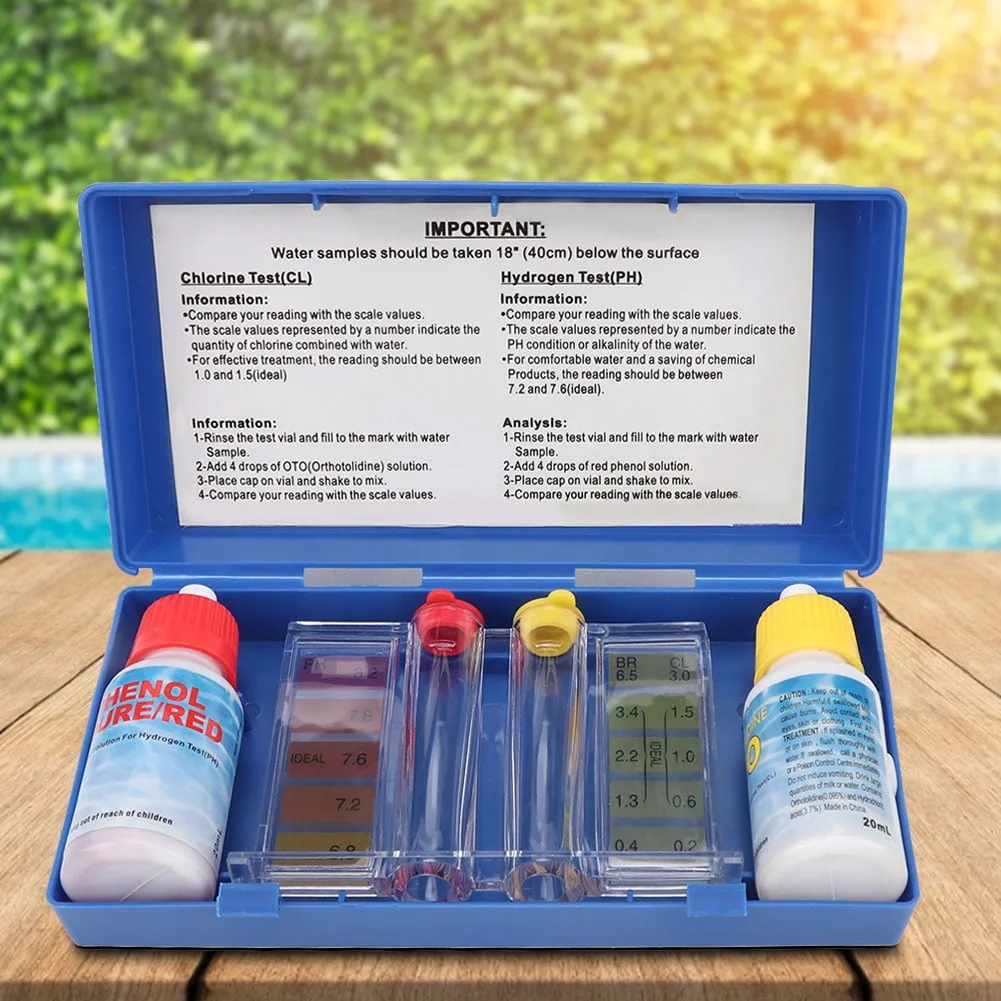
Image source: Bing (Web (fair-use with source credit))
When you look at your above-ground pool, you want it to be a sparkling oasis, not a murky mess. Knowing how to test above ground pool water is the secret ingredient to achieving that perfect, inviting water every time. It’s about more than just avoiding green algae; it’s about ensuring your pool is safe for everyone and protecting your investment.
Getting the chemistry right might seem daunting, but it breaks down into simple steps. With the right approach, you can confidently manage your pool's water balance. For instance, maintaining a free chlorine level between 1 and 3 parts per million (ppm) is crucial for sanitization, as recommended by many pool care professionals.
Quick Answer
To test above ground pool water, collect a sample and use a test kit to measure key chemical levels like pH, chlorine, and alkalinity. Interpret the results against ideal ranges, then add specific pool chemicals to adjust any imbalances. Re-test after adjustments to confirm.
Why Testing Your Above Ground Pool Water Matters
This isn't just about appearances; it's about health, safety, and the longevity of your pool equipment. Imbalanced water can lead to a cascade of problems, from skin irritations to damage that costs a fortune to fix. Think of it like regular check-ups for your body, testing your pool water is its preventative healthcare.
- Health & Safety: Unbalanced water, especially with low sanitizer levels, can harbor harmful bacteria and pathogens. High chlorine or pH can cause stinging eyes and skin irritation.
- Preventing Algae: Algae thrive in water that's out of whack. Consistent testing helps you catch the conditions that allow algae to bloom before you’re faced with a green swimming pool.
- Protecting Equipment: Corrosive water (often due to low pH) can eat away at your pool liner, pump, and filter system. Over-sanitized water can also degrade materials over time.
Ultimately, regular testing simplifies pool ownership. It gives you the control to fix small issues before they become big, expensive headaches.
Choosing the Right Pool Water Test Kit
You’ve got a few main options when it comes to figuring out what’s going on in your pool water. Each has its own personality, some are super fast, others are more precise, and some are budget-friendly. Picking the right one often comes down to your preference for speed, accuracy, and how much you want to spend.
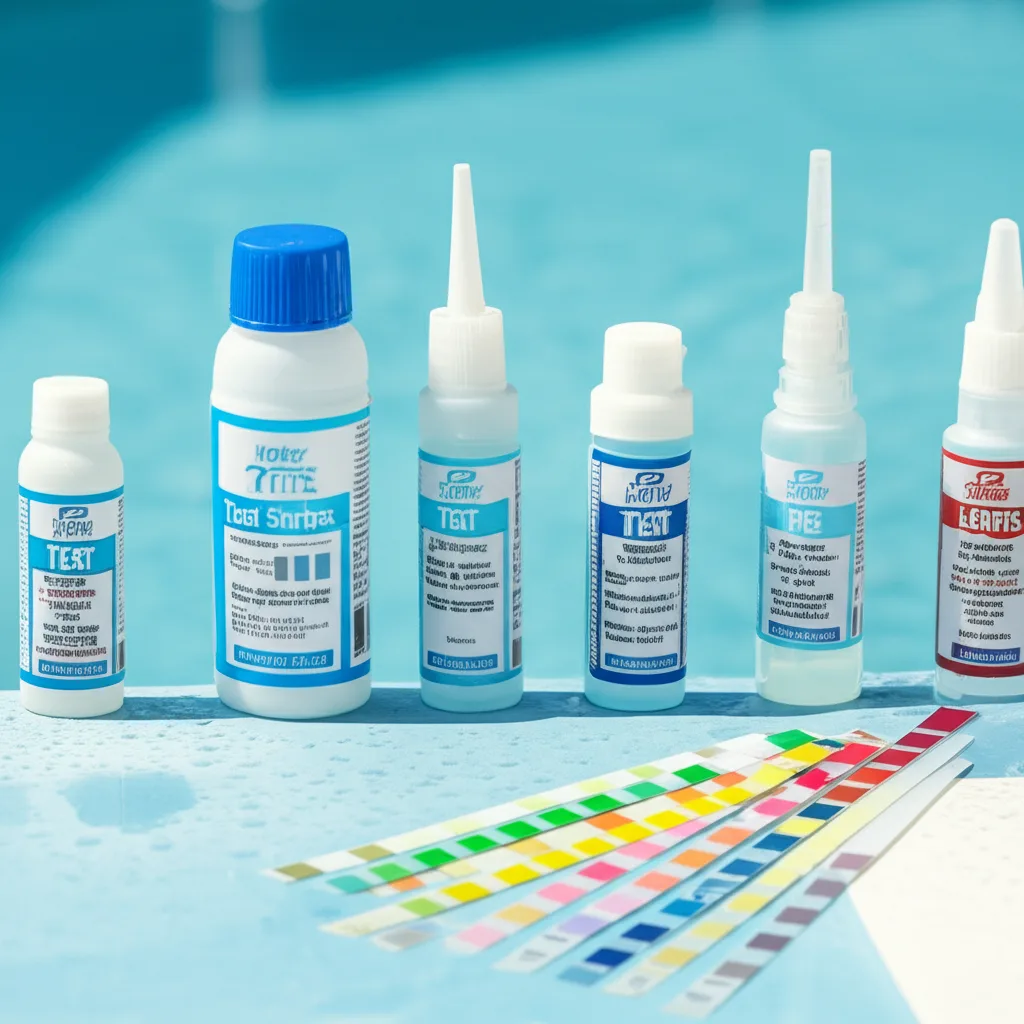
Test Strips: Quick and Easy
These are probably the most common. You just dip a strip into your pool water, wait a few seconds, and then compare the colored pads on the strip to a color chart on the bottle. It’s super straightforward and quick.
- Pros: Fast, easy to use, often test for multiple parameters at once (like pH, chlorine, alkalinity, and sometimes hardness or stabilizer).
- Cons: Can be less accurate than other methods, colors can be hard to match precisely, and sometimes affected by water temperature or turbidity. Manufacturer specifications often list ranges of 1-3 ppm for free chlorine and 7.2-7.6 for pH as ideal targets.
Liquid Reagent Kits: The Classic Approach
These kits usually involve test tubes or small vials and liquid chemicals (reagents). You add a specific number of water drops to the tube, then add a few drops of the reagent. The color change tells you the level of a particular chemical.
- Pros: Generally more accurate than test strips, reagents can be more stable over time than strips, and they offer a good balance between cost and accuracy.
- Cons: Takes a bit longer than strips, requires careful measurement of drops, and you might need separate kits for different tests (though many come with multiple reagents).
Digital Testers: Modern Precision
For those who like tech, digital testers offer a sleek solution. You typically dip a probe into the water or use a small sample, and the device displays a digital readout of the chemical levels.
- Pros: High accuracy, easy to read results, and some advanced models can store data or connect to apps.
- Cons: Usually the most expensive option, requires calibration and battery changes, and can be more sensitive to damage if dropped.
Your Pool Water Testing Workflow: Step-by-Step
This is the heart of managing your pool's health. Following a consistent process ensures you get reliable readings and know exactly what to do. It’s a bit like following a recipe, get the steps right, and you’ll end up with a great result.
Step 1: Collecting the Water Sample
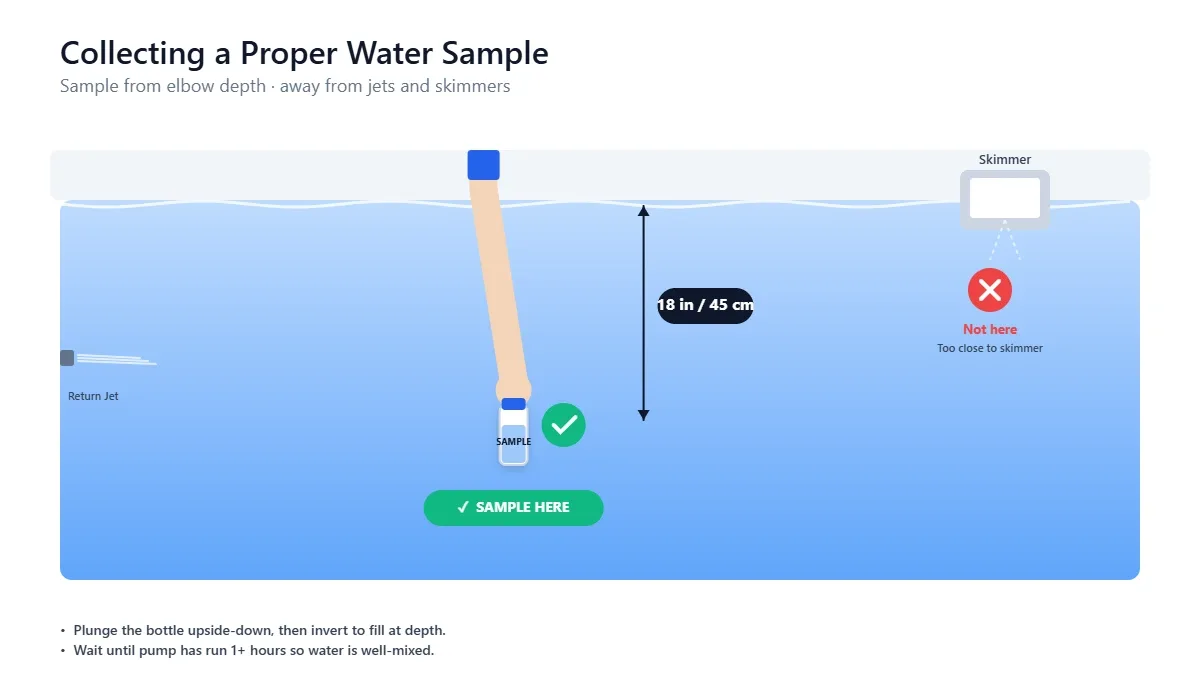
This sounds simple, but how you collect the water actually matters for accurate results. You want a sample that represents the general water chemistry of your pool, not just the surface.
- Where to Sample: Dip your collection bottle or vial about elbow-deep into the pool water, away from skimmers or return jets. This ensures you're getting water from the main body of the pool, not just the immediate surface or where chemicals are being added.
- Rinse Your Container: Always rinse the collection bottle or vial with pool water first before filling it for your test. This removes any tap water residue or contaminants that could skew your readings.
Step 2: Performing the Tests
Once you have your sample, it’s time to get testing. The exact method depends on your chosen test kit, but the goal is to measure the crucial chemical levels that keep your pool balanced and safe.
Testing pH Levels
pH measures how acidic or basic your water is. It’s super important because it affects how well your sanitizer works and can cause discomfort or damage.
- With Test Strips: Dip the strip into the water, swirl for the recommended time (usually 15 seconds), and pull it out. Compare the pH pad's color to the chart within the time specified on the bottle (often 30 seconds).
- With Liquid Kits: Fill the designated test tube with pool water to the line. Add the specified number of drops of pH reagent. Cap the tube and invert it several times to mix. Compare the color to the pH comparator chart.
Testing Chlorine Levels
Chlorine is your primary sanitizer, killing off germs and keeping your water clear. There are two types to check: free chlorine (the active sanitizer) and combined chlorine (chloramines, which are spent sanitizer and cause that "chlorine smell").
- With Test Strips: Look at the chlorine pads on the strip after the specified time. Match the color to the chlorine scale on the bottle. Some strips have separate pads for free and total chlorine.
- With Liquid Kits: Fill a separate test tube with pool water. Add the correct number of drops of the appropriate chlorine reagent (often DPD #1 for free chlorine). Cap and invert to mix. Compare the color to the chlorine comparator. To test total chlorine, you'd typically add a second reagent (like DPD #3) after the first reading.
Testing Total Alkalinity
Total alkalinity acts as a buffer for your pH, helping to keep it stable. If your alkalinity is too low, your pH can swing wildly. If it's too high, pH can become difficult to adjust.
- With Test Strips: Check the alkalinity pad on the strip. Compare its color to the alkalinity scale on the bottle.
- With Liquid Kits: Use a separate test tube and the specific alkalinity reagent. This often involves adding reagents until the water changes color, counting the number of drops used.
Testing Cyanuric Acid (Stabilizer)
Cyanuric acid, often called stabilizer or conditioner, protects your chlorine from being burned off by the sun's UV rays. It's especially important for outdoor pools.
- With Test Strips: Some test strips include a pad for cyanuric acid. Follow the same dip-and-compare method.
- With Liquid Kits: These kits often have a specific test for cyanuric acid. This usually involves filling a tube with water, adding a powder reagent, and looking for a specific turbidity or cloudiness to appear when the sample is viewed against a black dot or background.
Step 3: Understanding Your Results
This is where the numbers on your test kit translate into action. You’ll be comparing your readings to ideal ranges. As of 2026, the widely accepted ideal ranges for an above-ground pool are:
- pH: 7.2, 7.6
- Free Chlorine: 1, 3 ppm (parts per million)
- Total Alkalinity: 80, 120 ppm
- Cyanuric Acid (Stabilizer): 30, 50 ppm (for most outdoor pools)
If your numbers are outside these ranges, don't worry! That's what the testing is for. You'll then move on to making adjustments.
Step 4: Adjusting Chemical Levels Safely
Once you know what’s off, you'll add chemicals to bring your pool into balance. Always add chemicals one at a time, allowing time for them to circulate and dissolve, and re-test before adding more.
- Adjusting pH:
- To Lower pH (acidic): Use a pH decreaser, typically muriatic acid or sodium bisulfate. Always add slowly, while the pump is running, and broadcast it over the water's surface.
- To Raise pH (basic): Use a pH increaser, typically soda ash (sodium carbonate). Add it slowly while the pump is running.
- Adjusting Chlorine:
- To Raise Chlorine: Use a granular chlorine shock (like calcium hypochlorite) or liquid chlorine (sodium hypochlorite). Follow product instructions carefully, as shock treatments can be potent. Always add to the water, never directly to the skimmer basket with granular forms, and ensure your pump is running.
- To Lower Chlorine: This is less common and usually occurs naturally as chlorine dissipates. If levels are extremely high, you might need to wait it out or use a specific chlorine neutralizer product if absolutely necessary, following its instructions precisely.
- Adjusting Total Alkalinity:
- To Raise Alkalinity: Use an alkalinity increaser, usually sodium bicarbonate (baking soda). Add slowly with the pump running.
- To Lower Alkalinity: Use a pH decreaser (muriatic acid or sodium bisulfate). It’s often added slowly with the pump running, and the acid lowers both pH and alkalinity.
- Adjusting Cyanuric Acid:
- To Raise Cyanuric Acid: Use a stabilizer product (e.g., cyanuric acid granules). Add it slowly, often through the skimmer, and let it dissolve.
- To Lower Cyanuric Acid: This is trickier, as there isn't a direct chemical to lower it. The most common method is partial draining and refilling your pool with fresh water, which dilutes the stabilizer.
Always follow the specific dosage instructions on the chemical product packaging. And remember to let the pool pump run for at least 4-8 hours (or overnight) after adding chemicals to ensure they circulate and mix thoroughly before re-testing.
Ideal Pool Water Chemistry for Your Above Ground Pool
Maintaining the right chemical balance in your above-ground pool is key to a safe, clean, and enjoyable swimming experience. It’s not just about having clear water; it’s about ensuring the water is healthy for swimmers and doesn’t damage your pool's components. Think of these ranges as your pool's sweet spot.
Here are the core chemical levels you need to monitor regularly, along with their ideal ranges:
pH: This measures how acidic or alkaline your water is.
- Ideal Range: 7.2, 7.6
- Why it Matters: If your pH is too low (acidic), it can cause skin and eye irritation, corrode metal parts of your pump and ladder, and eat away at your pool liner. If it’s too high (alkaline), your sanitizer (chlorine) won't work effectively, and you might see cloudy water and scaling.
Free Chlorine: This is your main sanitizer, actively killing bacteria, viruses, and algae.
- Ideal Range: 1, 3 ppm (parts per million)
- Why it Matters: Too little chlorine means your pool isn't being sanitized properly, opening the door for algae and harmful microorganisms. Too much chlorine can cause skin and eye irritation, fade swimwear, and damage certain pool materials.
Total Alkalinity: This acts as a pH buffer, helping to keep your pH levels stable.
- Ideal Range: 80, 120 ppm
- Why it Matters: If your total alkalinity is too low, your pH will bounce around erratically, making it hard to maintain. If it’s too high, your pH can become sticky and difficult to adjust.
Cyanuric Acid (Stabilizer): This chemical protects your chlorine from being degraded by the sun's UV rays, especially crucial for outdoor pools.
- Ideal Range: 30, 50 ppm
- Why it Matters: Without enough cyanuric acid, your chlorine will be used up much faster on sunny days, requiring constant re-dosing. Too much can also reduce chlorine's effectiveness, creating a false sense of security while your sanitizer struggles.
Regularly testing these levels, ideally at least twice a week, will help you catch any shifts early and make small adjustments before they become big problems.
Common Pool Water Testing Mistakes and How to Avoid Them
Even with the best intentions, it’s easy to make a few slips when testing your pool water. These common mistakes can lead to inaccurate readings, which means you might add the wrong chemicals, creating more problems than you solved. Let’s look at what to watch out for.
Mistake 1: Not Collecting Water Correctly. Grabbing a sample from the surface or right next to a return jet can give you skewed readings. The water at the top might be hotter or have more direct sun exposure, and jets are introducing chemicals.
- How to Avoid It: Always collect your sample about elbow-deep into the pool water, away from any inlets or outlets. Also, rinse your collection bottle with pool water before filling it for the test to remove any residual tap water or contaminants.
Mistake 2: Using Expired or Contaminated Test Kits. Test strips have a shelf life, and the chemicals in liquid kits can degrade over time, especially if exposed to heat or light. Even a tiny bit of sunscreen or lotion on a strip can throw off readings.
- How to Avoid It: Always check the expiration date on your test kit. Store kits in a cool, dry place, away from direct sunlight and chemicals. Don't touch the reactive pads on test strips with your fingers.
Mistake 3: Testing Water at the Wrong Time. Testing water immediately after adding chemicals or after a heavy rainstorm can give you inaccurate results. Chemicals need time to circulate and mix, and rain can dilute your water or introduce contaminants.
- How to Avoid It: Test your pool water in the morning before you swim, and ideally before adding any chemicals for the day. If you've just added chemicals, wait at least 4-8 hours (and let your pump run) before re-testing. If it's just rained heavily, wait until the water has settled and has had a chance to circulate.
Mistake 4: Misreading the Colors on Test Strips. The color charts can be tricky, and lighting conditions can make a big difference. Sometimes the colors are very similar.
- How to Avoid It: Test in good, natural daylight. Hold the strip next to the color chart on the bottle and try to match the colors as closely as possible. If it's borderline, it's often safer to adjust towards the lower end of the ideal range or re-test.
Mistake 5: Adding Too Much Chemical at Once. It’s tempting to fix everything at once, but over-correcting can be just as bad as being out of balance.
- How to Avoid It: Always add chemicals gradually, according to product instructions. Wait several hours for them to circulate and re-test before adding more. It's always easier to add more than to take it away.
Frequent Questions About Testing Above Ground Pool Water
How often should I test my above ground pool water?
For most above ground pools, testing at least twice a week is recommended. If you swim frequently, experience heavy rainfall, or have very hot weather, you might need to test more often, possibly daily.
What's the difference between free chlorine and total chlorine?
Free chlorine is the amount of active chlorine available to sanitize your water. Total chlorine is the sum of free chlorine and combined chlorine (chloramines). Combined chlorine is essentially used-up chlorine that can cause that strong "chlorine smell" and is less effective at sanitizing.
Your goal is to keep free chlorine high and combined chlorine as low as possible.
Can I use tap water to dilute my pool water if my levels are too high?
Yes, in some cases, partial draining and refilling with fresh tap water can help dilute high levels of certain chemicals, particularly cyanuric acid or high mineral content. However, be aware that tap water can also introduce its own levels of chlorine, calcium, or other minerals, so test your tap water first if possible. Always ensure your pool pump is running during this process.
My test strips show different results each time I use them. What's wrong?
Inconsistent results from test strips can stem from several issues: expired strips, improper storage, water collected incorrectly, or difficulty reading the colors. Ensure your strips are fresh, stored properly, and that you're testing in good light, collecting samples from the correct depth. If problems persist, consider trying a liquid reagent kit for potentially more stable accuracy.
Do I need to test my pool water in the winter?
If you close your pool for the winter and maintain it with a winterizing chemical regimen, you typically don't need to test it as frequently. However, it's still a good idea to check water balance in the spring before opening, and perhaps once mid-winter if you're experiencing unusual temperature swings or conditions, to ensure your winterization is holding.
Making the Best Choice for Your Pool
When it comes to testing your pool water, the "best" kit isn't one-size-fits-all. It depends on your priorities: speed, accuracy, cost, and how much detail you want. For most above-ground pool owners, a balance is key.
For the Quick Check: If you just need a fast, general idea of your water's condition, especially if you’re testing frequently, test strips are your go-to. They’re simple and cover the main parameters. Just be aware of their potential for slight inaccuracies.
For Reliable Readings: If you’re looking for more consistent and dependable results, a liquid reagent kit is often the better choice. They require a little more time and effort, but the readings are typically more precise for pH and chlorine.
For the Tech-Savvy: Digital testers offer convenience and precision, but they come at a higher price point and require maintenance. They're great for those who want the most accurate, effortless readings and don't mind the investment.
No matter which you choose, remember that consistent testing and adherence to ideal chemical ranges are more important than the specific type of kit you use.
How Often to Test and When to Adjust
Figuring out the right testing schedule is crucial. Too little testing means you might miss developing issues, while testing excessively can become a chore. Our research indicates that most above-ground pool owners find a routine that works best after a little experience.
Daily Checks
Even without a full kit, you can do a quick visual check. Look at the water clarity. Is it sparkling, or starting to look a little hazy or cloudy?
Also, check if your pump and filter are running correctly. These simple observations can be early indicators of an imbalance.
Weekly Testing
A more thorough chemical test, using your chosen kit, should happen at least twice a week. Testing on a regular schedule, like Monday and Friday mornings, helps you stay ahead of problems. If your pool gets a lot of use, or if the weather is extremely hot or rainy, you may need to test daily.
Adjusting Chemicals: The Step-by-Step Process
- Test Your Water: Use your kit to measure pH, chlorine, and alkalinity.
- Compare to Ideal Ranges: See where your numbers fall compared to the recommended levels (pH 7.2-7.6, Free Chlorine 1-3 ppm, Total Alkalinity 80-120 ppm).
- Add Chemicals One at a Time: If a level is off, add the appropriate chemical (e.g., pH decreaser, chlorine shock, alkalinity increaser). Always follow the product's instructions for dosage based on your pool's volume.
- Circulate and Wait: Let your pool pump run for at least 4-8 hours after adding chemicals to ensure they mix thoroughly.
- Re-Test: After the circulation period, test your water again to confirm the levels are now within the ideal range. Repeat the adjustment process if necessary, adding chemicals incrementally.
This iterative process ensures you don't over-correct and helps you fine-tune your pool's chemistry effectively.
What If My Pool Water Isn't Clear?
Cloudy or discolored pool water is a common sign that something is out of balance, and it's a clear signal to test your water immediately. The cause can be one or a combination of factors that testing will help you identify.
Cloudy Water
- Possible Causes: Low chlorine levels, high pH, poor filtration, or high total dissolved solids (TDS).
- What to Test For: Check pH and chlorine first. If they are in range, look at your filter's performance. Is it clean? Is it running long enough each day (typically 8-12 hours)?
- Solution: Adjust pH and chlorine as needed. Clean your filter. If cloudiness persists, you might need a clarifier product to help your filter capture tiny particles, or consider a partial water change if TDS is very high.
Green Water (Algae Bloom)
- Possible Causes: Insufficient chlorine levels, high pH, lack of circulation, or phosphates (algae food).
- What to Test For: Low free chlorine and high pH are primary suspects. Test alkalinity too, as it affects pH stability.
- Solution: This requires a "shock" treatment. Raise your free chlorine level significantly, often to 10 ppm or higher, according to product instructions. Ensure your pump runs 24/7 until the water is clear. You may also need to brush the pool walls and floor vigorously. Adding a phosphate remover can help prevent future algae growth.
Other Discolorations
- Red/Brown Water: Often caused by high levels of iron or other metals, sometimes from your fill water or corroding equipment. Testing won't directly measure metals, but if your pH and chlorine are fine, metals are a likely culprit.
- Solution: Use a metal sequestering agent. You may also need to clean your filter and potentially drain and refill if levels are very high.
Pool Chemical Safety and Handling
Working with pool chemicals requires a healthy respect for safety. These products are designed to be potent, and mishandling them can lead to serious injury. Always prioritize safety when storing, handling, and adding chemicals to your pool.
- Read the Labels: This is the most critical step. Every chemical product will have specific instructions, warnings, and safety precautions. Read them thoroughly before you use the product.
- Personal Protective Equipment (PPE): Wear gloves and eye protection whenever you handle pool chemicals, especially acids or granular shock. Long sleeves and pants can also offer protection.
- Storage: Store chemicals in a cool, dry, well-ventilated area, away from direct sunlight and out of reach of children and pets. Never store different types of chemicals together, especially oxidizers (like chlorine) and acids, as they can react dangerously.
- Mixing: NEVER mix different pool chemicals together. Always add chemicals to water, never water to chemicals (especially acids). For example, when adding granular shock, add it directly to the pool water or pre-dissolve it in a bucket of pool water as per product directions, never add water to the granular product.
- Ventilation: Always ensure good ventilation when adding chemicals, especially if working in an enclosed space or if you are sensitive to fumes. Open doors or windows if necessary.
- First Aid: Know what to do in case of accidental contact. Have fresh water readily available for flushing skin or eyes. Refer to the product label for specific first-aid instructions and consult a medical professional if you experience any adverse effects.
Following these safety guidelines ensures your pool maintenance is effective and, most importantly, safe for you and your family.
How to Maintain Your Pool's Filter System
Your pool filter is the unsung hero of water clarity, working tirelessly to remove debris and keep your water sparkling. Just like your water chemistry needs testing, your filter needs regular attention to do its job effectively. Neglecting it will quickly lead to cloudy water, strained equipment, and inefficient sanitation.
Understanding Filter Types
Above-ground pools most commonly use either sand filters or cartridge filters. Each has its own maintenance schedule.
Sand Filters: Over time, sand can become clogged with debris and its filtering efficiency can decrease.
- Maintenance: Backwashing is the primary cleaning method. This involves reversing the water flow through the filter to flush out trapped dirt. It’s typically done when the filter pressure gauge reads 8-10 psi above its clean starting pressure, or at least once a month. The sand itself usually needs replacing every 3-5 years.
Cartridge Filters: These use a pleated fabric cartridge to trap debris.
- Maintenance: The cartridge needs to be removed and hosed down regularly, typically when the filter pressure gauge indicates it’s needed (similar to sand filters, 8-10 psi above clean pressure) or at least monthly. Deeper cleaning with a filter cleaner solution may be required a couple of times a season to remove oils and finer particles. Cartridges typically last 1-3 seasons depending on use and maintenance.
General Filter Maintenance Tips
- Monitor the Pressure Gauge: This is your best friend for filter health. A clean filter operates at a certain pressure. As it gets dirty, the pressure rises. When it hits 8-10 psi above the clean baseline, it’s time to clean it.
- Regular Cleaning: Don’t wait for the pressure to spike dramatically. Regular rinsing or backwashing keeps the filter working efficiently, which means better water quality and less strain on your pump.
- Deep Cleaning: Periodically, use a specialized filter cleaner (available for both sand and cartridge filters) to break down oils, lotions, and fine particles that regular rinsing might miss. This is especially important for cartridge filters.
- Inspect for Damage: While cleaning, check your filter tank, o-rings, and any seals for cracks or wear. For cartridge filters, inspect the fabric for tears or excessive clogging that indicates it’s time for a replacement. For sand filters, check the multiport valve for leaks or cracks.
- Proper Backwashing/Rinsing: Always follow your filter's manual for the correct procedure. For backwashing, ensure the pump is off before changing the valve setting, and run the backwash cycle until the water runs clear. For rinsing a cartridge, ensure you remove all loose debris with a strong jet of water.

