

Can shop vacuums pick up nails? Short answer: yes, but the real answer depends on a few things you should check first. A shop vac can handle nails, but the nail size, filter condition, and what else is mixed in with the debris all change the outcome.
Get those wrong, and you're looking at a torn filter, a jammed hose, or a blown motor.
Our research shows most wet/dry vacuums with a clean dry filter handle nails up to about two inches long without trouble. As of 2026, a standard 16-gallon shop vac pulls 100 to 200 CFM of airflow. That's usually enough to lift steel fasteners off bare concrete.
But before you grab the hose, walk through the four questions below.
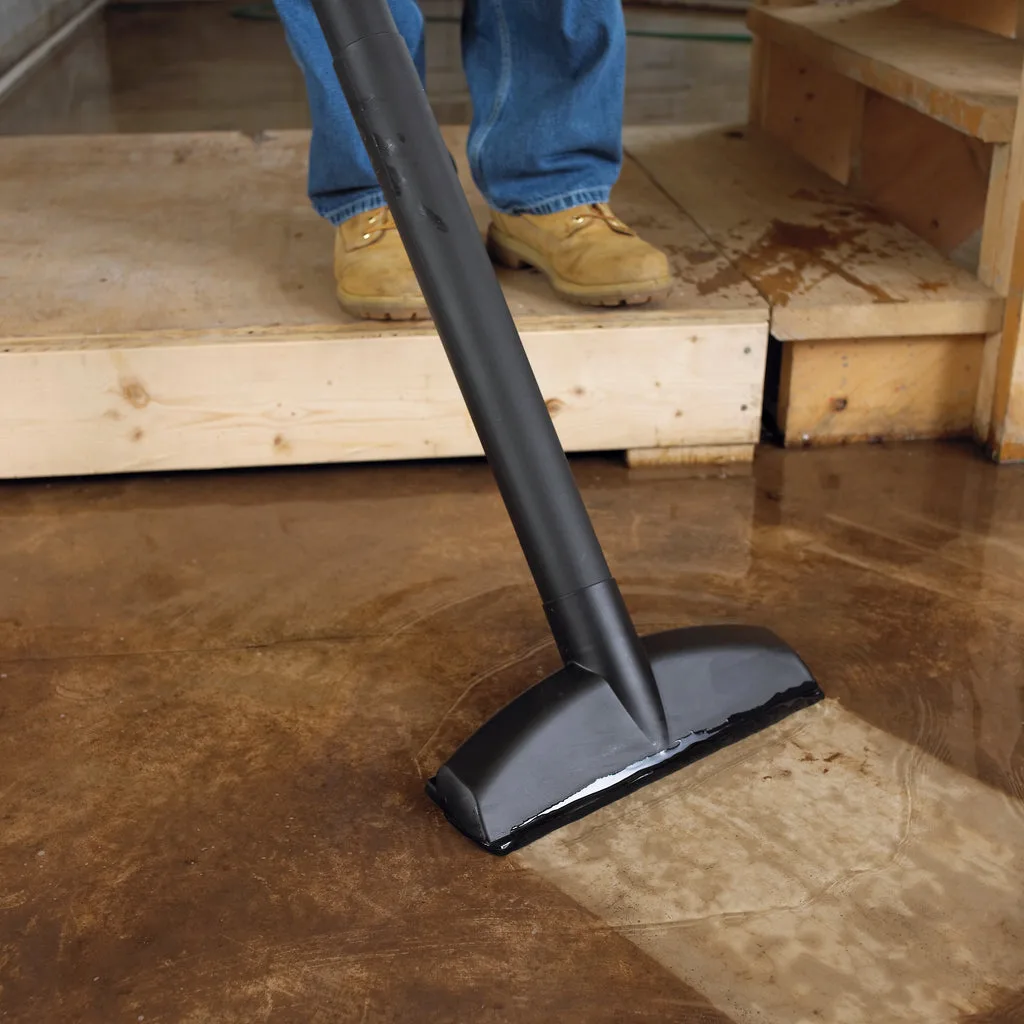
Image source: Bing (Web (fair-use with source credit))
Quick Answer: Yes, But It Depends on These Four Things
Yes, shop vacuums can pick up nails. But the safe answer depends on the vacuum, the nail, and the filter. Nails under two inches usually pass fine.
Longer or sharper nails can tear filters and jam hoses. Check your setup before you start.
The four things that matter are the vacuum type, the nail size, the filter condition, and the surrounding debris. On job sites, this matters beyond convenience. OSHA's construction housekeeping standard requires keeping walkways clear of scattered debris.
Knowing how to vacuum nails safely is a compliance issue, not just a tidy floor.
How a Shop Vacuum Handles Nails: What's Actually Happening Inside
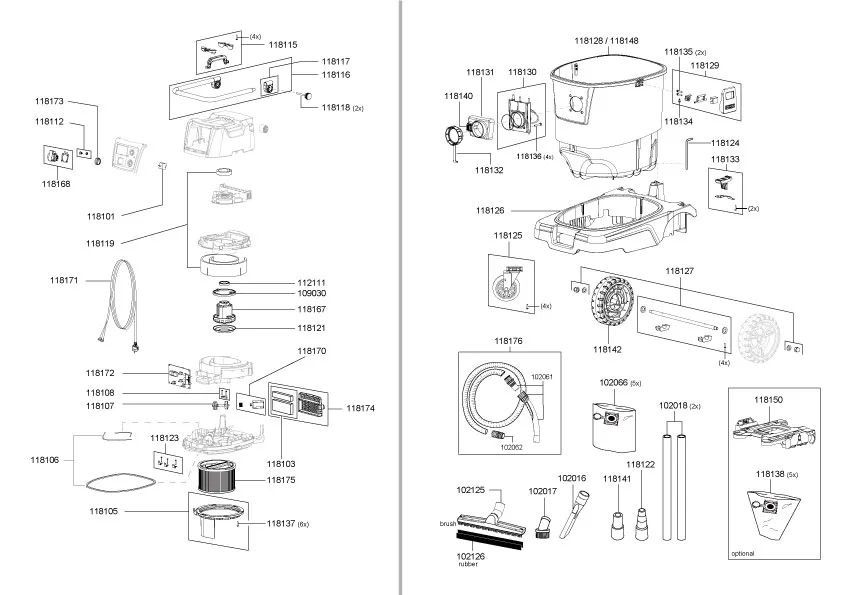
Image source: Web (Bing) / fity.club (Web image (fair-use with source credit))
When you suck up a nail, the airflow carries it into the hose and dumps it into the drum. The drum is empty, so the nail falls to the bottom. The air continues out through the filter, which keeps dust from reaching the motor.
The problem is geometry. A nail's sharp point can hit the filter with enough force to poke through. Once that happens, fine dust stops getting caught and heads straight into the motor.
That's how a simple cleanup turns into an expensive repair.
Most shop vacs use one of three filter types: a pleated cartridge, a foam sleeve, or a paper bag. The cartridge is the most common on mid-size and large models. Paper bags are great for dust but worse for nails, because a sharp point pierces them easily.
The filter also controls airflow. A clogged filter robs suction, and the nail never moves through the hose. Catching a torn filter before you start is cheaper than replacing a motor.
The First Decision: Dry-Only or Wet/Dry Vac?
This one is straightforward. A dry-only shop vacuum handles nails fine as long as everything is dry. A wet/dry vac needs to be set up for dry pickup.
Wet/dry vacs usually use the same filter for both jobs, but you must swap a wet filter for a dry one. A damp foam sleeve reduces suction and lets debris slip around. It also clogs fast when sawdust and metal flakes mix.
Follow this if/then logic:
- If the tank is clean and dry, proceed.
- If it's still wet from last week's spill, empty it and let it dry.
- If the filter is damp, swap it for a dry one.
- If the unit has a blower port, leave it closed during pickup.
One more thing: don't assume a "shop vac" is automatically a wet/dry machine. Some smaller vacuums labeled as shop vacs are dry-only. Check the manual or the sticker near the tank.
The Second Decision: What Size and Type of Nails Are We Talking?
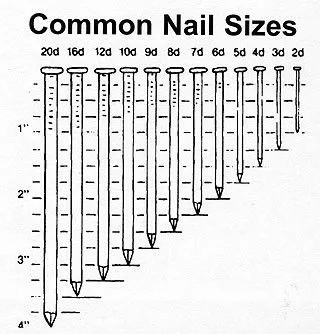
Image source: Web (Bing) / pinterest.com (Web image (fair-use with source credit))
Length matters more than brand. A 1-inch roofing nail has a wide head that can catch on the hose connection. A 3.5-inch framing nail has enough length to tumble sideways and jam.
The table below gives you a quick feel for what's safe.
| Nail Type | Typical Length | Shop Vac Verdict |
|---|---|---|
| Brad nails | 1/2" to 2" | Safe with any shop vac |
| Finishing nails | 1" to 3" | Fine up to 2.5", larger can jam |
| Roofing nails | 1" to 1.75" | Usually fine, wide heads can catch |
| Framing nails | 2" to 3.5" | Risky, longer ones cause clogs |
| Concrete nails | 3/4" to 3" | Sharp, can puncture filters |
Common 16d framing nails are 3.5 inches long, and those give shop vacs the most trouble. They travel through the hose like little spears. If they hit the filter point-first, they can tear it.
If they hit the hose wall at an angle, they lodge in place.
The safest approach is to pre-sort the big stuff. Sweep or rake large clusters of nails into a pile. Then run the shop vac over the leftovers.
That reduces the chance of a long nail causing a blockage. If you run into a jam, knowing how to clear the blockage quickly saves a lot of frustration.
The Third Decision: Is Your Filter Up for the Job?
Your filter is the most important part of this decision. If it's missing, torn, or installed wrong, do not run the vacuum. Without a filter, the motor pulls in dust, rust flakes, and tiny metal shards.
Those particles grind into the impeller and bearings. The motor eventually fails.
For nails, a pleated cartridge filter is the best all-around choice. It's durable, easy to clean, and holds up better than paper when metal hits it. Foam sleeves work for large debris but let fine dust through.
Paper bags tear easily on sharp points.
Before you start, inspect the filter for holes, cracks, or crumbling pleats. Hold it up to the light and look for pinholes. Tap it against the trash can to knock loose dust.
If it's a cartridge filter, rinse it only if the manufacturer says it's washable.
There's also a health angle. If your nails came from old painted trim, the surrounding dust may contain lead. Lead paint dust is a serious hazard, and the EPA regulates how you handle it during renovations.
The EPA's lead renovation program explains the rules. If lead might be present, use a HEPA-rated filter and keep the dust contained.
The Fourth Decision: What Else Is Mixed In With the Nails?
Nails rarely sit alone on a floor. They're usually buried in sawdust, drywall dust, or loose dirt. That changes the risk level.
Dry sawdust and wood shavings are easy. A shop vac handles them well, and the dust gets caught in the filter. The nails fall to the drum.
The biggest risk is the dust coating the filter and reducing suction mid-task.
Drywall dust is worse. It's fine, powdery, and clogs pleated filters fast. If you vacuum nails mixed with drywall dust, stop and clean the filter halfway through.
A clogged filter drops airflow significantly, and that's when nails start lodging in the hose.
Here's the if/then logic for mixed debris:
- If the pile is mostly nails, use the floor nozzle and go slow.
- If it's mostly sawdust, shake or sweep the nails out first.
- If it's wet mud or paint chips, let everything dry before running the vac.
- If it's metal shavings with nails, add a magnet pass first to grab the bulk.
One more scenario: nails mixed with insulation. Fiberglass strands get sucked into the motor if the filter is weak. They also stick to the hose interior and narrow the path.
When that happens, the nails jam faster.
Step-by-Step: Safely Vacuum Up Nails Without Ruining Your Shop Vac
Follow this sequence every time. It takes under a minute and saves you from a costly repair.
- Check the filter. Inspect for holes, tears, or gaps around the seal. Replace or clean as needed.
- Swap to a dry setup. If the tank or hose is wet, empty and dry it. Damp conditions wreck suction.
- Attach the floor nozzle. It covers more ground and holds the nozzle off the floor so nails don't bounce away.
- Sweep large piles together. Use a broom or a piece of cardboard to cluster scattered nails.
- Vacuum at a slow, steady pace. Fast passes let nails flutter out of the air stream.
- Lift the nozzle off the floor every few feet to clear partial clogs.
- Empty the drum immediately. Nails at the bottom rattle around and can scratch the tank.
- Clean the filter after you finish. Tap it out or rinse it if the manufacturer allows.
The one thing people skip most is checking the hose inlet. Nails with wide heads, like roofing nails, sometimes jam right at the connection where the hose meets the nozzle. If you hear the motor strain and suction drops, stop and check there first.
Common Mistakes That Ruin Filters, Hoses, and Motors
These are the errors we see repeated in aggregate reviews and job-site forums. Most are easy to avoid once you know they exist.
Vacuuming nails without a filter. This is the fastest way to kill a shop vac. Metal shards and dust fly directly into the impeller. The motor overheats and burns out.
Never run the unit this way.
Using a paper bag for sharp debris. Paper bags tear on the first nail. Once torn, they funnel dust into the motor compartment. If you use bags, switch to a cartridge filter for nail duty.
Vacuuming wet nails with a dry filter. Moisture knots up the filter media and blocks airflow. That kills suction and leaves the filter permanently warped.
Letting the drum overfill. Nails sitting near the top block the air inlet. That reduces pickup power and forces the motor to work harder.
Ignoring clogs. Partial clogs don't always stop the vacuum. They just reduce suction. If the hose sounds whistle-y or the motor pitch climbs, turn off the unit and fix the issue before suction gets worse.
Emptying nails by hand. Sticking your hand into a drum full of rusty nails is a quick way to get a puncture wound. Dump the tank carefully, or use pliers if the opening is narrow.
When Not to Use a Shop Vac: Grab a Magnet or Broom Instead
Sometimes the right tool isn't the vacuum at all. For scattered nails on open floors, a magnetic nail sweeper is faster and safer. You roll it like a push broom, and nails snap to the magnet bar.
When you're done, release the lever and the nails drop into the bin.
These tools cost less than a replacement shop vac filter. They handle hundreds of nails in one pass. And they completely eliminate the risk of a nail tearing through a foam sleeve or paper bag.
For framing crews cleaning up at the end of the day, a rolling magnet is the standard solution.
The trade-off is that magnets only grab ferrous metal. Stainless steel nails, copper, and aluminum are non-magnetic. For those, you're back to the vacuum or picking them up by hand.
Broom and dustpan is another solid alternative for small piles. Sweep the nails into a dustpan, then transfer them to a bucket. No filter risk, no motor risk, no noise.
It's the simplest method, but it's slower over big areas.
Think of it this way. The shop vac is for nails mixed with sawdust or for hard-to-reach corners. The magnet is for open floor coverage.
The broom is for tiny messes. Match the tool to the job. The same logic applies to other vacuum types too, and our comparison of pool vacuum options shows how tool selection matters for different surfaces.
Best Attachments and Nozzles for Nail Pickup
The nozzle you choose affects how well nails get picked up. The wide floor nozzle is the best default for most cleanup jobs. It creates a broad suction band that grabs nails before they can scatter.
The crevice tool is useful for nails wedged along baseboards, in corners, or between wall studs. Its narrow opening concentrates suction into a tight stream. But it also pushes lightweight nails away before they get captured.
Go slow.
The utility nozzle, also called the multi-surface nozzle, is a middle ground. It has bristles on the edge that help dislodge nails from carpet or padding. It's a good choice for post-remodel carpet cleanup.
Skip the brush attachments. Soft bristles flex around the nails and let them slide past. A stiff bristle brush can work outdoors, but the floor nozzle handles that surface better anyway.
One tip that consistently shows up in verified buyer feedback: attach the hose directly to the drum without extension wands. The shorter the path, the less chance a nail has to tumble and jam. For quick nail cleanup, keep the setup short and simple.
Cleaning Out Afterward: Maintenance That Keeps Your Vac Ready
When the cleanup is done, don't just park the shop vac in the corner. Nails left in the drum rust, clump together, and corrode. They also scratch the interior and make the next pickup smell like old metal.
Empty the tank immediately after every nail session. Tip the drum over a trash bin, or dump it onto a drop cloth. Then check the hose by bending it along its length.
Nails hide inside the corrugation and only show up the next time you use the vac.
Clean or replace the filter before storing. Tap a cartridge filter outdoors to knock loose drywall dust and rust flakes. If there are pinholes or a tear, swap in a new one.
A clean filter means stronger suction on the next project. Regular cleaning and maintenance extends the life of any vacuum, shop vacs included.
Real-World Scenarios: Framing Crew, Roof Teardown, and Garage Floor
A framing crew on a new build can scatter hundreds of 3.5-inch framing nails across a subfloor every day. The model that works best is a rolling magnet for the open floor, then a shop vac for the sawdust-and-nail mix along the wall edges. The vacuum stays clear, and the filter needs one quick tap-out mid-day.
Roofing tear-offs are a different story. Galvanized roofing nails end up in grass, gravel, and driveway cracks. A shop vac with a floor nozzle pulls them out, but the wide heads catch on the hose inlet.
Slow passes and regular inlet checks keep things moving.
Garage floor cleanups are the easiest. Finishing and brad nails mixed with concrete dust move through a shop vac without drama. Just empty the drum and knock out the filter afterward.
Safety First: Lead Paint, Sharp Metal, and Proper Disposal
Nails from old painted trim can carry lead paint dust. The surrounding debris may be contaminated too. The EPA's lead renovation program covers this situation for pre-1978 housing.
Use a HEPA-rated filter if there's any chance lead is present.
Rusty nails also carry a tetanus risk. Wear thick gloves when you empty the tank, and never stick your bare hand into the drum. Transfer nails to a puncture-resistant metal container before tossing them in the trash.
If you vacuum a nail that's embedded in drywall or wood, leave it in the debris and dispose of everything together. Don't try to pull it out and reuse it.
Your Decision Guide: Quick Flowchart Summary of What to Do
Here's the full decision path in one glance:
- Is there any water or dampness? Dry everything first.
- Is the nail longer than 3 inches? Use a magnet or broom instead.
- Is the filter torn or missing? Replace it before vacuuming.
- Is the pile mostly nails and dust? Sweep it together, then vacuum slowly.
- Are nails scattered wide on an open floor? Use a rolling magnet first.
- Does suction drop mid-task? Stop, check the hose inlet, and clear the jam.
This flow catches the most common mistakes before they happen. It's the same checklist a general contractor runs through before letting anyone on site touch the shop vac.
Frequently Asked Questions
Will nails ruin a shop vac filter?
Nails can, but they usually don't. A single nail rarely tears a pleated cartridge filter. The danger is repeated use or a nail hitting the filter point-first at high speed.
Check the filter for pinholes after every nail session. Replace it at the first sign of damage.
Can a shop vacuum pick up screws too?
Yes, screws under two inches long behave just like nails. Their threads can catch on filter pleats, but they usually drop into the drum. Use the same checklist: dry tank, clean filter, short hose setup.
How do I get a nail unstuck from the shop vac hose?
Shut off the vacuum and unplug it first. Bend the hose along its length until the nail loosens, then pull it out with pliers. Tap the hose against a workbench if it's wedged in tight.
Is it safe to vacuum rusty nails?
It's safe as long as the setup is dry and the filter is intact. Rust flakes can shed off the nails and get pulled toward the filter. Wear gloves when emptying the tank, and never handle rusty debris with bare skin.

