

The whirring sound of your Dyson robot vacuum is usually a comforting sign of a clean home, but what happens when that sound turns into a concerning silence, or worse, an error code? Dyson robots, like any advanced piece of technology, can encounter issues.
From navigation problems to charging failures, understanding common troubleshooting steps can save you time, frustration, and potentially, the need for a costly repair. This guide will equip you with the knowledge to diagnose and resolve most issues, ensuring your Dyson robot vacuum continues to perform at its best.
Key Takeaways
- Regular Maintenance is Key: Most Dyson robot vacuum issues stem from simple maintenance oversights, such as clogged filters, full bins, or obstructed brushes.
- Understand Error Codes: Dyson robots display specific error codes that directly point to the problem, making diagnosis easier. Familiarize yourself with common codes.
- Battery Health Matters: Battery degradation is a common cause of reduced run time or failure to charge. Proper charging habits can prolong battery life.
- Software Updates are Crucial: Ensure your Dyson robot vacuum’s firmware is up-to-date, as updates often include bug fixes and performance improvements.
- Connectivity Issues: Wi-Fi connectivity problems can prevent app control and scheduled cleaning. Resetting network settings or the robot can often resolve this.
- Physical Obstructions: Debris lodged in brushes, wheels, or sensors is a frequent culprit for performance issues. Regular cleaning of these components is vital.
- Contact Support When Needed: For persistent or complex issues, Dyson’s customer support is a valuable resource.
Common Dyson Robot Vacuum Problems And Solutions
Dyson robot vacuums are sophisticated machines designed for convenience and efficiency. However, like any complex electronic device, they can sometimes experience glitches or operational hiccups. Most of these issues are not indicative of a serious defect and can be resolved with straightforward troubleshooting steps.
Understanding the potential problems and their fixes can significantly enhance your ownership experience and keep your robot running smoothly.
Navigation And Mapping Issues
One of the most frustrating problems is when your Dyson robot vacuum struggles to navigate your home. This can manifest as the robot getting stuck frequently, repeatedly cleaning the same area, or failing to cover the entire designated space. These issues often relate to the robot’s sensors, its mapping system, or environmental factors.
Sensor Malfunctions
Dyson robots rely on an array of sensors to perceive their surroundings, avoid obstacles, and map your home. If these sensors become dirty or obstructed, the robot’s ability to navigate effectively will be compromised.
- Dirty Sensors: Dust, pet hair, or other debris can accumulate on the robot’s various sensors, including the cliff sensors (located on the underside to prevent falls down stairs) and the vision system sensors (often located at the front or top).
- Solution: Gently wipe all external sensors with a clean, dry microfiber cloth. For stubborn grime, a slightly damp cloth can be used, but ensure the sensors are completely dry before operating the robot. Refer to your Dyson manual for the exact location of all sensors.
- Obstructed Vision System: The vision system is crucial for mapping and navigation. Anything that blocks its view, such as a large sticker or a crack in the lens, can cause problems.
- Solution: Inspect the primary vision lens for any obstructions or damage. Clean it carefully with a soft cloth.
Mapping Errors
The robot creates a map of your home to plan its cleaning routes. If this map becomes corrupted or inaccurate, it can lead to erratic cleaning behavior.
- Incomplete or Corrupted Map: This can happen if the robot is moved mid-clean, loses power unexpectedly, or encounters significant environmental changes (e.g., new furniture).
- Solution: In the Dyson Link app, you can typically reset the map. Navigate to the robot’s settings and look for an option like “Delete Map” or “Reset Map.” After resetting, run a full cleaning cycle to allow the robot to create a new, accurate map. Ensure the robot has a clear path and sufficient battery power for this initial mapping run.
- Environmental Changes: Significant changes to your home’s layout, such as adding or removing large furniture, can confuse the robot’s existing map.
- Solution: While the robot can often adapt, a full map reset and a new mapping run might be necessary for optimal performance after major reconfigurations.
Inability To Connect To Wi-fi Or App
The Dyson Link app is essential for controlling your robot, scheduling cleanings, and receiving notifications. If your robot fails to connect to your Wi-Fi network or the app, its functionality is severely limited.
Network Congestion Or Router Issues
Home Wi-Fi networks can become congested with multiple devices, or the router itself might experience temporary glitches.
- Solution:
- Restart your router: Unplug your Wi-Fi router, wait for 30 seconds, and plug it back in. Allow it a few minutes to fully boot up.
- Check network compatibility: Ensure your robot is connecting to a 2.4GHz Wi-Fi network, as many smart home devices do not support 5GHz bands. Check your Dyson robot’s specifications for supported Wi-Fi standards.
- Router proximity: Ensure the robot is within a reasonable range of your Wi-Fi router. Weak signal strength can cause intermittent connectivity.
Robot’s Network Settings
Sometimes, the robot’s internal network settings can become outdated or corrupted.
- Solution:
- Reset Wi-Fi on the robot: Most Dyson robots have a procedure to reset their Wi-Fi settings. This usually involves pressing and holding a specific button or combination of buttons on the robot itself until an indicator light changes. Consult your Dyson manual for the exact steps.
- Re-pair with the app: After resetting the Wi-Fi on the robot, you will need to re-add it to your Dyson Link app, going through the initial setup process again.
Failed To Connect To Wi-fi During Setup
If you’re setting up your robot for the first time and it won’t connect to Wi-Fi.
- Solution:
- Verify Wi-Fi password: Double-check that you are entering the correct Wi-Fi password. Passwords are case-sensitive.
- Simplify network name (SSID): Avoid special characters or spaces in your Wi-Fi network name.
- Firewall settings: Ensure your router’s firewall isn’t blocking the robot’s connection. You may need to consult your router’s manual or ISP for assistance.

Charging And Battery Problems
A robot vacuum that won’t charge or has a significantly reduced run time is practically useless. These issues are often related to the charging dock, the robot’s battery, or the power connection.
Robot Not Charging
If your Dyson robot vacuum consistently fails to return to its dock or doesn’t show signs of charging when docked.
Docking Station Issues
The charging dock is the intermediary between your robot and the power supply.
- Obstructions at the Dock: Debris or dust bunnies around the charging contacts on the dock or the robot can prevent a proper connection.
- Solution: Ensure the area around the docking station is clear of debris. Wipe the charging contacts on both the robot and the docking station with a clean, dry cloth. Sometimes, a pencil eraser can be used gently on the metal contacts to remove oxidation.
- Dock Not Powered: The charging dock itself needs power.
- Solution: Check that the power adapter is securely plugged into the dock and the wall outlet. Try a different wall outlet to rule out an issue with the outlet itself. Ensure the indicator light on the dock is illuminated, signifying it has power.
- Dock Placement: The robot needs to be able to align with the dock easily.
- Solution: Ensure the dock is placed on a hard, level surface with adequate clearance around it, as specified in your user manual. Avoid placing it on thick carpets or in tight corners where the robot might struggle to dock.
Battery Health And Performance
The rechargeable battery is the heart of your robot’s mobile operation.
- Battery Degradation: Like all rechargeable batteries, the one in your Dyson robot will degrade over time, leading to shorter run times. If your robot used to clean for an hour but now only lasts 15-20 minutes, battery wear is a likely cause.
- Solution: Unfortunately, battery degradation is a natural process. If the run time is significantly reduced and the robot is still under warranty, contact Dyson support. Otherwise, you may need to consider a battery replacement.
- Battery Not Seated Properly: Though less common, the battery pack might become dislodged.
- Solution: Refer to your manual for instructions on how to check or remove and reinsert the battery pack. Ensure it clicks securely into place.
- Extreme Temperatures: Charging or operating the robot in very hot or very cold environments can affect battery performance and longevity.
- Solution: Operate and charge your robot within the temperature ranges specified in the user manual (typically room temperature).
Reduced Run Time
Even if the robot charges, a shorter-than-expected cleaning duration is a common complaint.
- Frequent Recharging: If the robot frequently returns to its dock to recharge mid-cycle, it indicates the battery isn’t holding enough charge for a full clean.
- Solution: This points back to potential battery degradation or a charging issue. Ensure the robot is fully charging each time. Check the Dyson Link app for any battery health indicators if available.
- Heavy Soiling or Difficult Terrain: If you’re asking the robot to clean particularly dirty floors or navigate thick carpets, it will consume more power, leading to a shorter run time.
- Solution: Consider breaking down large cleaning areas into smaller zones. Ensure filters and brushes are clean to maximize efficiency. For very thick carpets, some Dyson models may struggle; manual vacuuming might be necessary for these areas.
Cleaning Performance Issues
Your Dyson robot vacuum might be running, charging, and connecting, but if it’s not picking up dirt effectively, it defeats the purpose. This can be due to several factors related to the cleaning mechanism itself.
Brush Bar Problems
The brush bar is responsible for agitating dirt and debris from your floors and carpets, sweeping it towards the suction inlet.
- Tangled Debris: Hair (human and pet), threads, and other fibrous materials are notorious for wrapping around the brush bar, hindering its rotation and reducing cleaning efficiency.
- Solution: Regularly remove the brush bar (refer to your manual for instructions) and meticulously remove any tangled debris. Dyson often provides a tool to help cut away stubborn hairs. Ensure the brush bar spins freely after cleaning.
- Worn Brush Bar: Over time, the bristles on the brush bar can become worn down, especially with heavy use or on abrasive surfaces.
- Solution: Inspect the brush bar for significant bristle wear. If the bristles are noticeably flattened or missing, it may be time to replace the brush bar assembly.
- Brush Bar Not Spinning: If the brush bar isn’t spinning at all, it could be due to a jam, a disconnected motor, or a fault with the brush motor itself.
- Solution: First, check for tangles (as above). If clear, ensure the brush bar is correctly seated. If the problem persists, it may require professional diagnosis.
Suction Power Loss
Insufficient suction means the robot won’t be able to pick up dirt effectively.
- Full or Clogged Dustbin: The simplest cause of reduced suction is a full dustbin.
- Solution: Empty the dustbin after every cleaning cycle, or as soon as the app indicates it’s full. Ensure the internal filter is also clean.
- Clogged Filter: The filters in Dyson vacuums are designed to trap fine dust particles. When clogged, they significantly restrict airflow, reducing suction power.
- Solution: Wash the filter(s) regularly according to the manufacturer’s instructions (usually with cold water, no detergent). Allow the filter(s) to air dry completely (at least 24 hours) before reinstalling them. A wet filter will not only reduce suction but can also damage the robot’s motor. Check your manual for the location and type of filter(s).
- Blocked Airway: Debris can sometimes become lodged in the pathway between the brush bar and the dustbin, creating a blockage.
- Solution: With the brush bar removed and the dustbin empty, visually inspect the internal airway for any obstructions. Use a long, blunt object (like a broom handle) to gently dislodge any blockages if necessary.
Inconsistent Cleaning Patterns
The robot might leave streaks, miss spots, or seem to clean randomly.
- Uneven Floor Surfaces: Highly textured carpets or uneven flooring can sometimes lead to inconsistent results.
- Solution: Ensure the robot is set to the correct floor type in the app, if applicable. For very high-pile carpets, manual vacuuming might still be the most effective solution.
- Software Glitches: Occasionally, a software bug can affect the robot’s cleaning algorithm.
- Solution: Ensure your robot’s firmware is up-to-date via the Dyson Link app. Performing a software update can resolve unexpected behavioral issues. If the problem persists after an update, consider a factory reset (see below).
Error Codes And Indicator Lights
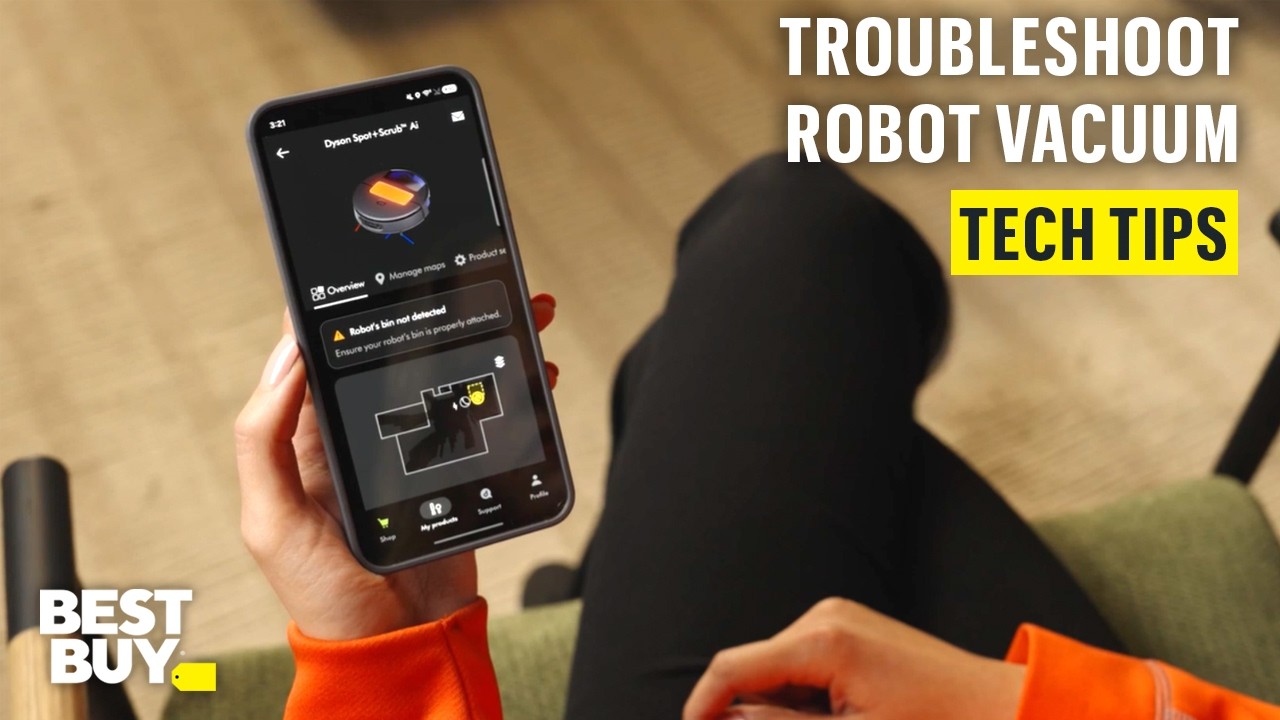
Dyson robot vacuums often communicate problems through a series of beeps, voice alerts, or flashing indicator lights and error codes displayed in the Dyson Link app. Understanding these signals is crucial for quick diagnosis.
Common Error Codes And Meanings
While the exact codes can vary slightly between models, some are quite common:
- “Brush bar jammed” or similar: Indicates an obstruction around the main brush bar.
- Solution: Turn off the robot, remove the brush bar, clean it thoroughly, and reinsert it securely.
- “Wheel stuck” or similar: A wheel is obstructed or unable to turn freely.
- Solution: Inspect the wheels for tangled debris or damage. Clean the wheel housings. Try manually spinning the wheels to ensure they move freely.
- “Cliff sensor blocked” or similar: The sensors designed to prevent falls are dirty or obstructed.
- Solution: Clean all cliff sensors on the underside of the robot with a dry cloth.
- “Bin full” or similar: The dustbin needs to be emptied.
- Solution: Empty the dustbin and ensure it’s correctly reinserted.
- “Filter needs cleaning/replacing” or similar: The air filter is clogged or requires maintenance.
- Solution: Wash or replace the filter as per the manual’s instructions. Ensure it’s completely dry before reinstallation.
- “Battery low” or “Charging error”: Indicates an issue with the battery or the charging process.
- Solution: Check dock connections, clean contacts, and ensure the robot is properly docked. If persistent, it may indicate a battery issue.
Interpreting Indicator Lights
Many Dyson robots use LED lights to indicate status:
- Solid White/Blue: Robot is on and operational.
- Pulsing White/Blue: Charging.
- Flashing White/Blue: Attempting to connect, updating, or performing a specific function.
- Solid Red: Error state. Check the app or listen for audio cues for specific details.
- Flashing Red: Critical error, often related to battery or motor failure.
Pro Tip: Always keep your Dyson robot’s user manual handy. It contains a detailed list of error codes and indicator light meanings specific to your model, which is invaluable for troubleshooting. You can usually find a digital version on the Dyson website.
Advanced Troubleshooting: Resets And Maintenance
When basic troubleshooting steps don’t resolve the issue, more advanced procedures might be necessary. These include software resets and diligent, regular maintenance beyond just emptying the bin.
Performing A Factory Reset
A factory reset restores the robot vacuum to its original out-of-the-box settings. This can resolve persistent software glitches, connectivity issues, or erratic behavior that hasn’t responded to other methods.
- Procedure: The exact method varies by model. It typically involves pressing and holding a combination of buttons on the robot itself for an extended period (e.g., 10-20 seconds) until the robot powers down or an indicator light confirms the reset. Some models might require a reset through the Dyson Link app.
- Consequences: Be aware that a factory reset will erase all saved maps, Wi-Fi settings, and personalized configurations. You will need to set up the robot again from scratch, including reconnecting it to your Wi-Fi and re-mapping your home.
- When to Use: Use this as a last resort before contacting customer support, especially for issues like unresolvable app connectivity problems or strange operational quirks.
Software Updates
Dyson frequently releases firmware updates for its robot vacuums. These updates can include performance improvements, bug fixes, and new features.
- Importance: Keeping your robot’s software up-to-date is crucial for optimal performance and security. Updates often address issues that users might perceive as hardware problems but are actually software-related.
- How to Update: Updates are typically downloaded and installed automatically when the robot is connected to Wi-Fi, docked, and charging. You can usually check the current firmware version and initiate an update (if available) through the Dyson Link app. Ensure the robot has a stable Wi-Fi connection and sufficient battery charge during the update process.
Deep Cleaning And Preventative Maintenance
Consistent, thorough maintenance is the best way to prevent most problems from occurring in the first place.
- Regular Inspection: Make it a habit to visually inspect your robot before and after cleaning cycles. Look for any obvious debris, damage, or obstructions.
- Brush Bar Maintenance: Dedicate time weekly or bi-weekly (depending on usage and pet presence) to thoroughly clean the brush bar. Removing it allows for a more complete cleaning of the housing and the area around it.
- Sensor Care: Gently wipe down all sensors (cliff, navigation, wall sensors) at least once a week with a dry microfiber cloth.
- Wheel Cleaning: Check the wheels and their housings for tangled hair or debris. Sometimes, small objects can get lodged and impede movement.
- Charging Contacts: Clean the charging contacts on both the robot and the dock monthly using a dry cloth or a pencil eraser to ensure a clean connection.
- Filter Lifecycle: While washable filters can be reused many times, they do have a lifespan. If a filter becomes torn, misshapen, or permanently discolored even after washing, it’s time for a replacement. Check Dyson’s recommendations for filter replacement intervals.
When To Contact Dyson Support
Despite your best efforts, some issues may persist or indicate a hardware failure. Knowing when to escalate the problem is important.
Persistent Issues
If you’ve worked through all the relevant troubleshooting steps for your specific problem and the robot still isn’t functioning correctly, it’s time to reach out for professional help. This includes:
- Recurring error codes that cannot be cleared.
- Failure to charge despite trying all docking station and battery troubleshooting steps.
- Significantly reduced run time that doesn’t improve after troubleshooting.
- Unusual noises (grinding, clicking) that suggest mechanical failure.
- Complete failure to power on.
Warranty Considerations
Dyson offers a limited warranty on its robot vacuums. If your robot is still within the warranty period, attempting complex repairs yourself could void the warranty. Contacting support first is always advisable in such cases.
- Information to Have Ready: When you contact Dyson support, be prepared to provide:
- Your robot’s serial number (usually found on the underside of the robot).
- The model number.
- A detailed description of the problem, including any error codes or indicator lights.
- The troubleshooting steps you have already taken.
- Proof of purchase (receipt or order confirmation).
Dyson’s support team can guide you through further advanced diagnostics or arrange for repairs if necessary. You can find contact information and support resources on the official Dyson Support website.
Frequently Asked Questions
My Dyson Robot Vacuum Is Making A Loud Noise. What Could Be Wrong?
Loud noises typically indicate a physical obstruction or a mechanical issue. First, ensure the brush bar is completely free of tangled hair and debris, as this is a common cause. Check that the brush bar is correctly seated. If the noise persists, inspect the wheels for obstructions.
Unusual grinding or clicking sounds might point to a motor issue or a problem with the drive system, which may require professional attention.
The Dyson Link App Isn’t Showing My Robot’s Location Or Status Correctly. How Can I Fix This?
This usually points to a connectivity issue. First, ensure both your smartphone and the robot vacuum are connected to the internet. Try restarting your Wi-Fi router and your robot vacuum. If the problem continues, try resetting the Wi-Fi settings on the robot itself (consult your manual for the specific procedure) and then re-pairing it with the Dyson Link app.
Ensure the app itself is updated to the latest version.
My Robot Vacuum Keeps Getting Stuck In The Same Spot. What Should I Do?
This often relates to navigation or mapping errors. Check the area where it gets stuck for potential hazards like loose rugs, cables, or thresholds it struggles with. Ensure the robot’s sensors (especially the cliff sensors and vision system) are clean.
If the robot has a map of your home, try resetting the map within the Dyson

