

Experiencing issues with your iRobot Roomba can be frustrating, especially when you rely on its automated cleaning power. From error messages to unexpected shutdowns, these intelligent robots, while generally reliable, can encounter a variety of problems. Understanding how to troubleshoot common Roomba issues can save you time, money, and the inconvenience of a non-functional cleaning companion.
This guide will walk you through the most frequent challenges and provide practical, step-by-step solutions to get your Roomba back on track.
Key Takeaways
- Power and Charging Issues: Ensure the Home Base is properly plugged in, the charging contacts are clean on both the Roomba and the base, and the outlet is functional.
- Navigation Problems: Check for obstructed sensors, clean the cliff and bumper sensors, and ensure the Roomba is on a surface it can navigate (avoiding very dark carpets or highly reflective surfaces).
- Error Messages: Decode common error codes (e.g., “Clean the brushes,” “Error 6”) by referring to the manual or iRobot’s support site and performing the indicated maintenance.
- Connectivity Issues (Wi-Fi): Restart your router, ensure the Roomba is within Wi-Fi range, and re-establish the connection through the iRobot Home app.
- Brush and Filter Maintenance: Regularly clean or replace the main brushes, side brushes, and filters to prevent performance degradation and error messages.
- Firmware Updates: Keep your Roomba’s firmware up-to-date via the app for optimal performance and bug fixes.
Common Irobot Roomba Power And Charging Problems
One of the most common frustrations with any robotic device is when it refuses to power on or charge. Your Roomba is no different, and several factors can contribute to these power-related woes. Addressing these issues often involves simple checks and maintenance.
Roomba Not Turning On
If your Roomba is completely unresponsive, the first step is to ensure it has sufficient power.
- Check the Battery: Most Roombas have a battery indicator light. If it’s off, the battery may be completely depleted. Place the Roomba on its Home Base and allow it to charge for at least a few hours. Some older models or those with significantly degraded batteries might require an overnight charge.
- Inspect the Home Base Connection: Ensure the Home Base is securely plugged into a working electrical outlet. Try plugging another device into the same outlet to confirm it’s functional. Also, check that the power cord is firmly connected to the Home Base itself.
- Clean the Charging Contacts: Over time, dust and debris can accumulate on the charging contacts of both the Roomba and its Home Base. This buildup can prevent a proper electrical connection. Use a clean, dry cloth or a pencil eraser to gently wipe the metal charging contacts on the robot and the base. Avoid using liquids or abrasive cleaners.
- Reset the Roomba: For some models, a hard reset can resolve power issues. This typically involves pressing and holding the CLEAN button for about 10-20 seconds until all the lights on the robot briefly illuminate. Consult your specific Roomba model’s manual for the exact reset procedure.
Roomba Not Charging
Even if your Roomba turns on, it might fail to charge when placed on its Home Base.
- Verify Home Base Placement: Ensure the Home Base is placed on a hard, level surface against a wall, with adequate clearance around it. IRobot recommends specific clearances (check your manual, but generally around 1.5 feet on each side and 4 feet in front). Obstructions can prevent the Roomba from docking correctly.
- Check for Docking Errors: Listen for the “charging” sound or look for the charging indicator light on the Roomba when it docks. If it doesn’t seem to be docking properly, manually guide it closer to the base. Sometimes, a slight adjustment is all that’s needed.
- Clean Docking Sensors: Similar to charging contacts, the IR sensors on the Roomba and Home Base that guide it to dock can become dirty. Gently wipe these sensors with a clean, dry cloth.
- Battery Health: If your Roomba is several years old, the rechargeable battery may have reached the end of its lifespan. Batteries are consumables and will degrade over time. If charging issues persist after trying other troubleshooting steps, a replacement battery might be necessary. You can usually check battery health status within the iRobot Home app for compatible models.

Troubleshooting Roomba Navigation And Mapping Issues
A Roomba’s ability to navigate your home efficiently is crucial for its cleaning performance. When it gets stuck, misses spots, or behaves erratically, navigation problems are usually the culprit.
Roomba Getting Stuck Or Lost
Repeatedly finding your Roomba wedged under furniture or in a corner can be a significant annoyance.
- Identify Common Obstacles: Look for recurring spots where the Roomba gets stuck. This might be loose rug fringes, cords, tall furniture legs, or transition strips between floor types.
- “Virtual Walls” and “Keep Out Zones”: For advanced models, utilize the Virtual Wall accessories (physical devices) or Keep Out Zones (set via the app) to block off areas the Roomba struggles with. This is especially useful for areas with many cords or delicate items.
- Clear Clutter: Before starting a cleaning cycle, do a quick walkthrough of the area and pick up small objects, toys, or clothing that could impede the Roomba’s movement.
- Check Bumper Sensitivity: The front bumper is designed to detect obstacles. If it’s stuck or jammed, gently tap it to ensure it’s free to move. Clean around the bumper mechanism with a dry cloth.
Roomba Missing Spots Or Cleaning Inconsistently
If your Roomba seems to be ignoring certain areas or leaving patches of dirt, it could be a navigation or sensor issue.
- Sensor Cleaning is Key: The cliff sensors (located on the underside) prevent the Roomba from falling down stairs. The bumper sensors help it detect walls and furniture. The floor tracking sensor (on the underside) helps with navigation. All these sensors need to be kept clean. Use a dry microfiber cloth or a soft brush to gently clean them. For stubborn dirt, a slightly dampened cloth (water only, well wrung out) can be used, followed by immediate drying.
- Surface Considerations: Roombas can sometimes struggle with very dark carpets (which can be mistaken for cliffs by IR sensors) or highly reflective surfaces like mirrors or glossy tiles. Ensure your flooring is within the Roomba’s operational parameters.
- Mapping Issues (Smart Maps): For models with smart mapping capabilities, ensure the room is well-lit during the initial mapping run. Obstructions present during the mapping run will be remembered. If furniture is moved significantly, you might need to re-run the mapping process. You can also edit the map in the iRobot Home app to define rooms and Clean Zones.
- Check the Brushes: Ensure the main brushes are spinning freely and are free of tangled hair or debris. If the brushes are obstructed, the Roomba might not be able to move effectively or clean properly.
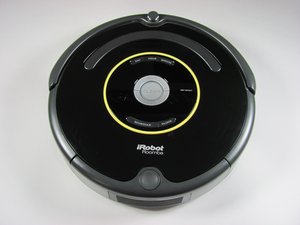
Decoding Irobot Roomba Error Messages
IRobot Roombas communicate problems through a series of audible beeps and voice prompts, often accompanied by error codes displayed in the iRobot Home app. Understanding these messages is crucial for quick resolution.
Common Error Codes And Solutions
- “Error 1: Clean the Roomba’s brushes.” This is one of the most frequent errors. It means debris is tangled around the main bristle or rubber brushes, preventing them from spinning.
- Action: Flip the Roomba over. Release the brush frame by pressing the yellow tabs (or similar colored tabs depending on model). Lift out the brushes and remove all tangled hair, string, and debris. Clean the brush bearings and the area where the brushes sit. Reinstall the brushes, ensuring they click into place.
- “Error 2: Clean the Roomba’s bin.” The dustbin is full, or the filter is clogged, preventing airflow.
- Action: Remove the dustbin. Empty its contents. Tap the filter against your trash bin to dislodge dust. For washable filters, rinse them under cool water and allow them to air dry completely (at least 24 hours) before reinserting. Do not put a wet filter back in the Roomba.
- “Error 3: Move the Roomba to a new location.” The Roomba is stuck or unable to navigate effectively from its current position.
- Action: Pick up the Roomba and place it on its Home Base or a different, clear area of the floor. Press CLEAN to restart.
- “Error 5: Clean the Roomba’s cliff sensors.” The cliff sensors are dirty or blocked.
- Action: Turn the Roomba upside down. Use a clean, dry cloth or a soft brush to gently wipe the cliff detection sensors located on the underside, near the edges.
- “Error 6: Clean the Roomba’s caster wheel.” The front caster wheel is stuck or jammed with debris.
- Action: Turn the Roomba over. Pull the front wheel assembly outwards. Remove any tangled hair, string, or debris. Ensure the wheel spins freely after cleaning. Reinsert the wheel module firmly.
- “Error 7: Clean the Roomba’s side brush.” The side brush is tangled or not spinning correctly.
- Action: Turn the Roomba over. Unscrew the side brush (usually a single screw). Remove any tangled debris. Clean the brush and the area around the screw hole. Reattach the side brush securely.
- “Error 11, 12, or 13: Check the Roomba’s bin and filter.” Similar to Error 2, these codes indicate airflow issues, often related to a full bin or clogged filter.
- Action: Empty the bin and clean or replace the filter. Ensure the filter is completely dry if washed.
- “Error 14: Clean the Roomba’s main brushes.” Similar to Error 1, indicating an issue with the main brush rotation.
- Action: Follow the steps for Error 1.
For a comprehensive list of error codes specific to your model, always refer to the official iRobot support website or your Roomba’s user manual.

Addressing Irobot Roomba Wi-fi And Connectivity Problems
Modern Roombas offer smart features controlled via the iRobot Home app, including scheduling, remote start, and smart mapping. When Wi-Fi connectivity fails, these features become inaccessible.
Roomba Not Connecting To Wi-fi
This is a common issue, especially after network changes or router resets.
- Check Wi-Fi Network: Ensure your Wi-Fi network is active and other devices can connect to it. Roombas typically connect to 2.4GHz Wi-Fi networks. If you have a dual-band router (2.4GHz and 5GHz), make sure you are trying to connect the Roomba to the 2.4GHz band.
- Router Placement and Range: The Roomba needs to be within range of your Wi-Fi signal. If your Home Base is far from your router, or if you have many walls or obstacles in between, the signal might be too weak. Consider moving the Home Base closer to the router or using a Wi-Fi extender.
- Restart Devices: A simple restart can often resolve temporary glitches.
- Restart your Roomba: Press and hold the CLEAN button for 10-20 seconds until all lights flash.
- Restart your router: Unplug your router, wait 30 seconds, and plug it back in. Wait for it to fully reboot before attempting to reconnect the Roomba.
- Re-establish Connection: If the Roomba was previously connected, you may need to “Forget” the Wi-Fi network on the Roomba via the app and then go through the setup process again. Open the iRobot Home app, navigate to the Roomba’s settings, and look for Wi-Fi settings or network connection options to initiate the setup. You’ll typically need to press and hold specific buttons on the Roomba to put it into pairing mode.
App Not Responding Or Showing Incorrect Status
Sometimes, the app might not update the Roomba’s status correctly, or commands might not register.
- Force Close and Reopen App: On your smartphone or tablet, force close the iRobot Home app and then reopen it.
- Check App Updates: Ensure you have the latest version of the iRobot Home app installed from your device’s app store.
- Roomba’s Connection Status: Verify the Roomba itself is connected to Wi-Fi. Check the Wi-Fi indicator light on the Roomba (consult your manual for its meaning) or ensure it’s showing as “online” in the app after a successful connection.
- Account Synchronization: Log out of your iRobot account within the app and log back in. This can sometimes refresh the connection between your account and the robot.
Maintaining Your Roomba For Optimal Performance
Regular maintenance is the most effective way to prevent issues and ensure your Roomba operates at peak efficiency. Neglecting maintenance often leads to the errors and problems discussed earlier.
Cleaning The Brushes And Filters
This is the most critical maintenance task.
- Main Brushes: Depending on your usage and the type of debris in your home (e.g., pet hair), you should clean the main brushes at least once or twice a week. Remove them completely, detangle hair and debris, and clean the ends where hair tends to accumulate.
- Side Brush: Check the side brush weekly for tangled debris and clean as needed. If it’s bent or damaged, it may need replacement.
- Filters: The High-Efficiency Filter in the dustbin traps fine dust. Clean it by tapping it against the side of your trash bin after every cleaning cycle. Replace the filter every 2-3 months, or sooner if you notice reduced suction or the app indicates it. Washable filters (found on some models) should be rinsed and air-dried completely before reuse.
Cleaning Sensors And Charging Contacts
As mentioned in previous sections, keeping sensors and charging contacts clean is vital.
- Sensors: Wipe down the cliff sensors, bumper sensors, and floor tracking sensors with a dry microfiber cloth or a slightly damp cloth (water only, well wrung out) every couple of weeks, or whenever you notice performance issues.
- Charging Contacts: Clean the charging contacts on both the Roomba and the Home Base monthly using a pencil eraser or a dry cloth. This ensures a reliable charging connection.
Firmware Updates
iRobot regularly releases firmware updates that can improve performance, fix bugs, and add new features.
- Automatic Updates: Ensure your Roomba is connected to Wi-Fi and has sufficient charge. Most models will automatically download and install updates when docked and not in use.
- Manual Check: You can also check for updates manually within the iRobot Home app under the Roomba’s settings. Keep your app updated as well.
Battery Care
- Keep it Charged: For optimal battery health, it’s generally recommended to keep your Roomba on its Home Base when not in use, allowing it to stay charged.
- Avoid Extreme Temperatures: Do not leave your Roomba in excessively hot or cold environments, as this can degrade battery performance.
Advanced Troubleshooting And When To Seek Professional Help
While most Roomba issues can be resolved with the steps above, some problems may require more advanced troubleshooting or professional intervention.
Performing A Factory Reset
If you’ve tried all other troubleshooting steps and are still experiencing persistent issues, a factory reset can sometimes resolve software glitches.
- Caution: A factory reset will erase all your custom settings, including Smart Maps, schedules, and Wi-Fi configurations. You will need to set up your Roomba again from scratch.
- Procedure: The method varies by model. Typically, it involves pressing and holding a combination of buttons (e.g., CLEAN and HOME buttons) for an extended period (often 10-20 seconds) until the robot announces it’s resetting or the lights flash in a specific pattern. Always consult your Roomba’s specific user manual or the iRobot support website for the correct factory reset procedure for your model.
Diagnosing Persistent Mechanical Issues
- Wheel Alignment: If the Roomba consistently veers to one side or struggles to move straight, the caster wheel or drive wheels might be misaligned or damaged. Check for obstructions and ensure the wheels spin freely.
- Brush Motor Issues: If error messages related to brush cleaning persist even after thorough cleaning, the brush motors themselves might be failing. This is a more serious issue that usually requires professional repair.
- Suction Problems: If cleaning the bin, filter, and brushes doesn’t restore adequate suction, there might be a blockage further up in the air path or a problem with the vacuum motor.
When To Contact Irobot Support
If you’ve exhausted all troubleshooting steps, performed a factory reset, and your Roomba is still not functioning correctly, it’s time to contact iRobot customer support.
- Warranty: Check if your Roomba is still under warranty. IRobot typically offers a one-year limited warranty for new robots. If it’s within the warranty period, they may repair or replace your unit.
- Support Resources: Visit the official iRobot support page for detailed troubleshooting guides, FAQs, and contact information.
- Professional Repair: If your Roomba is out of warranty, iRobot may offer out-of-warranty repair services, or you might consider a reputable third-party repair service.
By systematically working through these troubleshooting steps, you can resolve most common issues and keep your iRobot Roomba running efficiently, ensuring your floors stay clean with minimal effort.
Frequently Asked Questions
Why Does My Roomba Keep Returning To Its Base Mid-clean?
This usually happens if the Roomba’s battery level is critically low and it needs to recharge before continuing. It might also occur if it encounters an area it cannot navigate or clean effectively, prompting it to seek the Home Base. Ensure the battery is healthy, the charging contacts are clean, and there are no persistent navigation obstacles. If the issue persists, check the iRobot Home app for any error messages or battery health indicators.
How Often Should I Replace My Roomba’s Filter And Brushes?
The replacement frequency depends on usage and the environment. Generally, filters should be replaced every 2-3 months. Main brushes typically last 6-12 months, while side brushes may need replacing every 3-6 months, especially if they become bent or worn. Regularly inspect them for damage and excessive wear. High-traffic homes or those with pets may require more frequent replacements.
My Roomba Is Making A Strange Grinding Noise. What Could Be The Cause?
A grinding noise often indicates that something is jammed in the brushes or the caster wheel. Turn the Roomba over and carefully inspect the main brushes, side brush, and the front caster wheel for any tangled debris, hair, string, or foreign objects. Remove any obstructions and ensure all moving parts spin freely. If the noise persists after clearing obstructions, it might indicate a worn motor or bearing, potentially requiring professional service.
Can I Use My Roomba On Different Floor Types?
Yes, most iRobot Roombas are designed to work on a variety of floor types, including carpets, hardwood, tile, and laminate. However, performance can vary. Some models may have specific modes or settings for different surfaces. Be mindful of very thick or high-pile carpets, very dark carpets that can interfere with cliff sensors, or extremely slippery, highly polished surfaces. Always check your specific model’s capabilities.
What Should I Do If My Roomba Doesn’t Seem To Be Picking Up Dirt Effectively?
First, perform basic maintenance: ensure the dustbin is empty, the filter is clean (or replaced), and the main brushes and side brush are free of tangled debris and spinning correctly. Check for any blockages in the air path leading to the dustbin. If these steps don’t resolve the issue, the battery might be degrading, or the vacuum motor could be failing, which might require professional attention or a battery replacement.

