

You replace a canister vacuum bag by opening the compartment, removing the full bag, and sealing in a new one.
Today's Exclusive Deals
Limited-time Exclusive Deals. Check current discount on Amazon.
Check Price on Amazon As an Amazon Associate I earn from qualifying purchases.If you want your canister vacuum to keep strong suction and clean air, learning how do you replace a canister vacuum bag the right way matters more than most people think. I’ve done this many times in real homes and seen how a small bag change can make a vacuum feel brand new again. In this guide, I’ll walk you through how do you replace a canister vacuum bag step by step, plus the common mistakes that can waste time, create dust, or even damage the machine.

What a canister vacuum bag does
A canister vacuum bag collects dirt, dust, pet hair, and fine debris before it reaches the motor. It acts like the first line of defense, so the vacuum can keep air moving through the system.
Today's Exclusive Deals
Limited-time Exclusive Deals. Check current discount on Amazon.
Check Price on Amazon As an Amazon Associate I earn from qualifying purchases.When the bag fills up, airflow drops. That is why suction gets weak and the vacuum may feel less effective on carpet, rugs, and hard floors. Knowing how do you replace a canister vacuum bag helps you keep the machine working at its best.
Canister vacuums are popular because they are often lighter to use than upright vacuums. They are also good at trapping messes in a sealed bag, which can be helpful for allergy control and cleaner disposal.
Signs it is time to replace the bag
A full bag does not always look packed to the top before it starts causing trouble. In my experience, many people wait too long because the vacuum still runs. But the suction starts slipping long before the bag looks completely stuffed.
Watch for these signs:
Today's Exclusive Deals
Limited-time Exclusive Deals. Check current discount on Amazon.
Check Price on Amazon As an Amazon Associate I earn from qualifying purchases.- Weak suction, even when the hose and brush are clear
- A strange smell from dust, pet hair, or trapped debris
- The bag indicator light or fill window shows full
- The vacuum sounds louder or strained
- Dust starts blowing back into the room
If you notice any of these, it is probably time to replace the bag. If the machine still feels weak after a fresh bag, the filter, hose, or brush roll may need attention too.
What you need before you start
The job is simple, but it helps to gather a few things first. I always tell people to have everything ready before opening the vacuum, because a loose bag can spill dust fast.
You may need:
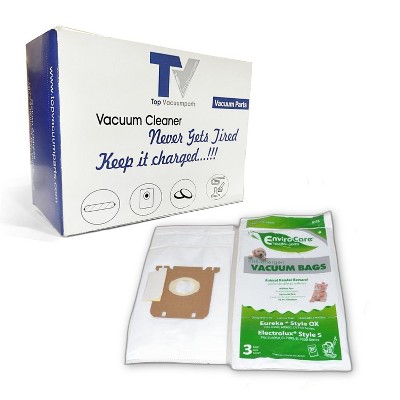
- A replacement bag made for your exact vacuum model
- A trash bin or bag nearby
- A clean, dry cloth
- Gloves if you are sensitive to dust
- A new filter, if your model uses one and it is due for replacement
Using the right bag matters. A bag that does not fit well can leak, reduce suction, or make the compartment hard to close.
How do you replace a canister vacuum bag step by step
Here is the safest and easiest way to do it.
- Turn off and unplug the vacuum
Unplug the machine first. This is simple, but it is the step people skip when they are in a hurry. Safety comes first, and unplugging also keeps the vacuum from turning on while you are opening the bag compartment.
- Open the canister compartment
Find the latch or release button that opens the bag door. Some canister vacuums open from the top, while others have a front or side panel.
Open it slowly. If the bag is very full, avoid shaking the unit, because loose dust can spill out.
- Locate the bag collar or holder
Most canister vacuum bags attach to a cardboard collar, plastic ring, or holder. This is the part that locks the bag into place.
Take a moment to see how it fits before removing it. That makes the next replacement easier, especially if you are doing this for the first time.
- Remove the full bag carefully
Pull the bag free in one smooth motion. Many bags have a closing flap or seal that shuts the opening when removed. If yours has one, close it right away.
This part is where I have seen the biggest messes. A slow, careful pull usually prevents dust clouds and keeps the inside of the vacuum cleaner.
- Dispose of the old bag
Place the full bag directly into the trash. If you are dealing with pet hair, fine dust, or allergy-triggering debris, seal the trash bag before taking it out.
It is a small step, but it helps keep your home cleaner and your hands less dusty.
- Check the compartment for dust or debris
Before inserting the new bag, look inside the chamber. Wipe away loose dust with a dry cloth.
Do not use water unless the manufacturer says it is safe. Moisture inside the vacuum can damage the motor or create clogs later.
- Insert the new bag
Slide the new bag into the holder or collar until it fits firmly in place. Make sure it is aligned the same way the old bag was.
A bag that is not seated properly can leak or prevent the compartment from closing. If the fit feels off, remove it and try again rather than forcing it.
- Close the compartment securely
Close the door or panel until it clicks or locks. This step matters because even a slightly open compartment can hurt suction.
Give it a gentle check. If it does not close fully, the bag may be installed wrong or not centered well.
- Test the vacuum
Plug the machine back in and turn it on. Listen for smooth airflow and check suction at the hose or nozzle.
If it sounds normal and picks up well, the bag replacement was successful. If suction still seems weak, check the filter, hose, wand, or brush for clogs.
Common mistakes to avoid
I have made a few of these myself early on, and they are easy to avoid once you know what to look for. A canister vacuum bag replacement is simple, but small errors can cause bigger problems.
Avoid these mistakes:
- Using the wrong bag size or model
- Letting dust spill into the compartment
- Forcing the bag into place
- Forgetting to close the bag door fully
- Ignoring a dirty filter
- Waiting too long to replace a full bag
The biggest mistake is thinking the vacuum will still “work fine” with an overfilled bag. It may run, but it often works harder and cleans worse.
How often should you replace a canister vacuum bag
There is no single rule for every home. It depends on how often you vacuum, how much dirt your floors collect, and whether you have pets or allergy concerns.
A good general habit is to check the bag often and replace it when it is about two-thirds to three-quarters full. That usually helps keep suction strong and airflow steady.
You may need to change it more often if:
- You have pets that shed a lot
- You live in a dusty area
- You vacuum large spaces often
- You clean up fine powder or construction dust
If the vacuum uses a fill indicator, trust it, but also use your own eyes and suction test. Sometimes the bag can clog before it looks completely full.
Why replacing the bag improves performance
A fresh bag does more than hold dirt. It helps the vacuum breathe.
When the bag gets packed, air cannot move through it as easily. That means the vacuum has to work harder to pull in dirt, and the result is weaker pickup. In real use, a clean bag often restores the “just bought it” feel.
Replacing the bag regularly can also:
- Reduce dust leaks
- Improve odor control
- Help the motor run with less strain
- Support longer vacuum life
- Keep floors cleaner in fewer passes
That is why learning how do you replace a canister vacuum bag is such a useful home care skill. It saves time, protects the machine, and makes cleaning less frustrating.
Tips for better results
A few small habits can make the process smoother and cleaner.
- Keep spare bags on hand so you do not wait too long
- Replace the bag before it is overpacked
- Check the filter at the same time
- Store replacement bags in a dry place
- Match the bag to your exact vacuum model
If you have allergies, wear a simple dust mask while changing the bag. I have found that this tiny step can make a big difference if the old bag is full of fine dust or pet dander.
What to do if suction is still weak after replacing the bag
If you already know how do you replace a canister vacuum bag and the vacuum still underperforms, the bag may not be the only issue. That is common, and it does not always mean the vacuum is failing.
Check these parts next:
- The hose for clogs
- The wand or extension tube for blockages
- The filter for dirt buildup
- The brush head for tangled hair or debris
- The seal around the bag compartment
Sometimes a small clog acts like a cork in a bottle. The vacuum may turn on, but airflow stays weak until the blockage is cleared.
Frequently Asked Questions of How do you replace a canister vacuum bag?
How do you replace a canister vacuum bag without making a mess?
Turn off and unplug the vacuum first, then remove the bag slowly and seal it right away if it has a closing flap. Keep a trash bin nearby and check the compartment for loose dust before inserting the new bag.
Can I reuse a canister vacuum bag?
No, most canister vacuum bags are designed for single use. Reusing one can reduce suction, let dust leak, and increase wear on the vacuum motor.
What happens if I do not replace the bag?
A full bag can block airflow, which lowers suction and makes cleaning less effective. It can also cause odors, dust leaks, and extra strain on the vacuum.
How do I know which bag fits my canister vacuum?
Check the model number on the vacuum body or manual, then match it to the replacement bag size and type. Using the exact fit is important because the wrong bag can leak or prevent the compartment from closing.
Should I replace the filter when I change the bag?
Not every time, but it is a good idea to check the filter when you replace the bag. If the filter looks dirty, damaged, or clogged, changing it can help restore airflow and suction.
Conclusion
Learning how do you replace a canister vacuum bag is one of those small home tasks that pays off fast. It keeps suction strong, helps control dust, and can make your vacuum last longer with less stress on the motor.
The key is simple: use the right bag, change it before it gets too full, and take a quick look at the filter and hose while you are there. If you follow those steps, your vacuum will clean better and feel easier to use.
Try the steps the next time your canister vacuum starts losing power, and keep a spare pack of bags nearby so you are always ready. If this guide helped, explore more home care tips or leave a comment with your vacuum model and questions.

