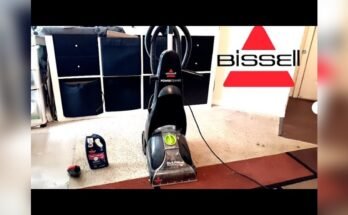
If you want your Bissell carpet cleaner to work like new, you need to go beyond just a surface clean. Disassembling your machine for a deep clean is the secret to removing hidden dirt and buildup that affects its performance.
In this guide, you’ll learn simple steps to take apart your Bissell carpet cleaner safely and give it a thorough clean. This will not only extend its life but also leave your carpets fresher and cleaner than ever. Ready to get started?
Let’s dive in and make your carpet cleaner shine inside and out!

Tools Needed
Disassembling your Bissell carpet cleaner needs the right tools. Having the correct tools makes the process smooth and safe. It helps avoid damage and saves time. Below is a list of tools you will need to start.
Phillips Head Screwdriver
This tool is key for removing screws on the carpet cleaner. Most Bissell models use Phillips screws. A medium-sized screwdriver fits most screws perfectly. It helps to keep screws safe for reassembly.
Flathead Screwdriver
A flathead screwdriver helps in prying open parts gently. It can remove clips or snap fittings without breaking them. Use it carefully to avoid marks or scratches.
Needle-nose Pliers
These pliers reach tight spots and hold small parts. They help to pull wires or connectors safely. Needle-nose pliers give a good grip in narrow areas.
Soft Cloth Or Rag
Use a soft cloth to clean parts during disassembly. It removes dust and dirt without scratching. Keeping parts clean helps in proper inspection.
Container For Small Parts
A small container or bowl keeps screws and clips organized. It prevents losing tiny pieces. Label the container if needed to ease reassembly.
Safety Precautions
Disassembling your Bissell carpet cleaner is important for a deep clean. Safety matters most during this process. Taking the right steps protects you and your machine. Follow these safety precautions to avoid accidents and damage.
Unplug The Carpet Cleaner
Always unplug the machine before starting. This stops any chance of electric shock. Even if the cleaner looks off, unplug it first.
Allow The Machine To Cool
The carpet cleaner parts can get hot during use. Wait at least 30 minutes before touching any part. This prevents burns and injuries.
Wear Protective Gloves
Use gloves to protect your hands from dirt and sharp parts. Gloves keep your skin safe and clean. They also improve your grip on small parts.
Use Proper Tools
Only use the tools recommended in the manual. Wrong tools can break parts or cause injury. Keep tools organized and within reach.
Work In A Clean, Dry Area
Choose a flat surface with good light. Avoid wet or slippery floors. Clean areas reduce the risk of slips and lost parts.
Keep Children And Pets Away
Disassembly involves small parts and tools. Keep children and pets out of the workspace. This avoids accidents and distractions.
Preparing The Cleaner
Preparing your Bissell carpet cleaner is the first step for a thorough deep clean. Proper preparation ensures safety and helps the cleaning process go smoothly. Taking time to ready the machine prevents damage and keeps it working well.
Emptying Water Tanks
Start by removing the clean water tank. Pour out any leftover water. Next, take out the dirty water tank. Empty the dirty water into a sink or drain. Rinse both tanks with clean water to remove residue. Let them dry before reassembling. Clean tanks help avoid mold and smells.
Unplugging And Cooling Down
Always unplug the cleaner before disassembling. This step protects you from electrical shock. Allow the cleaner to cool down completely. A hot machine can cause burns or damage parts. Wait at least 30 minutes after use before opening it up. Cooling also helps loosen dirt inside.

Removing External Parts
Removing the external parts of your Bissell carpet cleaner makes deep cleaning easier. It helps you reach hidden dirt and clean every corner. Take your time to carefully detach each piece. Follow simple steps to avoid damage and ensure smooth reassembly.
Detaching The Hose
Start by unplugging the cleaner. Locate the hose connection near the base. Press the release button or twist the hose gently. Pull the hose away from the machine. Clean it separately to remove trapped debris. Check for cracks or damage before reattaching.
Removing The Brush Roll
Turn the cleaner upside down on a flat surface. Find the brush roll cover and unlock it with a screwdriver. Slide out the brush roll carefully. Remove any hair or fibers wrapped around it. Wash the brush roll with warm water and soap. Let it dry completely before putting it back.
Taking Off The Nozzle
Locate the nozzle at the front of the cleaner. Press the tabs or screws holding it in place. Pull the nozzle away with steady force. Clean the nozzle thoroughly to clear blockages. Inspect the nozzle for cracks or worn parts. Replace it if necessary for better cleaning.
Accessing Internal Components
Accessing the internal components of your Bissell carpet cleaner is key for a deep clean. It lets you remove dirt and debris stuck inside. This step helps keep your machine working well for a long time.
Take your time to open the cleaner carefully. Knowing how to reach the motor and pump helps you clean them properly. This can improve the machine’s performance and lifespan.
Unscrewing The Housing
Start by unplugging the carpet cleaner for safety. Find the screws on the outer casing. Use a screwdriver to remove all screws holding the housing.
Keep the screws in a safe place. Gently lift the housing off to avoid breaking clips or wires inside. This exposes the inner parts of the cleaner for inspection and cleaning.
Separating The Motor And Pump
Once the housing is off, locate the motor and pump assembly. These parts are usually connected by screws or clips. Remove the fasteners carefully to separate them.
Handle the motor and pump with care. Clean any dirt or buildup on these parts using a soft cloth. This helps the cleaner run smoothly and reduces wear over time.
Cleaning Each Component
Cleaning each part of your Bissell carpet cleaner is key for a deep clean. Dirt and grime hide in different spots. Taking time to clean every component helps your machine work better. It also lasts longer and cleans carpets more effectively.
Washing Water Tanks
Start by emptying the water tanks. Rinse them with warm water to remove leftover detergent. Use a soft cloth or sponge to wipe inside. Check for any buildup or residue. Let the tanks air dry completely before reassembling. Clean tanks keep your cleaner fresh and avoid bad smells.
Scrubbing Brushes And Nozzle
Remove the brushes and nozzle carefully. Look for hair, threads, or dirt stuck around the bristles. Use a small brush or your fingers to pull debris out. Wash them with warm, soapy water. Rinse well and dry fully. Clean brushes help your carpet get the best scrub.
Cleaning The Hose
Detach the hose from the machine. Run warm water through it to clear blockages. Gently shake or tap to loosen trapped dirt. Use a long brush or cloth if needed to reach inside. Make sure the hose is dry before putting it back. A clear hose keeps water flowing smoothly.
Maintaining The Motor And Pump
Unplug your cleaner before handling the motor and pump. Use a dry cloth to wipe dust off the motor area. Avoid water contact with electrical parts. Check the pump for any clogs or leaks. Clean around the pump carefully to keep it working well. Regular care prevents breakdowns and keeps power steady.
Reassembling The Cleaner
Reassembling your Bissell carpet cleaner after a deep clean is important. It helps the machine work well again. Taking your time during this process ensures all parts fit correctly. This prevents leaks and keeps the cleaner running smoothly.
Securing Internal Parts
Start by placing all internal parts back in their spots. Check that each piece fits tightly. Loose parts can cause the cleaner to malfunction. Use screws or clips to hold parts firmly. Make sure wires and hoses are connected properly. This helps avoid damage and ensures good performance.
Reattaching External Components
Next, attach the external parts like the tank and brushes. Align them carefully with the slots and hooks. Press or snap these parts into place. Tighten any external screws to keep parts secure. Double-check for any gaps or loose pieces. This step keeps dirt and water inside the machine during use.
Testing After Reassembly
Testing your Bissell carpet cleaner after reassembly is important. It helps to ensure everything works well. This step checks for leaks, proper suction, and water flow. You can fix small problems before a full cleaning session. Follow these steps to test your machine carefully.
Filling Water Tanks
Start by filling the clean water tank with fresh water. Use warm water for better cleaning results. Do not overfill the tank; follow the fill line. Add the right amount of cleaning solution if needed. Secure the tank back on the machine firmly. Check that the tank fits without gaps or leaks.
Running A Test Clean
Turn on the carpet cleaner and run it on a small carpet area. Move the machine slowly to check water spray and suction. Watch for leaks around the tanks and hoses. Listen for unusual sounds that may mean a loose part. Confirm the dirty water tank collects used water properly. Stop and adjust if you see any issues before full use.
Tips For Regular Maintenance
Keeping your Bissell carpet cleaner in good shape helps it last longer. Regular maintenance stops small problems from becoming big. A clean machine works better and cleans deeper every time.
Follow these simple tips to keep your carpet cleaner running smoothly. These easy steps save time and money on repairs.
Clean The Brushes And Rollers
Remove hair and debris from the brushes after each use. Use scissors to cut tangled threads carefully. Clean rollers keep the machine moving freely and improve cleaning power.
Empty And Rinse The Dirty Water Tank
Empty the dirty water tank right after cleaning. Rinse it with warm water to remove dirt and soap residue. A clean tank prevents odors and keeps the machine fresh.
Check And Clean The Filters
Look at the filters regularly for dirt build-up. Rinse or replace filters as the manual suggests. Clean filters help the machine run efficiently and extend its life.
Wipe Down The Exterior
Use a damp cloth to wipe the outside of the cleaner. Remove dust and spills to keep it looking new. A clean exterior prevents dust from entering the machine.
Store Properly After Use
Store your carpet cleaner in a dry place. Avoid areas with extreme heat or cold. Proper storage stops damage and keeps parts working well.

Frequently Asked Questions
How Do I Safely Disassemble My Bissell Carpet Cleaner?
To safely disassemble, unplug the machine first. Remove the clean and dirty water tanks. Detach the brush roll and nozzle carefully. Follow your model’s manual for specific steps to avoid damage or injury during disassembly.
What Tools Are Needed To Disassemble A Bissell Carpet Cleaner?
Most models require no special tools. A screwdriver may be needed to remove screws or panels. Always check your model’s manual for any specific tools recommended for disassembly and deep cleaning.
How Often Should I Disassemble My Bissell Carpet Cleaner?
Disassemble your cleaner every few months or after heavy use. Regular disassembly prevents buildup and improves cleaning efficiency. This routine also extends your machine’s lifespan and ensures optimal performance.
Can Disassembling My Bissell Void The Warranty?
Disassembling by yourself may void the warranty if you damage parts. Always consult the warranty terms before disassembling. For complex repairs, consider professional service to keep your warranty intact.
Conclusion
Disassembling your Bissell carpet cleaner helps keep it working well. You remove dirt and grime from hard-to-reach parts. This deep clean can make your carpet cleaner last longer. Regular care also improves cleaning performance every time. Take your time and follow each step carefully.
Clean parts dry before putting them back together. Enjoy fresher carpets and a cleaner home. Simple maintenance makes a big difference in the long run. Try this routine to keep your cleaner in top shape.