

Keeping your vacuum cleaner in top shape is not just about emptying the bag or canister. One key part that often gets ignored is the vacuum hose. Over time, dirt, dust, and even small objects can get stuck inside. This blocks suction, makes cleaning less effective, and can even damage your machine. If you’ve ever noticed a bad smell coming from your vacuum or seen it lose power, a dirty hose might be the reason. Learning how to clean a vacuum hose is easy and helps your vacuum last longer, work better, and keep your home healthier. In this guide, you’ll learn everything you need to know to clean your vacuum hose safely and effectively.
Why Cleaning Your Vacuum Hose Matters
The vacuum hose is the main path for dirt and debris from your floor to the vacuum’s dustbin or bag. If this path is blocked or dirty, your vacuum can’t do its job well. Some common problems caused by a dirty hose include:
- Reduced suction power: Even a small blockage can lower the vacuum’s performance.
- Bad odors: Moisture and dirt can make the hose smell, spreading odors around your home.
- Damage to the vacuum: If the hose is clogged, the motor has to work harder and may overheat.
- Allergy issues: Dust and mold can collect inside, making allergies worse.
Cleaning the hose regularly prevents these problems. Most people should clean their vacuum hose every 1–3 months, depending on how much they use their vacuum.
What You Need Before You Start
Before you clean your vacuum hose, you’ll need a few simple items:
- A long, flexible brush (like a bottle brush)
- Dish soap or a gentle cleaner
- A bucket or bathtub
- Warm water
- A broom handle or straight stick (optional, for pushing clogs)
- Towels for drying
- A screwdriver (if your hose is attached with screws)
- Vinegar or baking soda (optional, for odors)
- Protective gloves (if you have sensitive skin)
These are common household items. If you don’t have a long brush, a straightened wire hanger with a cloth on the end can work in a pinch.
Removing The Hose From Your Vacuum
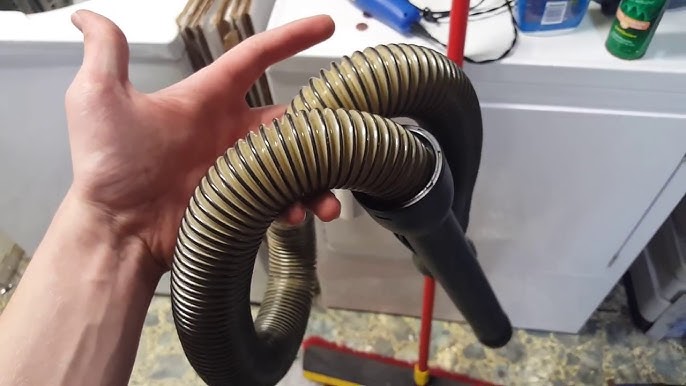
The first step is to remove the hose from your vacuum. Most hoses twist off or have clips. Some models may need a screwdriver to loosen screws. Always check your vacuum’s manual to avoid breaking anything.
- Turn off and unplug your vacuum for safety.
- Look for clips, screws, or twist mechanisms at each end of the hose.
- Gently remove the hose. Don’t pull too hard—some parts are fragile.
- Take note of how the hose attaches so you can put it back easily.
Some vacuums have hoses that are not meant to be removed. In this case, you can clean what you can reach, but deep cleaning may not be possible.
Step-by-step: Cleaning The Vacuum Hose
Once your hose is off, you can start cleaning. Here’s a detailed process for a deep clean:
1. Check For Clogs Or Large Debris
Hold the hose up to the light. Look through it. If you see a blockage, use a broom handle or a straight stick to gently push it out. Never use sharp objects, as they can puncture or tear the hose.
2. Rinse Out Loose Dirt
Take the hose outside or to a large sink. Run warm water through it to remove loose dust and dirt. Move the hose around so water flows through all parts.
3. Scrub The Inside
Fill a bucket or bathtub with warm, soapy water. Dish soap works well. Submerge the hose and use a long brush to scrub inside. Focus on any spots with visible dirt or mold.
If you notice bad smells, pour a little baking soda or vinegar into the hose, then scrub. These help remove odors and break down grime.
4. Rinse Thoroughly
After scrubbing, rinse the hose several times with clean water. Make sure all soap, dirt, and cleaning agents are gone. Leftover soap can attract more dirt.
5. Dry The Hose Completely
Shake out as much water as possible. Hang the hose over a shower rod, clothesline, or towel rack. Make sure both ends are open for air flow. Let it dry for at least 12–24 hours, or until you’re sure it’s completely dry.
A wet hose can cause mold or mildew in your vacuum.
Pro tip: To speed up drying, run a hair dryer on a cool setting through the hose, or push a small towel through with a stick.

How Often Should You Clean Your Vacuum Hose?
Most people should clean their vacuum hose every 2–3 months. If you vacuum pet hair, clean up after small children, or notice a loss of suction, you may need to clean it more often.
Here’s a quick comparison of cleaning frequency based on household type:
| Household Type | Recommended Cleaning Interval | Common Triggers |
|---|---|---|
| Pet Owners | Every 1–2 months | Hair, odors |
| Large Families | Every 1–2 months | Frequent use |
| Single or Couple | Every 2–3 months | Dust buildup |
| Allergy Sufferers | Monthly | Pollen, dust |
Tips For Stubborn Blockages And Odors
Sometimes, simple cleaning is not enough. Here’s what to do with tougher problems:
- For hard clogs: If you can’t push out a blockage, try soaking the hose in hot, soapy water for 30 minutes. This can loosen the debris.
- For bad odors: Mix equal parts of water and vinegar. Pour it through the hose, let it sit for 10 minutes, then rinse. Baking soda can also help—sprinkle some inside, shake it around, then rinse.
- For sticky gunk: Use a bottle brush dipped in rubbing alcohol to scrub sticky spots, then rinse well.
Remember, never use harsh chemicals or bleach. These can damage the hose material and make it brittle.
How To Prevent Your Hose From Getting Dirty
Prevention is easier than frequent deep cleaning. Here are some simple ways to keep your hose cleaner:
- Check the floor for large debris before vacuuming (coins, toys, paper).
- Empty the dustbin or bag regularly to avoid backups into the hose.
- Use filters and keep them clean—clogged filters force dust into the hose.
- Store your vacuum in a dry place to prevent moisture and mold.
- Wipe the outside of the hose after every use.
A little care goes a long way. Most vacuum hose problems can be avoided with these habits.
Common Mistakes When Cleaning A Vacuum Hose
Many people make simple mistakes that can damage their vacuum hose or make cleaning less effective. Avoid these errors:
- Not drying the hose fully: A damp hose can grow mold inside your vacuum.
- Using sharp tools: These can cut or puncture the hose, causing leaks.
- Forgetting to check both ends: Sometimes, debris is stuck right at the attachment point.
- Ignoring bad smells: Odors can mean bacteria or mold is growing.
- Skipping regular cleaning: Waiting too long makes blockages much harder to remove.
If you’re not sure your hose is clean, run a white cloth through it. If it comes out dirty, clean again.
Vacuum Hose Materials: Differences In Cleaning
Not all vacuum hoses are the same. Some are made from plastic, others from reinforced rubber, and some have metal coils. The cleaning method is mostly the same, but there are small differences.
| Hose Material | Cleaning Tips | Durability |
|---|---|---|
| Plastic | Use warm water, mild soap; avoid hot water | Moderate |
| Rubber | Use gentle brush, avoid harsh chemicals | High |
| Metal Reinforced | Dry thoroughly to avoid rust | Very High |
If you’re not sure about your hose type, check your vacuum’s manual or look for markings on the hose itself.
How A Clean Hose Improves Vacuum Performance
You might be surprised how much difference a clean hose makes. Here are some benefits you’ll notice:
- Stronger suction: With no blockages, your vacuum works at full power.
- Cleaner air: Less dust and bacteria inside the hose means healthier air at home.
- Longer vacuum life: The motor doesn’t have to work as hard, so it lasts longer.
- Fewer repairs: Clogs are a common cause of vacuum breakdowns.
A clean hose can even help your vacuum pick up more dirt in just one pass. According to a study by the American Cleaning Institute, vacuums with clean hoses pick up up to 30% more debris than those with dirty hoses.
Choosing A Replacement Hose
Sometimes, a hose is too damaged or worn to clean. If you see cracks, holes, or heavy wear, it’s time to replace it. When buying a new hose, check these factors:
- Compatibility: Make sure the hose fits your vacuum model.
- Length: A longer hose is useful for stairs or cars, but can reduce suction if too long.
- Material: Choose a durable material if you use your vacuum often.
- Price: Higher price doesn’t always mean better quality—look for reviews.
Here’s a quick comparison of average vacuum hose prices (2024 data):
| Hose Type | Average Price (USD) | Recommended For |
|---|---|---|
| Standard Plastic | $15–$30 | Light use |
| Flexible Rubber | $25–$50 | Frequent cleaning |
| Metal Reinforced | $40–$70 | Heavy-duty tasks |
If you need help finding the right hose, sites like the Consumer Reports buying guide can help.
Frequently Asked Questions
How Do I Know If My Vacuum Hose Is Clogged?
If your vacuum has weak suction, makes strange noises, or leaves dirt behind, your hose may be clogged. Remove the hose and look through it. If you can’t see light at the other end, there’s probably a blockage.
Can I Use Bleach Or Strong Chemicals To Clean The Hose?
It’s best not to use bleach or harsh chemicals. These can weaken the hose and cause cracks. Stick to mild soap, vinegar, or baking soda for safe cleaning.
What If My Hose Is Not Removable?
If the hose does not come off, clean what you can reach with a long brush or flexible cleaning rod. Run warm soapy water through if possible, but be careful not to let water get into the vacuum’s main body.
How Long Does It Take To Dry A Vacuum Hose?
A hose usually takes 12–24 hours to dry completely. Drying times vary based on thickness and room temperature. Make sure both ends are open and air can flow through.
Is It Worth Replacing An Old Vacuum Hose?
Yes, if your hose is cracked, leaking, or too clogged to clean, replacing it can restore your vacuum’s performance. Make sure you buy the right size and type for your model.
Cleaning your vacuum hose is a simple but important step to keep your vacuum working its best. With regular care, you’ll enjoy a cleaner home, healthier air, and a vacuum that lasts for years.

