

So, you're dreaming of that backyard oasis and wondering if laying your above-ground pool directly on sand is the way to go. It's a question a lot of folks ask, and the truth is, it's not a straightforward "yes" or "no." It really depends on how you prepare that sand.
Think of it like building a house, you wouldn't just pour concrete on uneven dirt, right? You need a solid, level foundation. Your pool is no different, and sand can be a good base, but it needs some serious attention.
Manufacturer specifications generally require a level, stable base for any above-ground pool to ensure structural integrity.
Quick Answer
Yes, you can put an above-ground pool on sand. However, sand requires significant preparation to create a stable, level base. You must excavate, spread coarse sand, and compact it thoroughly.
Simply dumping sand is not sufficient and leads to problems.
Why Sand Isn't Always a Simple "Yes"
Putting an above-ground pool on a sand base sounds appealing because sand is often readily available and can be relatively inexpensive. It feels like a natural, soft material. But here's the catch: sand, on its own, is unstable.
It shifts easily when disturbed, and if not properly managed, it won't provide the consistent support your pool needs.
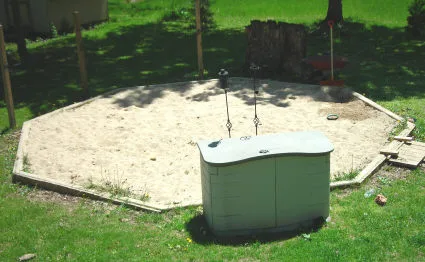
Image source: Bing (Web (fair-use with source credit))
The primary goal is a surface that remains perfectly level under the immense weight of the water. If the sand settles unevenly, your pool walls can bow, and the frame can be compromised. This is why simply piling sand and placing the pool on top is a recipe for disaster.
What Kind of Sand?
Not all sand is created equal when it comes to pool bases. You can't just grab the stuff from the local playground or a beach. What you need is a specific type of sand that compacts well and offers good stability.
- Coarse Washed Masonry Sand: This is a top choice. It's made up of larger, angular grains that interlock when compacted, creating a firm surface. The "washed" part means it’s free from fine dust and clay, which can cause drainage issues.
- Paver Sand: Similar to masonry sand, this is designed for creating stable bases under pavers. It's also coarse and compacts well.
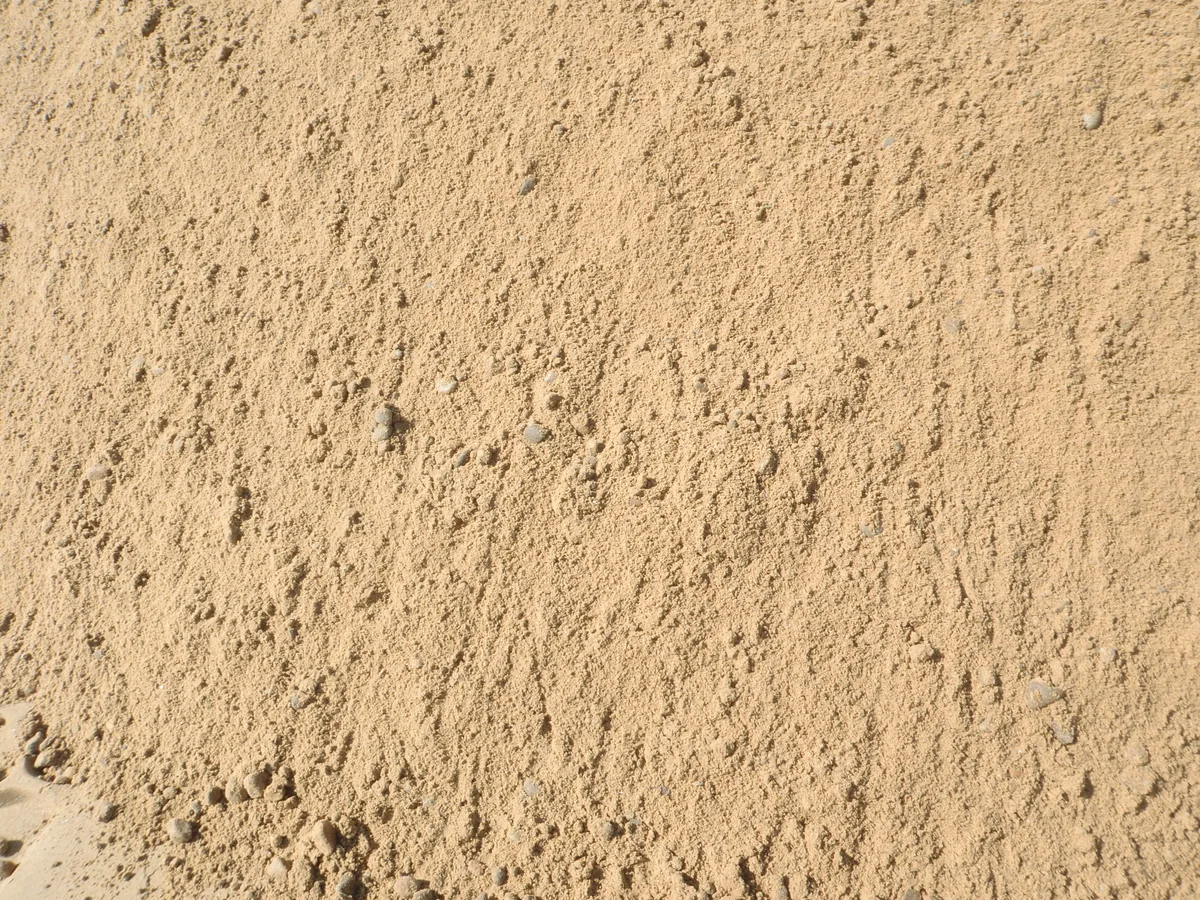
Image source: Web (Bing) / ridgeviewgardencentre.com (Web image (fair-use with source credit))
Fine play sand or construction sand with a lot of clay content is generally unsuitable. These types can hold too much moisture, become muddy, and won't firm up properly. Aggregates typically recommend using coarse, angular sand for a stable foundation.
The Crucial Role of Compaction
This is, without a doubt, the most critical step if you're using sand. Compaction is the process of pressing the sand grains together to eliminate air pockets and create a dense, stable layer. Think of it as turning loose sand into something more like a firm, packed dirt path.
Without proper compaction, any slight disturbance, like rain, kids playing around the pool, or even the initial filling of the pool, can cause the sand to shift or settle unevenly. This is a major cause of pool wall collapse and liner damage. Aggregate reviews consistently highlight inadequate compaction as the leading failure point for DIY sand bases.
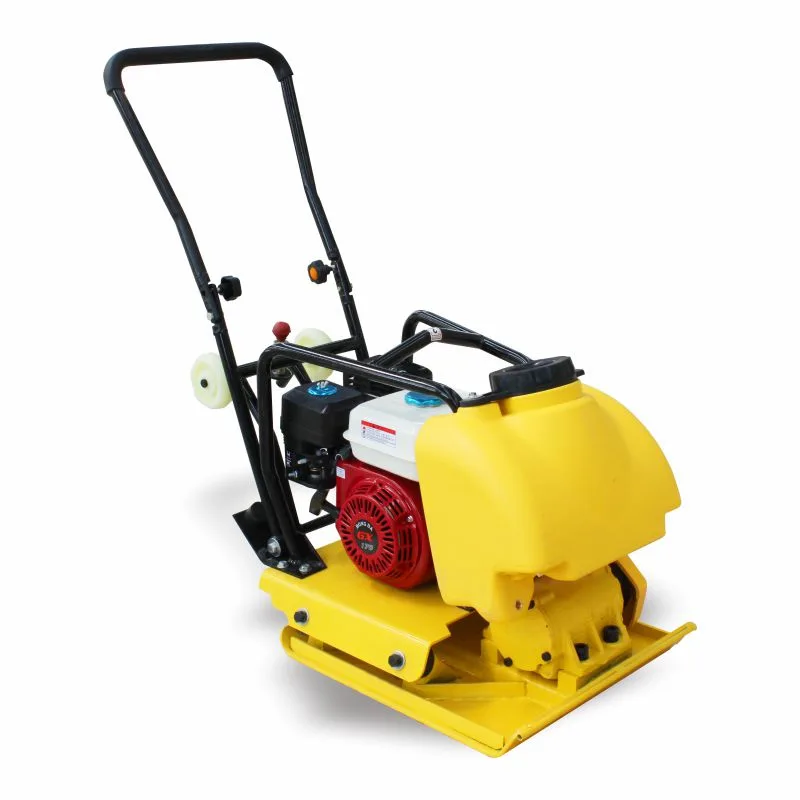
Image source: Web (Bing) / idealmachinery.en.made-in-china.com (Web image (fair-use with source credit))
Levelness is Non-Negotiable
Even the most perfectly compacted sand is useless if it's not perfectly level. An above-ground pool is designed to stand upright and distribute weight evenly across its entire footprint. A slight slope, even just an inch or two over the diameter of the pool, can create significant stress on one side.
Manufacturer specifications often state that the ground must be level within a very small tolerance, sometimes as little as 1 inch over 10 feet. If your sand base has even a minor tilt, water pressure will push harder on the lower side, potentially causing the pool to buckle or leak. Achieving and maintaining this levelness requires careful measurement and a precise application of your base material.
How to Properly Prepare a Sand Base for Your Pool
If you've decided sand is the right material for your above-ground pool base, you need to follow a specific process. This isn't a quick job; it takes time, patience, and the right tools to get it done correctly. Skipping steps here is where most people run into trouble down the line.
Step 1: Location & Excavation
First, choose your spot carefully. It needs to be a relatively flat area, clear of debris, and away from any underground utilities. You'll then need to excavate the area where the pool will sit.
- Mark the Area: Measure and mark the exact footprint of your pool. Add a foot or two of extra space around the perimeter for easier work.
- Remove Sod and Topsoil: Dig down about 4-6 inches to remove all grass, roots, and organic material. This ensures you're working with solid ground beneath.
- Initial Leveling: Use stakes and a long, flat level to get the excavated area as close to level as possible before you add any sand. This initial step saves a lot of work later.
Step 2: Spreading the Right Sand
Once your area is excavated and roughly leveled, it's time to add the sand. Remember, we're talking about coarse, washed masonry or paver sand here, not fine play sand.
- Material: Purchase a sufficient quantity of coarse, washed sand. Calculate the volume needed based on your pool's diameter and the desired depth (typically 2-4 inches after compaction).
- Even Distribution: Spread the sand evenly across the entire excavated area. Use a rake to distribute it as uniformly as possible.
Step 3: The Essential Compaction Process
This is the make-or-break step. You need to compact the sand until it's firm and stable.
- Tool Choice: The most effective tool is a plate compactor, which you can rent from a local tool rental shop. For smaller pools or if a compactor isn't feasible, a hand tamper will work, but it requires significant physical effort.
- Moisture Aid: Lightly mist the sand with water as you compact it. This helps the sand particles settle and bind together. Don't soak it; just a light dampening is needed.
- Systematic Compaction: Work in small, overlapping passes with the compactor or tamper, ensuring you cover the entire area multiple times. The goal is to make the surface resistant to footprints.
Step 4: Final Level Check & Protection
After thorough compaction, you must re-check for levelness. It's common for low spots to appear, requiring a bit more sand and another round of compaction in those areas.
- Precision Leveling: Use your long level and stakes to confirm the entire surface is perfectly flat. Adjust as needed with small amounts of sand, then re-compact.
- Ground Cloth: As an extra layer of protection for your pool liner, place a heavy-duty pool ground cloth or thick tarp over the compacted sand before setting up the pool structure. This guards against any stray sharp objects that might have been missed.
Mistakes to Absolutely Avoid When Using Sand
Setting up an above-ground pool on sand can seem like a straightforward DIY project, but there are common pitfalls that can lead to serious problems if you're not careful. These mistakes often stem from underestimating the importance of preparation and the unique properties of sand as a base material.
Common Sand Installation Errors
- Skipping Compaction: This is the biggest mistake. Many people just spread sand and assume it’s stable enough. Without proper compaction, the sand will settle unevenly under the weight of the water, leading to structural issues.
- Using the Wrong Sand: As mentioned, fine play sand or sand with a lot of clay will not compact well and can hold excessive moisture, creating a muddy, unstable base.
- Not Ensuring Levelness: Failing to get the base perfectly level is a critical error. Even a slight tilt can put immense stress on the pool’s frame and liner, potentially causing leaks or complete failure.
- Insufficient Excavation: Not digging deep enough to remove sod and organic material means you're building on unstable ground that can decompose and shift over time.
- Ignoring Drainage: Placing a pool in a low spot where water collects can lead to water pooling around the base, causing rust on metal components and making the sand base excessively wet and unstable.
Consequences of Improper Preparation
The consequences of these mistakes can range from minor inconvenconveniences to costly repairs or even the need to replace the entire pool.
- Pool Walls Bowing: Uneven pressure from water due to an unlevel base causes the walls to bend inward or outward, stressing seams and supports.
- Frame Damage: The pool's metal frame can bend, crack, or rust prematurely if it’s constantly bearing uneven loads.
- Liner Tears: Stress points on an uneven base can lead to the liner stretching or tearing, causing leaks and requiring expensive replacement.
- Pool Collapse: In severe cases, a poorly prepared base can lead to a catastrophic pool collapse, posing a safety hazard and resulting in total loss of the pool and water.
Tools and Materials for a Proper Sand Base
To successfully prepare a sand base for your above-ground pool, you'll need a few key tools and materials. Having these on hand before you start will make the process much smoother and ensure you achieve the necessary stability and levelness.
Essential Tools
- Shovel and Spade: For excavating sod and topsoil.
- Rake: A sturdy landscaping rake is crucial for spreading sand evenly.
- Measuring Tape and Stakes: To accurately mark out the pool area and check for levelness.
- Long Level: A 4-foot or 6-foot level is ideal for verifying the flatness of your base.
- Plate Compactor (Recommended) or Hand Tamper: The most critical tool for compacting the sand. Renting a plate compactor is highly recommended for efficient and effective results.
- Garden Hose with Sprayer Nozzle: For lightly misting the sand during compaction.
Key Materials
- Coarse Washed Masonry Sand or Paver Sand: The specific type of sand discussed earlier. Ensure it's free from fine particles and clay.
- Heavy-Duty Pool Ground Cloth or Tarp: To protect the pool liner from any residual sharp objects in the sand.
Step-by-Step: Building Your Sand Base
Here’s a breakdown of the workflow to create a stable, level sand base for your above-ground pool. Follow these steps diligently to avoid common mistakes and ensure longevity.
| Step | Action | Key Considerations |
|---|---|---|
| 1. Site Preparation | Mark pool area, excavate 4-6 inches, remove all sod/organic material. | Ensure area is clear of rocks, roots, and debris. |
| 2. Initial Leveling | Use stakes and a long level to make the excavated area as flat as possible before adding sand. | Aim for a tolerance of less than 1 inch of slope across the entire area. |
| 3. Sand Application | Spread 2-4 inches of coarse, washed sand evenly across the leveled area. | Use a rake for uniform distribution. |
| 4. Compaction | Use a plate compactor or hand tamper to press the sand firmly. Mist lightly with water as you go. | Make multiple passes. Goal is a hard, un-footprintable surface. |
| 5. Final Level & Check | Re-check the entire surface with your long level. Add small amounts of sand to low spots and re-compact. | Precision is paramount; any unevenness will stress the pool. |
| 6. Liner Protection | Lay down a heavy-duty ground cloth or tarp over the compacted sand. | This adds an extra barrier against punctures. |
| 7. Pool Setup | Proceed with assembling your above-ground pool according to the manufacturer’s instructions. | Ensure the pool is centered on the prepared base. |
Safety & Potential Risks with Sand Bases
While a properly prepared sand base can be functional, it's essential to acknowledge the inherent risks, especially compared to more robust materials like concrete. The primary concern revolves around stability and the potential for failure if preparation isn't perfect.
What Could Go Wrong?
- Settling: Even compacted sand can settle over time, especially with repeated use and moisture. This gradual settling can reintroduce unevenness, putting stress on the pool structure.
- Erosion/Washout: Heavy rainfall or poor drainage can wash away sand particles, particularly around the edges of the base, compromising its integrity. This is more common if the sand wasn't compacted well or if there's no proper edging.
- Sharp Object Intrusion: While a ground cloth helps, extremely sharp objects or debris can still potentially work their way up through compacted sand and puncture a liner over time.
- Foundation Failure: The most severe risk is foundation failure, leading to a pool collapse. This is a real safety hazard, especially if children are around. This is why manufacturer specifications, often found on sites like the Pool & Hot Tub Alliance, emphasize a level and stable foundation that can support the static and dynamic loads of the pool.
When to Re-evaluate Your Base
If you notice any signs of unevenness, shifting, or erosion around your sand base, it's crucial to address it immediately. This might involve re-leveling, adding more compacted sand, or even considering a more permanent base material for long-term safety and peace of mind. For any installation, consulting the specific installation manual provided by your pool manufacturer is the most critical step.
Frequently Asked Questions About Sand Pool Bases
### Can I just put sand directly on my lawn for an above ground pool?
No, you cannot just put sand directly on your lawn. You must excavate the grass and topsoil, level the ground, and then add and compact a specific type of coarse sand to create a stable base.
### How much sand do I need for an above ground pool?
The amount of sand needed depends on the diameter of your pool and the desired depth of the sand base, which is typically 2-4 inches after compaction. You'll need to calculate the volume based on your pool's dimensions and the sand's loose-to-compacted ratio.
### What is the best type of sand for an above ground pool base?
The best type of sand is coarse, washed masonry sand or paver sand. These have larger, angular grains that interlock and compact well, providing stability. Avoid fine play sand or sand with a lot of clay content.
### How long does it take to prepare a sand base for a pool?
Preparing a sand base can take anywhere from a few hours to a full day, depending on the size of the pool, your site conditions, and the tools you use. Compaction is the most time-consuming part.
### Can I use gravel instead of sand for my pool base?
Yes, compacted gravel is often a preferred alternative to sand. It offers excellent drainage and stability, though it requires careful smoothing to avoid damaging the pool liner with sharp edges.

