

When you're dreaming of cool dips and backyard fun, the last thing you want to think about is the ground beneath your above-ground pool. But how to level ground for an above ground pool is more than just a preparatory step; it’s the foundation for your entire pool experience. Getting this right means a stable, safe, and long-lasting pool.
An improperly leveled pool can lead to serious structural issues, from collapsed walls to uneven water distribution. Manufacturer specifications often note that an uneven base can void warranties and compromise safety. This guide will walk you through the essential steps to ensure your pool sits perfectly flat.
Image source: Bing (Web (fair-use with source credit))
Quick Answer
Leveling ground for an above-ground pool involves selecting a flat spot, marking the pool's perimeter, and excavating to achieve a consistent plane. You’ll likely need to remove sod, dig down slightly, and add a layer of sand or crushed stone, which is then tamped firm. Proper leveling prevents structural damage and ensures safe water distribution.
Follow manufacturer guidelines for maximum slope tolerance, typically around 1 inch over 10 feet.
Why Level Ground is Non-Negotiable for Your Above-Ground Pool
Your above-ground pool is a significant investment, and its longevity hinges on a solid, stable foundation. Imagine a cake that’s tilted on its serving plate; it’s unstable, messy, and prone to disaster. A pool is much the same.
When the ground isn't perfectly level, the water’s weight shifts unevenly. This puts immense pressure on certain parts of the pool wall while leaving others with less support.
This uneven pressure can cause the pool structure to deform over time, leading to a range of problems. It might start subtly, like a water level that’s always lower on one side, but it can escalate quickly. Ultimately, a compromised foundation can result in the pool wall buckling or even collapsing, which is not only a costly repair but a significant safety hazard.
Image source: Bing (Web (fair-use with source credit))
The Hidden Dangers of a Sloped Backyard
A backyard that looks only slightly sloped might not seem like a big deal for a pool. However, most manufacturers specify that the ground should not have more than a 1-inch deviation over a 10-foot span. For larger pools, this tolerance can be even less.
If your ground slopes more than this, the consequences can be severe. The side of the pool facing downhill will bear the brunt of the water's weight. This can stretch and damage the liner, bend or break the metal frame supports, and ultimately lead to a catastrophic failure.
Uneven ground also affects water circulation, potentially creating areas where algae can thrive and making chemical balancing more difficult.
Getting It Right: What "Level" Really Means for Your Pool
"Level" in the context of an above-ground pool isn't just about making it look good; it's a critical engineering requirement. We're talking about achieving a surface that is as close to a perfect horizontal plane as humanly possible. The National Association of Home Builders (NAHB) has standards for site preparation that, while not pool-specific, highlight the importance of a true level.
For pools, this means that when you place a long spirit level across the diameter of the prepared site, the bubble should sit perfectly centered.
This precision is essential because the pool liner and frame are designed to distribute weight evenly when the water is still. Any tilt forces the structure to work against itself. Think of it like building a tower on an unstable base; it’s bound to wobble and eventually fall.
The goal is to create a solid, unwavering platform that allows your pool to function as intended for years to come.
Understanding the Ideal Pool Site
The ideal spot for your above-ground pool is not just about being flat. It should also be a location that allows for easy access, has good drainage away from the pool, and is free from overhead hazards like tree branches or power lines. Crucially, it needs to be a relatively open area that can accommodate the pool's full diameter, plus several extra feet around it for installation and safe use.
When you're assessing potential spots, look for areas that appear naturally flat or where leveling would be most straightforward. Avoid low-lying areas that tend to collect water after rain, as this can compromise your leveling efforts and lead to ongoing drainage issues around the pool.
Your Step-by-Step Guide to Leveling the Pool Area
This is where the real work begins. Tackling the leveling yourself is absolutely doable with the right approach and a bit of elbow grease. It’s a process that requires careful measurement and consistent effort, but the payoff is a safe and stable pool.
We’ll break down each phase so you know exactly what to expect and how to achieve that perfect, flat surface.
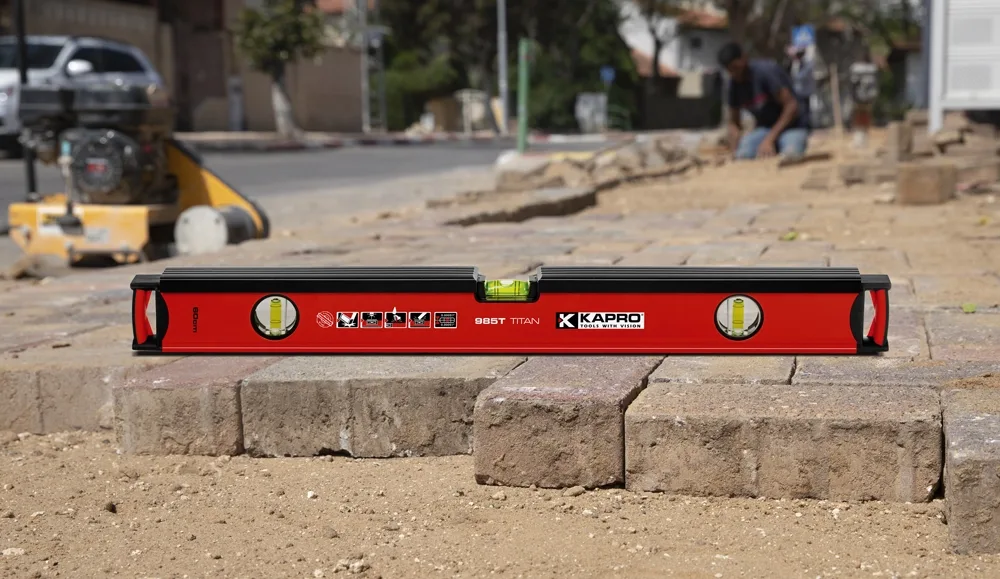
Image source: Bing (Web (fair-use with source credit))
1. Choosing the Perfect Spot
Before you grab a shovel, scout your yard. Look for a spot that’s:
- Naturally Flat: The flatter the ground to start, the less work you'll have.
- Well-Drained: Avoid low spots where water collects. Good drainage prevents the ground from becoming saturated, which can undermine your leveling efforts.
- Clear of Obstructions: Ensure no tree roots, rocks, or underground utilities are in the way. Check for overhead branches that could drop debris into the pool.
- Accessible: You'll need space to move materials and equipment. Plus, easy access makes setup and maintenance much simpler.
- Away from Structures: Maintain a safe distance from your house, fences, or septic systems as recommended by the pool manufacturer.
2. Measuring and Marking Your Pool's Footprint
Once you’ve picked your spot, it’s time to outline where the pool will sit.
- Measure the Pool Diameter: Check your pool's manual for the exact dimensions. Remember to add the space needed for the frame and a safety perimeter around the pool. Many manufacturers recommend an additional 3-5 feet of clearance.
- Mark the Perimeter: Use stakes and string to create a perfect circle or square, depending on your pool shape. Ensure the string is taut and the corners are square for rectangular pools. For circular pools, you can use a central stake and a measuring tape to draw the circle on the ground.
3. Clearing the Area: Sod, Roots, and Rocks
This step is crucial for preventing future problems.
- Remove Sod: If the area is grass, you'll need to remove the sod. You can do this with a spade or a sod cutter. Try to cut it in manageable strips.
- Excavate Roots and Rocks: Dig out any visible roots, large stones, or debris. Even small objects left in the ground can potentially puncture the pool liner once it's filled with water. This is a good time to inspect the soil for any drainage issues.
4. The Excavation Process: Digging Down to Flat
This is where you create the level surface.
- Determine the Lowest Point: Place a long spirit level or a laser level on the ground and find the lowest spot within your marked area.
- Mark the Level Line: Using your level and a spray can of marking paint or stakes, mark a line around the perimeter at the height of your chosen lowest point.
- Dig Down: Carefully excavate the higher areas within your marked perimeter down to this level line. It’s better to remove too much soil than too little. You can always add material back, but over-excavating is difficult to fix. Work slowly and check your level frequently.
5. Bringing in the Leveling Material (Sand or Stone)
After excavation, you'll have a depression that's roughly level. Now, you'll fill and fine-tune.
- Choose Your Material: Washed builder's sand is a common choice for its fine texture and leveling capabilities. Some prefer a layer of crushed stone (like paver base) for better drainage and stability, especially in very wet climates. Check your pool manufacturer's recommendations.
- Spread Evenly: Add your chosen material in layers, spreading it as evenly as possible. Don't just dump it all in one spot.
- Use a Straight Edge: A long piece of lumber (like a 2×4 or 2×6) can be used as a screed board. Rest it on the edges of your excavated area and drag it across the new material to smooth and level it.
Essential Tools and Materials for Pool Ground Prep
Getting your pool site ready requires a few key tools and materials. Having these on hand before you start will make the process much smoother and more efficient. It’s always better to be over-prepared than to have to stop mid-job to run to the store.
Here’s a breakdown of what you'll typically need:
| Tool/Material | Purpose | Notes |
|---|---|---|
| Measuring Tape | Accurately measure pool diameter and perimeter for marking. | A long tape (50ft+) is ideal for larger pools. |
| Stakes & String | To mark the precise outer perimeter of the pool area. | Ensure string is taut and corners are square if needed. |
| Spirit Level | Check for levelness across short distances and small areas. | A 4-foot or 6-foot level is very useful. |
| Laser Level | Provides a precise horizontal reference line around the entire area. | Highly recommended for larger pools or significant slopes, ensuring accuracy. |
| Shovel/Spade | For removing sod, digging, and moving soil or leveling material. | A sharp spade is best for cutting sod. |
| Sod Cutter | Optional, but speeds up sod removal significantly. | Can be rented from tool hire shops. |
| Tamper/Plate Compactor | To compact the soil and leveling material, creating a solid base. | A hand tamper works for small areas; a plate compactor (rented) is much faster and more effective. |
| Wheelbarrow | To transport soil, sand, or stone. | Essential for moving materials around the yard. |
| Screed Board | A long, straight piece of lumber (e.g., 2×4) for smoothing material. | Helps achieve a flat surface by dragging over the sand or stone. |
| Washed Builder's Sand | Common material for creating a smooth, level base. | A few inches typically suffice; check manufacturer specs. |
| Crushed Stone/Paver Base | Alternative or addition to sand for better drainage and stability. | Ensure it's fine enough to create a smooth surface. |
| Marking Paint | To mark the level line on stakes or directly on the ground. | Brightly colored paint helps visibility. |
| Work Gloves | Protect your hands during manual labor. | Sturdy work gloves are a must. |
| Safety Glasses | Protect your eyes from flying debris during digging and leveling. | Always wear eye protection when working with tools or materials. |
Common Mistakes That Can Ruin Your Pool Installation
Even with the best intentions, a few common missteps can turn your dream pool project into a headache. These mistakes usually stem from rushing the process, underestimating the importance of precision, or skipping crucial steps. Recognizing these pitfalls before you start can save you a lot of trouble and expense down the line.
Avoiding the Pitfalls of DIY Leveling
- Not Measuring Enough: Relying on a visual guess is a surefire way to end up with an uneven pool. Always use a level. Even a slight slope can cause significant stress on the pool's structure.
- Leaving Small Debris: Tiny pebbles, sharp twigs, or roots might seem insignificant, but under the immense weight of a filled pool, they can puncture the liner. Take the time to thoroughly clear the entire area.
- Compacting Insufficiently: If you don't tamp down the soil and leveling material properly, the ground will settle over time, creating an uneven surface after the pool is installed. Use a tamper or plate compactor, especially for larger areas.
- Ignoring Drainage: If your chosen spot floods easily, simply leveling the surface won't solve the problem. Water pooling around the base can compromise the ground's stability and lead to rust or rot in metal frames. Consider French drains or grading the surrounding area if drainage is a major concern.
- Over-Excavating Too Much: While it's better to dig too deep than too shallow, removing vast amounts of soil without a plan can be problematic. You'll need to replace it with compacted leveling material, which can be costly and time-consuming. Dig precisely to your level mark.
- Skipping Manufacturer Guidelines: Always consult your pool's installation manual. It will specify the maximum acceptable slope and may recommend specific base materials. Ignoring these can void your warranty.
When to Call in the Pros
While leveling the ground for an above-ground pool is a common DIY project, there are definitely times when bringing in professional help makes more sense. If you're unsure about your ability to achieve the required level of precision, or if your yard presents significant challenges, hiring an expert can save you a lot of stress and potential future problems.
Professional landscapers or pool installation services have the experience and specialized equipment, like professional-grade laser levels and heavy-duty plate compactors, to do the job quickly and accurately. They can also assess and address complex site issues such as poor drainage or unusually challenging soil types that might be beyond the scope of a typical DIYer. As of 2026, professional services can range from a few hundred to over a thousand dollars depending on the site and pool size.
Recognizing When a Site is Beyond DIY
Some yard conditions are clear indicators that you should consider hiring professionals. If your chosen spot has a consistent slope of more than 6 inches over the pool's diameter, for instance, you'll be removing a significant amount of soil. This requires careful grading to avoid creating a steep bank or an unusable amount of excavation.
Another red flag is rocky terrain or areas with numerous large roots that are difficult to remove without heavy machinery. If your yard has drainage problems that require more than just surface grading, like needing to install underground drainage systems, this also signals a need for professional expertise. Ultimately, if the thought of the manual labor and precision required makes you uneasy, it's wise to get quotes from professionals.
Frequently Asked Questions About Pool Ground Leveling
How long does it take to level ground for an above-ground pool?
The time required varies greatly depending on the size of the pool, the slope of the land, and whether you're doing it yourself or hiring professionals. For a moderately sized pool on a slightly sloped yard, DIY leveling can take anywhere from a full weekend to several days. Professionals can often complete the task much faster, sometimes in just a few hours.
What's the best material for leveling the ground under an above-ground pool?
Washed builder's sand is a popular choice because it’s fine-grained and easy to level, creating a smooth surface for the pool liner. Some also recommend using paver base or fine crushed stone, which offers better drainage and stability. Always check your pool manufacturer's recommendations, as they may have specific material preferences or requirements.
Can I put an above-ground pool on grass?
It’s generally not recommended to place an above-ground pool directly on grass without preparing the site. Grass and soil can shift and become uneven as they get wet, compromising the pool's stability. You’ll need to remove the sod and then level the ground beneath it, typically with sand or a similar leveling material, to create a firm, stable base.
How do I check if the ground is level enough?
Use a long spirit level, ideally 4 to 6 feet long, or a laser level. Place the level across the diameter of the prepared area. The bubble in a spirit level should be perfectly centered, or a laser level should show a consistent horizontal line.
Repeat this check at multiple points around the perimeter. Remember to adhere to your pool manufacturer’s stated tolerance for slope, usually around 1 inch over 10 feet.

