

Are shop vacuums safe for hardwood floors? The honest answer is: yes, but only if you take a few precautions. The suction itself isn't the problem.
Neither is the hose. Damage usually comes from hard plastic wheels, a bare metal wand, or the tiny grit you didn't sweep up first.
In our research, the risk comes down to mechanics, not suction. Per ASTM D4060, even a durable coating loses measurable thickness when abrasive grit is ground across it under pressure. As of 2026, most shop vacs still roll on hard plastic casters right out of the box.
So the real question is whether your setup matches your floor's finish.
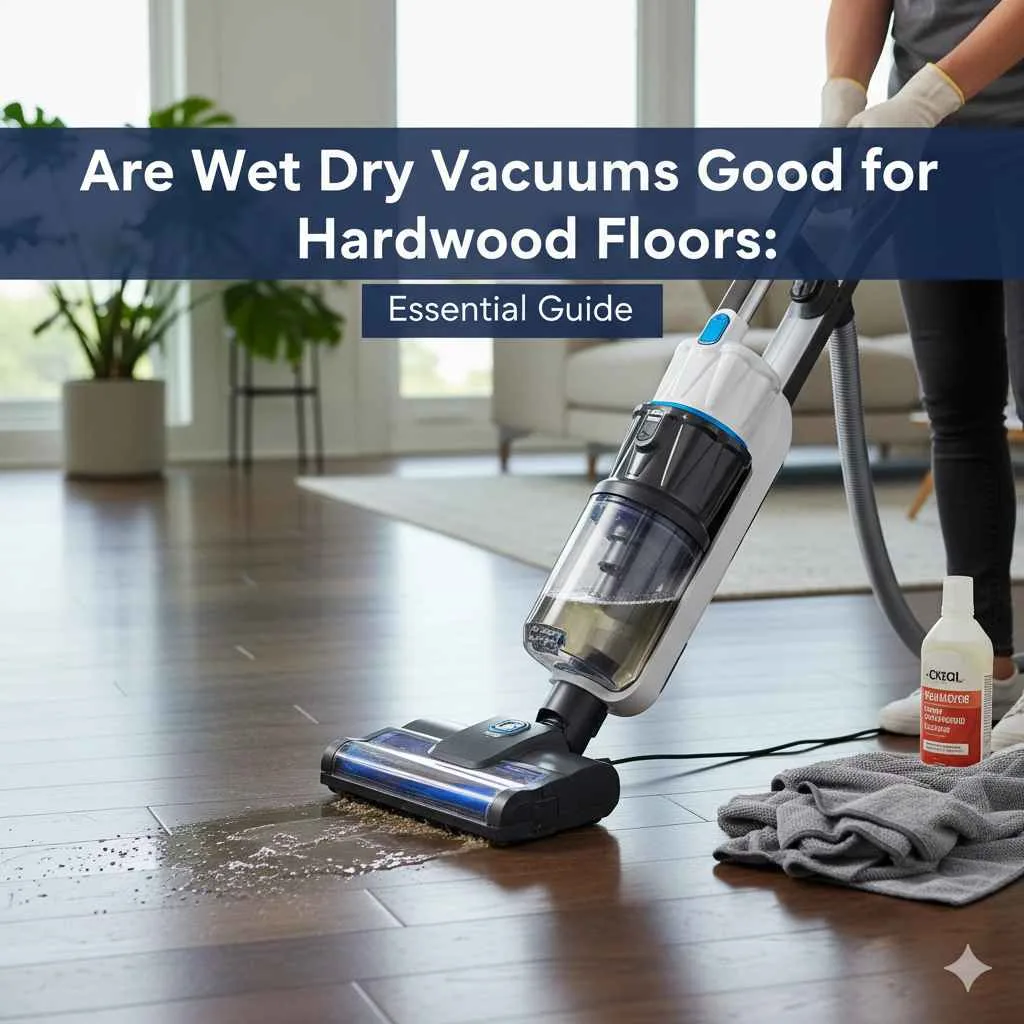
Image source: Web (Bing) / woodworkingadvisor.com (Web image (fair-use with source credit))
Quick Answer: Yes, It's Safe, but Only Under These Conditions
Are shop vacuums safe for hardwood floors? Yes, with the right attachments and technique. Suction alone won't harm sealed wood.
The real risks are hard wheels, bare metal wands, and leftover grit. Use a soft brush nozzle and keep wheels clean. Then you're fine.
First: Why Your Hardwood Keeps Getting Tiny Scratches
Most people blame the vacuum's suction for floor damage. That's a mistake. The damage comes from three things moving across the surface: wheels, wand, and grit.
Push a shop vac across hardwood and the wheels act like tiny rollers. Anything stuck to them, or stuck to the floor, gets pressed into the finish. A single grain of sand trapped under a hard plastic caster works like sandpaper.
One trip across the room can leave a trail of micro-scratches.
Those light marks show up most when sunlight hits the floor at a low angle. If you're seeing them, it's not suction. It's mechanical grinding.
Scratches, dents, and scuffs are different
Know which one you're dealing with before changing your routine.
- Scratches are thin, linear marks from grit dragged across the surface.
- Dents are small depressions from heavy pressure, like a caster under a fully loaded tank.
- Scuffs are surface marks from rubber or plastic. They often wipe away with a soft cloth.
Of the three, scratches are what most hardwood owners see. They happen because the caster rolls while grit is underneath. The fix is stopping grit before it gets ground into the finish.
If you're cleaning up after a renovation, that fine dust is exactly what scratches floors. The right filter and hose setup prevents sawdust from settling back down, and our guide to wet-dry sawdust pickup walks you through it.
What Actually Damages Wood: Wheels, Wands, and Grit
Hard plastic wheels
The casters on most shop vacs are made for shop floors, not finished wood. Hard plastic rolls smoothly over concrete, but on hardwood it's a gamble. The plastic itself rarely scratches anything.
The problem is debris that gets trapped between the caster and the floor. A small stone under a heavily loaded tank can gouge the finish.
The bare metal wand
The metal wand is the next risk. Swinging the hose sideways lets the edge contact the floor. A sharp aluminum edge can leave a long, thin scratch in seconds.
A soft brush attachment or a rubber bumper solves this.
Grit: the invisible sandpaper
Even a clean-looking hardwood floor holds fine abrasive dust. When a wheel rolls over it, you're pressing sandpaper into the finish with the weight of the vacuum. That's why a quick sweep or dust mop before vacuuming makes a huge difference.
Per the National Wood Flooring Association, the key is getting abrasive particles off the surface before any machine touches it. Their care guidelines recommend dust mopping before vacuuming. The same logic applies here: remove the grit first.
Condition Check #1: What Finish Is on Your Floor?
Before you think about wheels or wands, inspect the finish. This one variable changes the whole decision.
Polyurethane-sealed floors
Most modern hardwood floors have a polyurethane or aluminum-oxide finish. These are tough, water-resistant layers. With a soft brush nozzle and clean wheels, a shop vac is safe on them.
Oil-based and waxed floors
Oil-finished and waxed floors are softer. They scratch more easily and absorb moisture. Wet pickup is especially risky because water can soak in and leave white spots.
Skip the shop vac on these floors.
Old, weathered, or bare floors
If the finish is dull, flaking, or worn to bare wood, treat it as unprotected. A shop vac can lift loose finish along damaged edges. Avoid using it until the floor is refinished.
Finish type quick check
| Finish | Safe with shop vac? | Main risk |
|---|---|---|
| Intact polyurethane | Yes, with soft brush | Wheel scratches from grit |
| Aluminum-oxide | Yes, with soft brush | Same as above |
| Oil or wax finish | No | Soft surface, moisture damage |
| Weathered or bare wood | No | Deep scratches, lifted finish |
Not sure what you have? Put a drop of water on the floor. If it beads up, it's sealed.
If it soaks in, you're dealing with bare or oiled wood.
Condition Check #2: What Style of Shop Vac Are You Using?
Your vacuum's design matters as much as the floor. The good news is you can make most shop vacs safer in a few minutes.
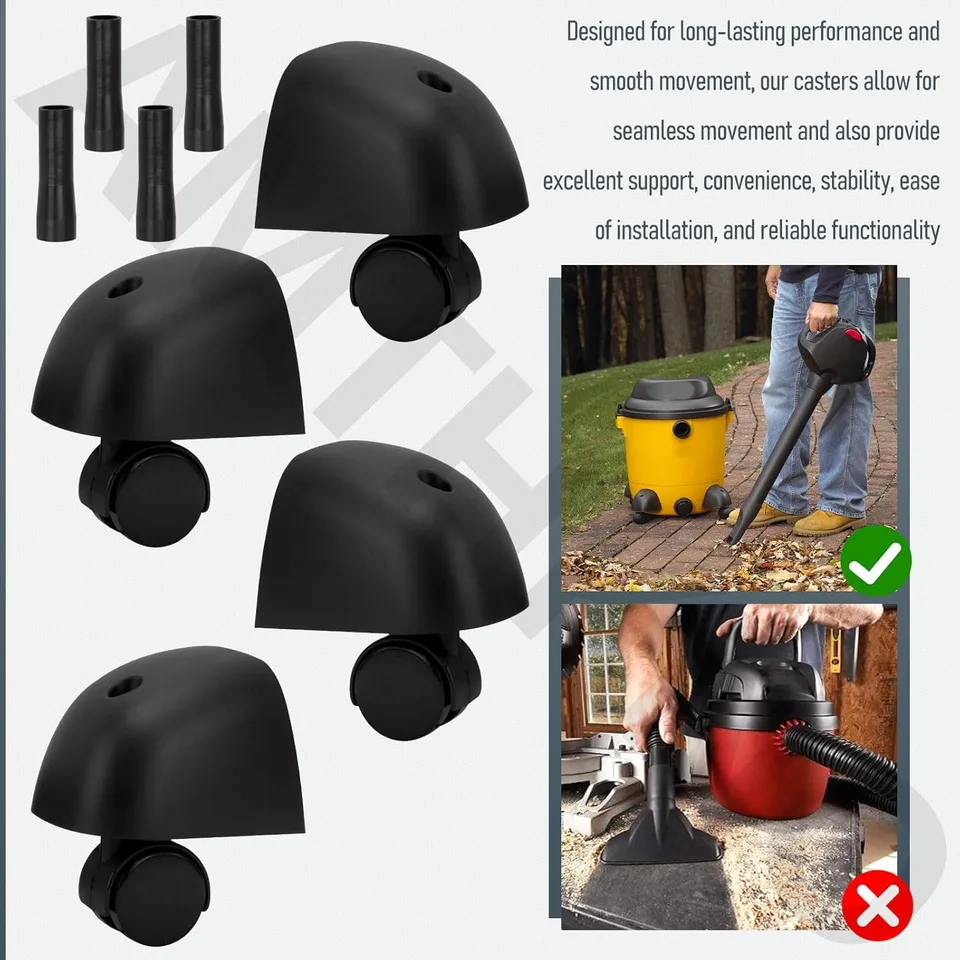
Image source: Web (Bing) / ebay.com (Web image (fair-use with source credit))
Check the casters first
Look at the wheels. If they're hard plastic, replace them with rubber or urethane casters if your model allows. No replacement available?
Set the vacuum on a drop cloth or piece of plywood when it's stationary. Move the unit carefully rather than dragging it.
Choose the right nozzle
Swap the bare utility nozzle for a soft-bristle floor brush. The brush lifts dust while keeping abrasive grit away from the wood. This one attachment does more than any other change you can make.
Understand your vac's wet and dry modes
On a wet/dry vacuum, confirm you're using the right filter mode. Some units can blow fine dust out if the filter is installed wrong. That dust settles on the floor, and then your wheels do the damage.
Also watch the hose. A snagged hose can tip the tank and scrape the wand across the floor. Keep the hose out of your path, and use both hands when moving the unit from room to room.
The Decision Tree: Safe to Use, Safe With Changes, or Don't
Run through three quick checks before turning on the vacuum. Floor finish, wheels, and nozzle. Each one points you to a different branch.
| Condition | Result |
|---|---|
| Sealed floor + soft brush + clean rubber wheels | Safe as-is |
| Sealed floor + hard plastic wheels or bare nozzle | Safe after changes |
| Oiled, waxed, worn, or unfinished floor | Don't risk it |
Branch 1: Safe to Use As-Is
If you have an intact polyurethane or aluminum-oxide finish, a soft-bristle floor brush, and rubber or urethane wheels, you're good. Keep the wheels clean and move the unit carefully. This setup is safe for regular cleanup.
Branch 2: Safe After a Quick Adjustment
Most people land here. You have a sealed floor, but your shop vac has hard plastic casters or only the bare utility nozzle. Change the nozzle first.
Add a soft brush. If the wheels worry you, set the tank on a drop cloth when it's stationary or upgrade the casters.
Branch 3: Stop and Use a Different Tool
Delicate finishes are a no-go. Oil-finished, waxed, or bare wood scratches too easily. The moisture risk from a wet/dry vac is also too high.
Use a dust mop, a soft broom, or a canister vacuum with a dedicated hardwood floor head.
Step-by-Step: How to Vacuum Hardwood With a Shop Vac Without Scratches
Follow this workflow in order every time. It keeps your floors clean and your finish intact.
Prep the floor first
Sweep or dust mop the room before you vacuum. This removes the coarse grit that causes micro-scratches. It sounds like extra work, but it takes two minutes and saves the finish.
Verified buyer feedback confirms that grit is the number one cause of scratches.
Set up the right attachments
Swap the utility nozzle for a soft-bristle floor brush. If you're doing wet pickup, use the rubber squeegee attachment instead of the brush. Check the wheels for embedded debris before you start.
A quick wipe with a rag handles this.
The same hose and filter setup that keeps drywall dust contained will prevent it from settling back onto the floor. Our guide to dry dust pickup covers the filter placement and hose dial settings for that exact job.
Vacuum with the right technique
Move the vacuum across the floor in slow, overlapping passes. Let the brush do the work, not your arm. Don't push down hard or drag the unit sideways by the hose.
When you need to move the tank, lift and carry it. Dragging is how casters pick up grit and grind it in.
Shop Vac vs. Dedicated Hardwood Vacuum: When It's Worth Switching
A shop vac works in a pinch. That doesn't mean it's the best daily tool for wood floors. Dedicated vacuums are built lighter, roll softer, and often include a hard floor mode with a felt-lined brush.
| Factor | Shop Vac | Dedicated Hardwood Vacuum |
|---|---|---|
| Wheel type | Hard plastic or rubber, tank-heavy | Soft rubber, light frame |
| Floor brush | Optional add-on | Usually included |
| Suction strength | Very high | Moderate, controllable |
| Wet pickup | Yes | No |
| Tank capacity | 2.5 to 16 gallons | Less than a gallon |
| Scratch risk with right setup | Low | Very low |
If you already own a shop vac, don't rush out to buy a new vacuum. A soft brush and careful technique get you 90% there. But if you vacuum wood floors every day, a dedicated machine is easier to live with.
The shop vac stays in the garage, where it belongs.
Wet Pickup on Wood Floors: Allowed or Asking for Trouble?
Wet pickup on hardwood is a gamble. On sealed floors, a small spill is fine if you act fast. You need the rubber squeegee attachment and the wet mode switch engaged before touching the wood.
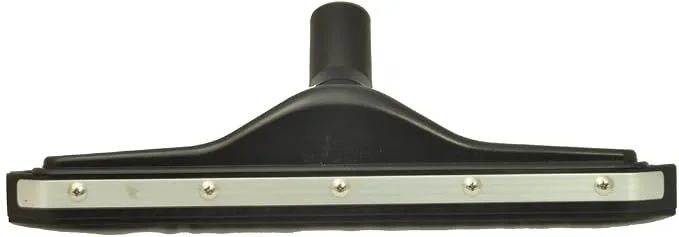
Image source: Bing (Web (fair-use with source credit))
The real danger is moisture left behind. Water seeping into seams or cracks can swell the planks. That causes buckling, cupping, and finish failure that costs thousands to repair.
The National Wood Flooring Association recommends keeping moisture exposure minimal, and they strongly advise against wet mopping wood surfaces. The same logic applies to a vacuum tank full of water.
When wet pickup is acceptable
| Scenario | Safe? | Notes |
|---|---|---|
| Small spill on sealed floor | Yes | Vacuum quickly, then dry with a cloth |
| Large spill on sealed floor | Riskier | Use squeegee, then dehumidify the room |
| Any water on oiled or waxed floor | No | Water stains immediately |
| Flood or standing water | No | Call a water-damage professional |
Stick to dry vacuuming unless you're dealing with an actual spill. The shop vac's high suction keeps the water on the surface only as long as you move the nozzle. Pause too long and you risk pulling moisture into the wood's edges.
Keep the nozzle moving, then dry the area with a towel.
Common Mistakes That Leave Permanent Marks
Most floor damage comes from small, avoidable errors. Here's what to stop doing today.
- Dragging the vacuum by the hose. The tank tips, the wand scrapes, and the casters gouge. Lift and carry it instead.
- Skipping the sweep. Grit left on the floor becomes sandpaper under the wheels. Always dust mop first.
- Using the bare utility nozzle. The hard plastic edge catches finish edges and chips them. Use a soft brush or rubber squeegee.
- Vacuuming wet wood with a dry filter. The filter saturates, suction drops, and water pools. Switch to wet mode before you start.
- Rolling over area rug edges. The caster grabs the rug, which yanks and scratches the wood underneath. Lift the rug or edge it aside first.
- Ignoring wheel buildup. A thin layer of sticky sawdust on the caster collects grit. Wipe the wheels down before every use.
One more hidden culprit: the filter. A clogged filter reduces suction, which makes you push harder and drag the nozzle across the floor. Clean the filter regularly, not just when it looks bad.
Cheap foam sleeves are washable and dry in an hour.
Who Should Use a Shop Vac on Hardwood — and Who Shouldn't
If your floor has a sealed finish and your vac has a soft brush, you're in the safe zone. If you own anything older, oiled, or waxed, you're not. That's the whole shortcut.
Shop vacs are best for occasional heavy cleanup. Post-renovation dust, construction debris, or a big spill. For daily maintenance, a dedicated hardwood vacuum or a dust mop is faster and safer.
Aggregate user feedback shows most scratch complaints come from people using shop vacs as their everyday cleaner.
Who shouldn't use one? Homeowners with oil-finished floors, historic homes with original woodwork, and anyone with worn or bare spots in the finish. If a drop of water sinks into the wood, keep the shop vac away entirely.
Pro Tips for Floors That See Heavy Foot Traffic
High-traffic areas take a beating. The finish dulls, scratches multiply, and dirt settles into the grain. A few habits keep them looking fresh.
- Place walk-off mats at every entrance. They capture grit before it hits the wood.
- Sweep or dust mop daily, even if you vacuum weekly. The less abrasive debris on the floor, the better.
- Wipe the vacuum wheels with a damp cloth before every pass. Embedded stones are invisible until they scratch.
- Move the tank by hand instead of dragging the hose. A snagged hose tips the unit and scrapes the wand.
- Refinish or reseal the floor on schedule. A fresh polyurethane coat is the best scratch protection you can buy.
If you're managing a workshop-to-home transition, remember that sawdust travels. Keeping the filter clean and the tank sealed prevents fine dust from settling back onto wood floors later. We explained the right filter setup in our guide on wet-dry vacs handling sawdust.
Quick FAQs: Attachments, Filter Care, and Wheel Marks
Will a shop vac scratch hardwood floors?
A shop vac can scratch hardwood if you use the wrong nozzle or roll over grit with hard plastic wheels. With a soft-bristle brush and clean rubber wheels, the risk is very low. The suction itself never damages the finish.
The mechanical contact does.
What is the best shop vac attachment for hardwood floors?
A soft-bristle floor brush is the best dry attachment. It lifts dust and traps grit away from the surface. For wet spills, switch to a rubber squeegee nozzle.
Never use the bare utility nozzle on wood, since its sharp plastic edge can catch the finish.
How do I remove caster marks from hardwood?
Most caster marks are scuffs, not scratches. Try wiping them with a soft cloth and a little water first. If that fails, a damp microfiber pad with mild floor cleaner works.
Stubborn marks may need a polishing compound designed for wood floors.
Can I use a shop vac to suck water off hardwood?
Yes, for small spills on sealed floors only. Use the wet mode and keep the rubber squeegee moving. Stop after a few passes and dry the area with a towel.
On oiled, waxed, or unfinished wood, skip the vacuum and blot the spill instead.
How often should I clean the shop vac filter?
Clean it when suction drops or once a month with regular use. A foam sleeve can be rinsed with water and dried. A cartridge filter needs tapping or brushing.
The routine is similar to keeping any vacuum's filter clear, and our guide to robotic pool vacuum filter cleaning explains why regular maintenance matters.
The Final Decision Guide: 3 Checks Before You Ever Turn It On
Run these three checks every time. It takes thirty seconds and saves your finish.
| Check | What to confirm | If it fails |
|---|---|---|
| Floor finish | Intact, sealed, water beads up | Stop, use a different tool |
| Wheels and wand | Rubber or clean wheels, soft brush attached | Swap the nozzle, wipe the casters |
| Floor prep | Swept or dust mopped, no visible grit | Sweep first, always |
If you pass all three, vacuum away. Move slowly, keep the nozzle moving, and carry the tank when switching rooms. Your hardwood will stay clean and scratch-free for years.

